Home › Forums › TRUCK BUILDS › Redee – 1986 4Runner
- This topic has 607 replies, 9 voices, and was last updated 3 weeks, 5 days ago by
 toys-n-yotas.
-
AuthorPosts
-
February 3, 2019 at 1:11 pm #207869
 finn the kareilian vikingKeymaster
i see a road trip was made. if that’s the same one that you posted up a coupla weeks back. nice score dude!
February 3, 2019 at 3:28 pm #207874 toys-n-yotasParticipant
Yup, same seller. Girls and I made the trip while Sam was sleeping off a night shift.
Still gotta read the installation manual to do some learning. Gotta figure out how to hook up locker air-line, and T off for tire fills. Hooray for book learnin’!!
February 4, 2019 at 6:50 pm #207887toys-n-yotasParticipantBook learnin’ has identified more money I gotta spend to be operational. The locker solenoid is included with the purchase of a new locker (not a new compressor) however they are available as a service part (#180103sp) and roughly $100. It’s possible the solenoid on old compressor is still functional too.
For airing up, ARB offers another kit, but from what I can tell it’s nothing more than a 1/8” plug with a quick connect, 20ft of hose, and some do-dads.
I still gotta decide where to mount the compressor. I’m torn between using the spot under the hood where one was previously installed (air line to locker still in place), or relocating it behind one of the plastic panels in the cargo area. Benefit being hidden from the elements. Trade-off being noise, potential cooling concerns, and annoyance of having to climb through the cargo area in order to air-up.
All of this is taking space on the back burner till Stage 1 “Road Legal” is complete.
February 10, 2019 at 9:34 am #207891toys-n-yotasParticipantHad a great night in the shop, knocking off a few overdue tasks.
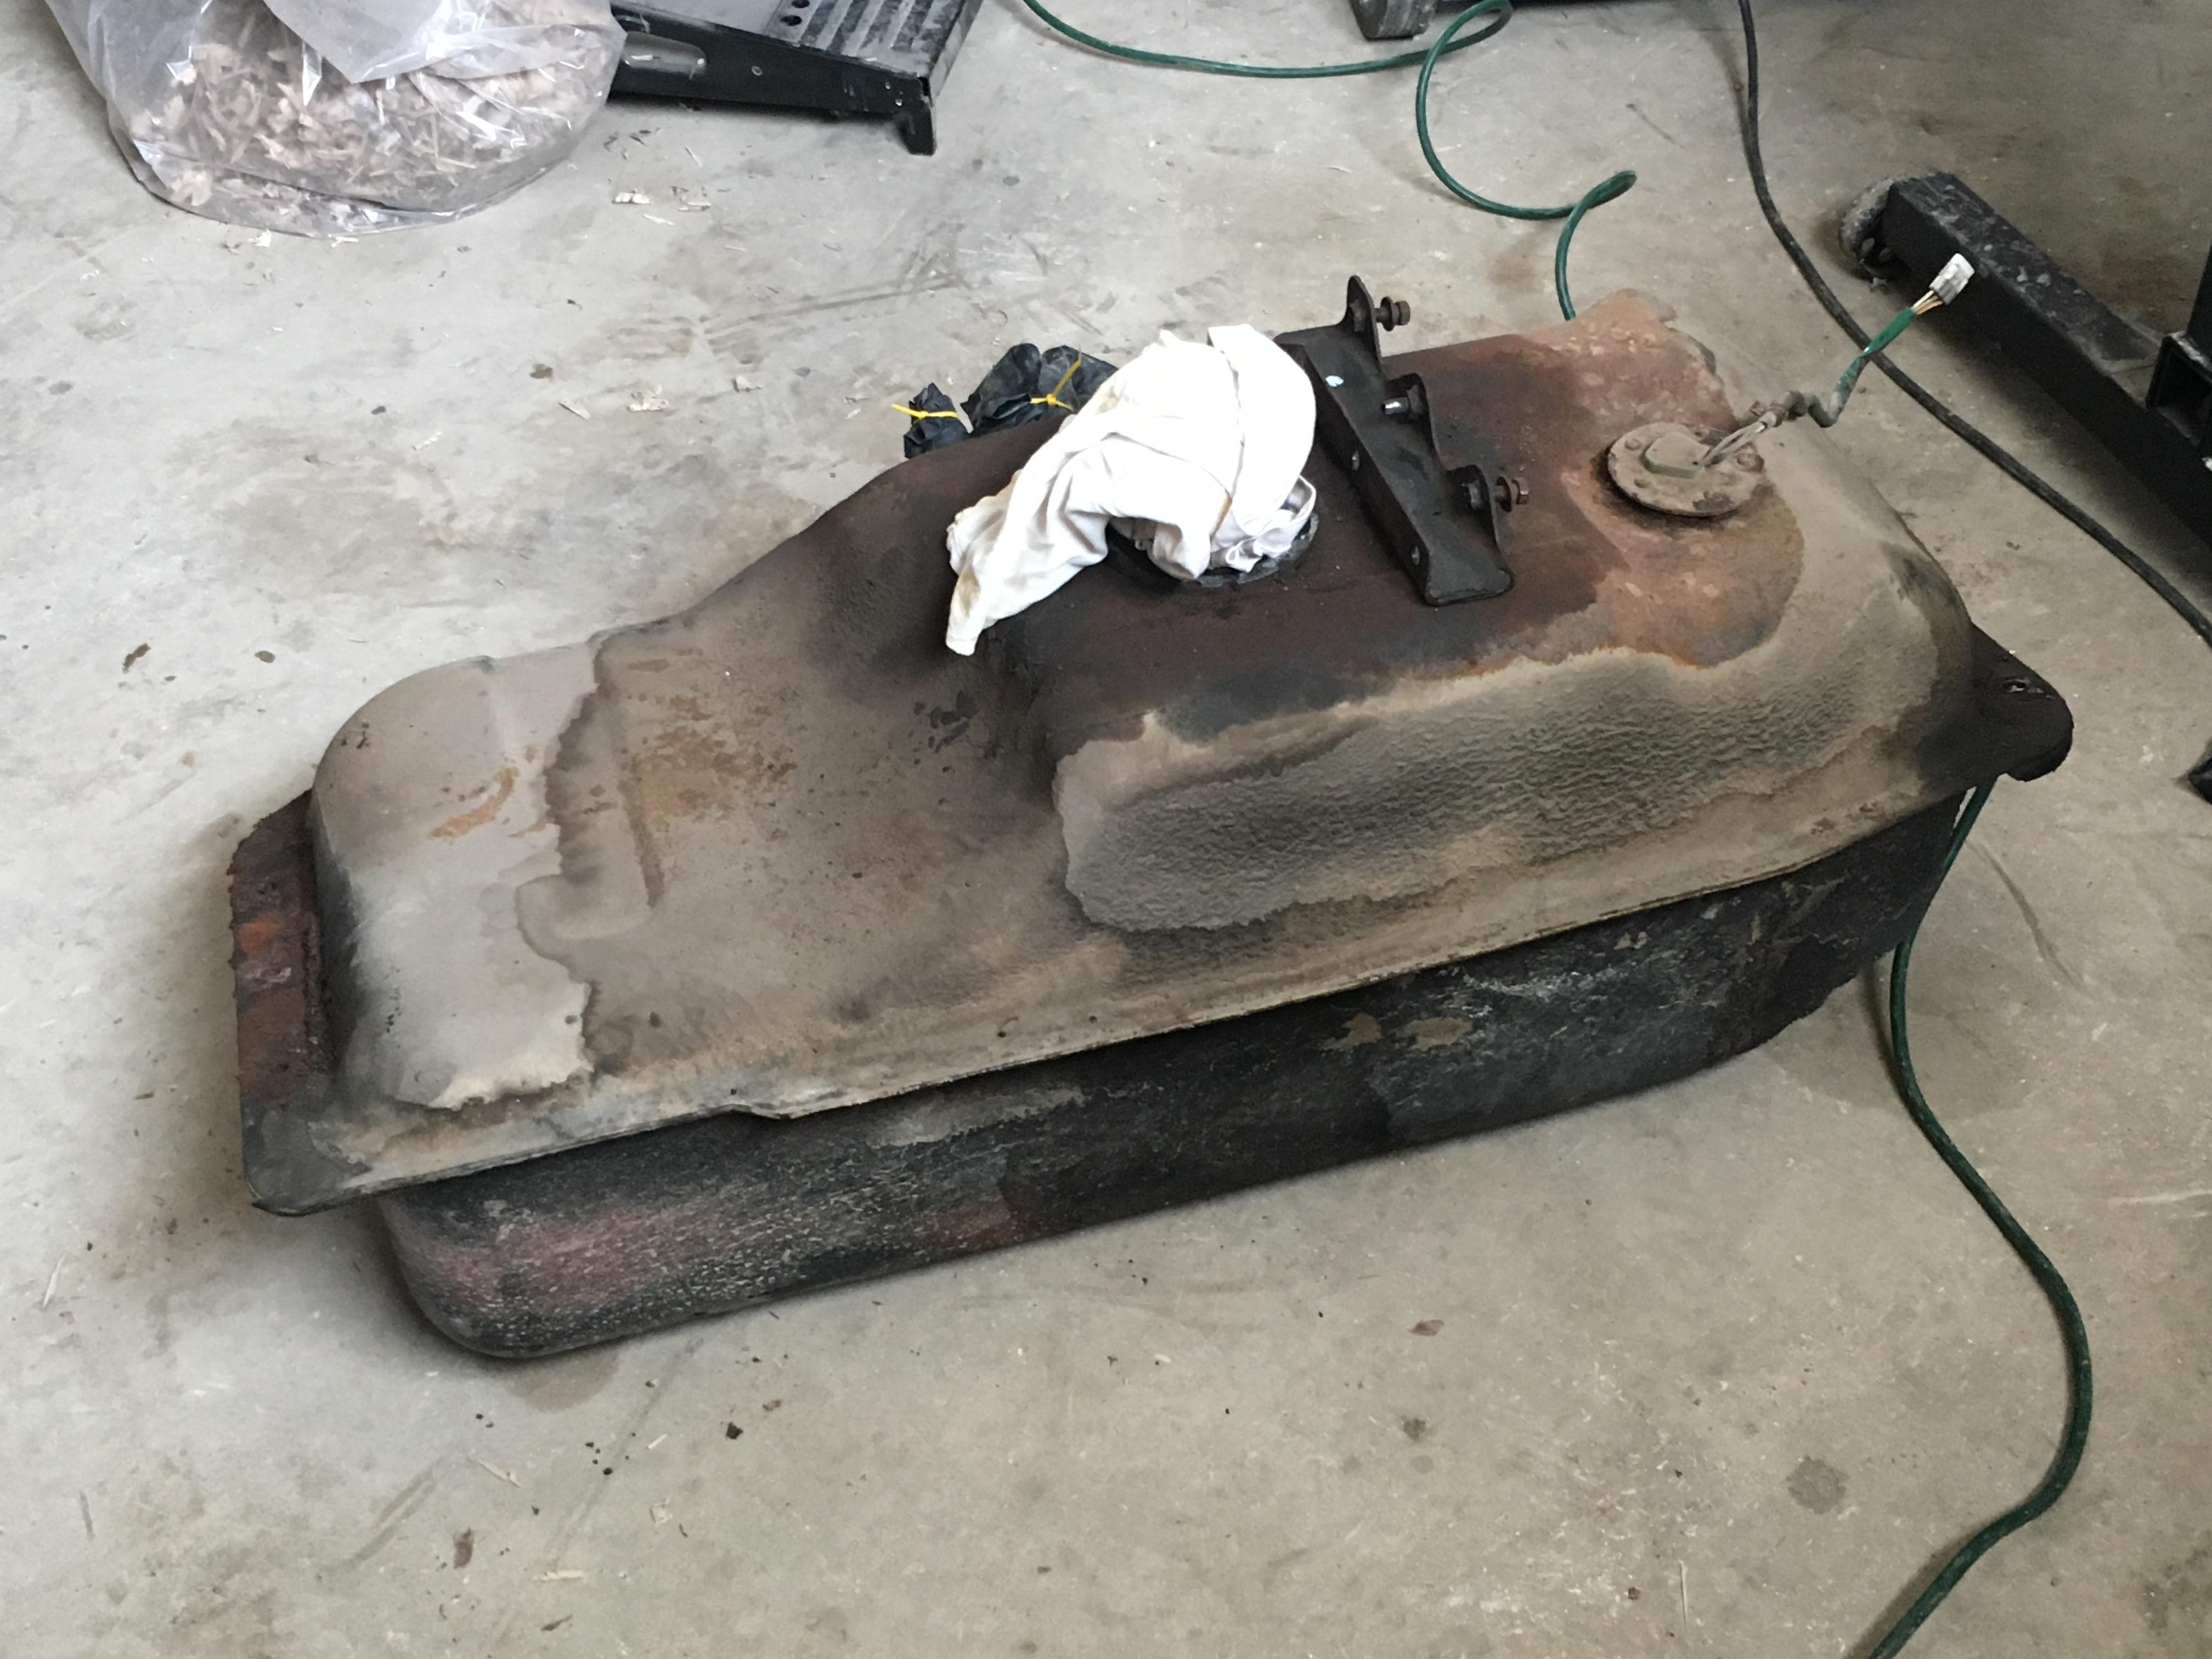
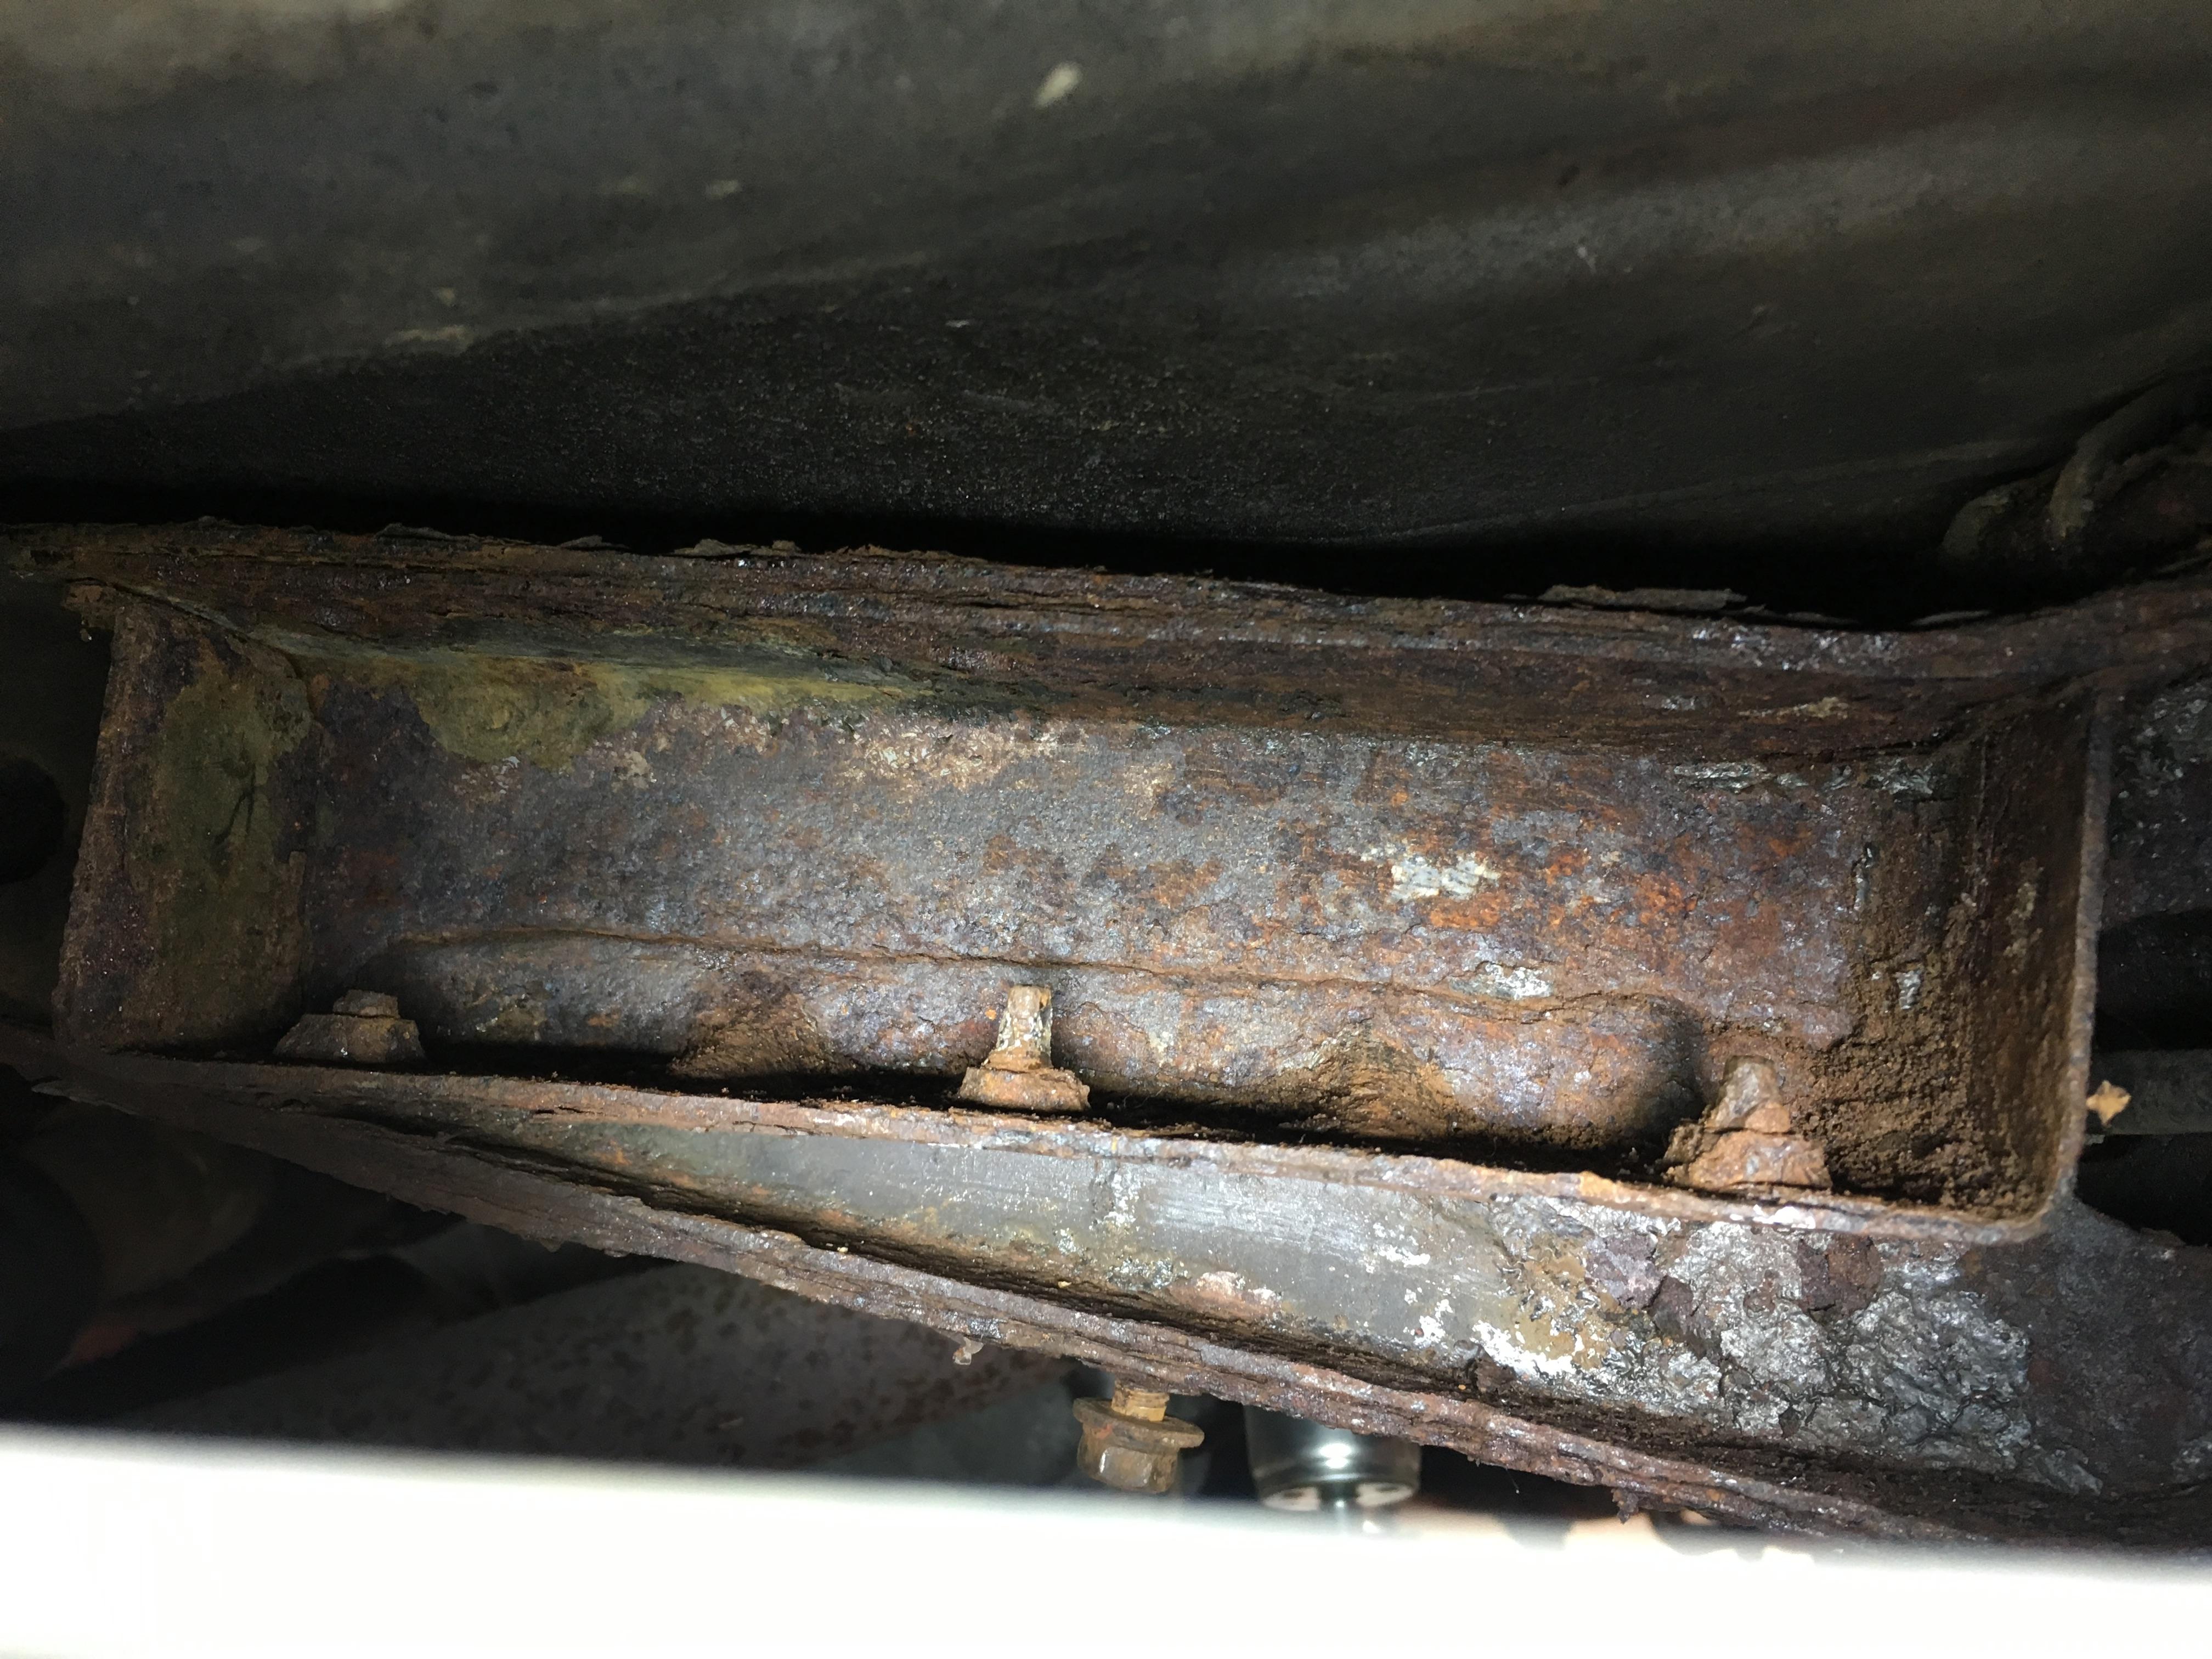
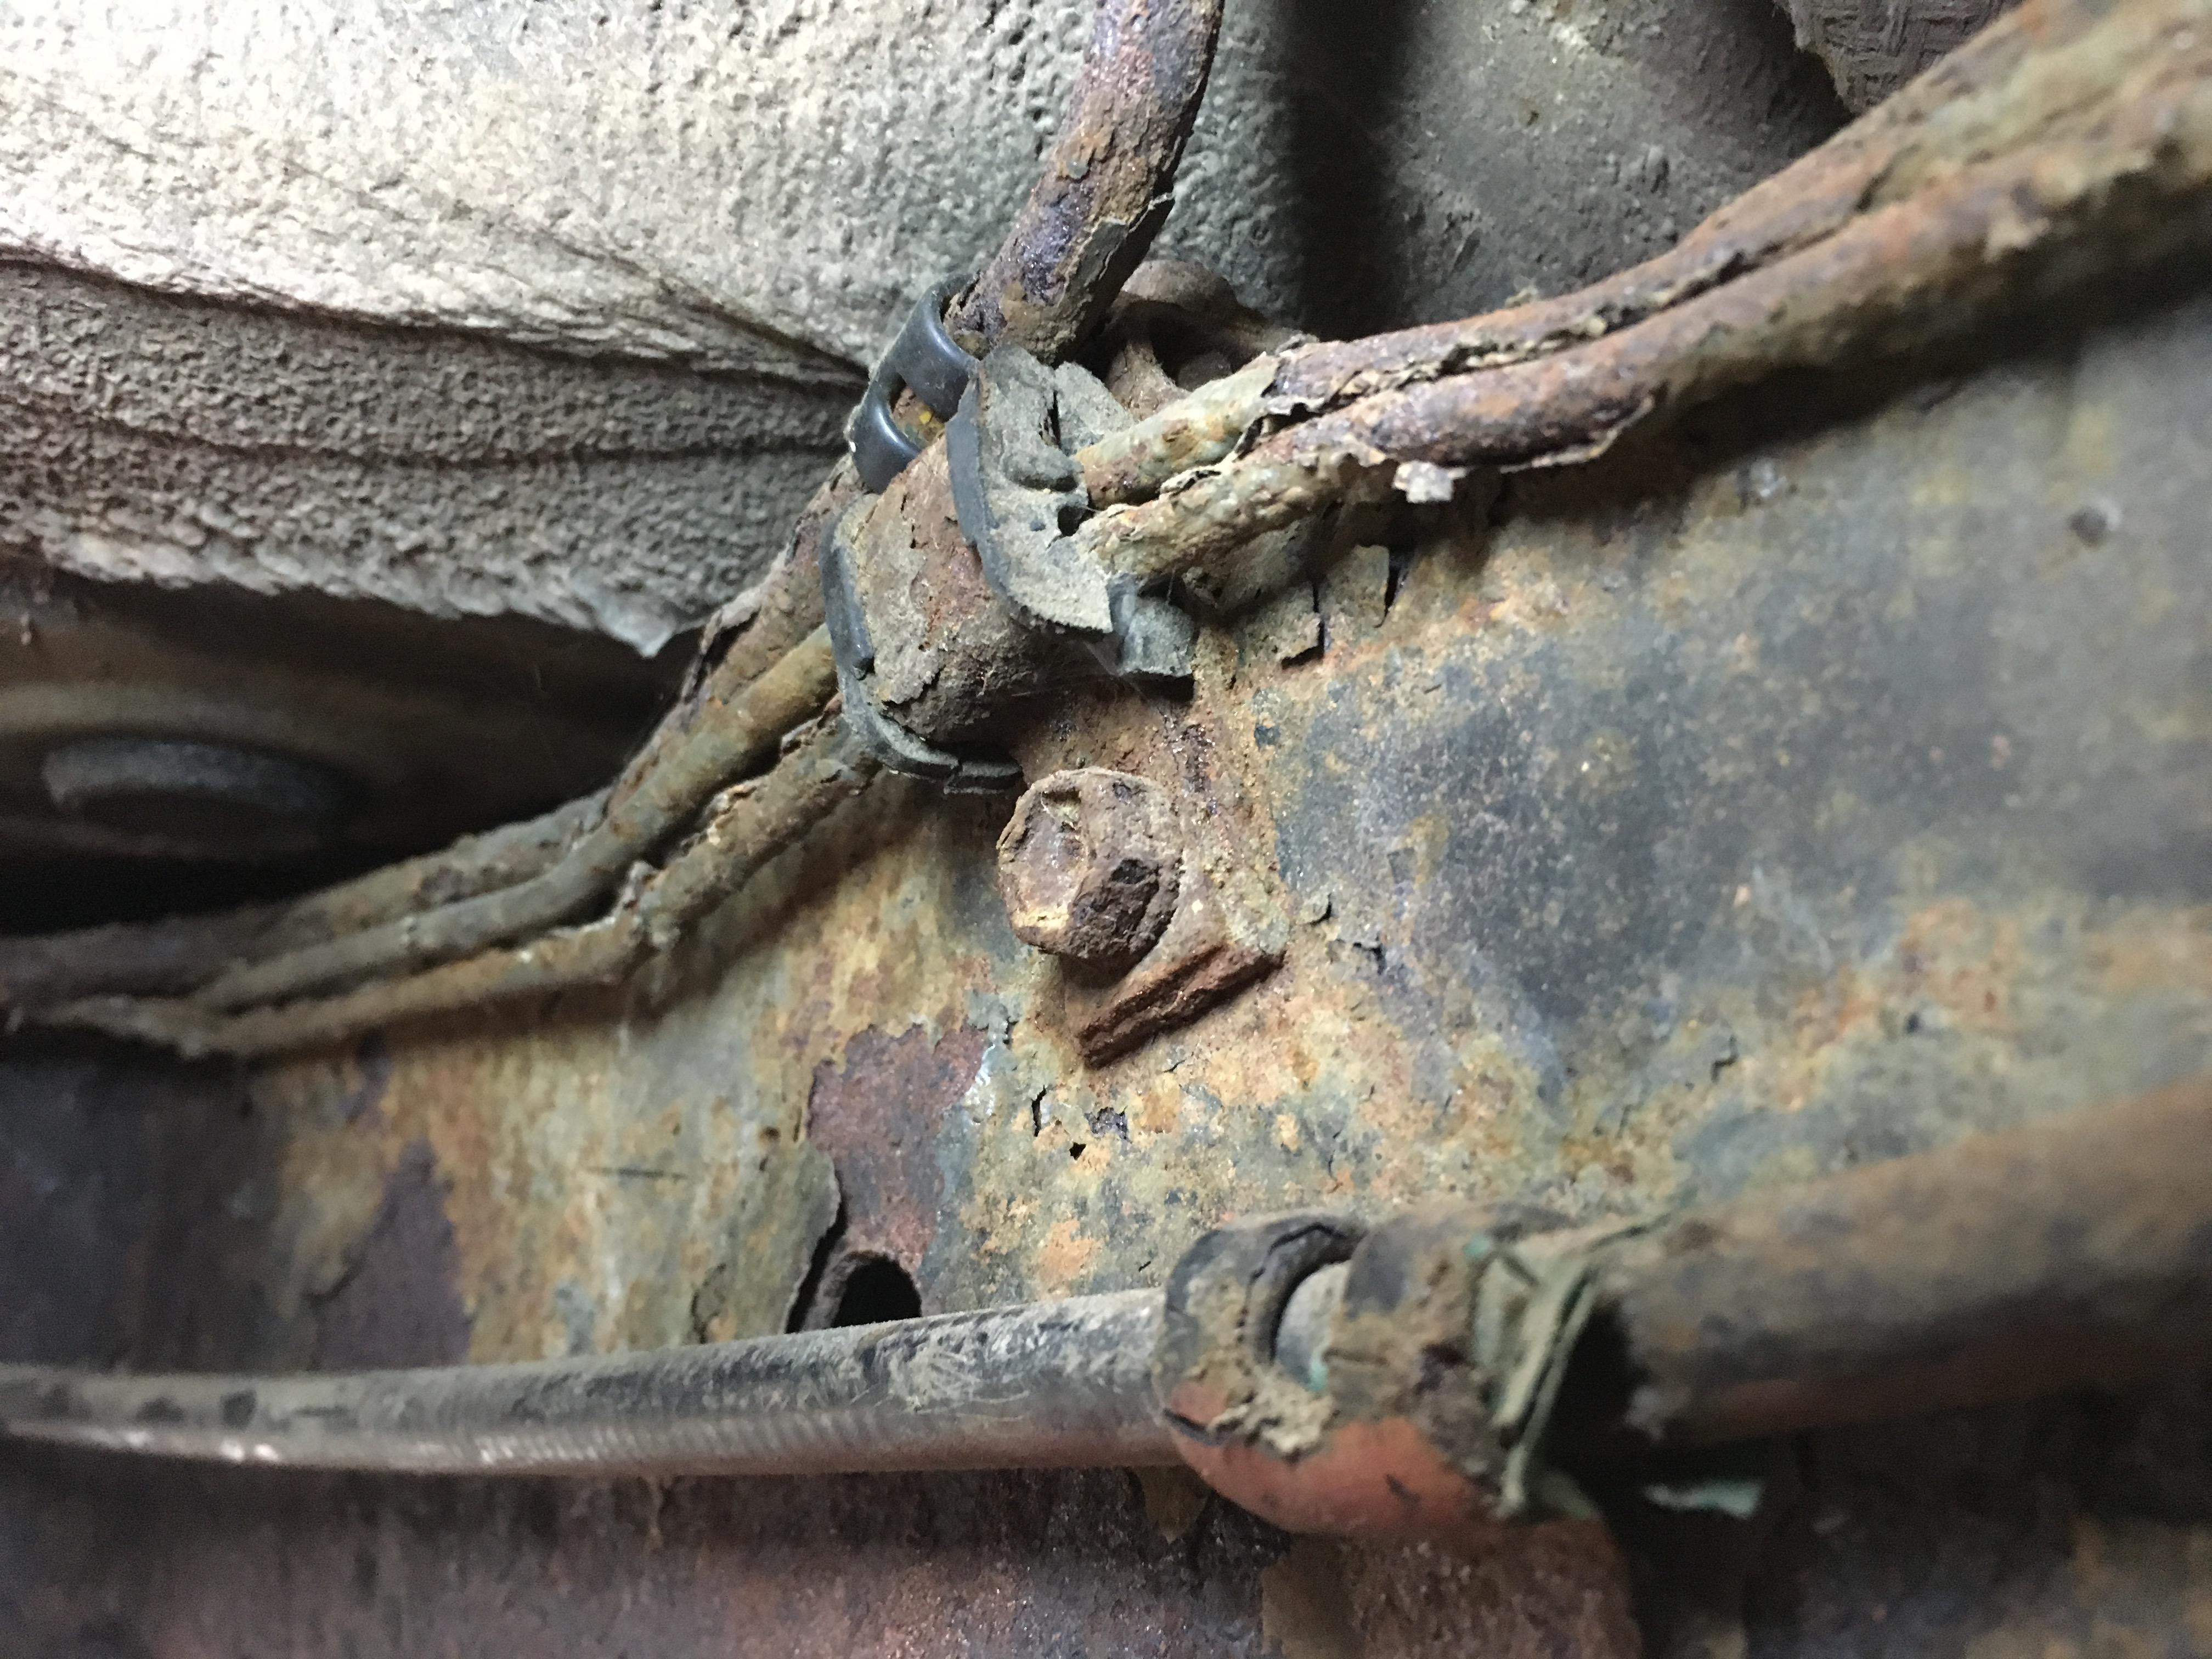
With help from my buddy James, I was able to drop the gas tank from Redee and get a better look inside. Eeeeek!! A mound of rusty crap in the bottom of the tank, gonna be a stinky job. Of the 6 bolts holding the tank in, all of them sheared off flush. So I started drilling them out until my shop light ran outta juice. With the tank out of the way, I got a better look at the brake and fuel lines….looking pretty crunchy. i’ve got a couple more lengths of each to buy and replace.
Then my buddy Dave showed up with 20L or solvent for my parts washer, and 6-tall boys. With Daves help, the three of us got a bunch of beer drinking knocked off the to-do list.
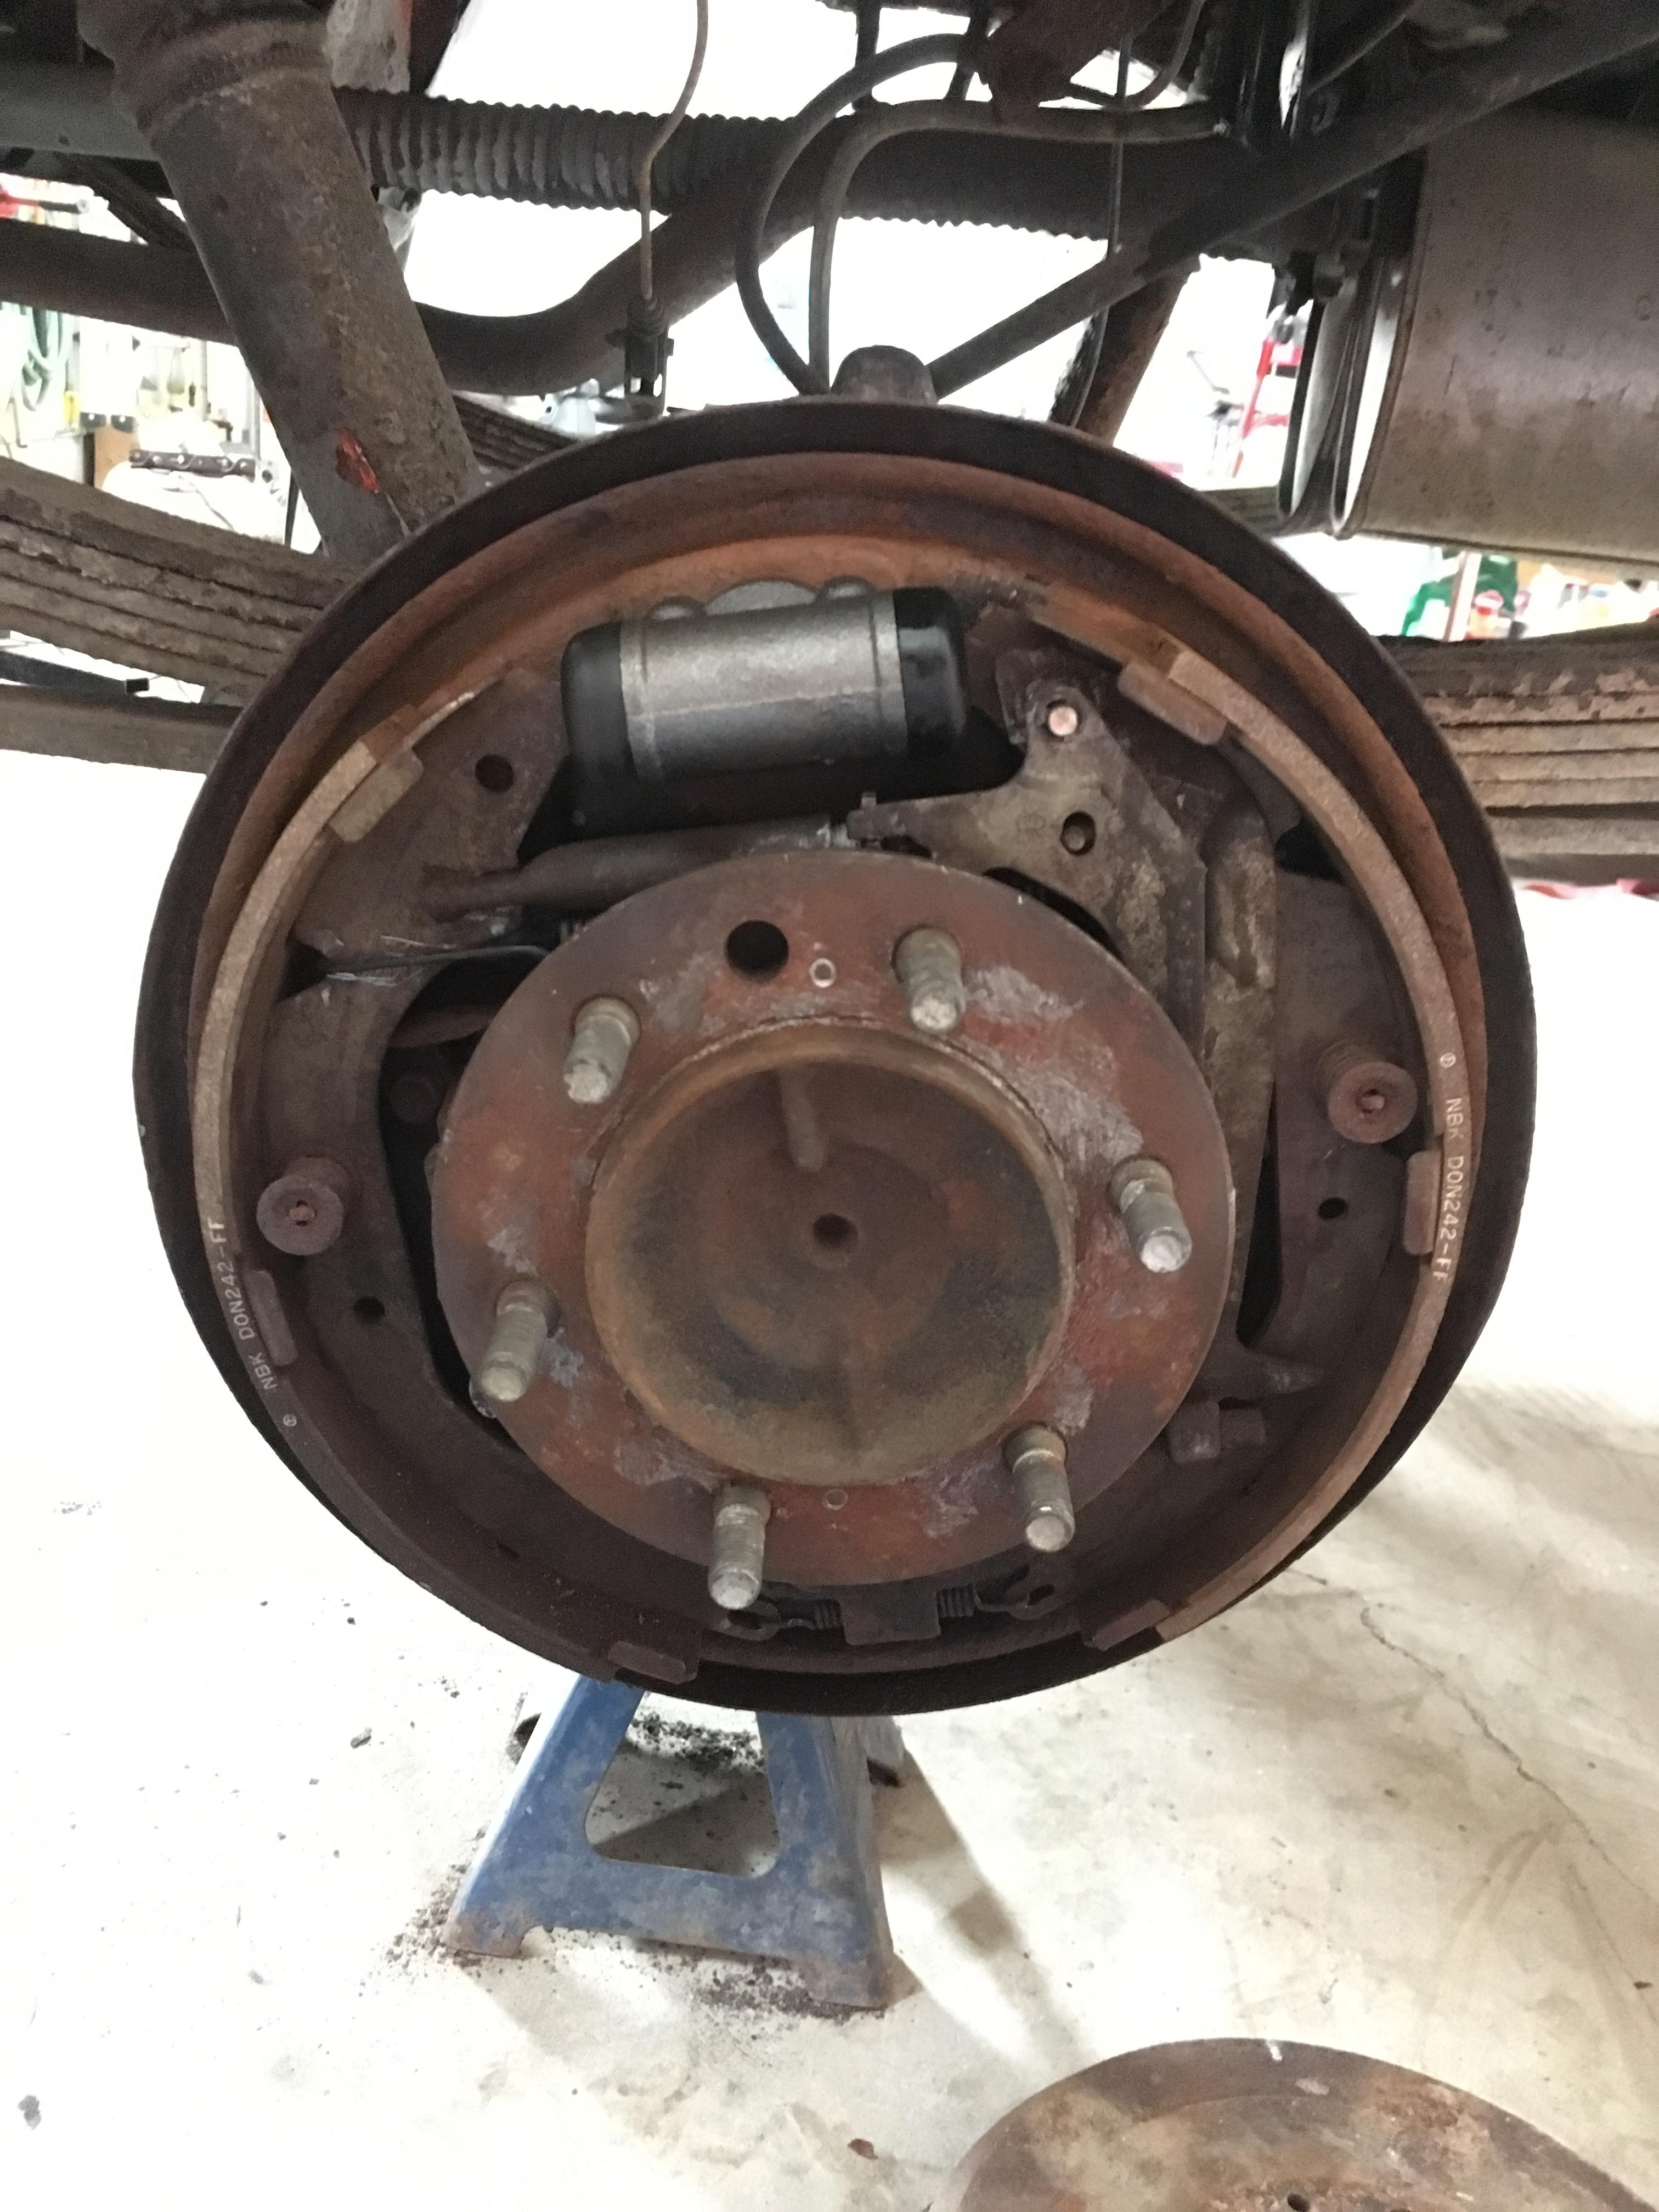
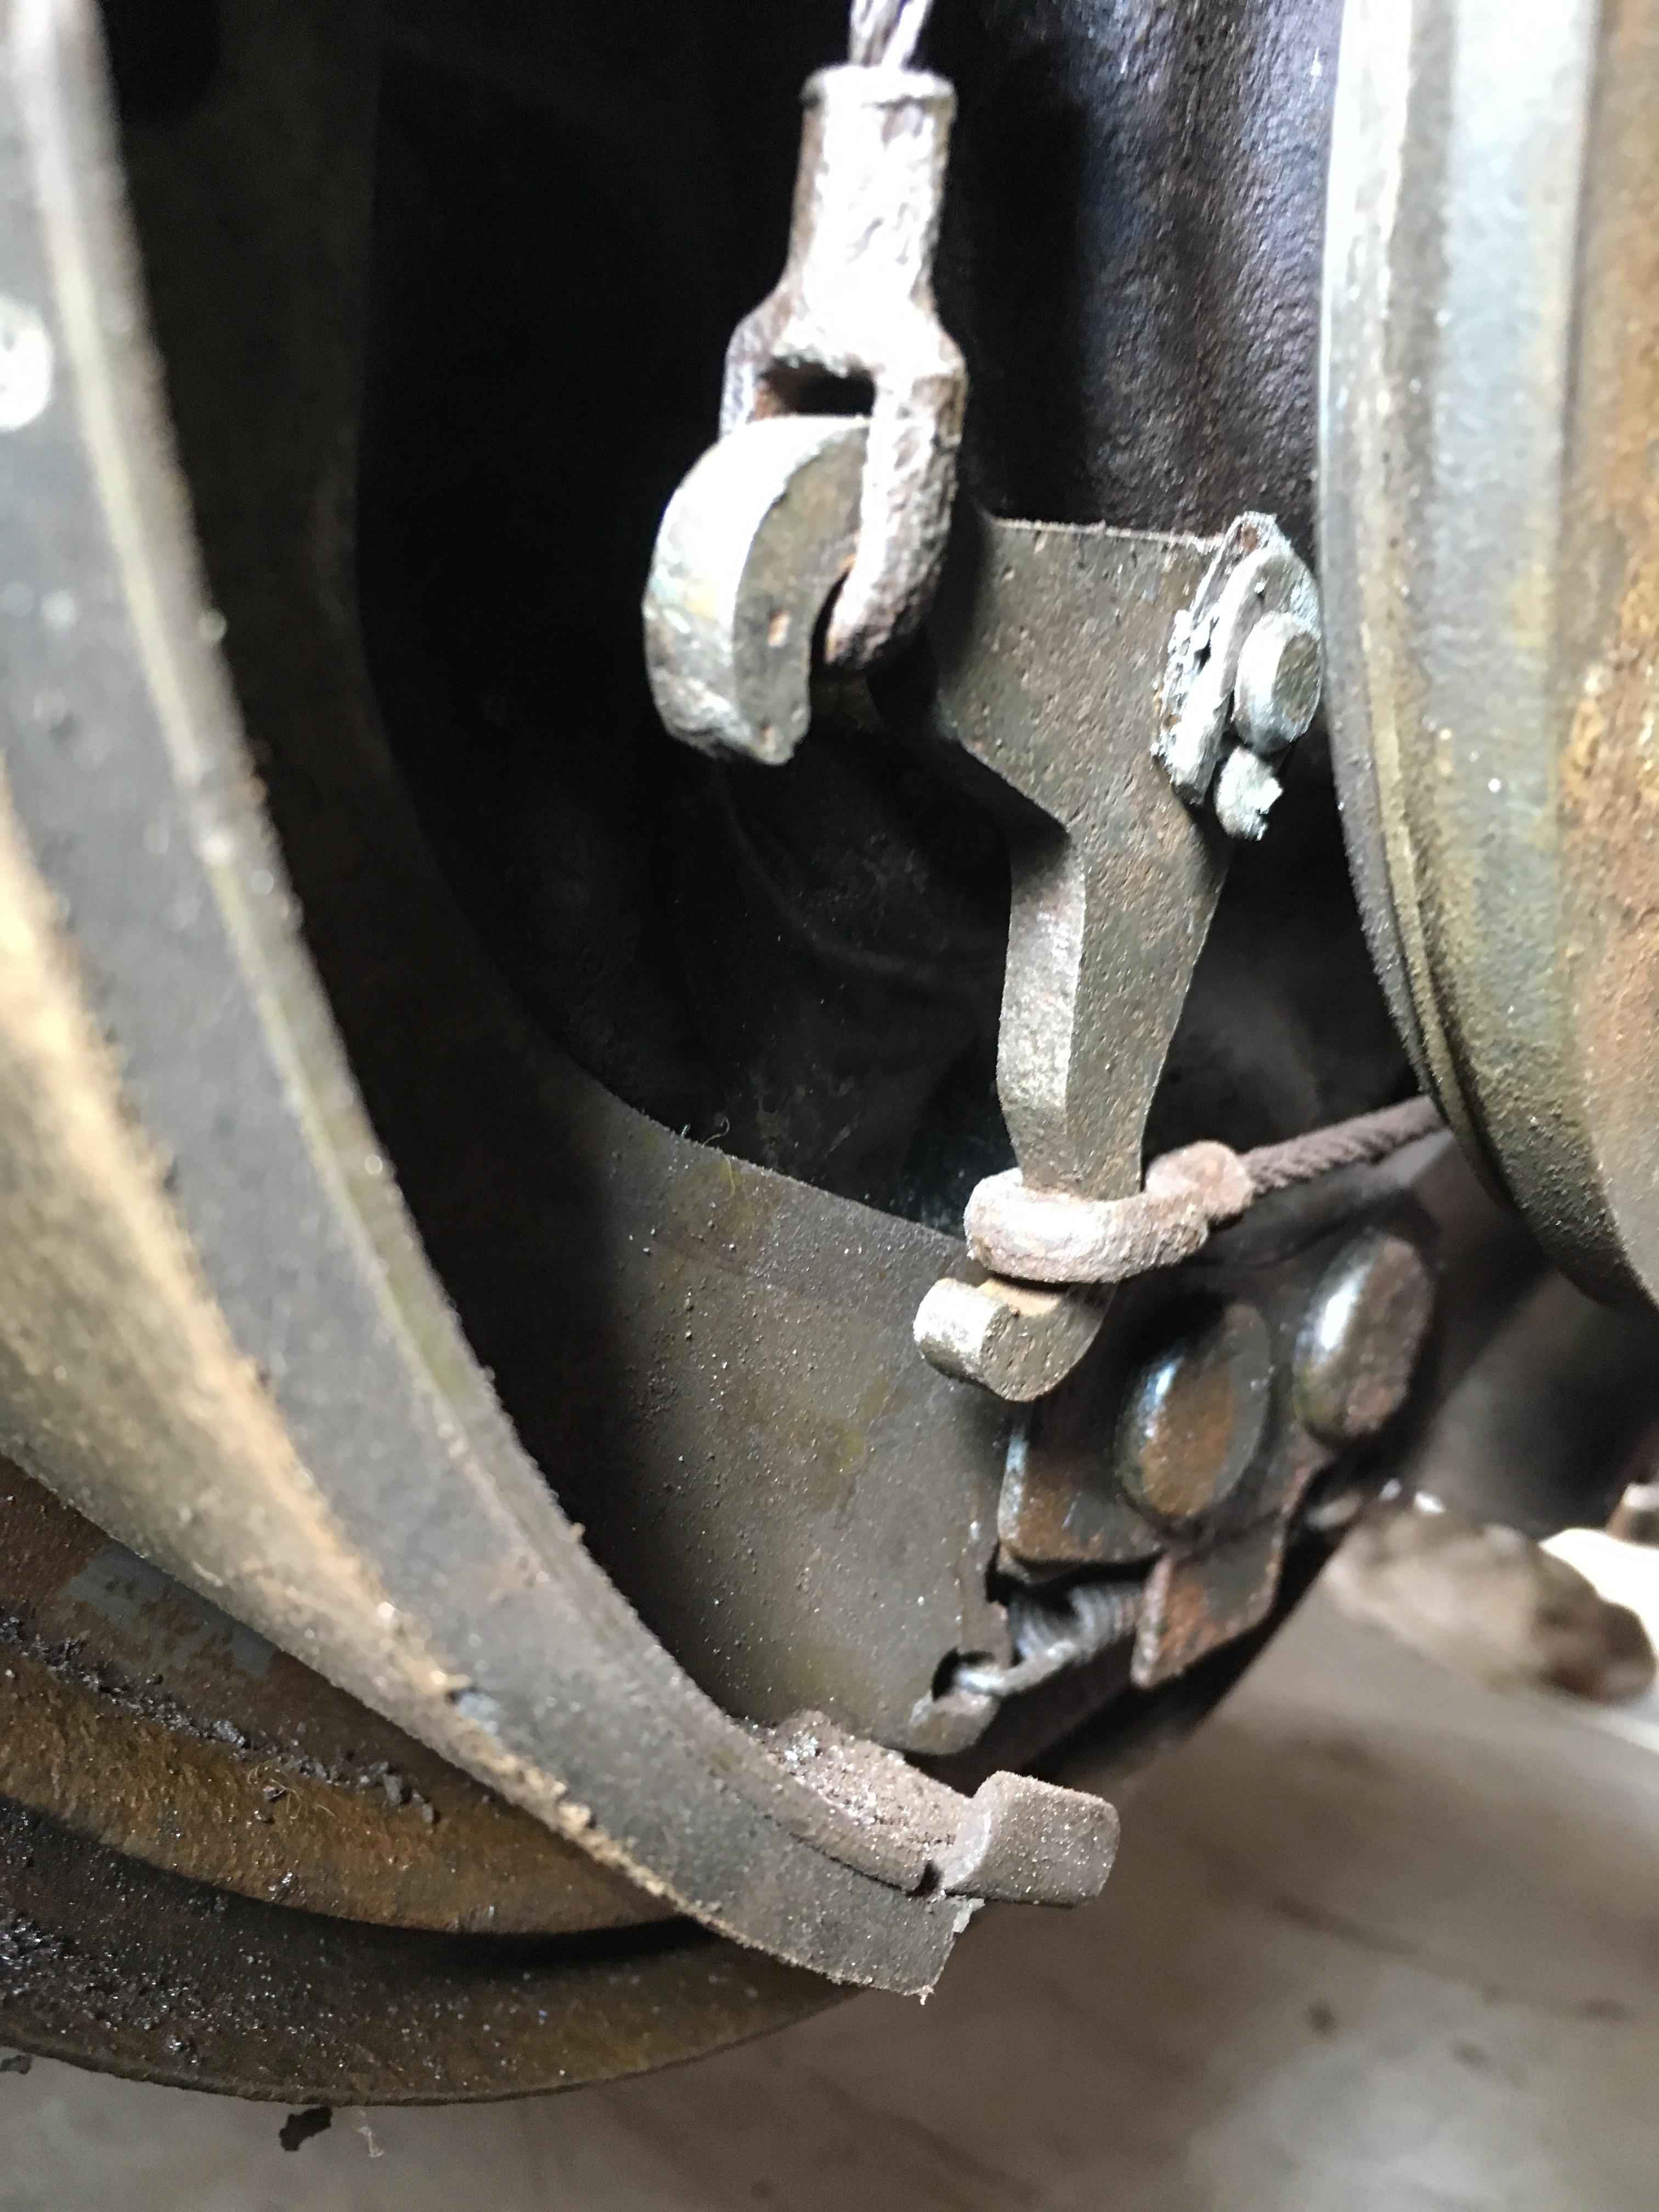
Next task I completed was successfully replacing the wheel cylinders on each side, and freeing up the the passenger side e-brake crank rocker. E-brake moves nice and free, and both drums are adjusted just right. Should have no trouble holding on a hill.
Rear brakes are done! Still gotta bend up some hard lines and remove the LSPV from the plumbing.
No pictures from last night, too much socializing. But Iit was a productive night on a few fronts.
February 10, 2019 at 1:28 pm #207896toys-n-yotasParticipantOk a few obligatory pictures.
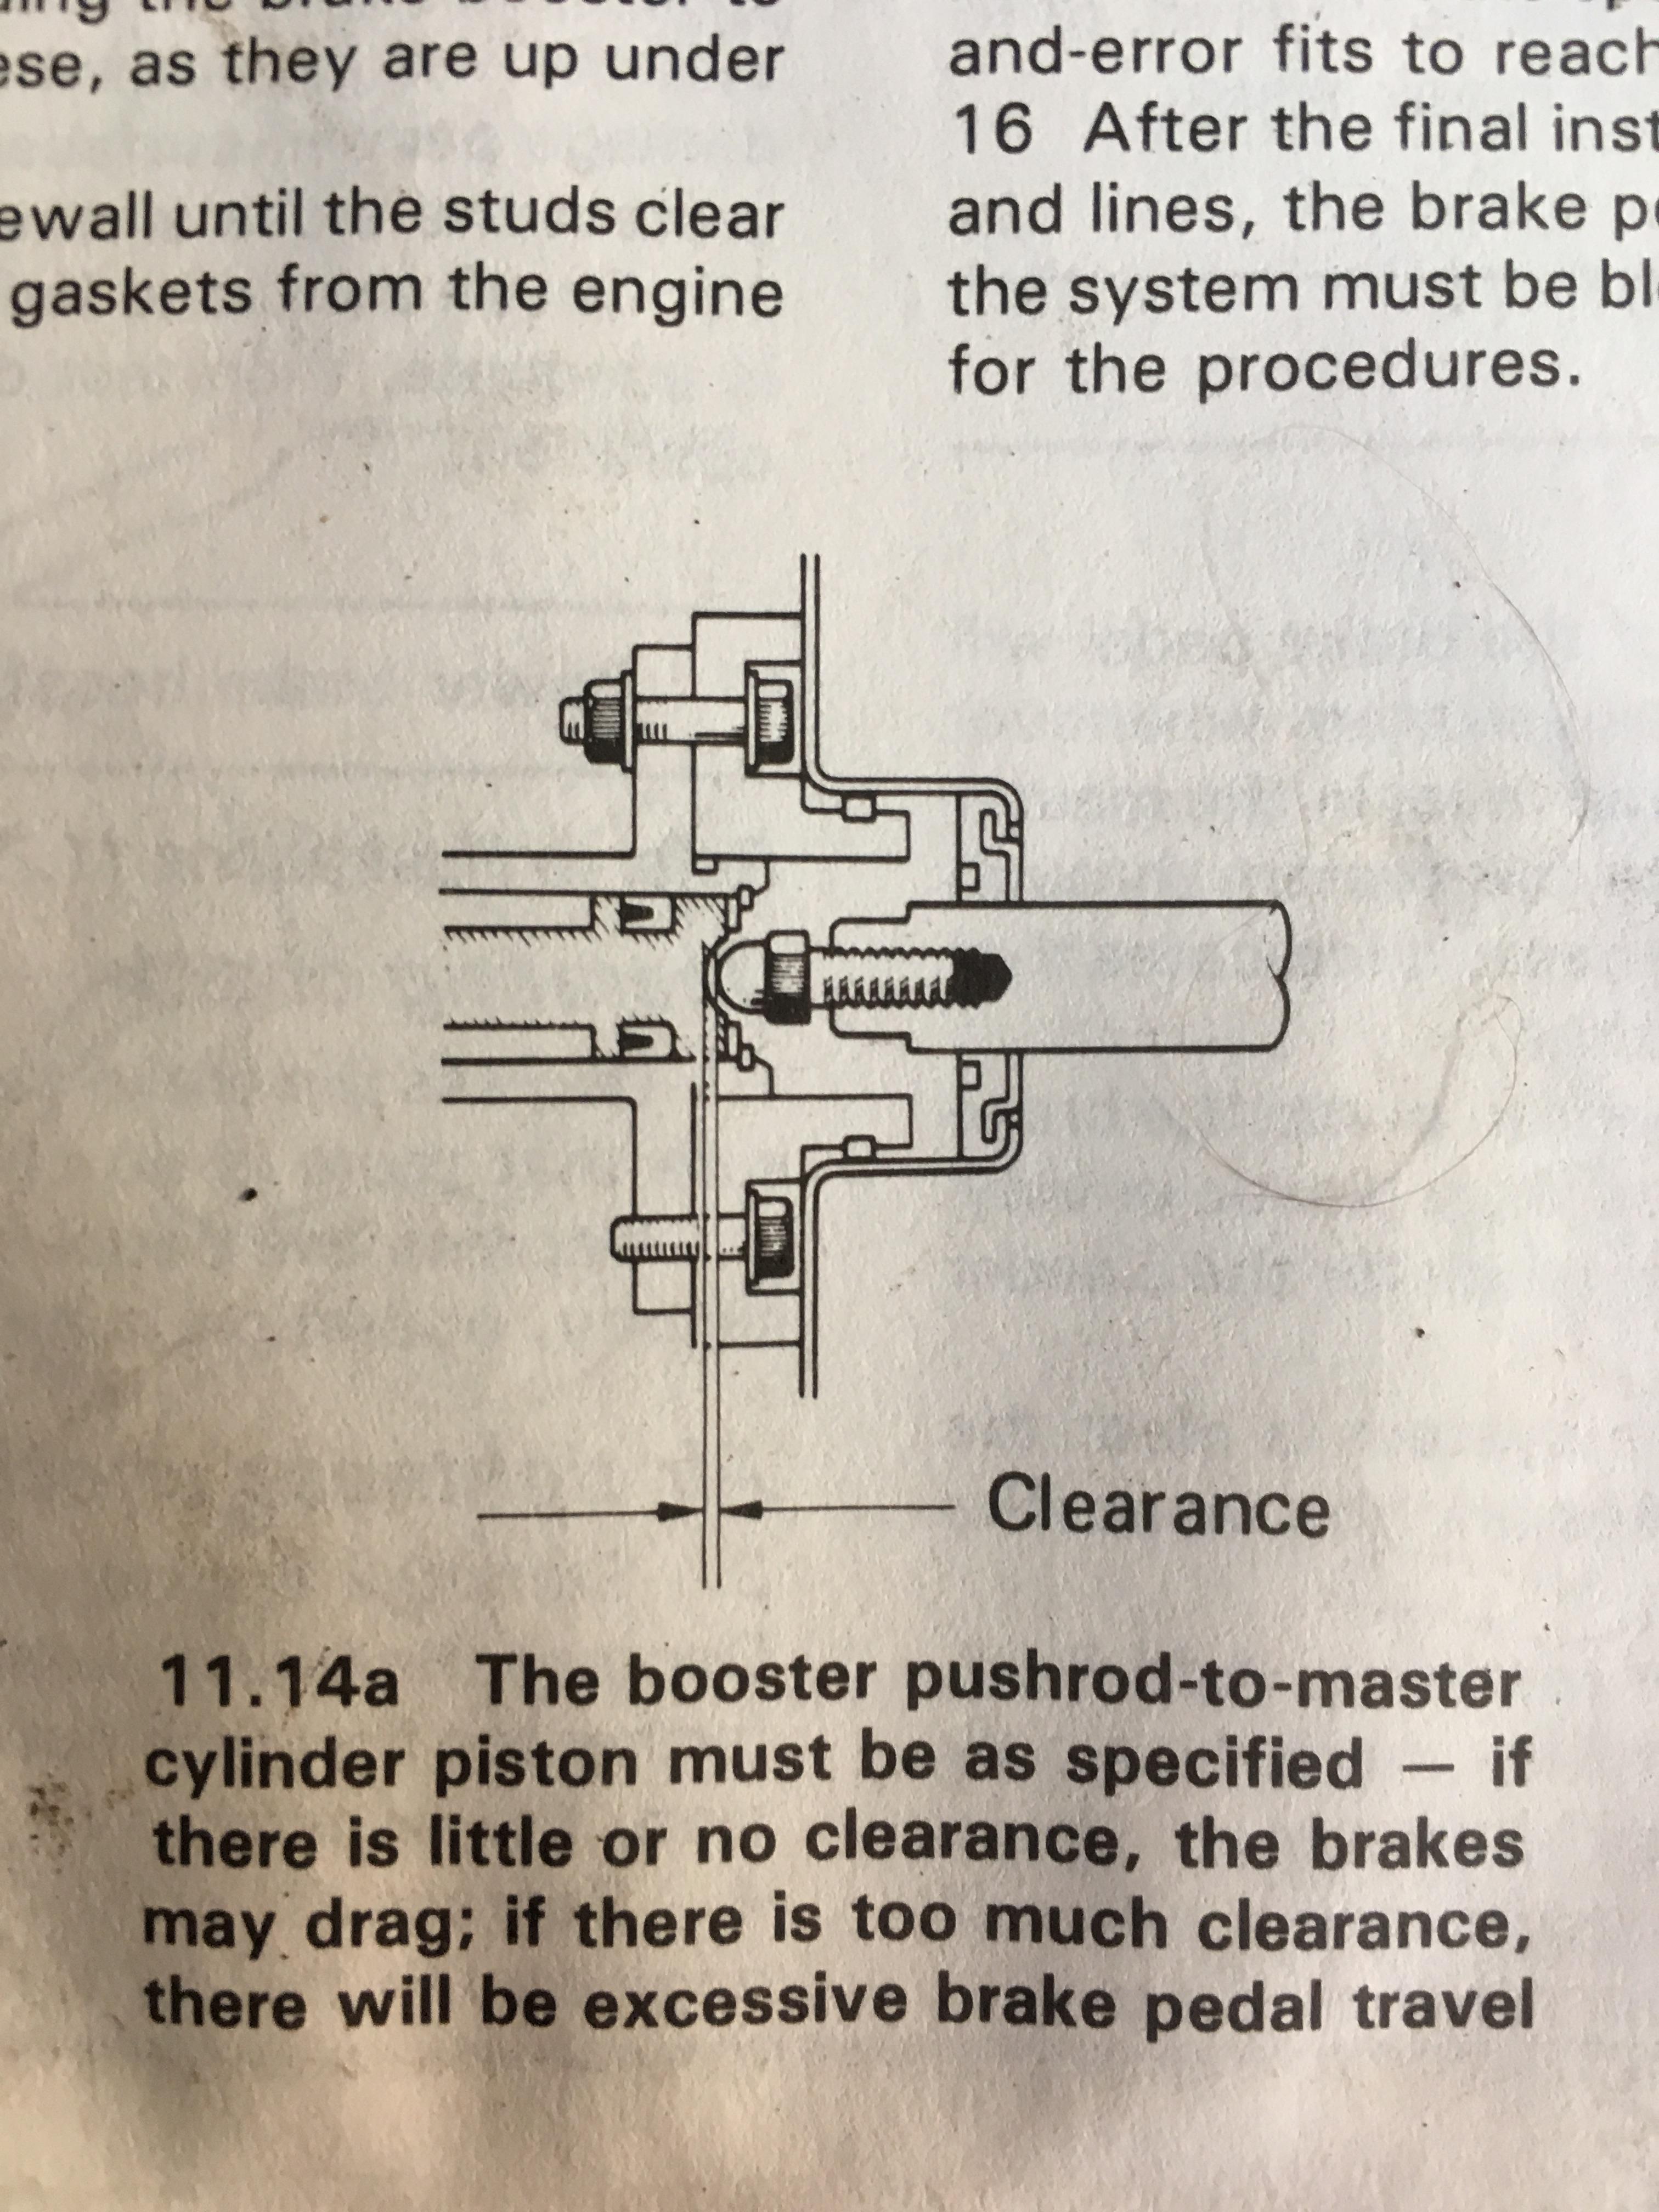
While the girls were having a Valentines party at a friends house, I put some tools away and adjusted the Booster Pushrod to length, with clearance to spec (or damn near close enough). That was a pain in the ass, despite my best attempt to use math and tools, trial and error was eventually successful.
Topped it off with a temp install of master and booster.
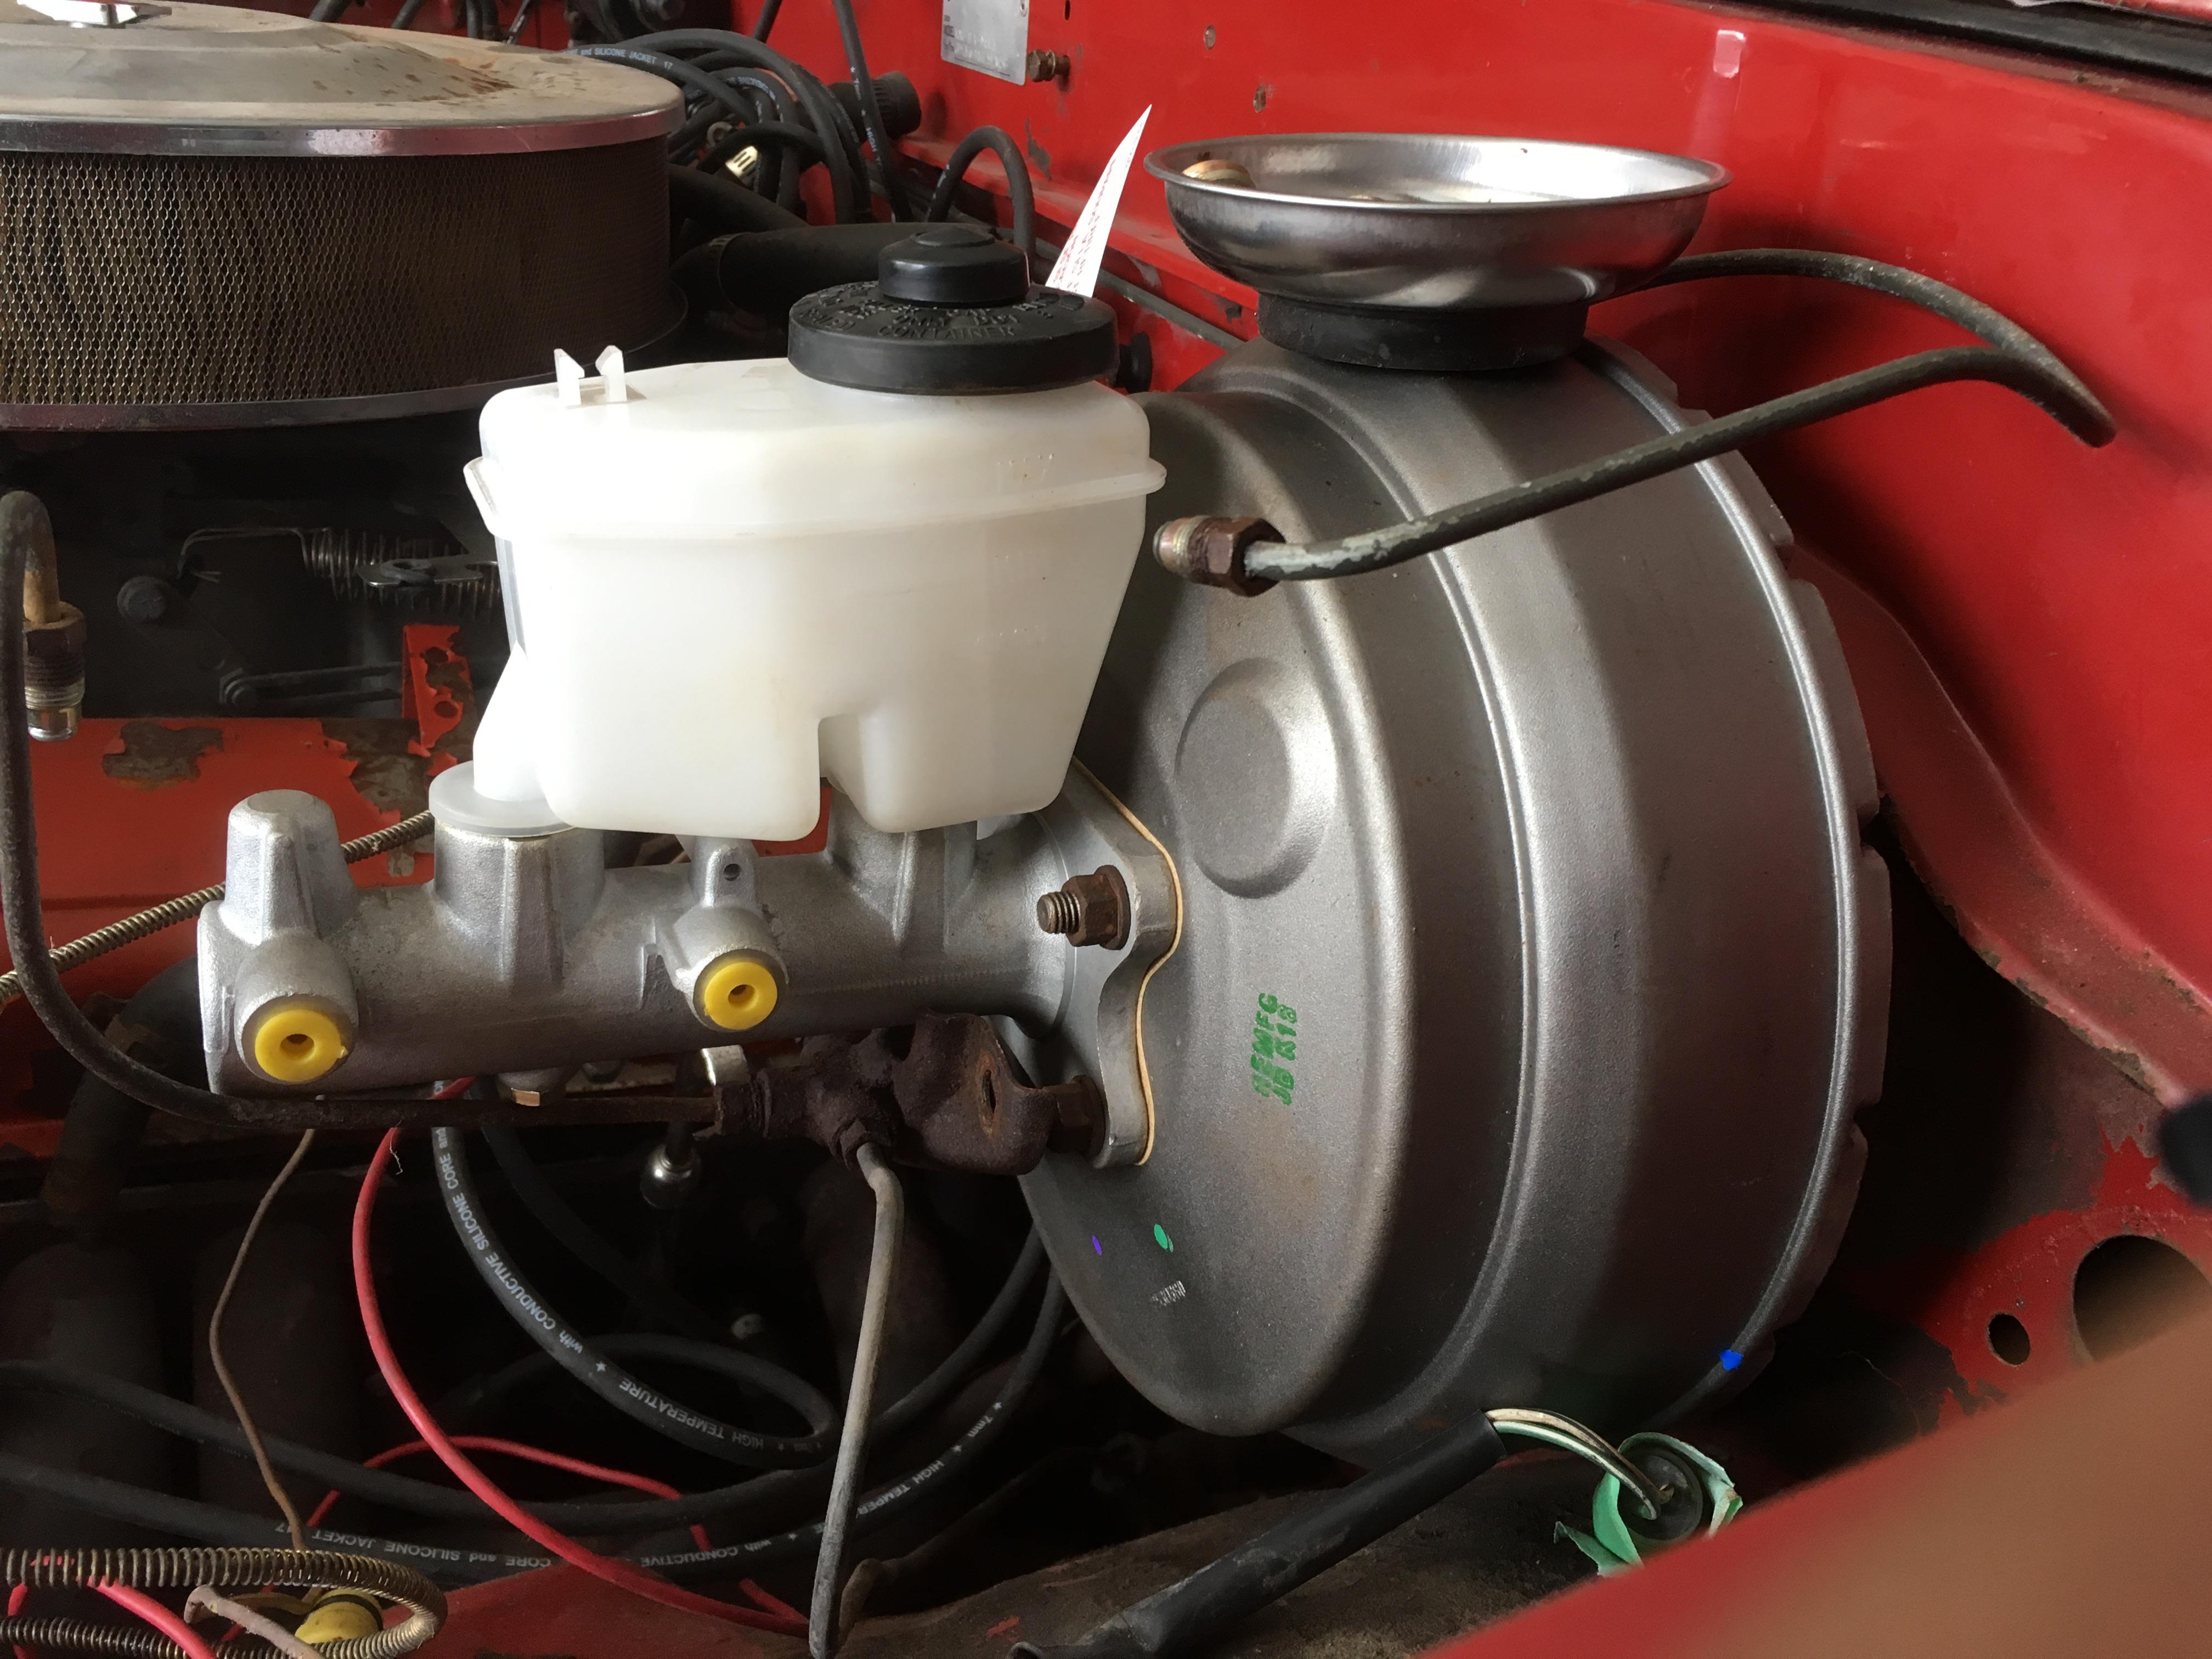
It’ll come back out when I clean up the spacer plates, and find a place to install the Manual Brake prop valve.
February 12, 2019 at 8:02 pm #207898toys-n-yotasParticipantUgggghhhh, nothing like work travel to interrupt good progress. I’m stuck in Ohio till Friday, 700km from home. Ugggghhhh, bored already.
Missing my girlies at home.
-
This reply was modified 5 years, 2 months ago by toys-n-yotas.
February 19, 2019 at 11:40 pm #207912toys-n-yotasParticipantMy USA trip was successful, and I returned home safely. The End…. No more shall we speak of work-work in this place.
I spent Family Day weekend doing family things with members of my family. Celebrated two birthdays, Happy 1st and 3rd Birthday my nieces! I’m callin’ it another success.
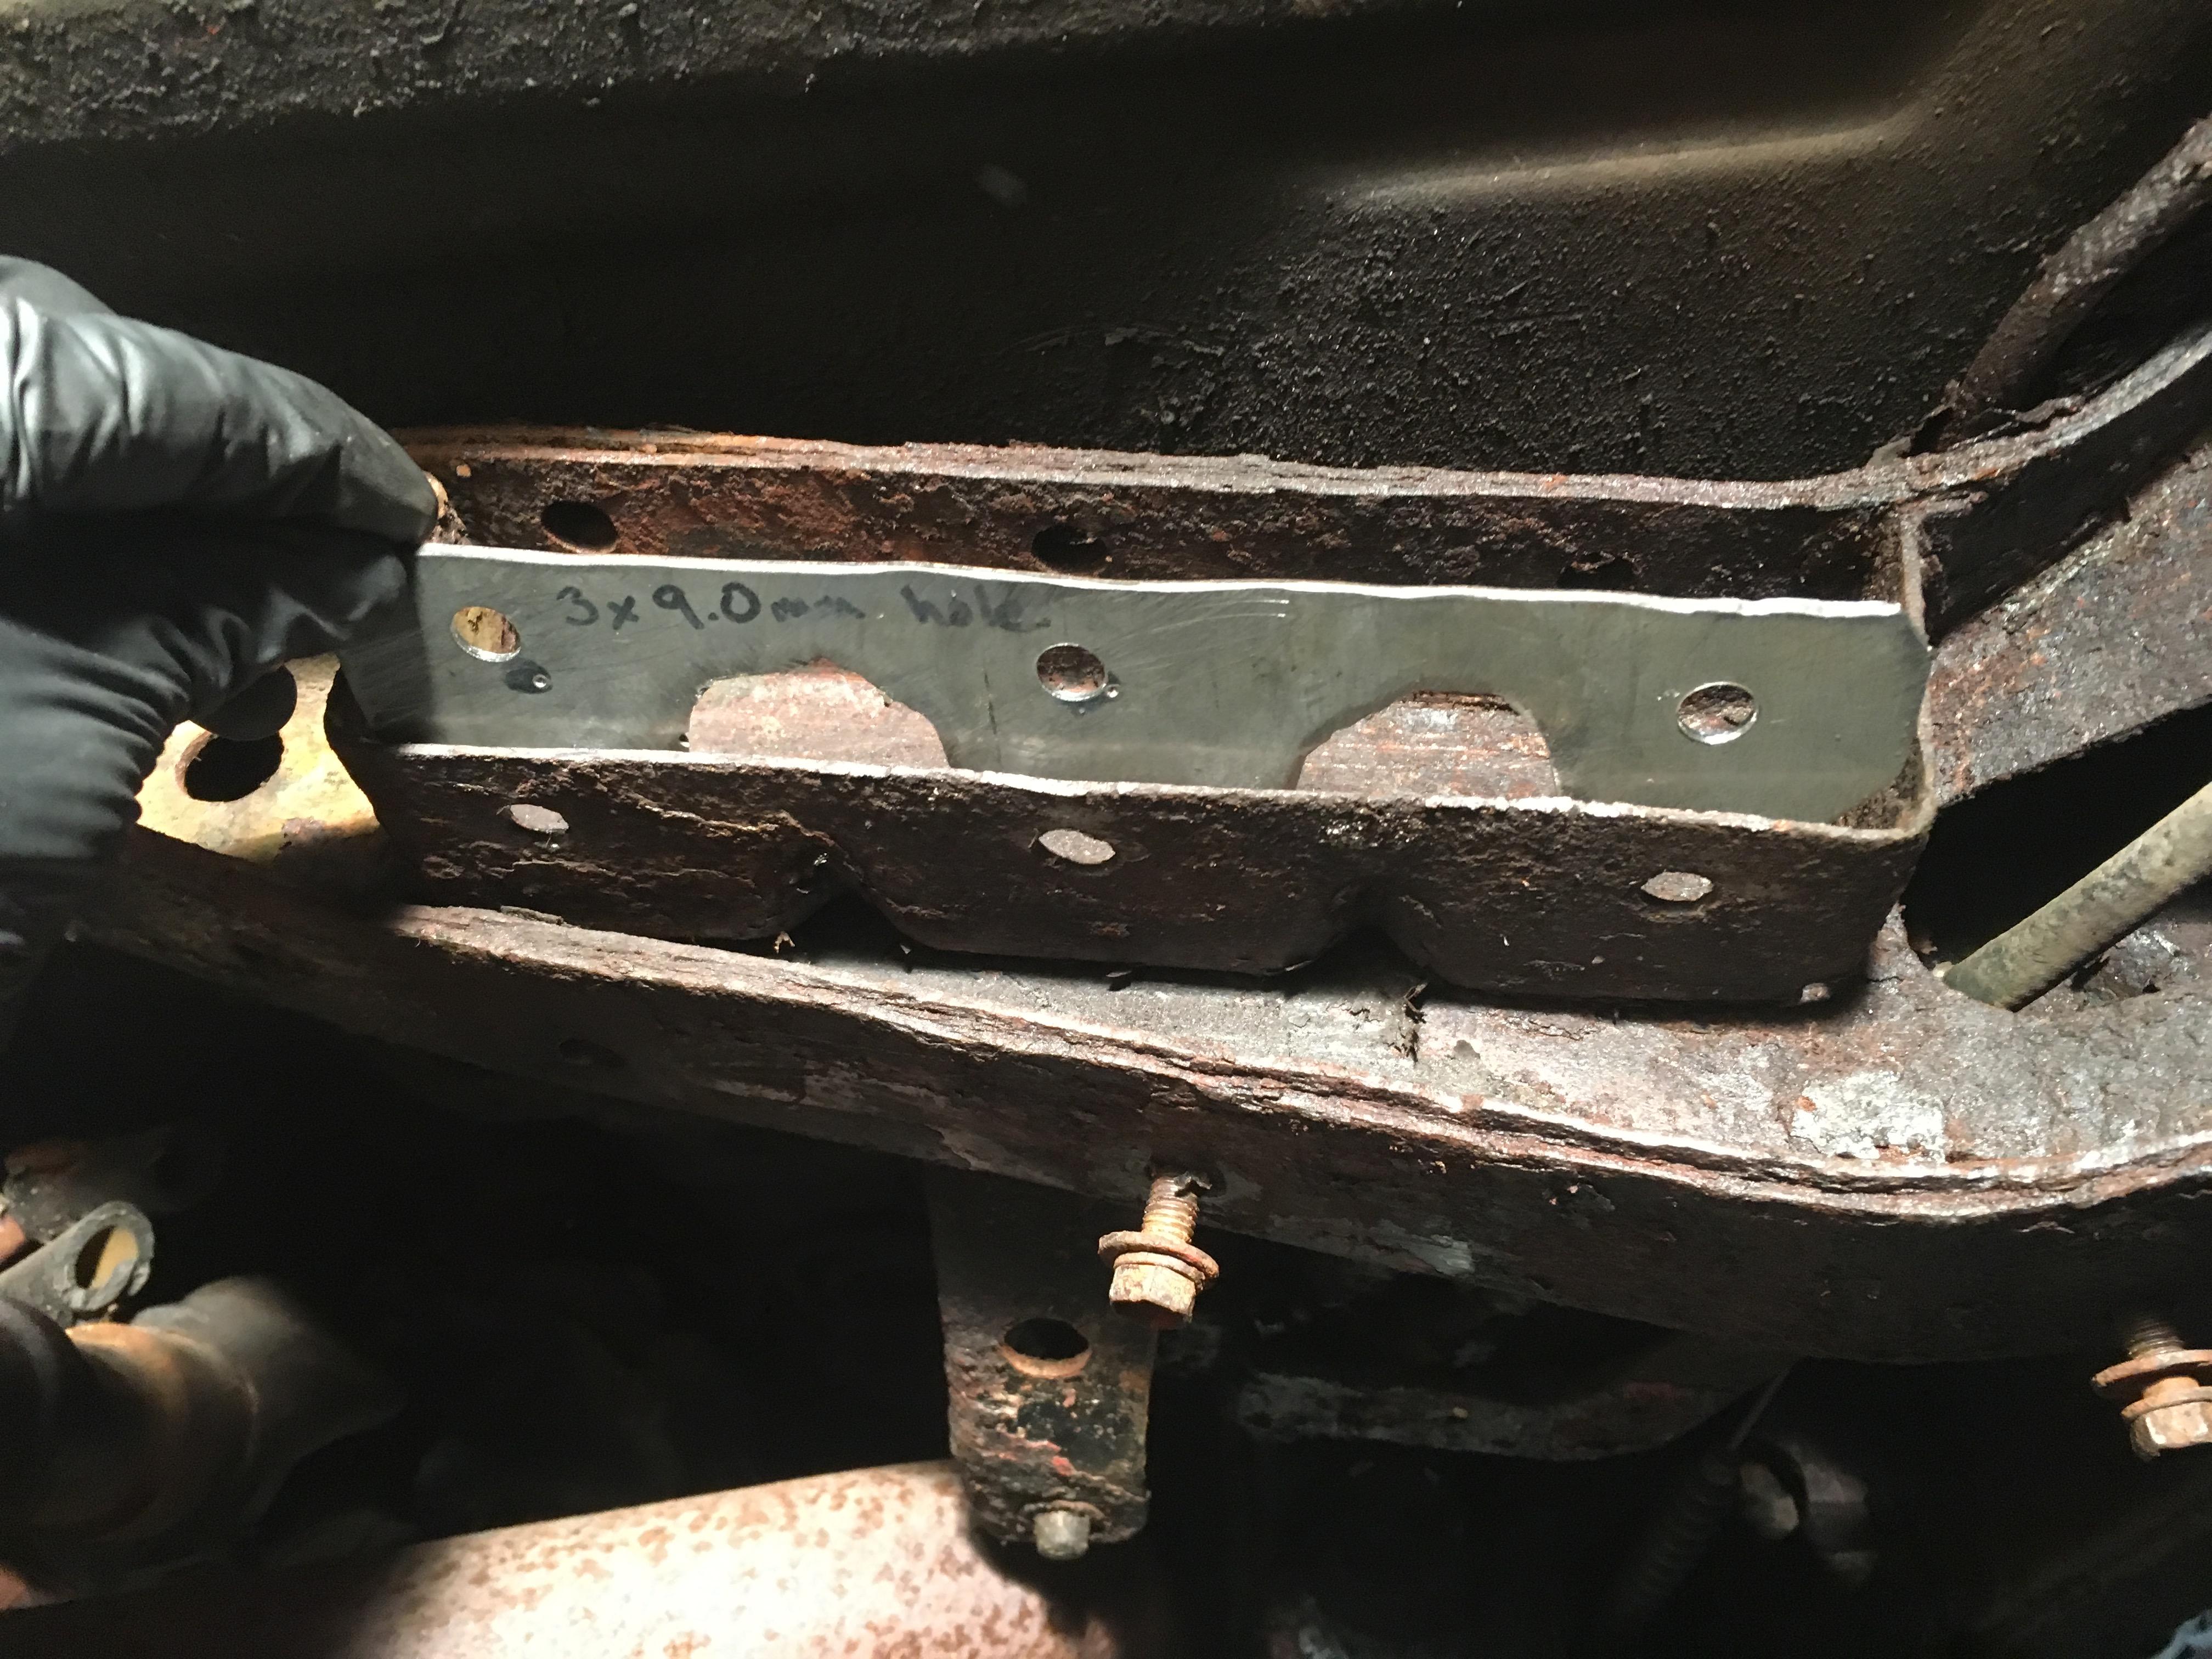
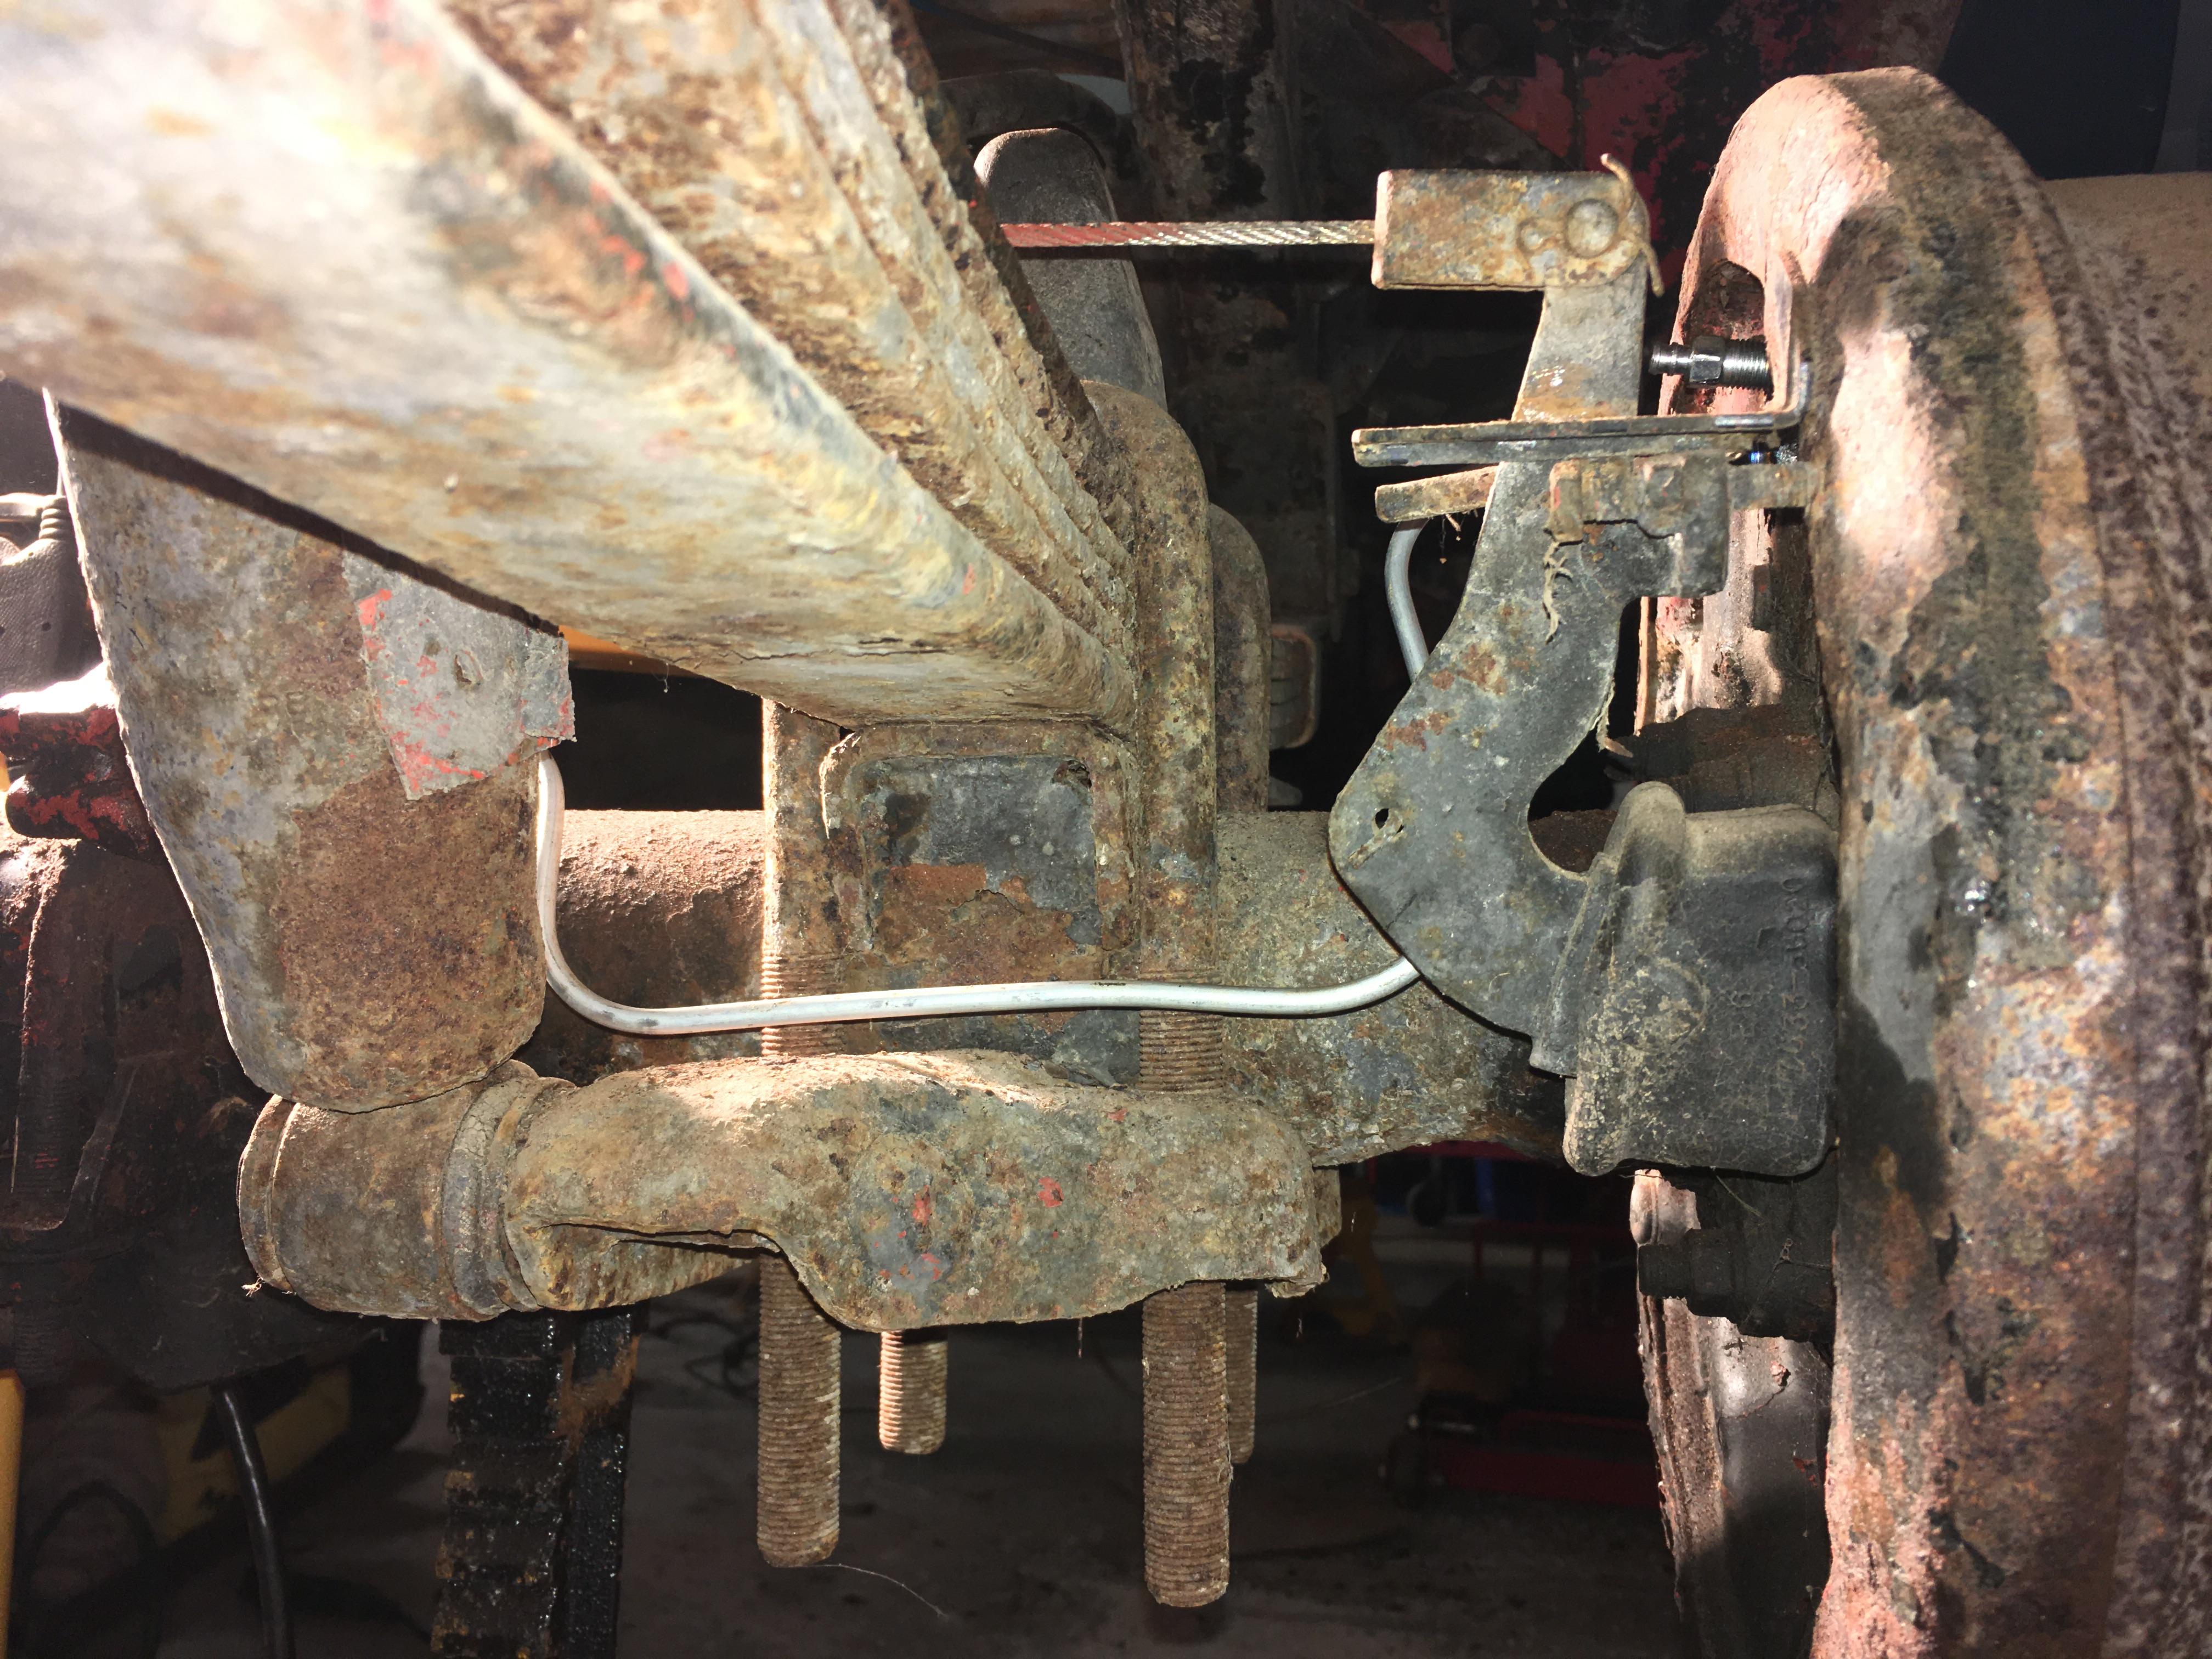
Monday night I continued to remove things from Redee. Seems to be a trend recently. Off came the brake hard lines from the rear axle, hard lines from the knuckles, and the master cylinder distribution block. I also removed the 2nd half of 4 botls that refused to come out when I removed the tank. I was going to remove the LSPV, but it was pretty late, and that involved moving lots of stuff from under and around Redee, so I called it a night. Don’t worry, that LSPV crap is still coming out.
February 21, 2019 at 6:06 am #207914 Toy-YotaParticipant
I know, the feeling of constantly removing stuff feels so defeating sometimes. In reality it’s progress toward the final goal but it just feels like you’re getting further away. The moment you take it out on the first trip with the girls it’ll be worth it.
Theres a 5.7 swapped xtra cab on kijiji right now with air lockers and dual cases that I think looks pretty cool. Looks like it could definitely use some tidying up but seems well built. Reminded me of redee.
February 23, 2019 at 9:25 am #207915toys-n-yotasParticipantI’m only a little defeated with parts still coming off Redee, but I know this is a labour of love and this is what I signed up for. Hard trying to decide when to stop digging, and when to start building. Now that the tank is out of the way, the last brake line and fuel lines are way more accessible.
Tonight I hope to get the LPSV off, make a template for the front tank holder M8 nuts, finish assembly on my sandblasting cabinet and setup the “rust removal electrolysis” for the gas tank. I figure $1 worth of baking soda is worth my effort before paying for a refurbishment or replacement. Thanks again to Kyle for the suggestion and link.
I’ve sent that 350 swapped pickup to two different buddies trying to get it purchased and brought into Shelburne. I just wanna drive it with the 5-spd manual, and judge for myself if it’s worth the swap. (Lower first and taller 5th gear, hard to imagine it wouldn’t be “better”). Apples-to-apples comparison. I like how functional that Xtra cab looks, bet it rocks the trails too.
February 23, 2019 at 3:13 pm #207916 FJTTSEKeymaster
Every step is a step in the right direction Tom,keep up the good work.
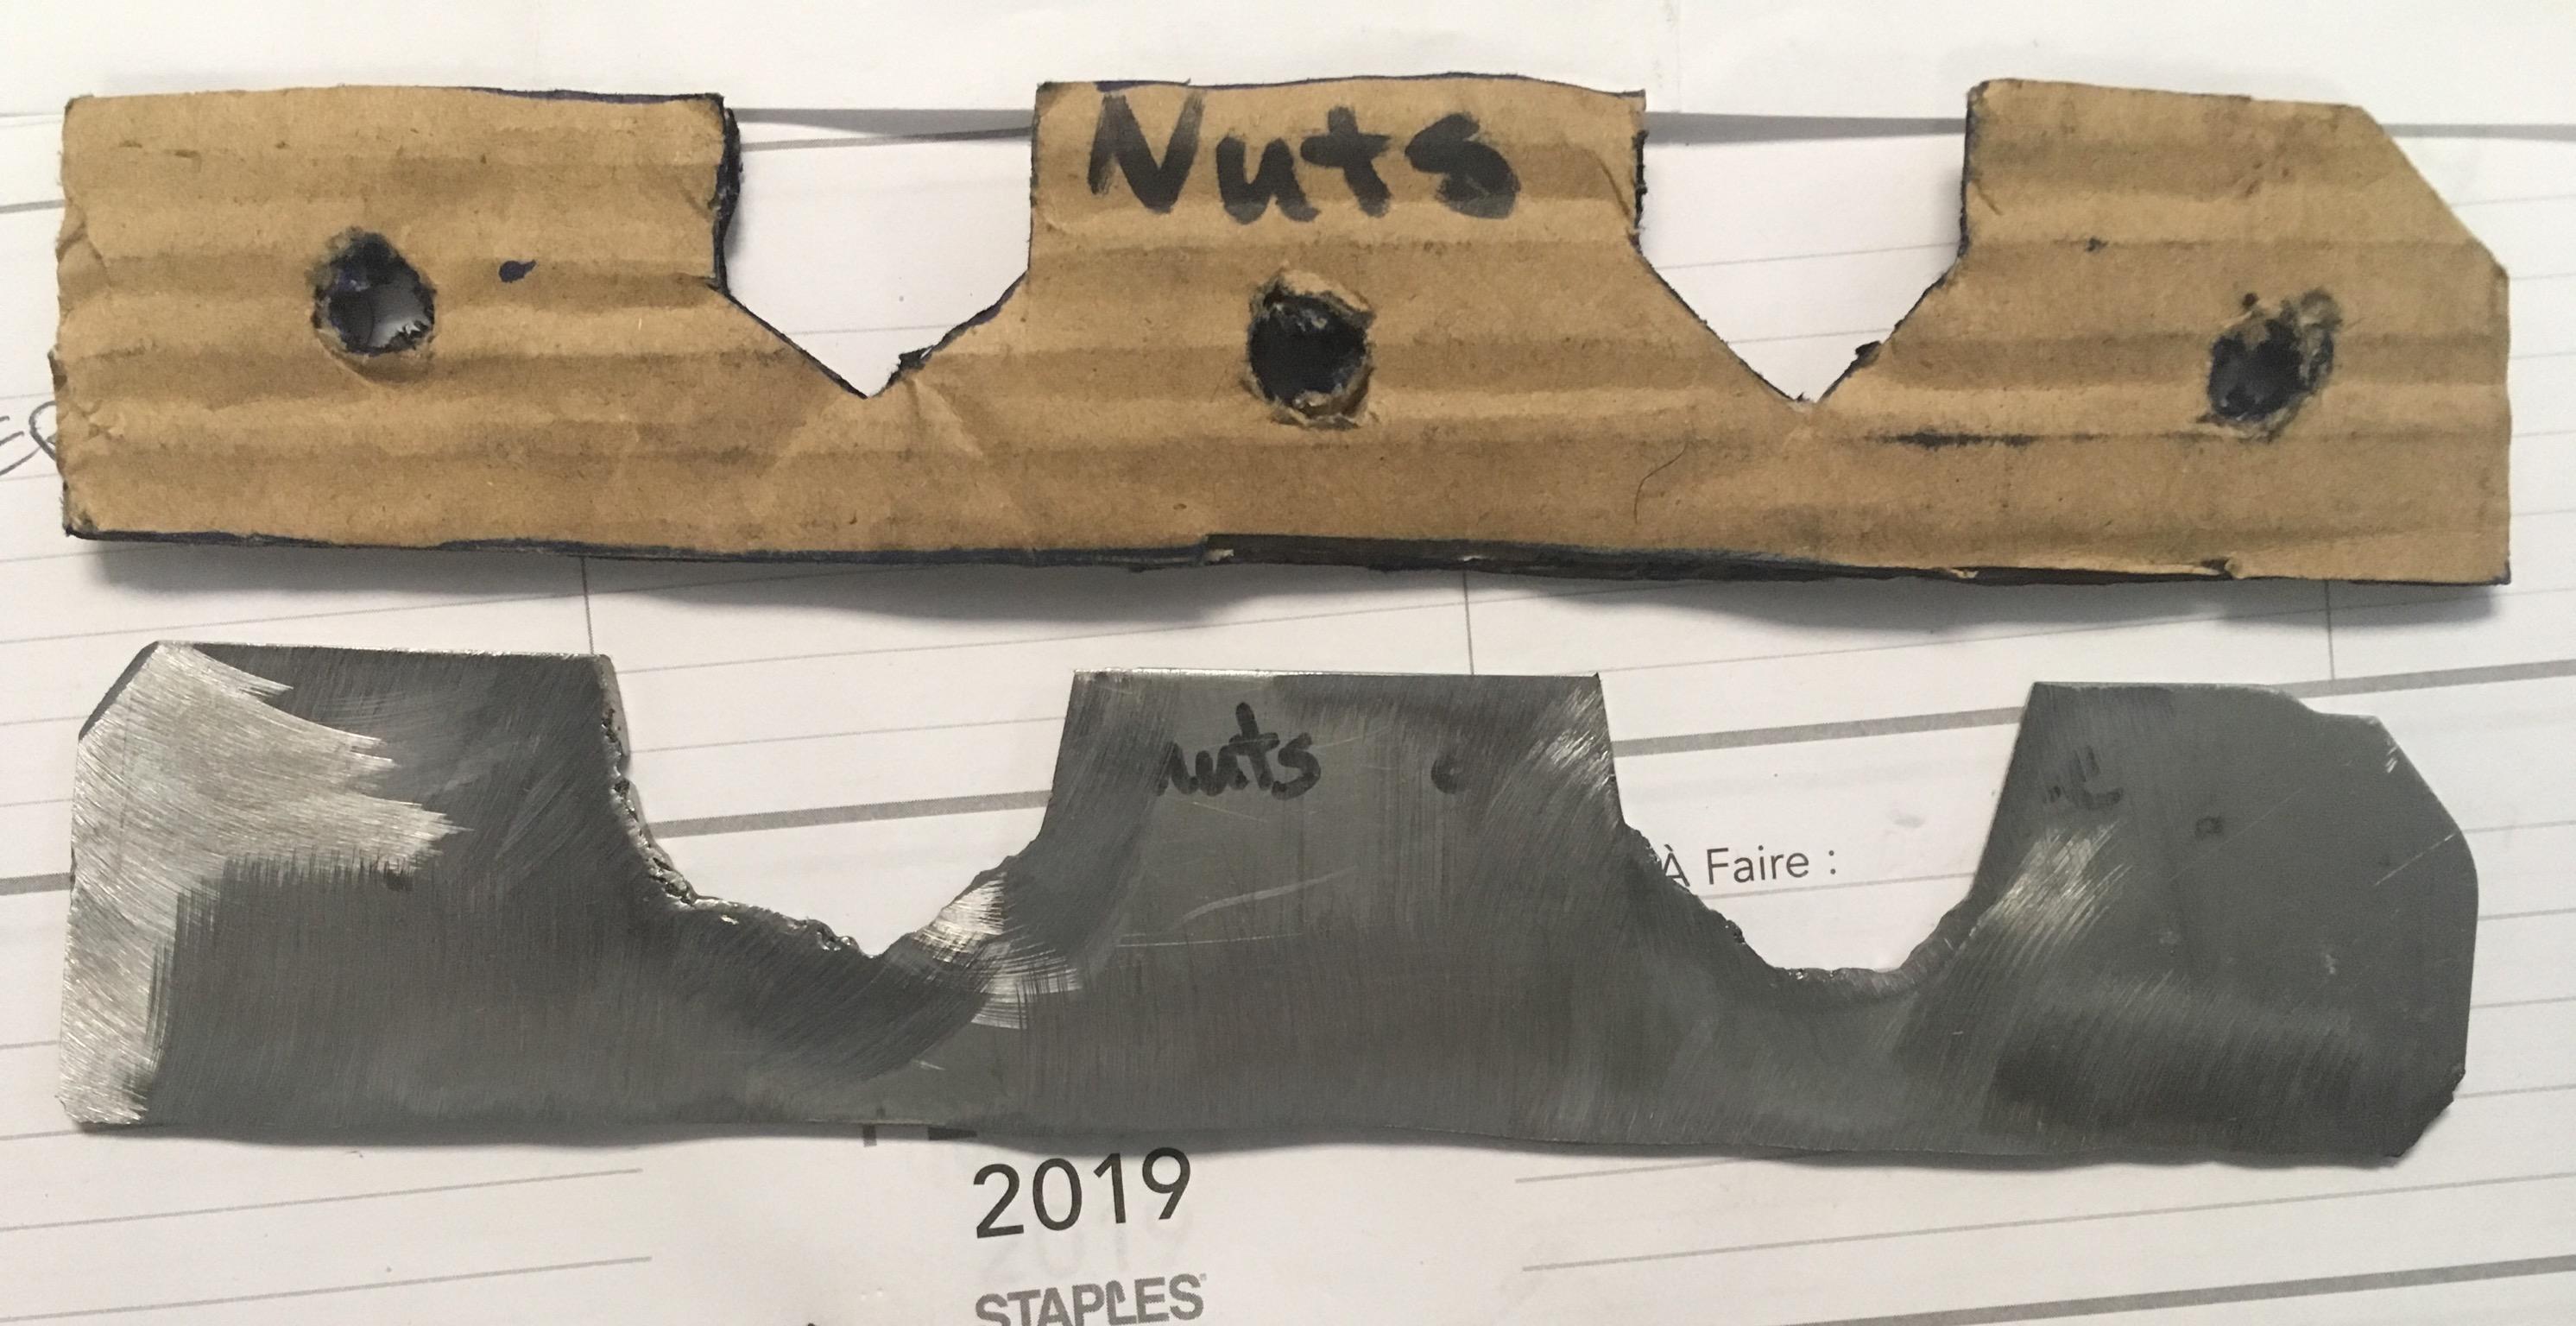
February 24, 2019 at 5:10 pm #207918toys-n-yotasParticipantMade a little progress yesterday. Got the old nuts ground off for the leading edge of the gas tank. Also made a template so I can fab up a simple plate and projection weld some M8 nuts on it at work.
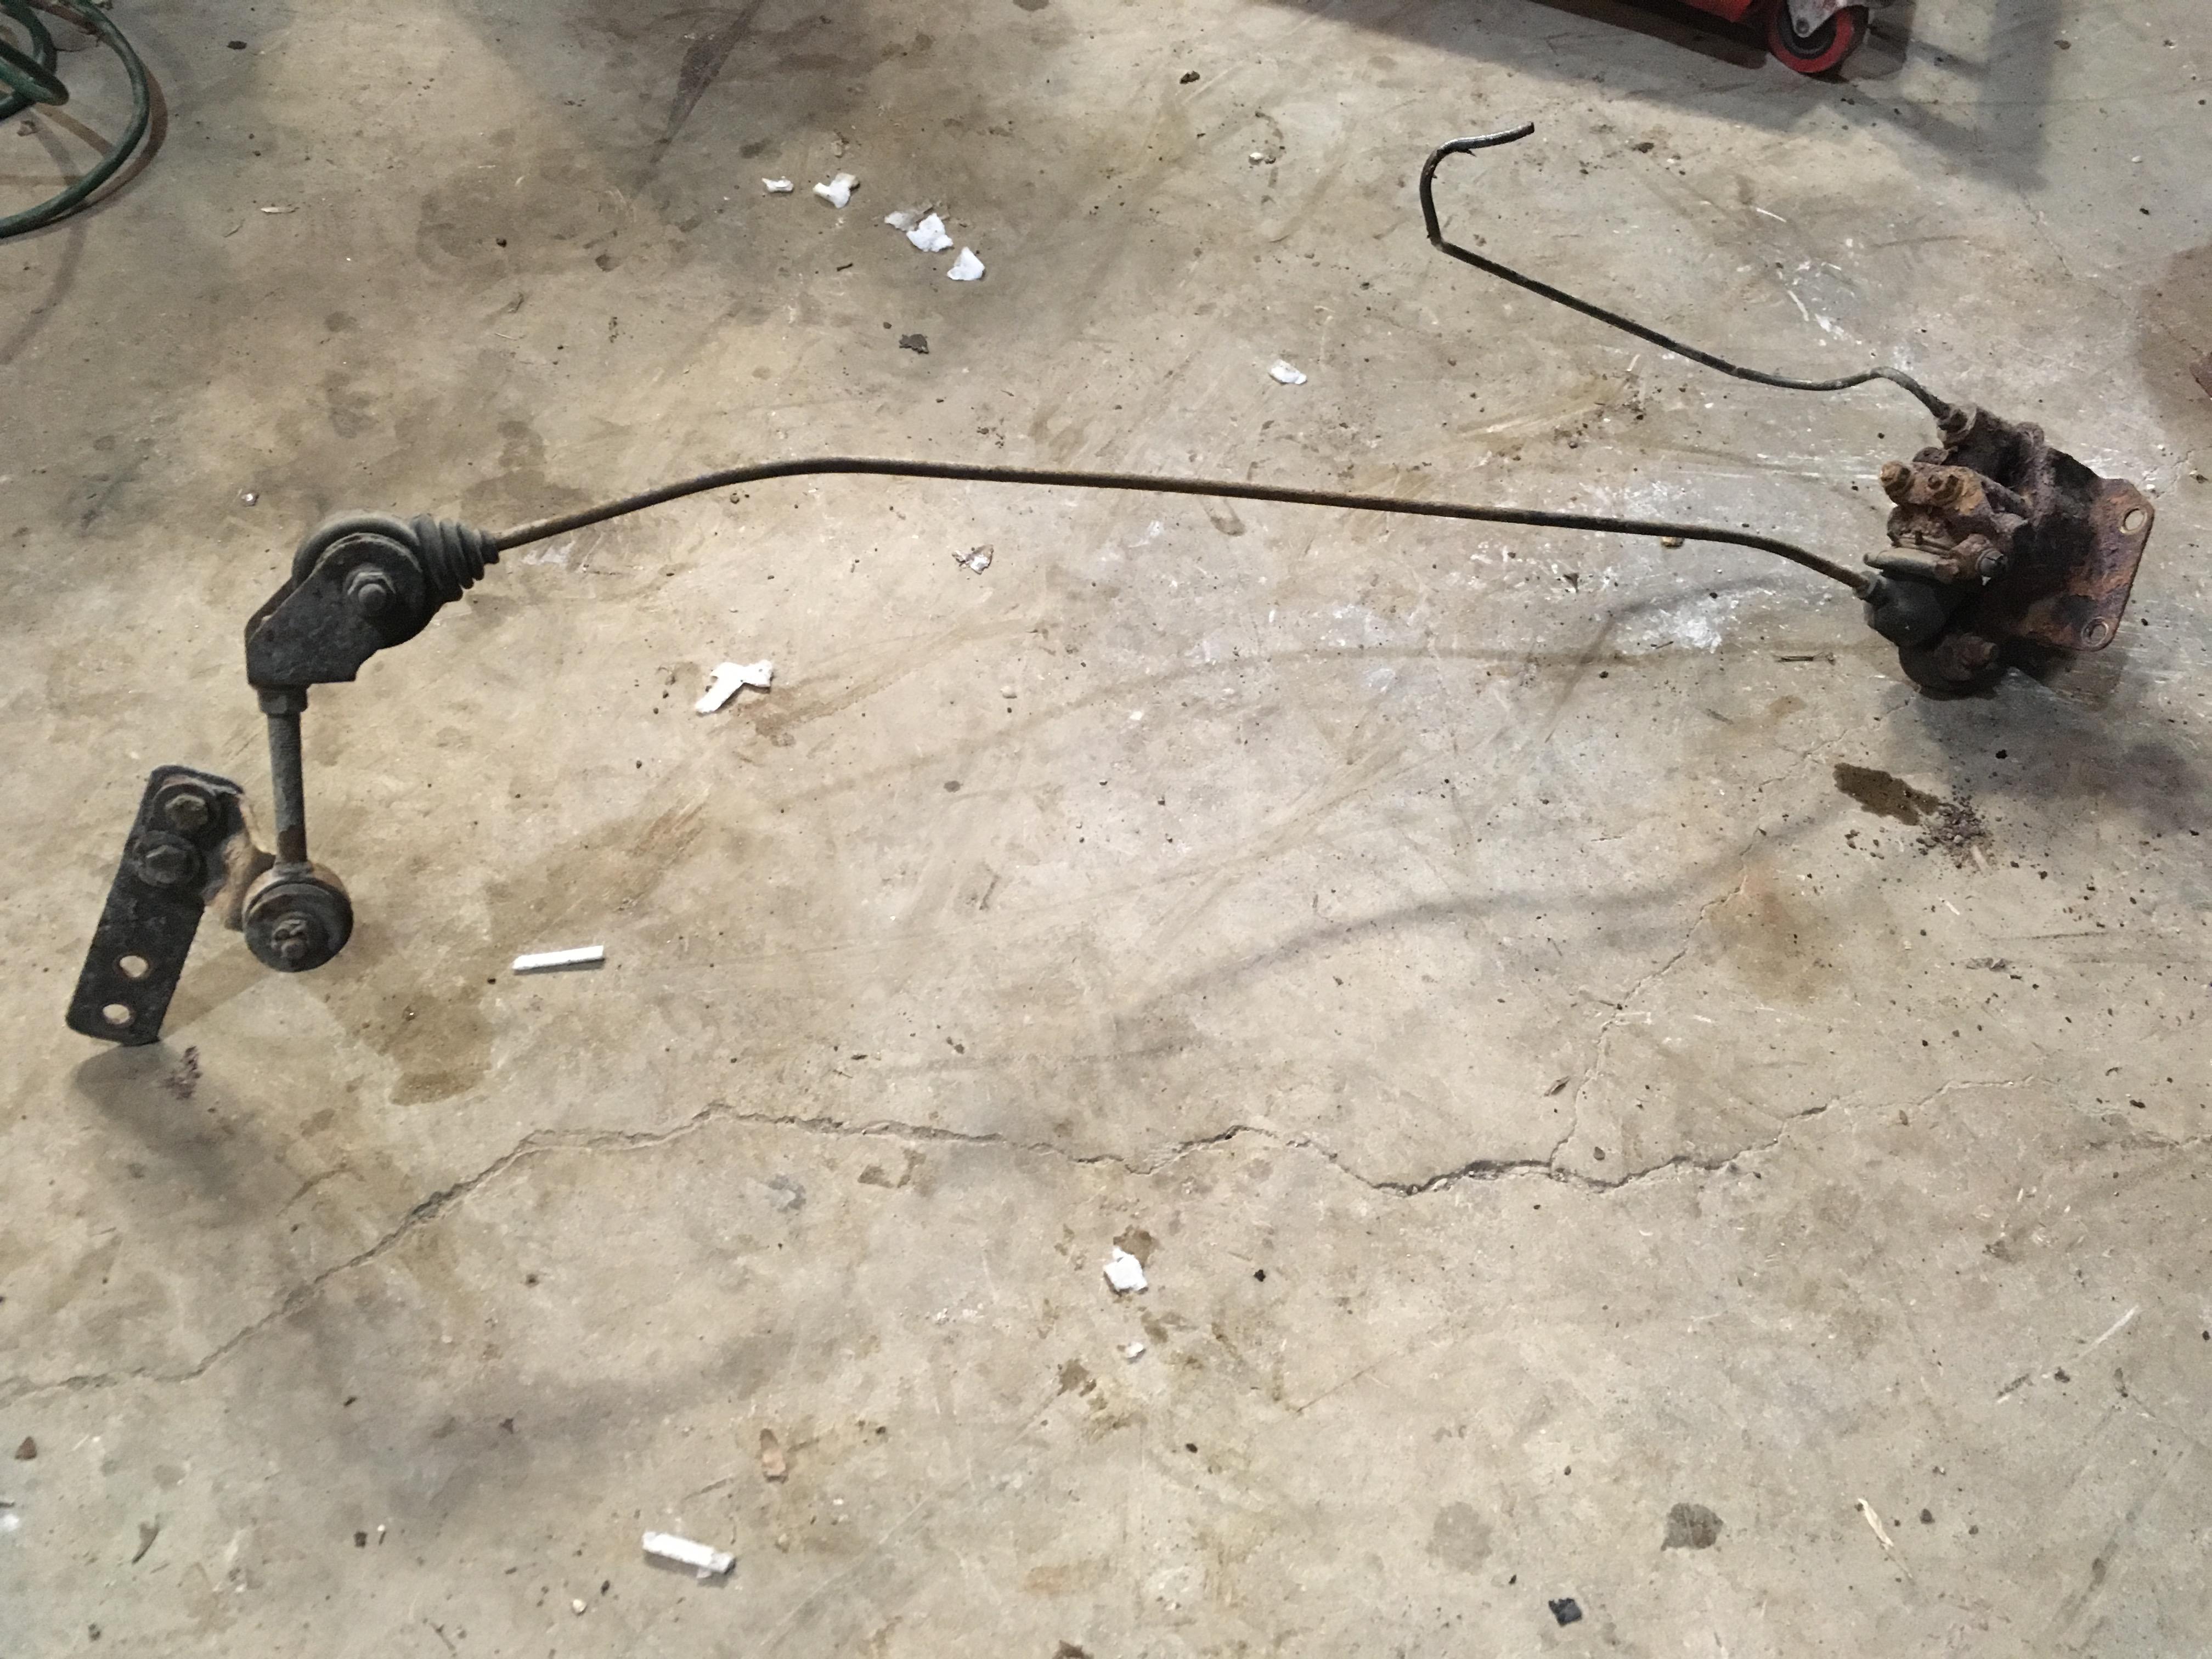
Lastly I removed the LSPV and all bracketry and hard lines associated with it. Pretty pleased to have that inferior crap off for good.
February 26, 2019 at 5:23 pm #207922toys-n-yotasParticipantWoot woot more progress last night.
Got the tank plate hanger fabbed up last night, and projection welded M8 nuts onto it today! Gotta hit it with some primer, and temporary mount it with silicone to prevent it from becomming eclipsed while mounting the tank. (Pardon how hideous the cut lines are, I’m a better designer/think-tanker than fabricator at this point in time)
LSPV free to a good home 😉
 March 2, 2019 at 12:27 pm #207924finn the kareilian vikingKeymaster
tom, good to see someone’s gettin’ $h!t done on their stuff! did you let a neighbors dog chew that bracket for you? yeah i know, stfu cuz i aint even workin’ on $h!t
March 3, 2019 at 1:25 am #207930toys-n-yotasParticipantFinn what was presented before your eyes was freehand cut with a plasma cutter. It’s a good thing tbe finished product will be completely hidden from sight.
More progress tonight. Made my first bent hardline, connected rear pass side cylinder to the T-block. Nice simple short run to build the confidence up. The drivers side I have to shorten and flare, so it’ll have to wait till next time.
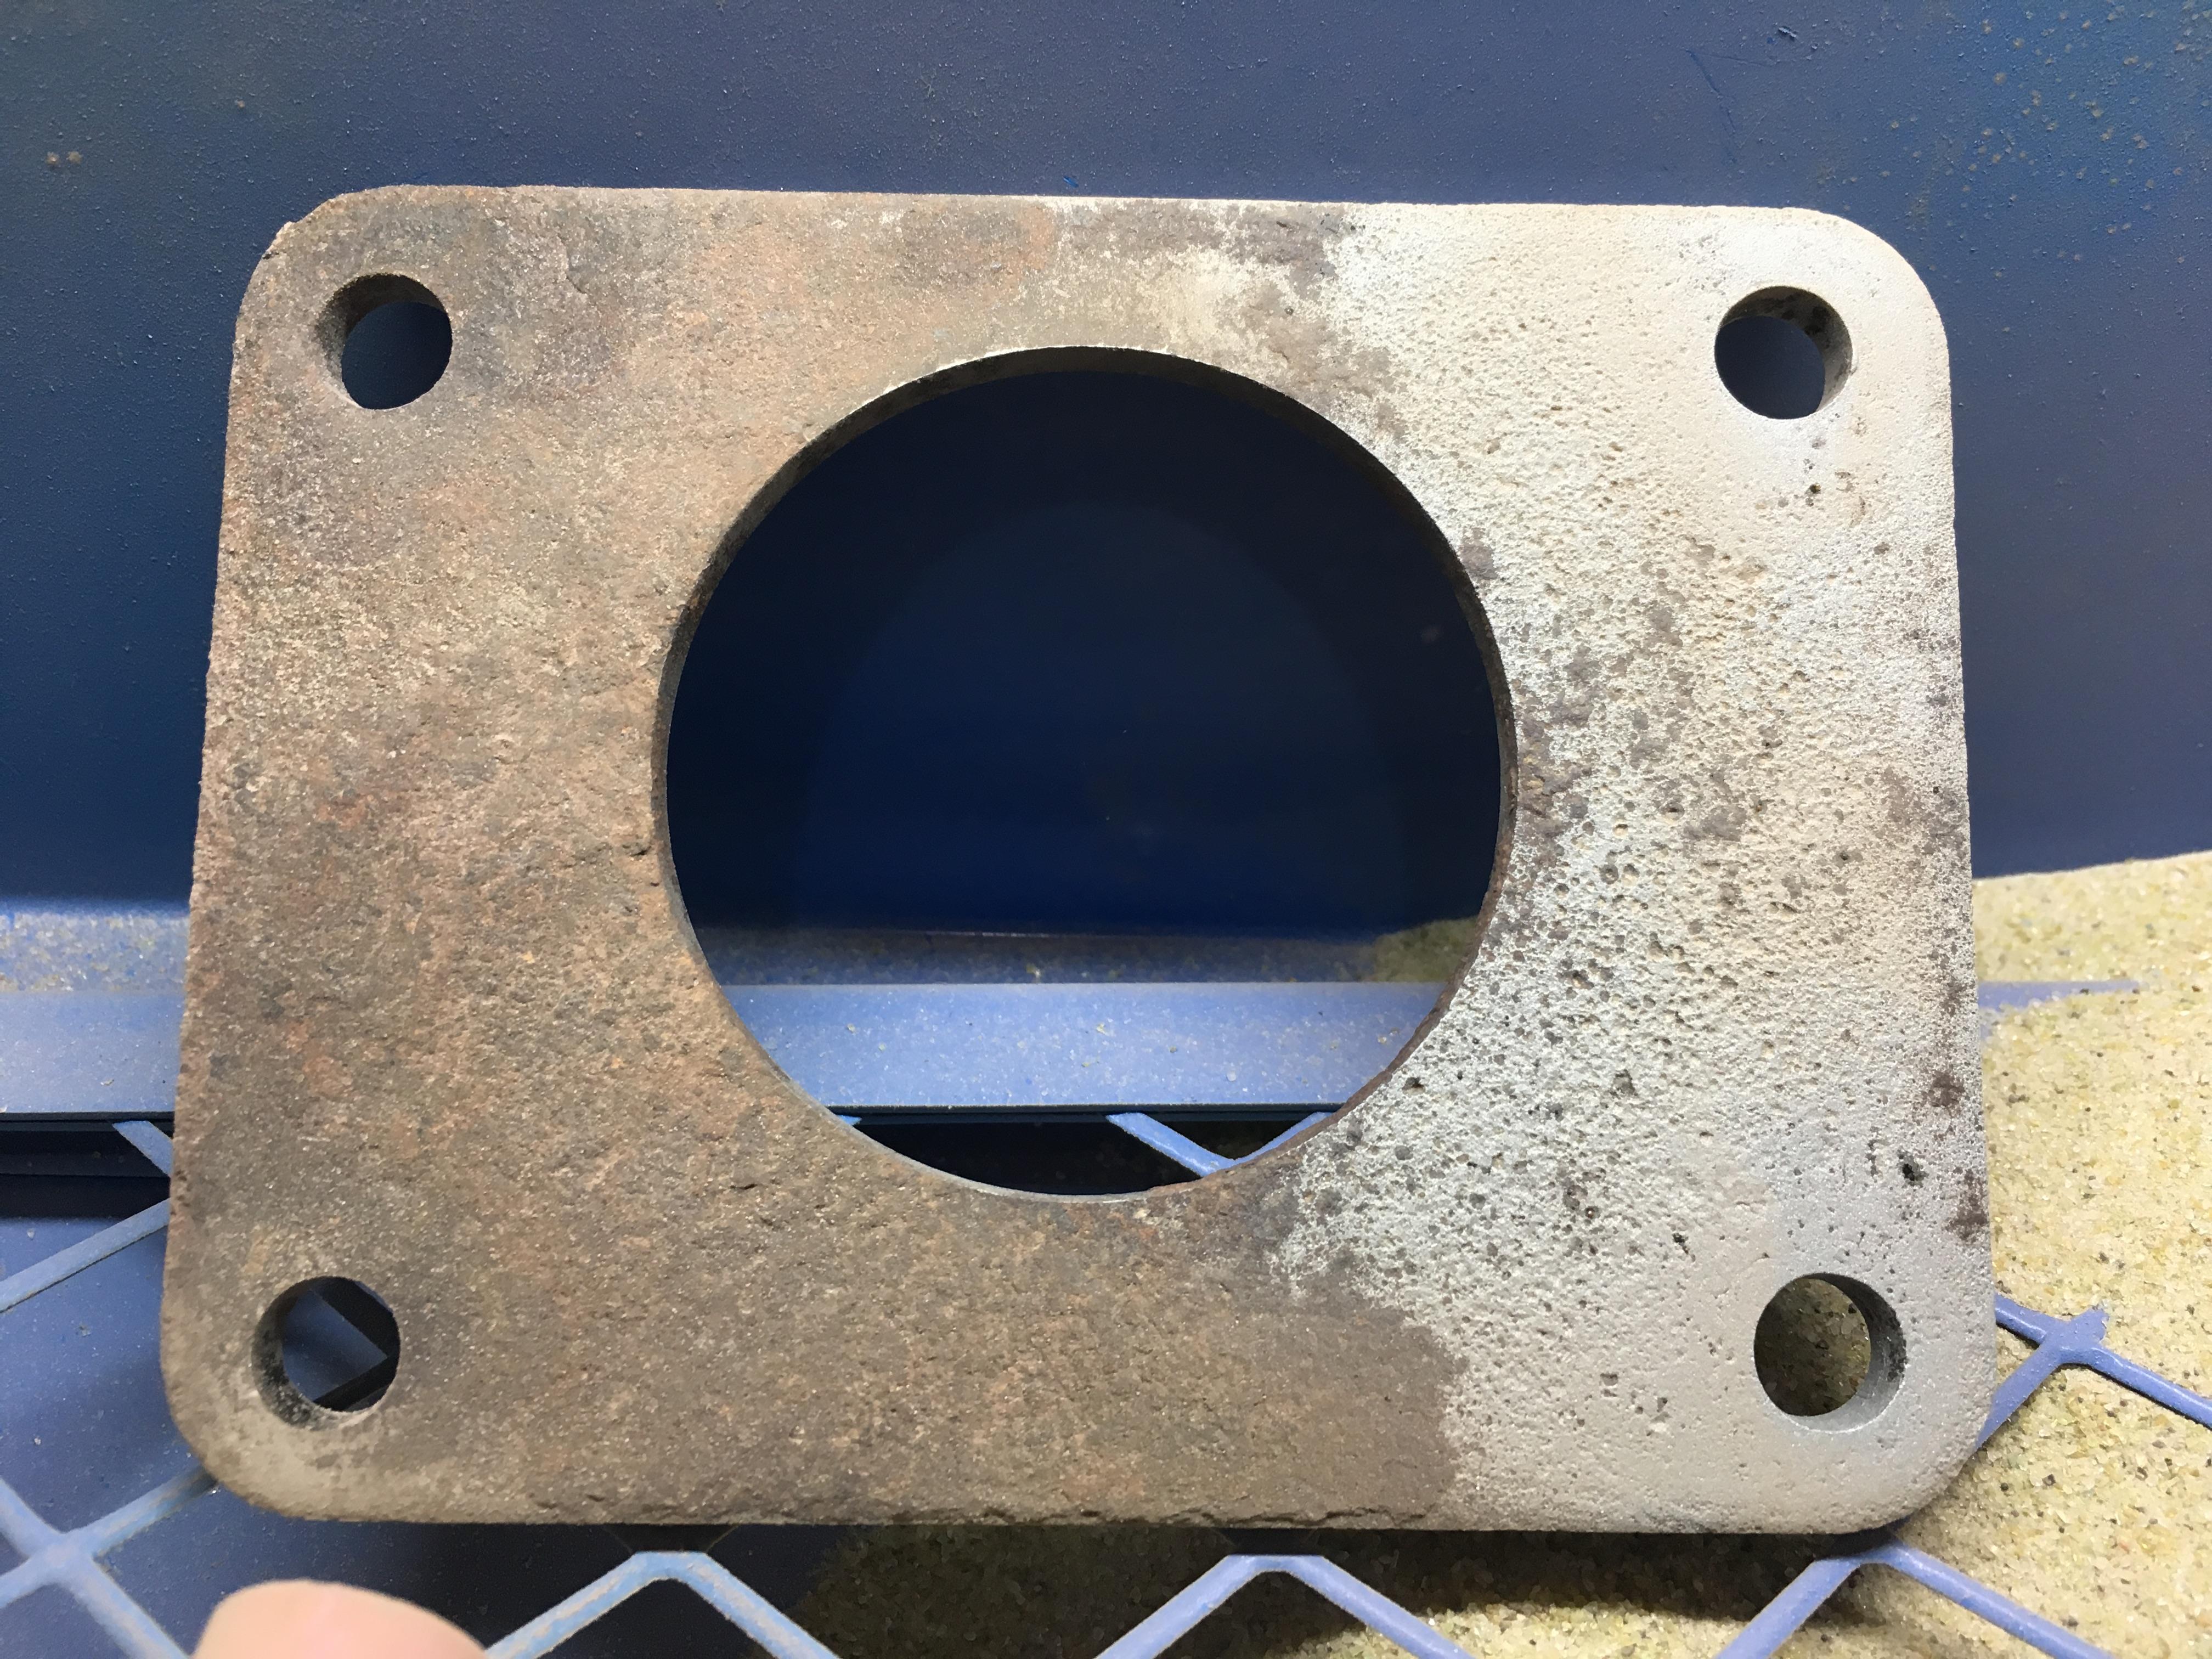
Next up, I finished up sand blasting the hydraulic booster firewall spacer plate. Looks awesome, again it’ll never get seen. But at least the new gaskets will sit flush and seal. Only took a couple more minutes from this point.
Next task for the night, yank the front driver side hub and get the old rusty rotors out of the way for upgraded rotors. Those dang cone washers are always a pain in the ass, just glad I didn’t break anything unintentionally.

Mock up!! So shiny….oooohhhhhh, ahhhhhhh…
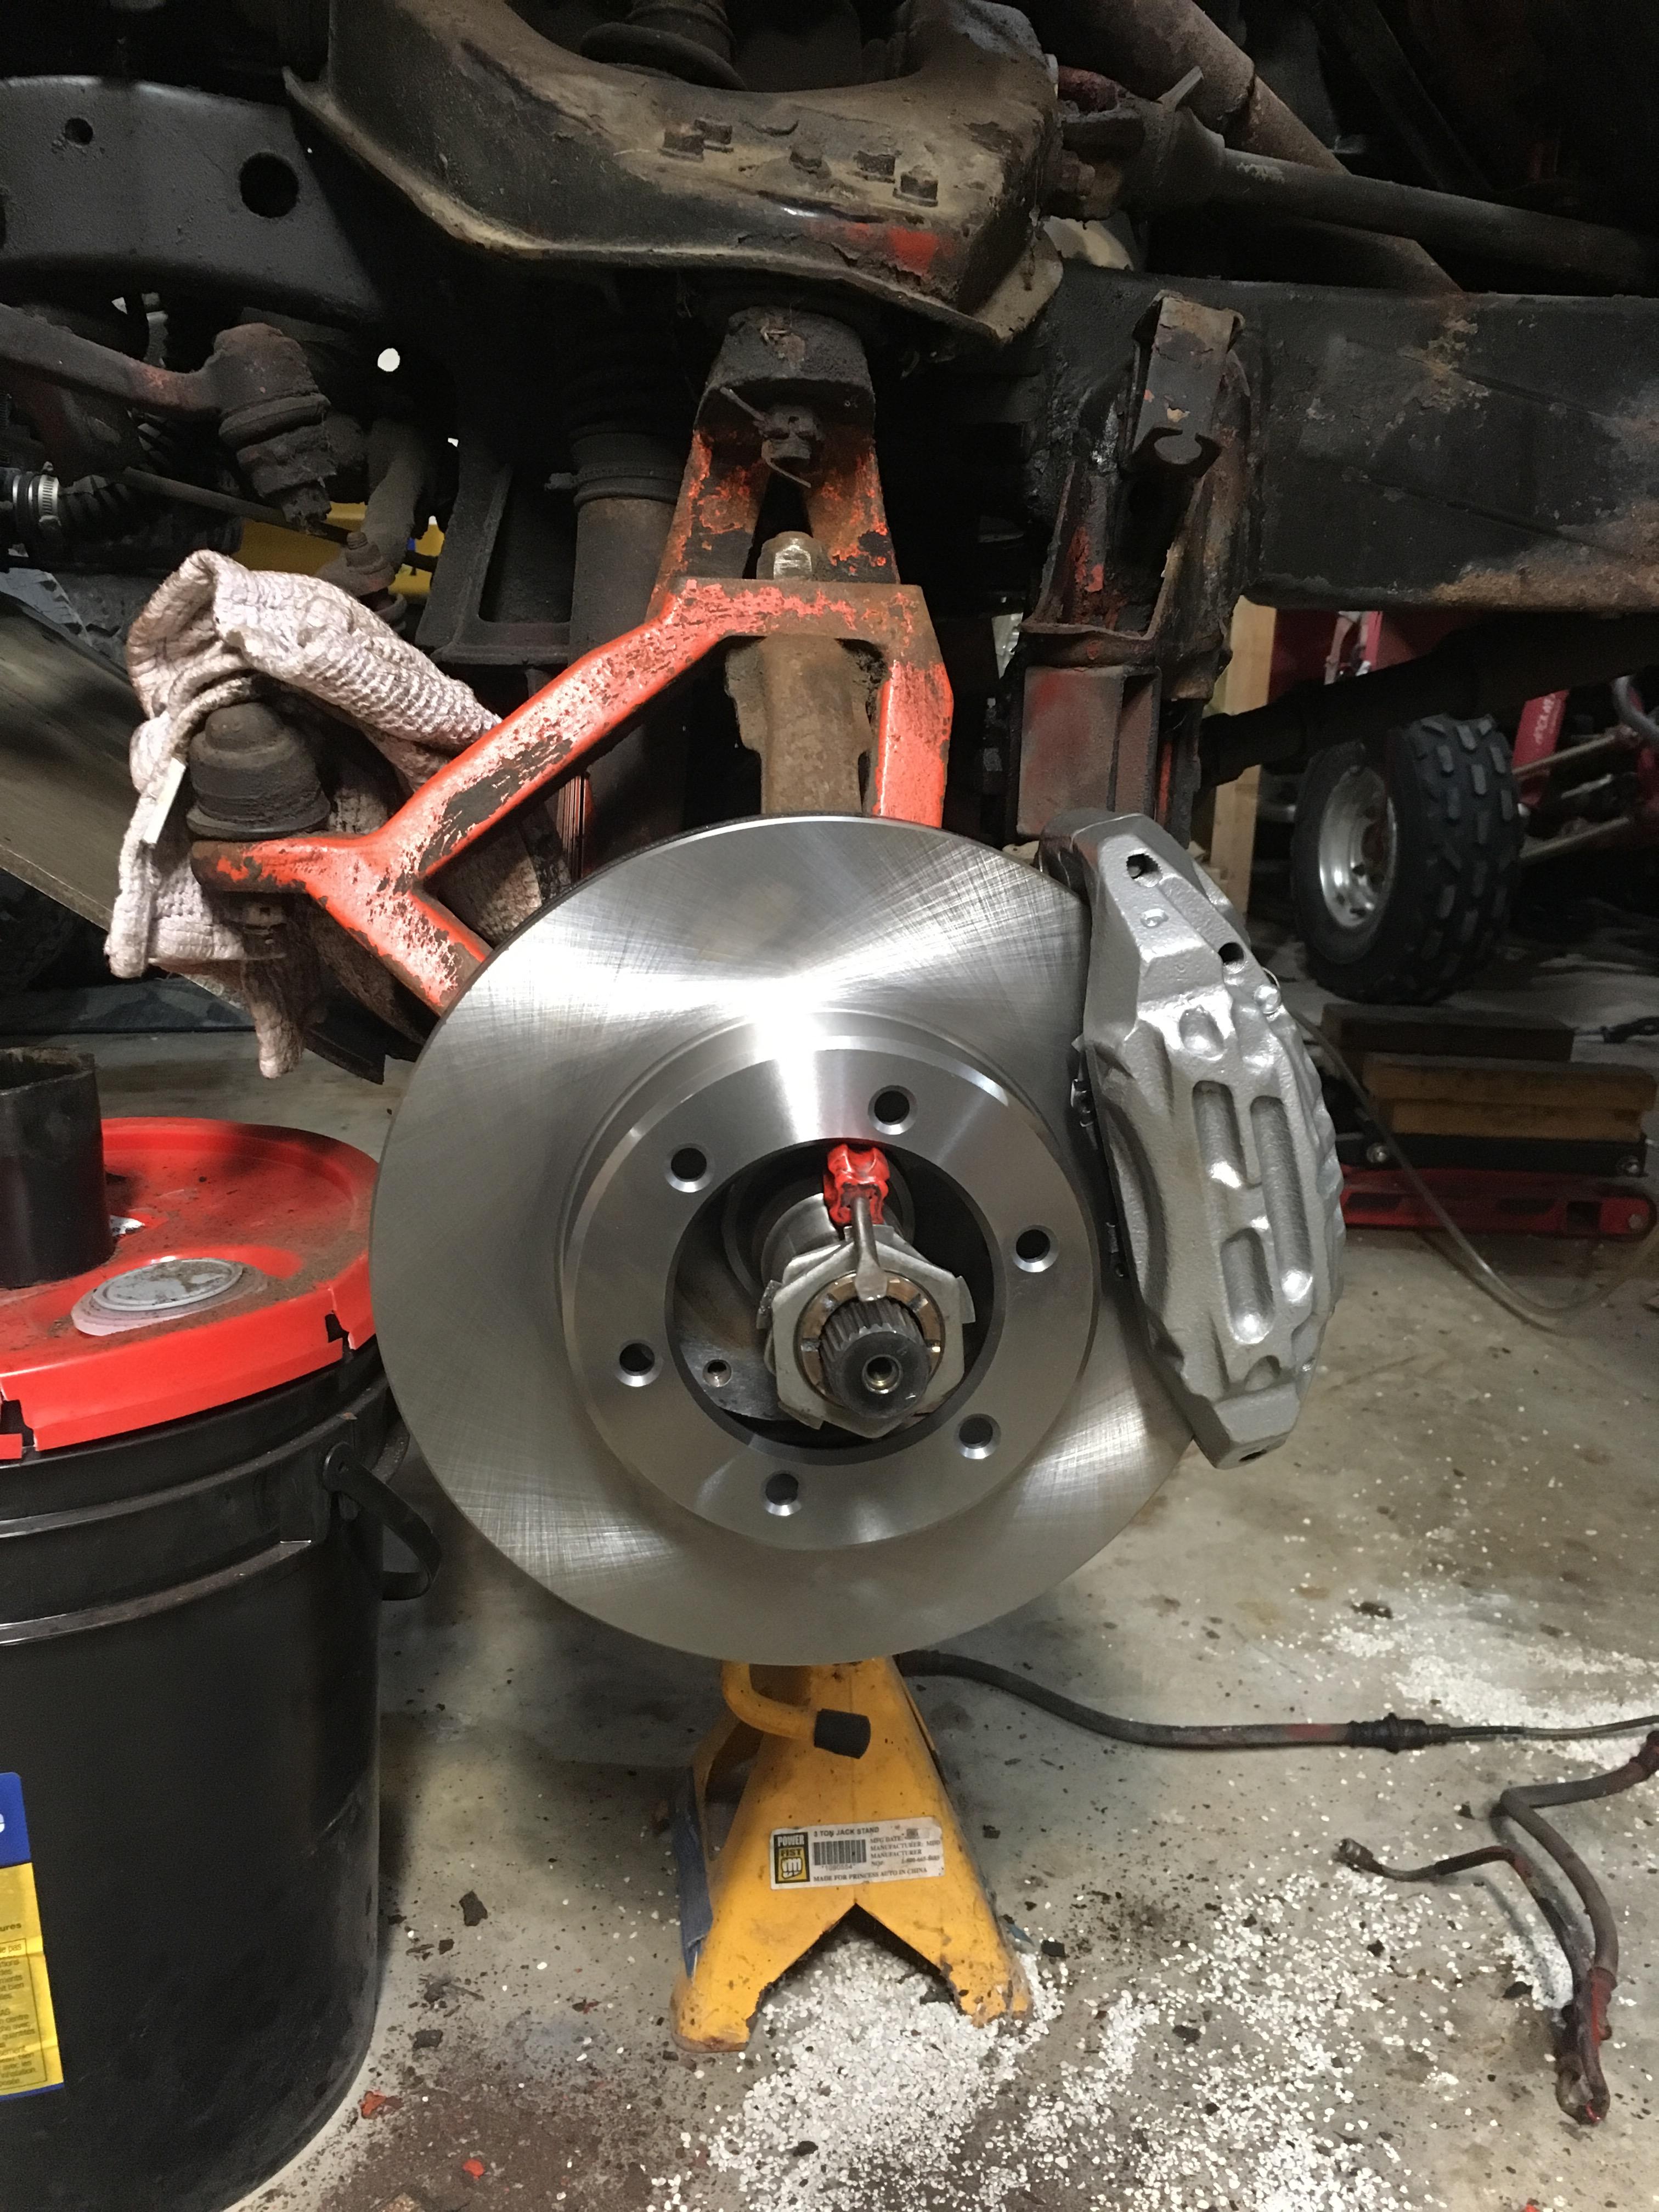
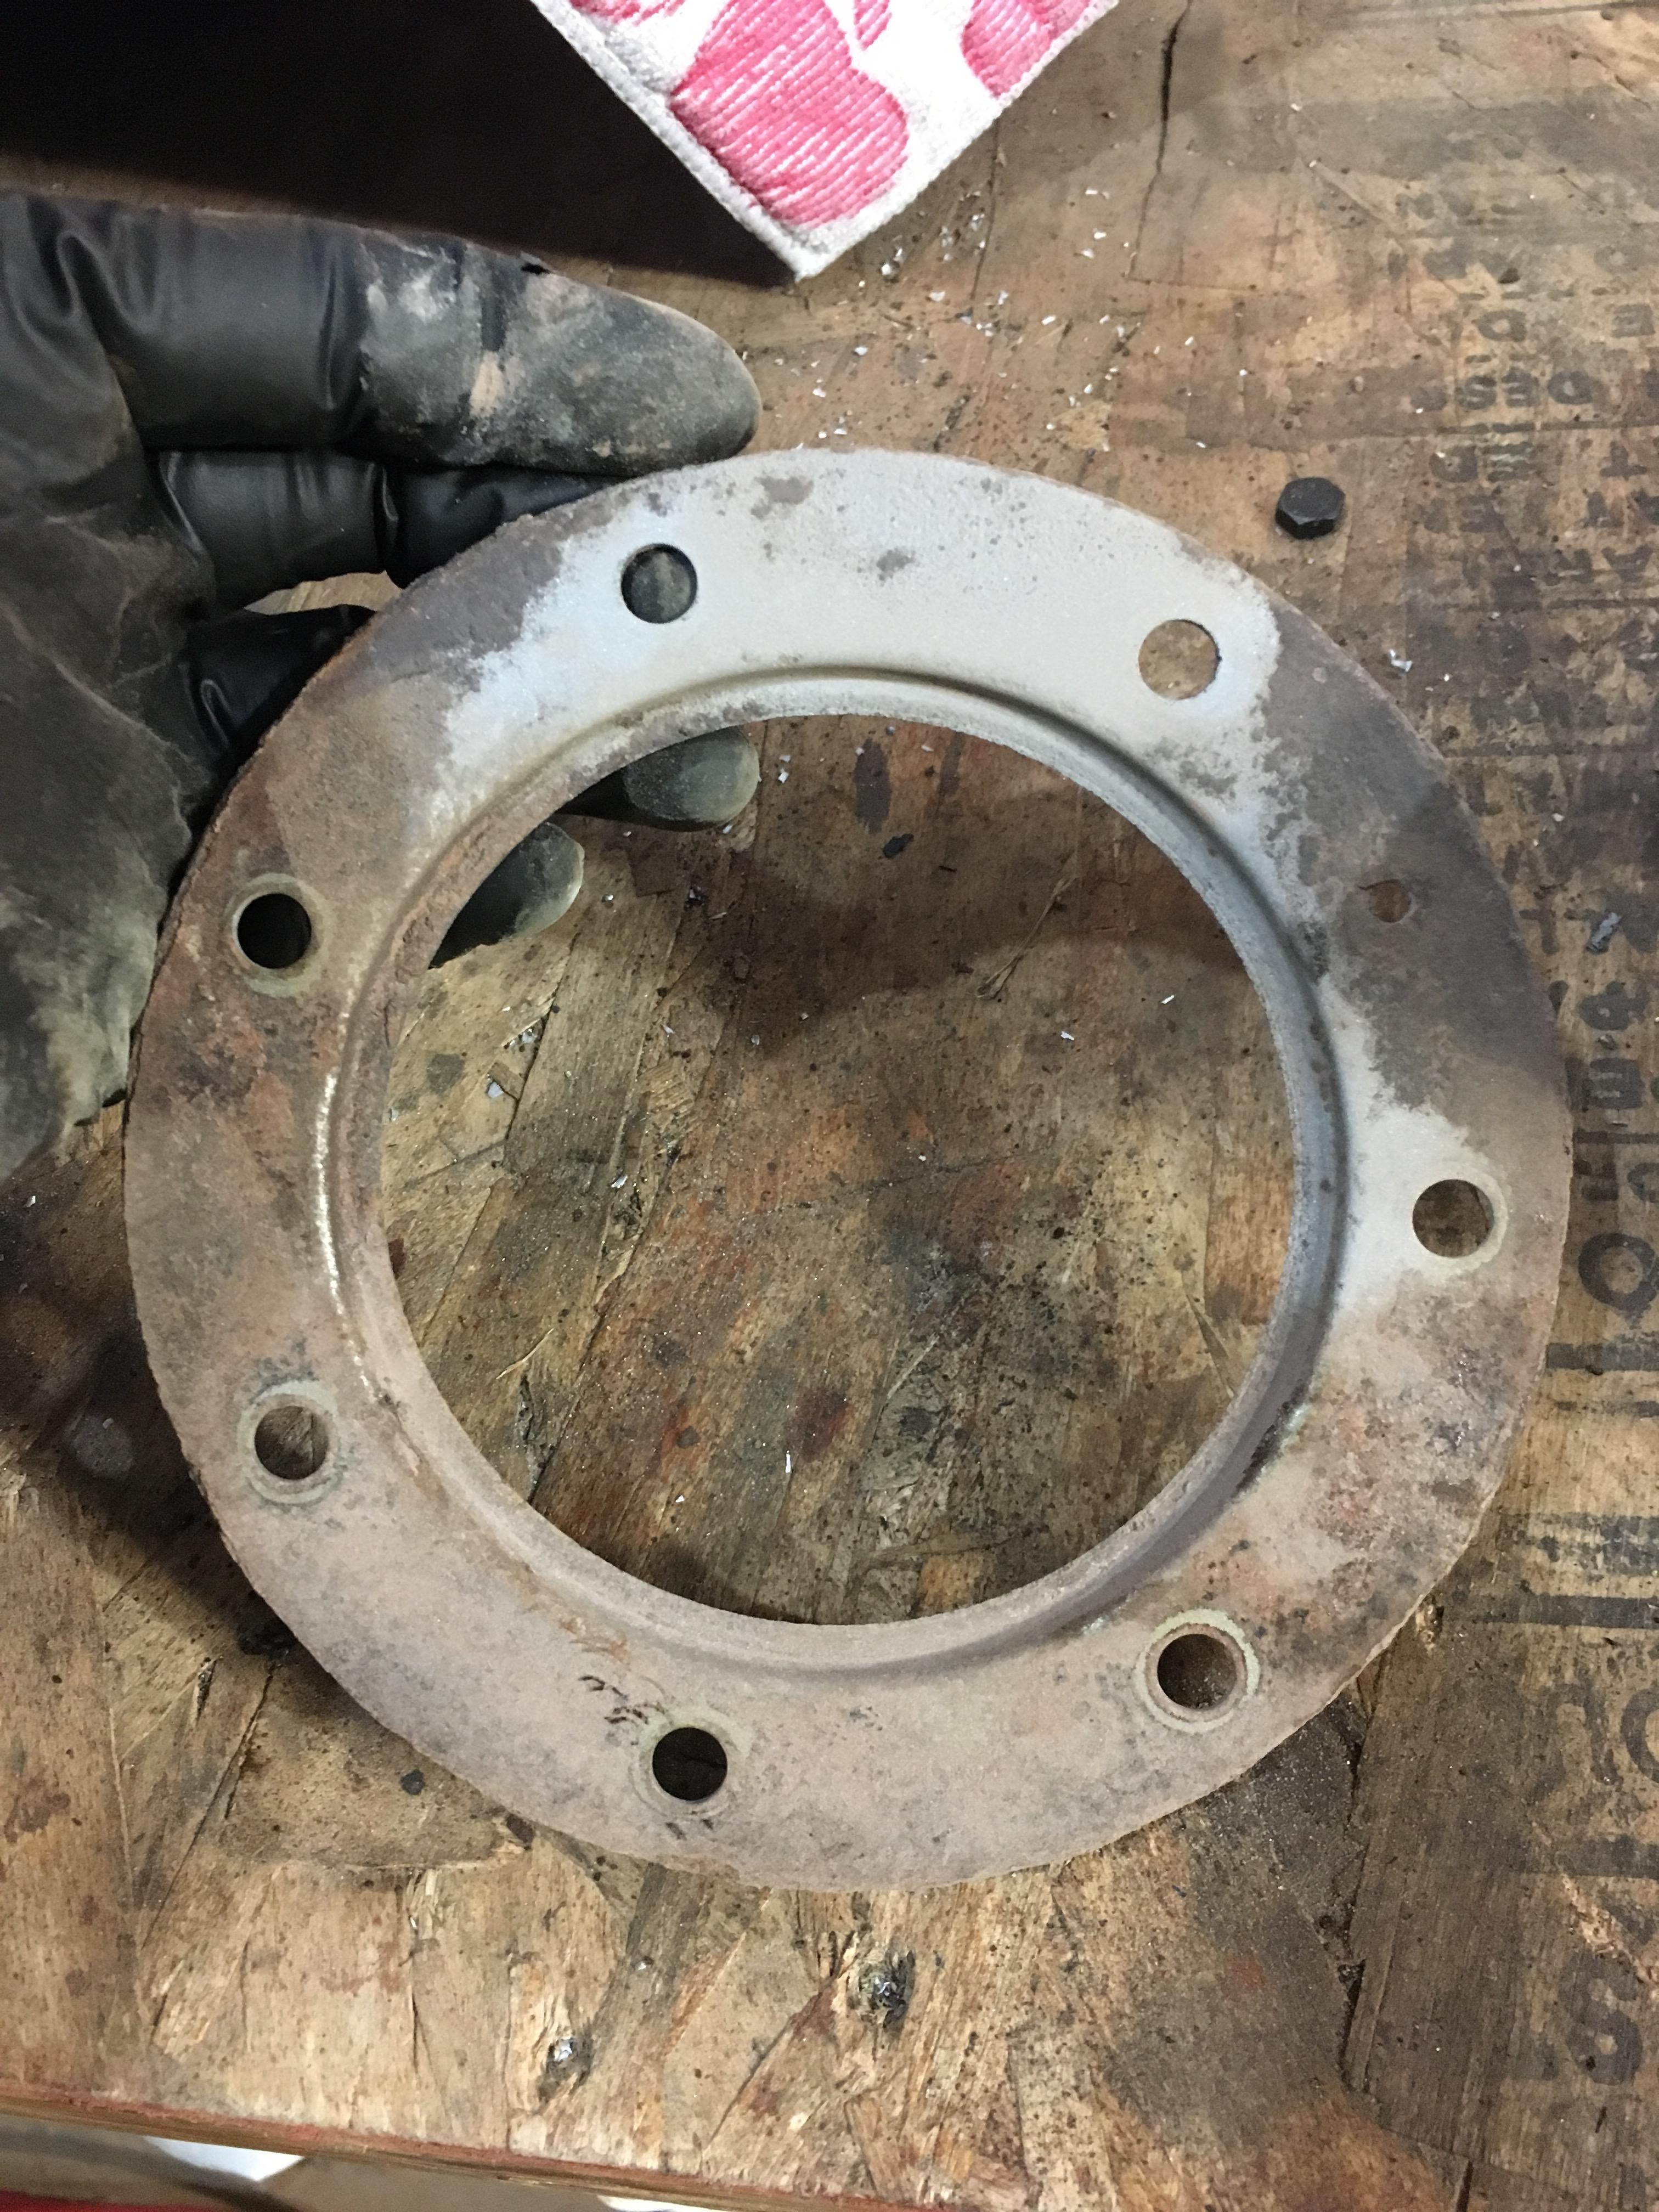
I’m pretty sure I’ve decided to abandon the dust shields up front. Rather than trimming to clearance the larger caliper, I’m just going to run without them. I am however cleaning up and reinstalling the dust shield retaining ring, as a means to protect the inner oil seal on the wheel hub.
Too tired, must sleep.
Next time I hope to put that drivers side all back together again.
-
This reply was modified 5 years, 2 months ago by toys-n-yotas.
March 3, 2019 at 1:11 pm #207933 Slick_YotaKeymaster
Nice work!
-
This reply was modified 5 years, 2 months ago by
-
AuthorPosts
- You must be logged in to reply to this topic.