Home › Forums › TRUCK BUILDS › Redee – 1986 4Runner
- This topic has 691 replies, 9 voices, and was last updated 1 week ago by
 toys-n-yotas.
-
AuthorPosts
-
October 1, 2023 at 12:38 pm #211857
 toys-n-yotasKeymaster
Haha yea windshield has been a canvas for 2 years now. The kids draw on it, my buddies write on it
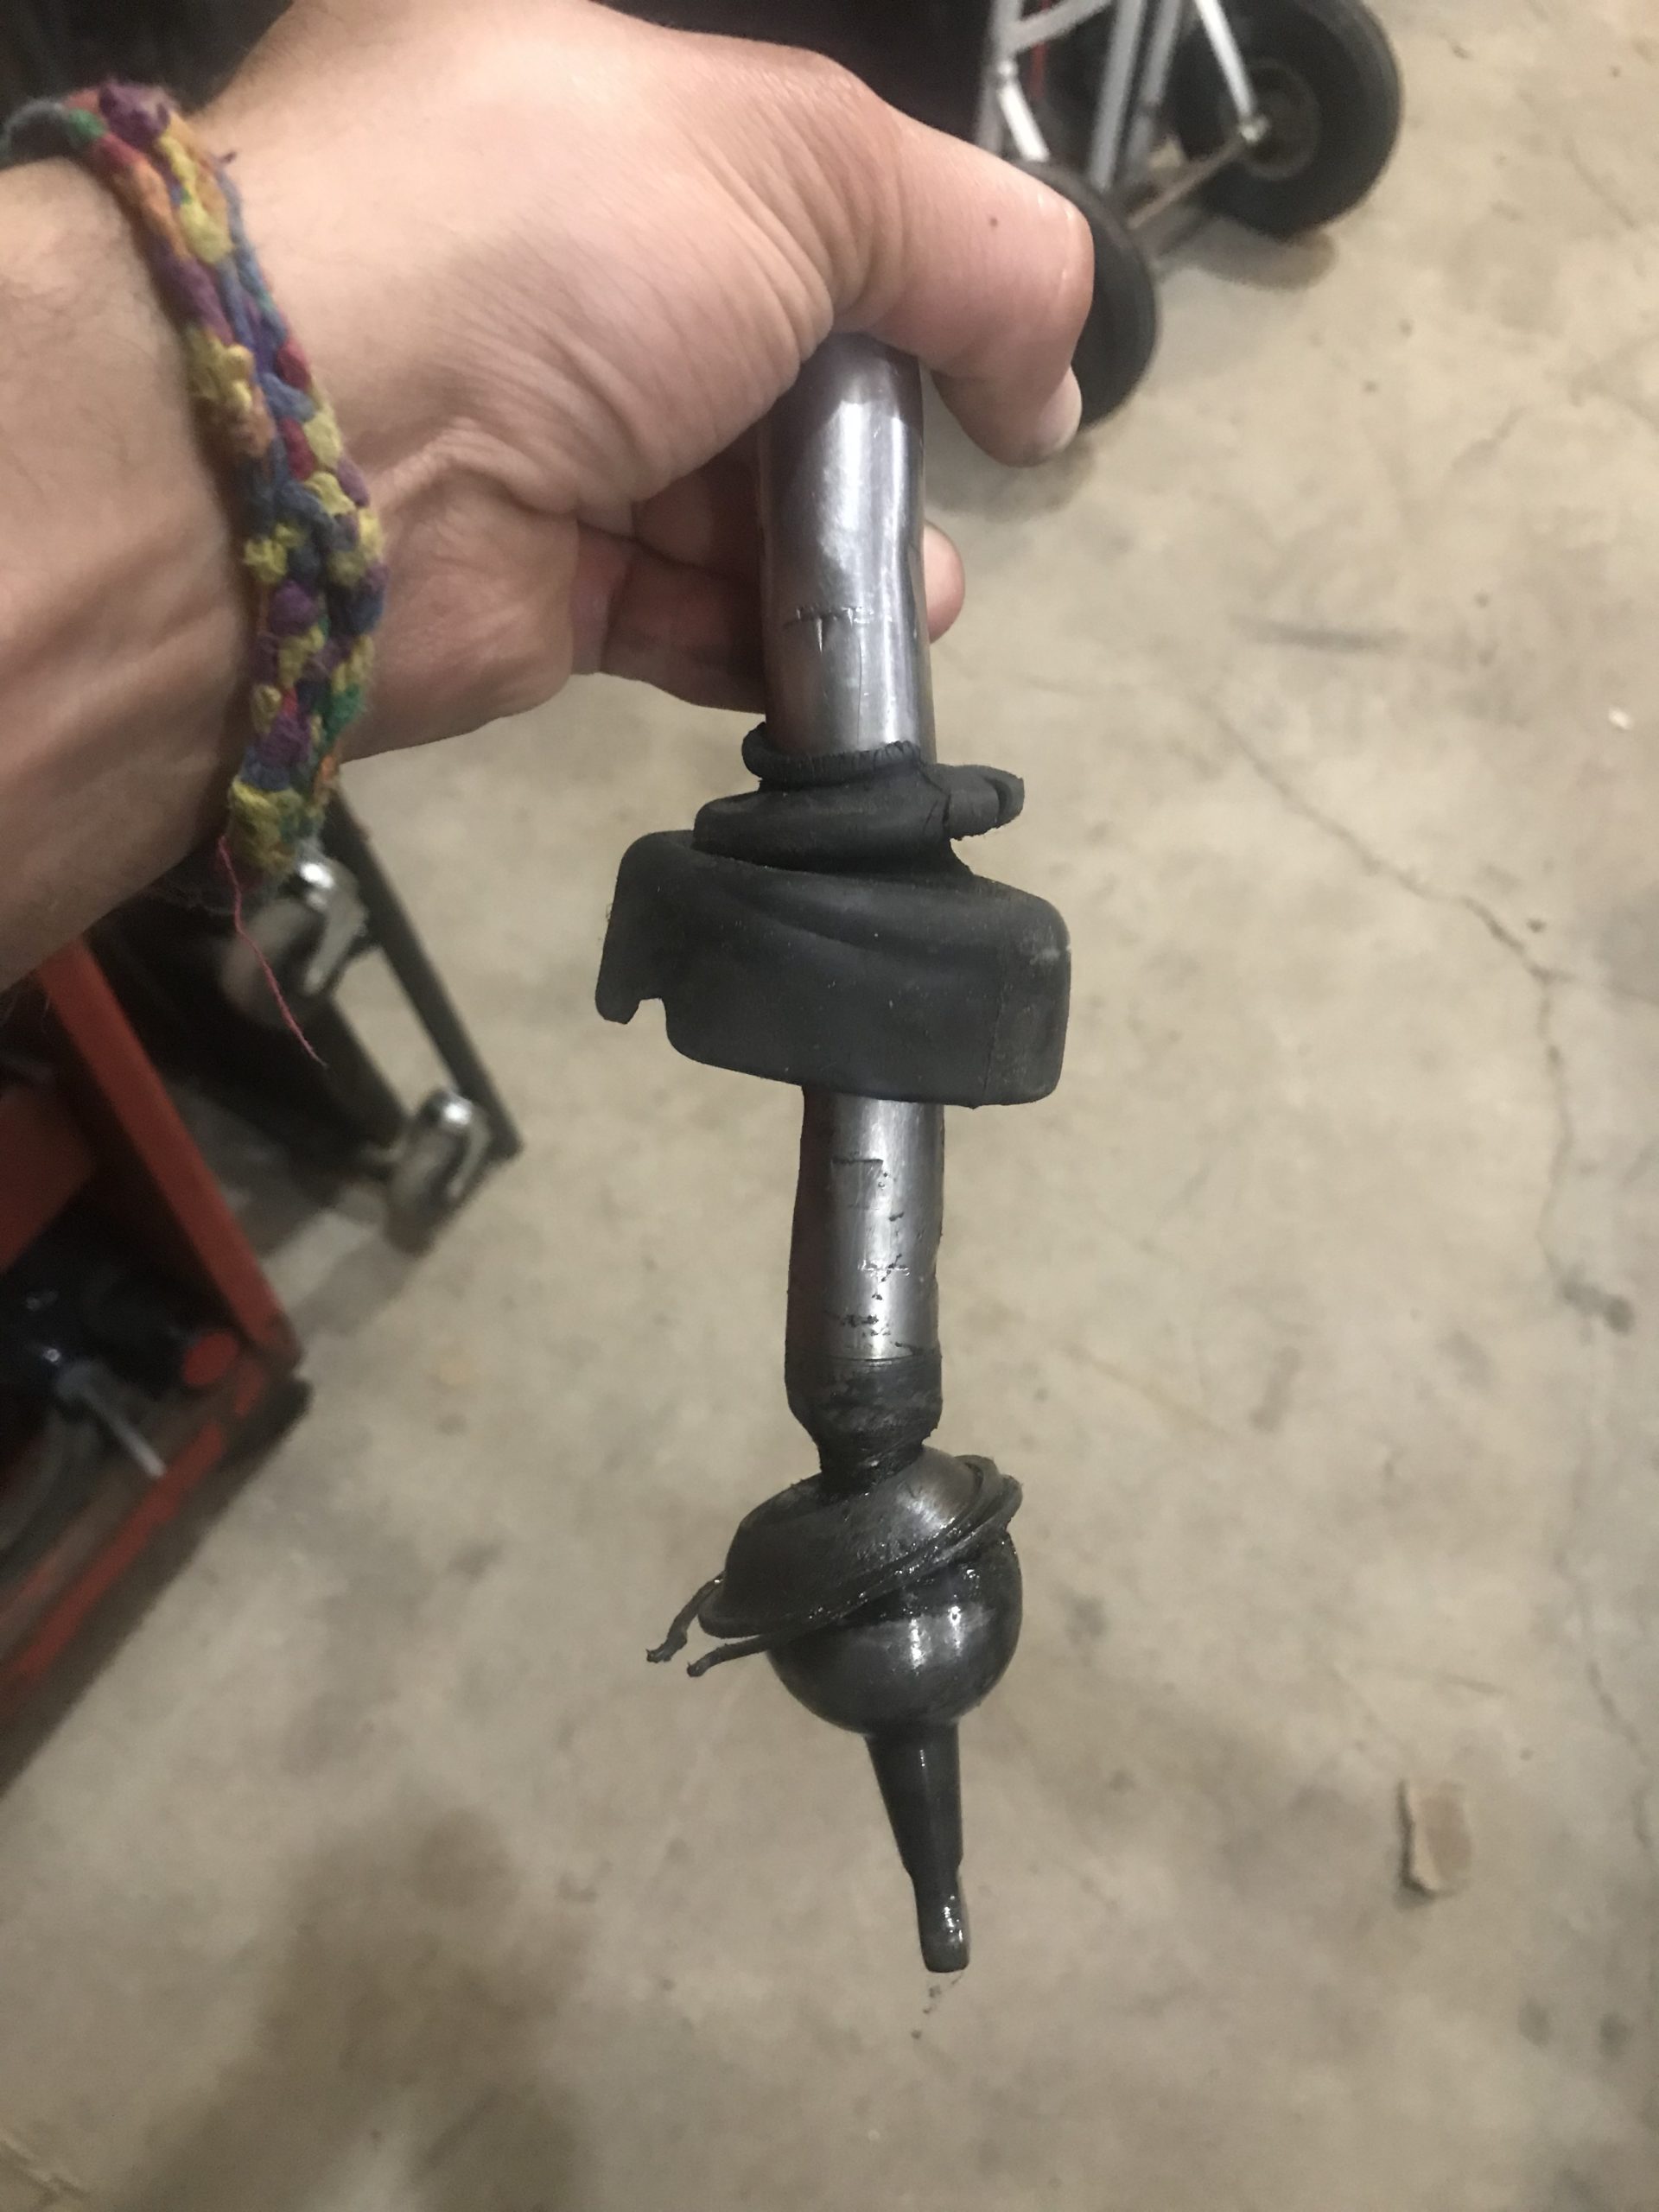
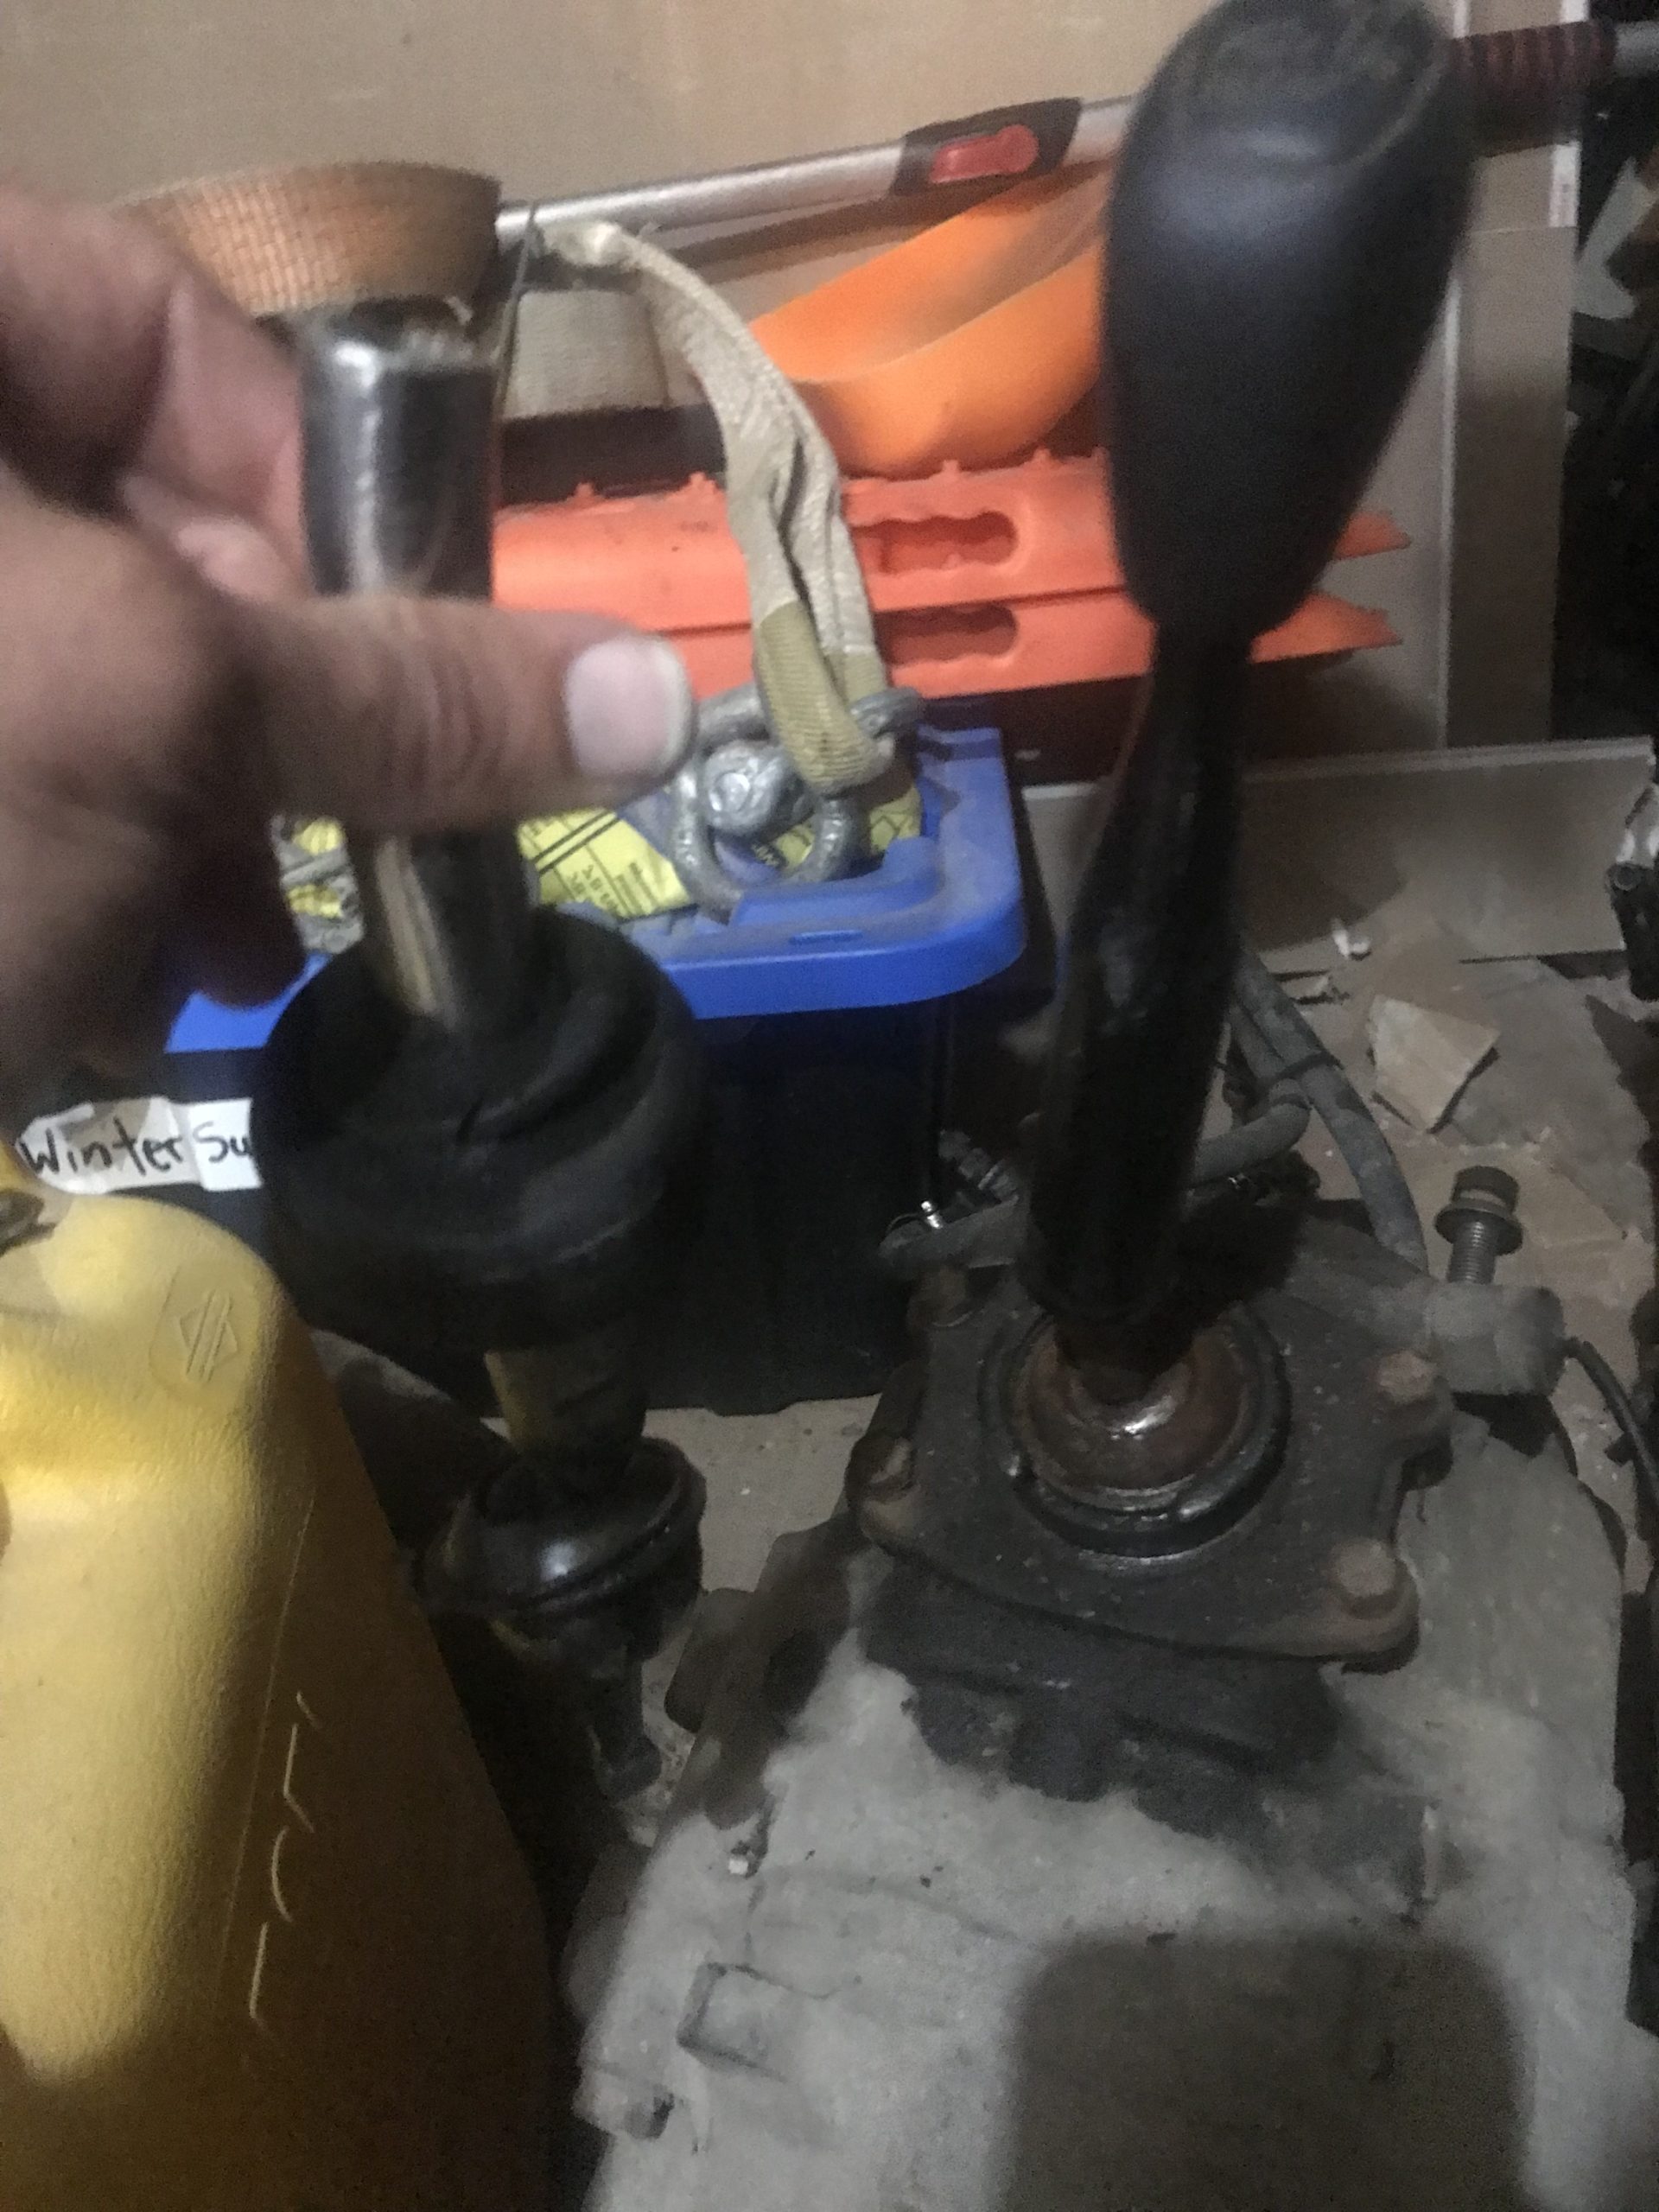
I forgot to mention I solved my terrible transfer case shifter lever by harvesting the one of the donor tcase. The mating flanges were not interchangeable, but the lever assembly is held in with a curclip, and once popped out, the lever were identical!! Made me sooooo happy, built lots of motivation.
October 3, 2023 at 6:06 pm #211860toys-n-yotasKeymasterProgress took a hit when I did, but doing my best to keep chipping away at it.
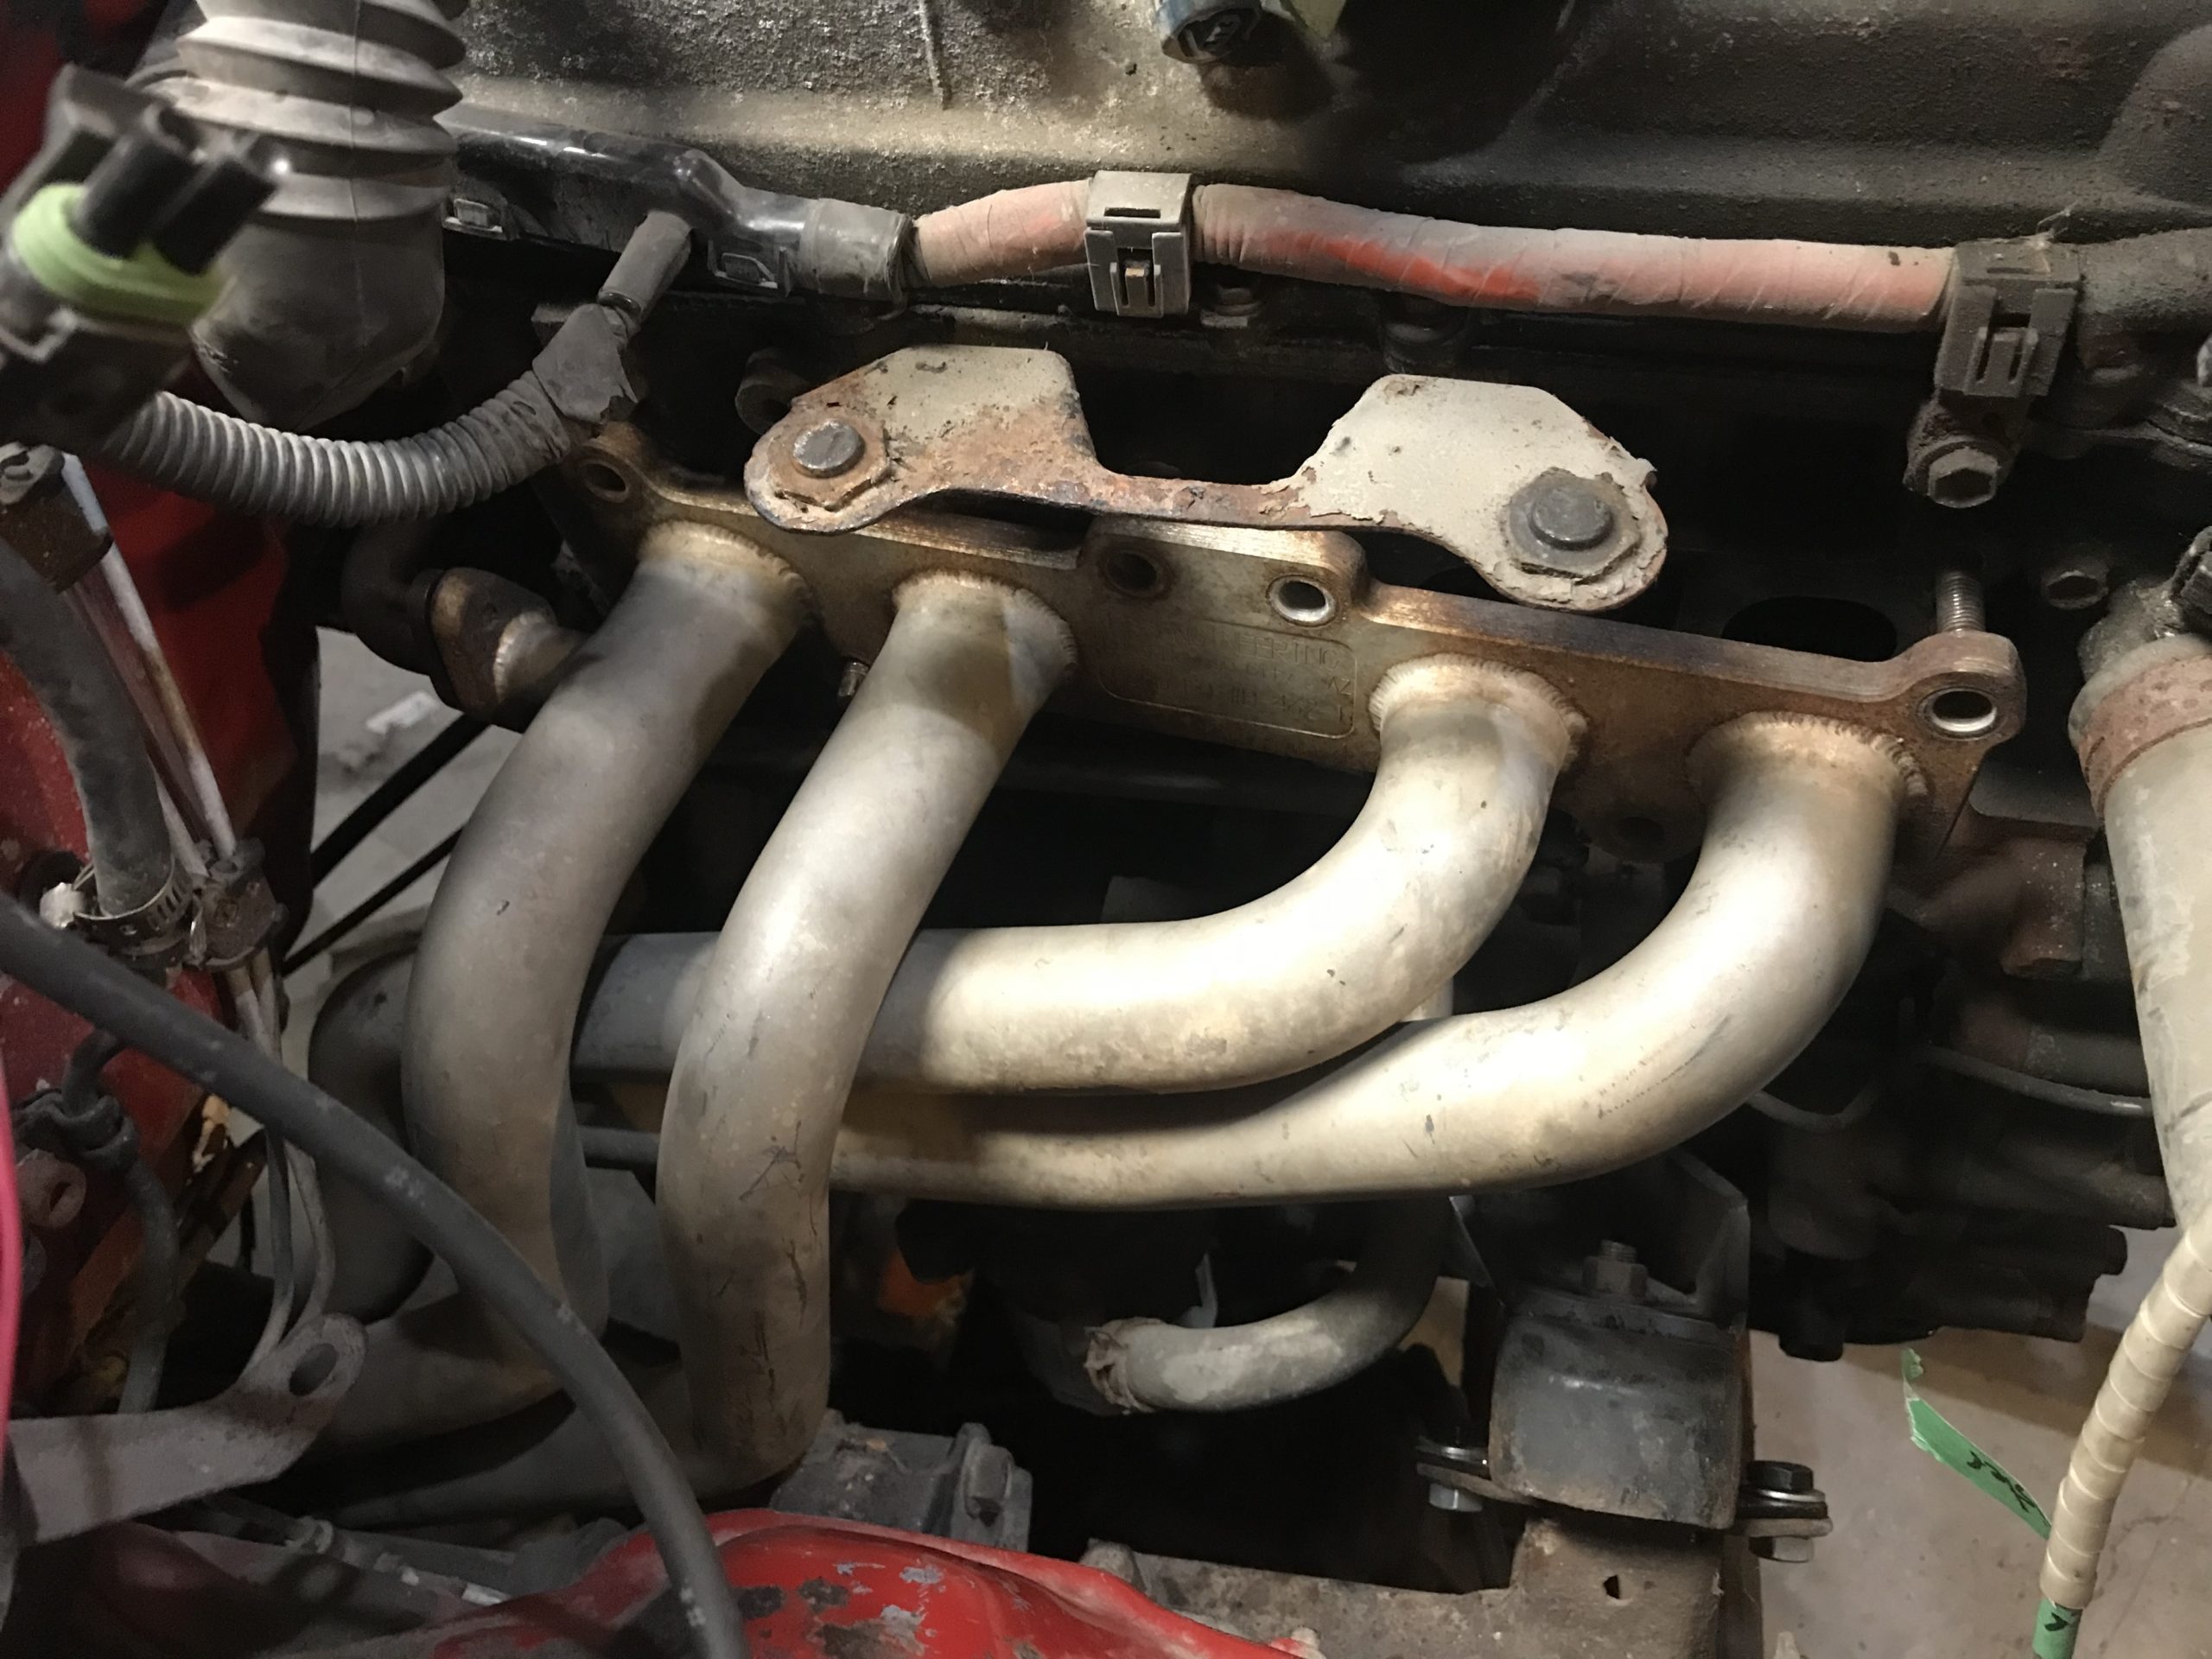
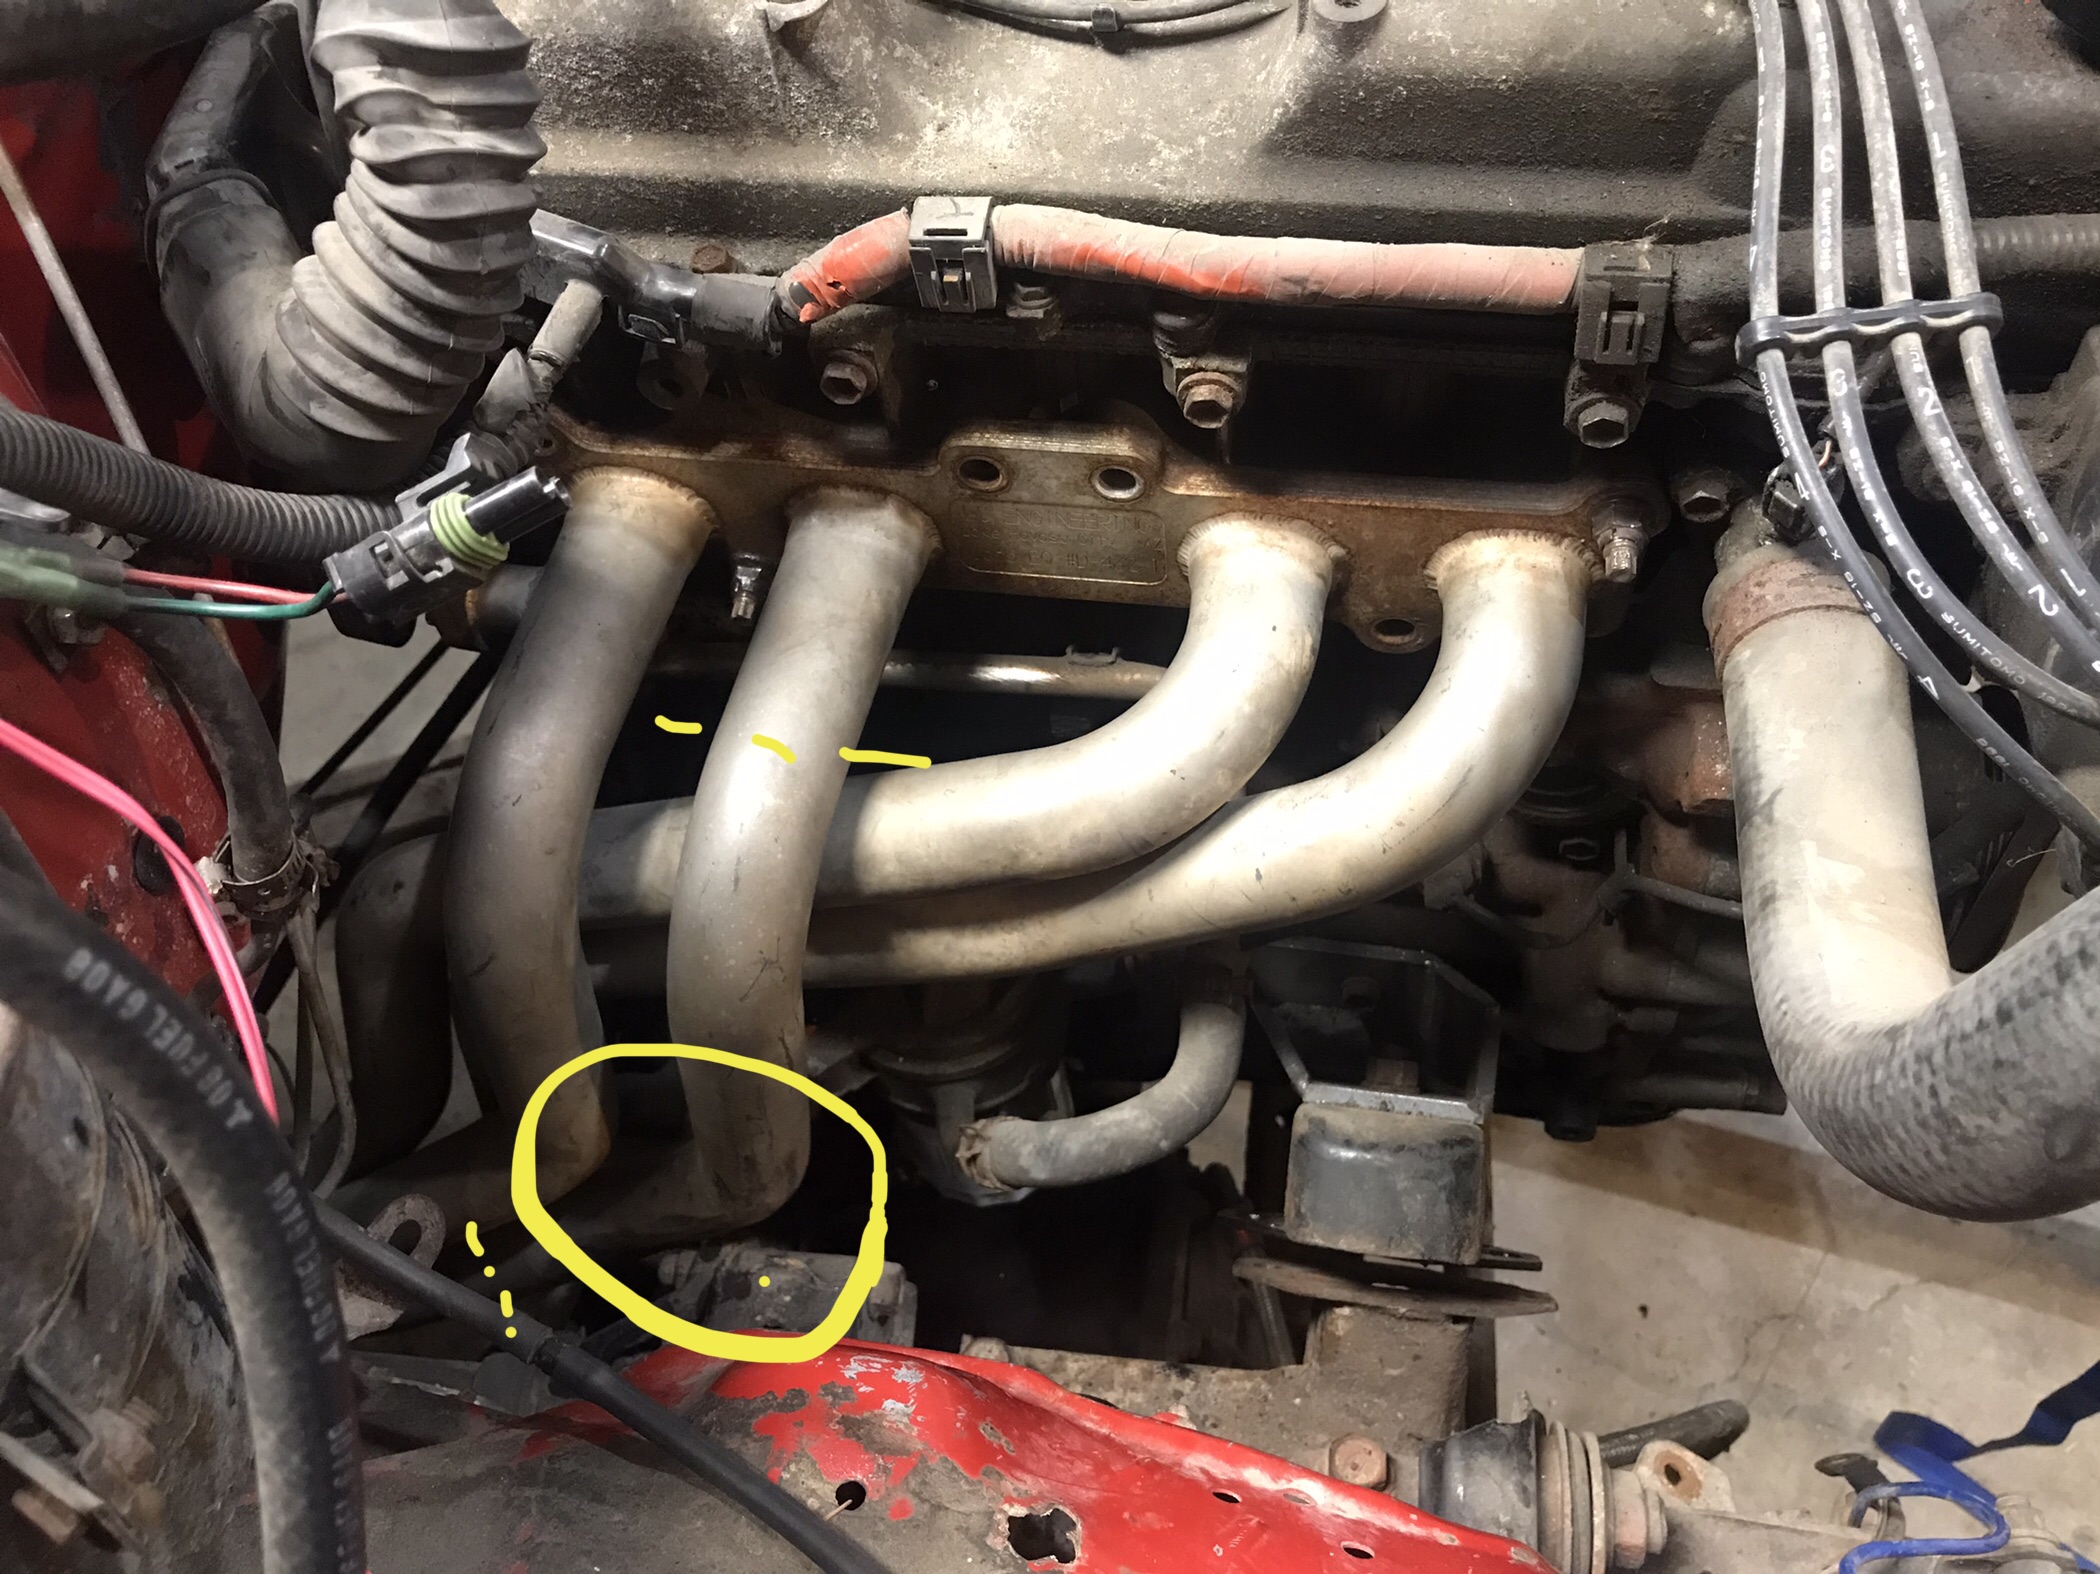
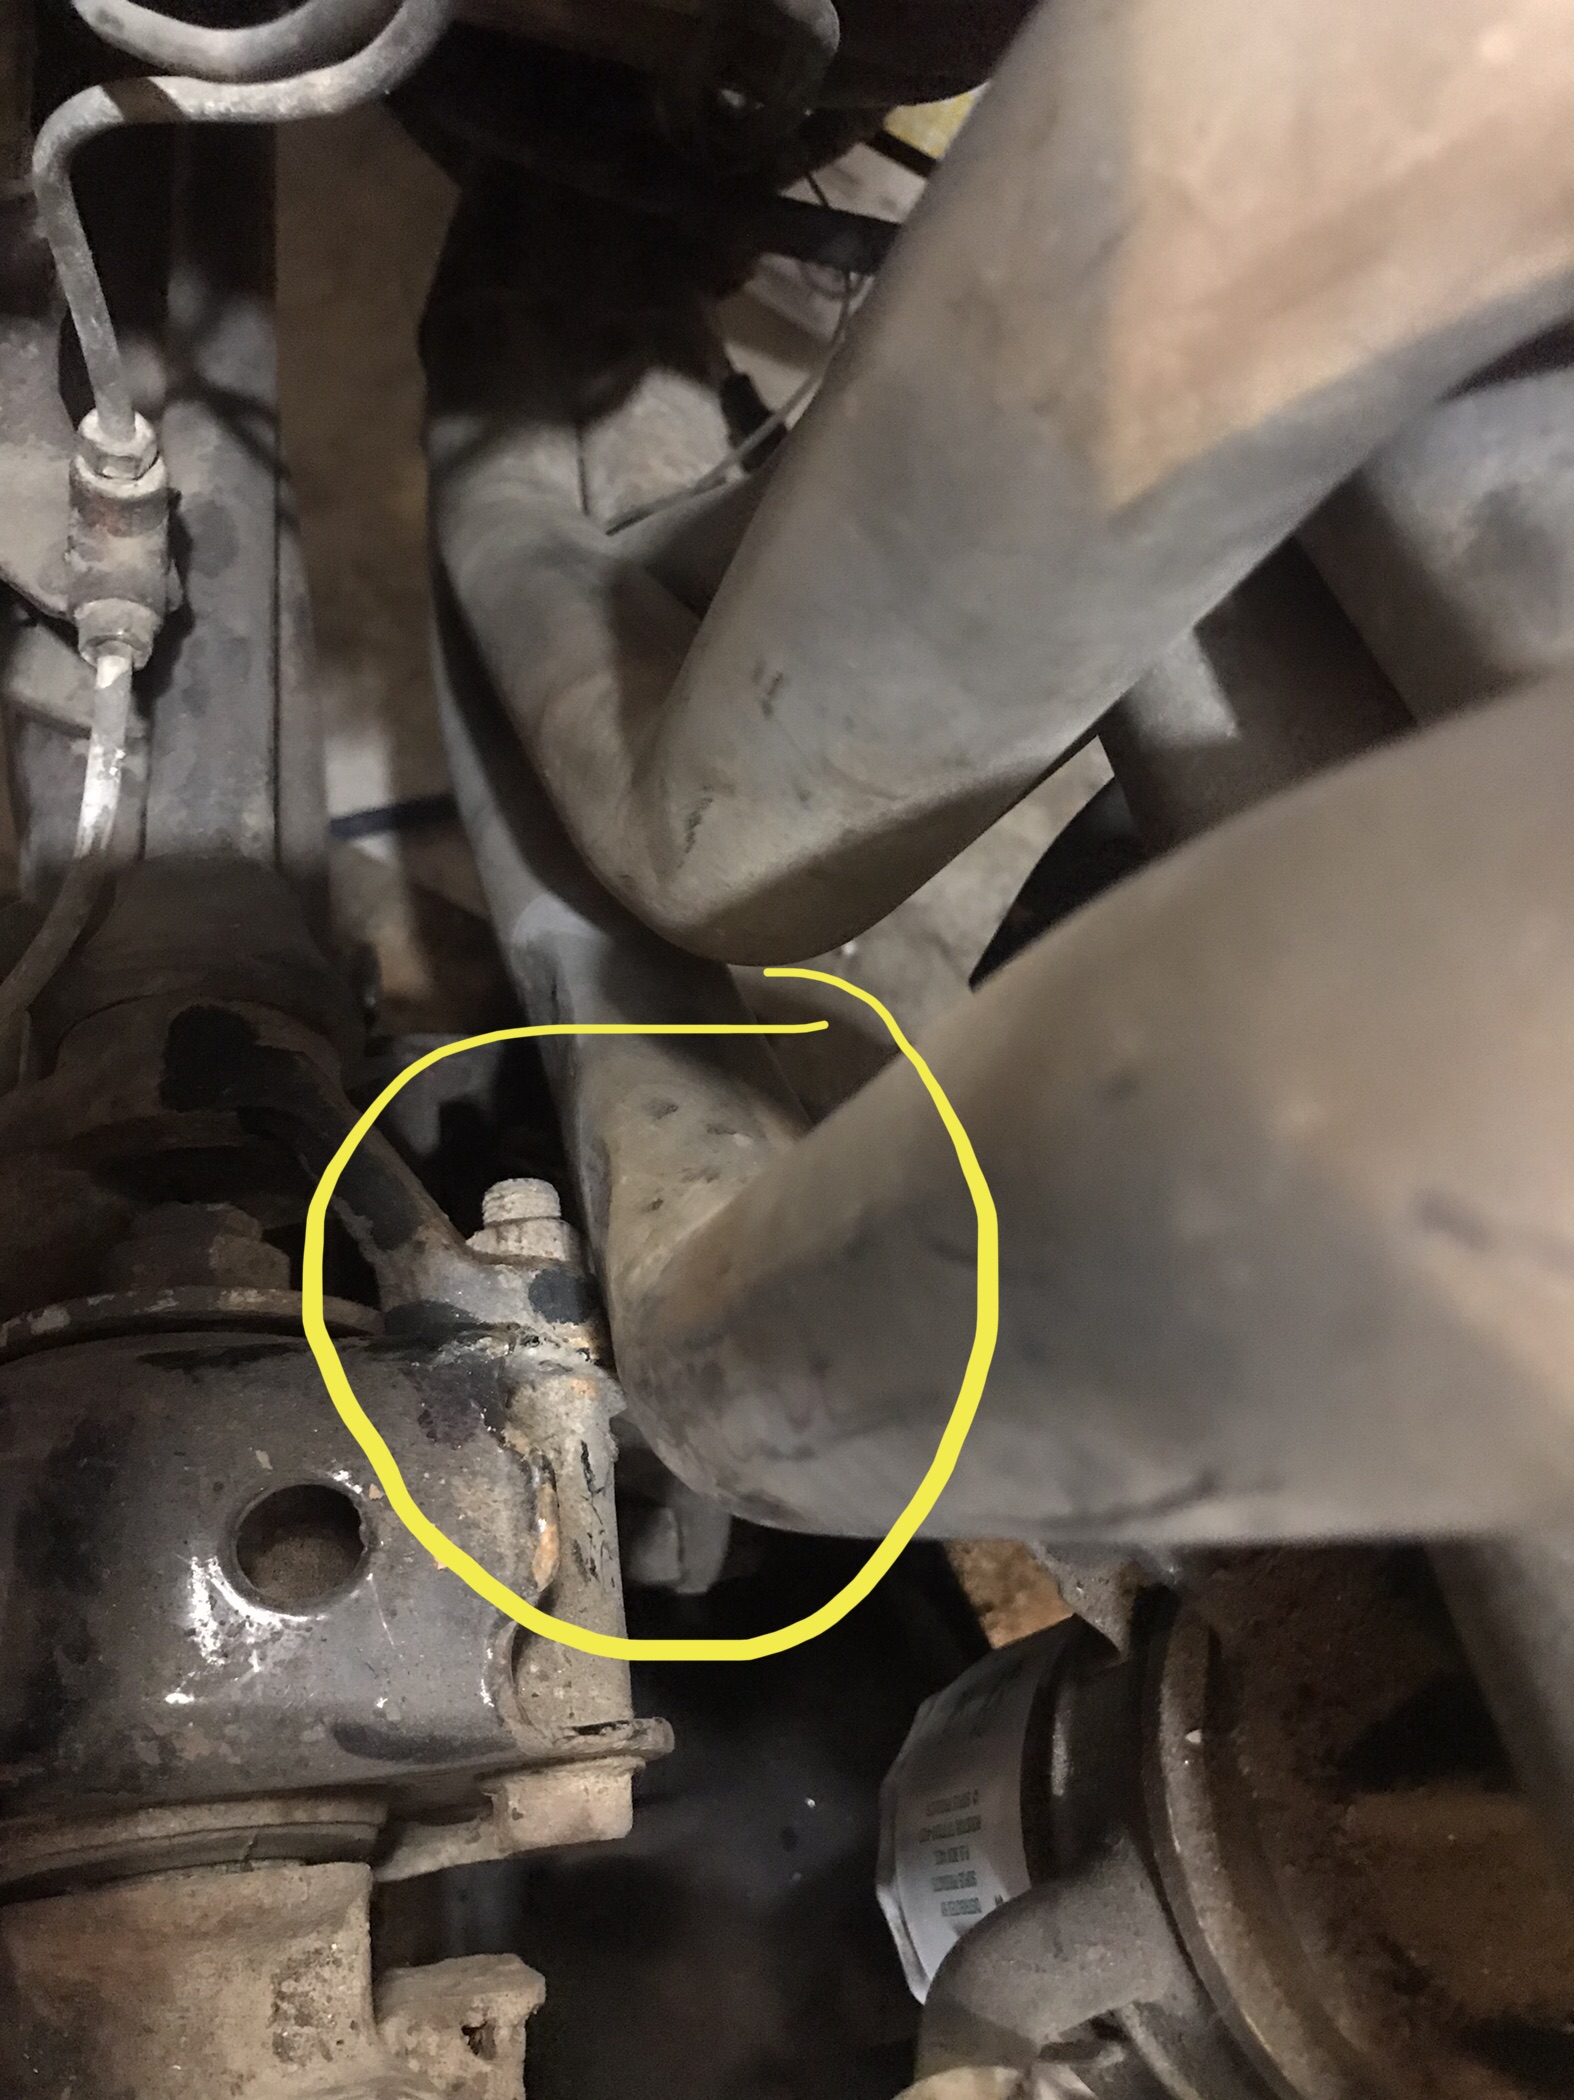
Last night i tried again to get the LCE long tube header in place, but the Upper Control Arm just won’t get out the way. I started heating and beating the interference out of the header, but I need a new tactic to minimize the deformation. I’m going to reattach the hoist and lift the motor a few inches, bolt the header in place, lower it until I get contact to the UCA, mark the location, then heat and beat that spot.
I will also have to re-route the fuel return lines to the tank, and move the brake lines further to the passenger side fender.October 15, 2023 at 5:38 pm #211863toys-n-yotasKeymasterLong tube header still doesn’t fit, just being stubborn.
Ribs still eff’d, tryin’ to get an appointment at the chiropractor this week.
Just today I Made a $300 sale of donor 4Runner parts, the trans, tcase and rear driveshaft are gone. To date I’ve sold $950 worth of parts off a donor that I paid $900 for.Hoping to finally beat this header issue this week.
October 17, 2023 at 7:38 am #211864toys-n-yotasKeymasterGahhhhhhh!!! So last night i got frustrated about the non-fit of the header, so I attempted to test fit the motor without the header…. The MF’r wouldn’t sit on the mounts!!! WTF?!?! I already confirmed it did fit!
Since that first test fit, I re-hooked the chains on the motor from the manifold studs to the bellhousing. First attempt on the bellhousing wrapped aroubd the EGR pipe, that created trouble because I couldnt slip the header past the studs of the EGR pipe. So I reset the chains in front of the EGR pipe… WRONG-O!! That was more than a weekago, and ever since the EGR and firewall have been playing keep away with the engine mounts.
Sooooo, I have to reset the chains again, and make sure I do it right this time. Once I discovered this last night, I cracked a beer and put my feet up.October 19, 2023 at 9:54 am #211866toys-n-yotasKeymasterSooooooo close to fitting. I can install, start threading nuts on the studs, but I can’t fully close the gap to the cylinder head before contact between header and uca mount. Suuuper close, perhaps tonight i shall defeat this interference. No pictures, they won’t do it Justice haha.
-
This reply was modified 1 year, 8 months ago by toys-n-yotas.
December 18, 2023 at 12:42 pm #211916toys-n-yotasKeymasterI’ve been struggling with the same damn problem so long, I’ve decided to outsource the solution. I’m going to take the long tube header to the guy who welded up my gas tank, hopefully he wants to do a tougher fab job for me. My suggestion to him will be to cut out the one tube, and weld in a new one that tucks in close behind the other 3. Lots of free space in the engine bay in that area. I will lose ceramic coating, but long tube will be worth it.
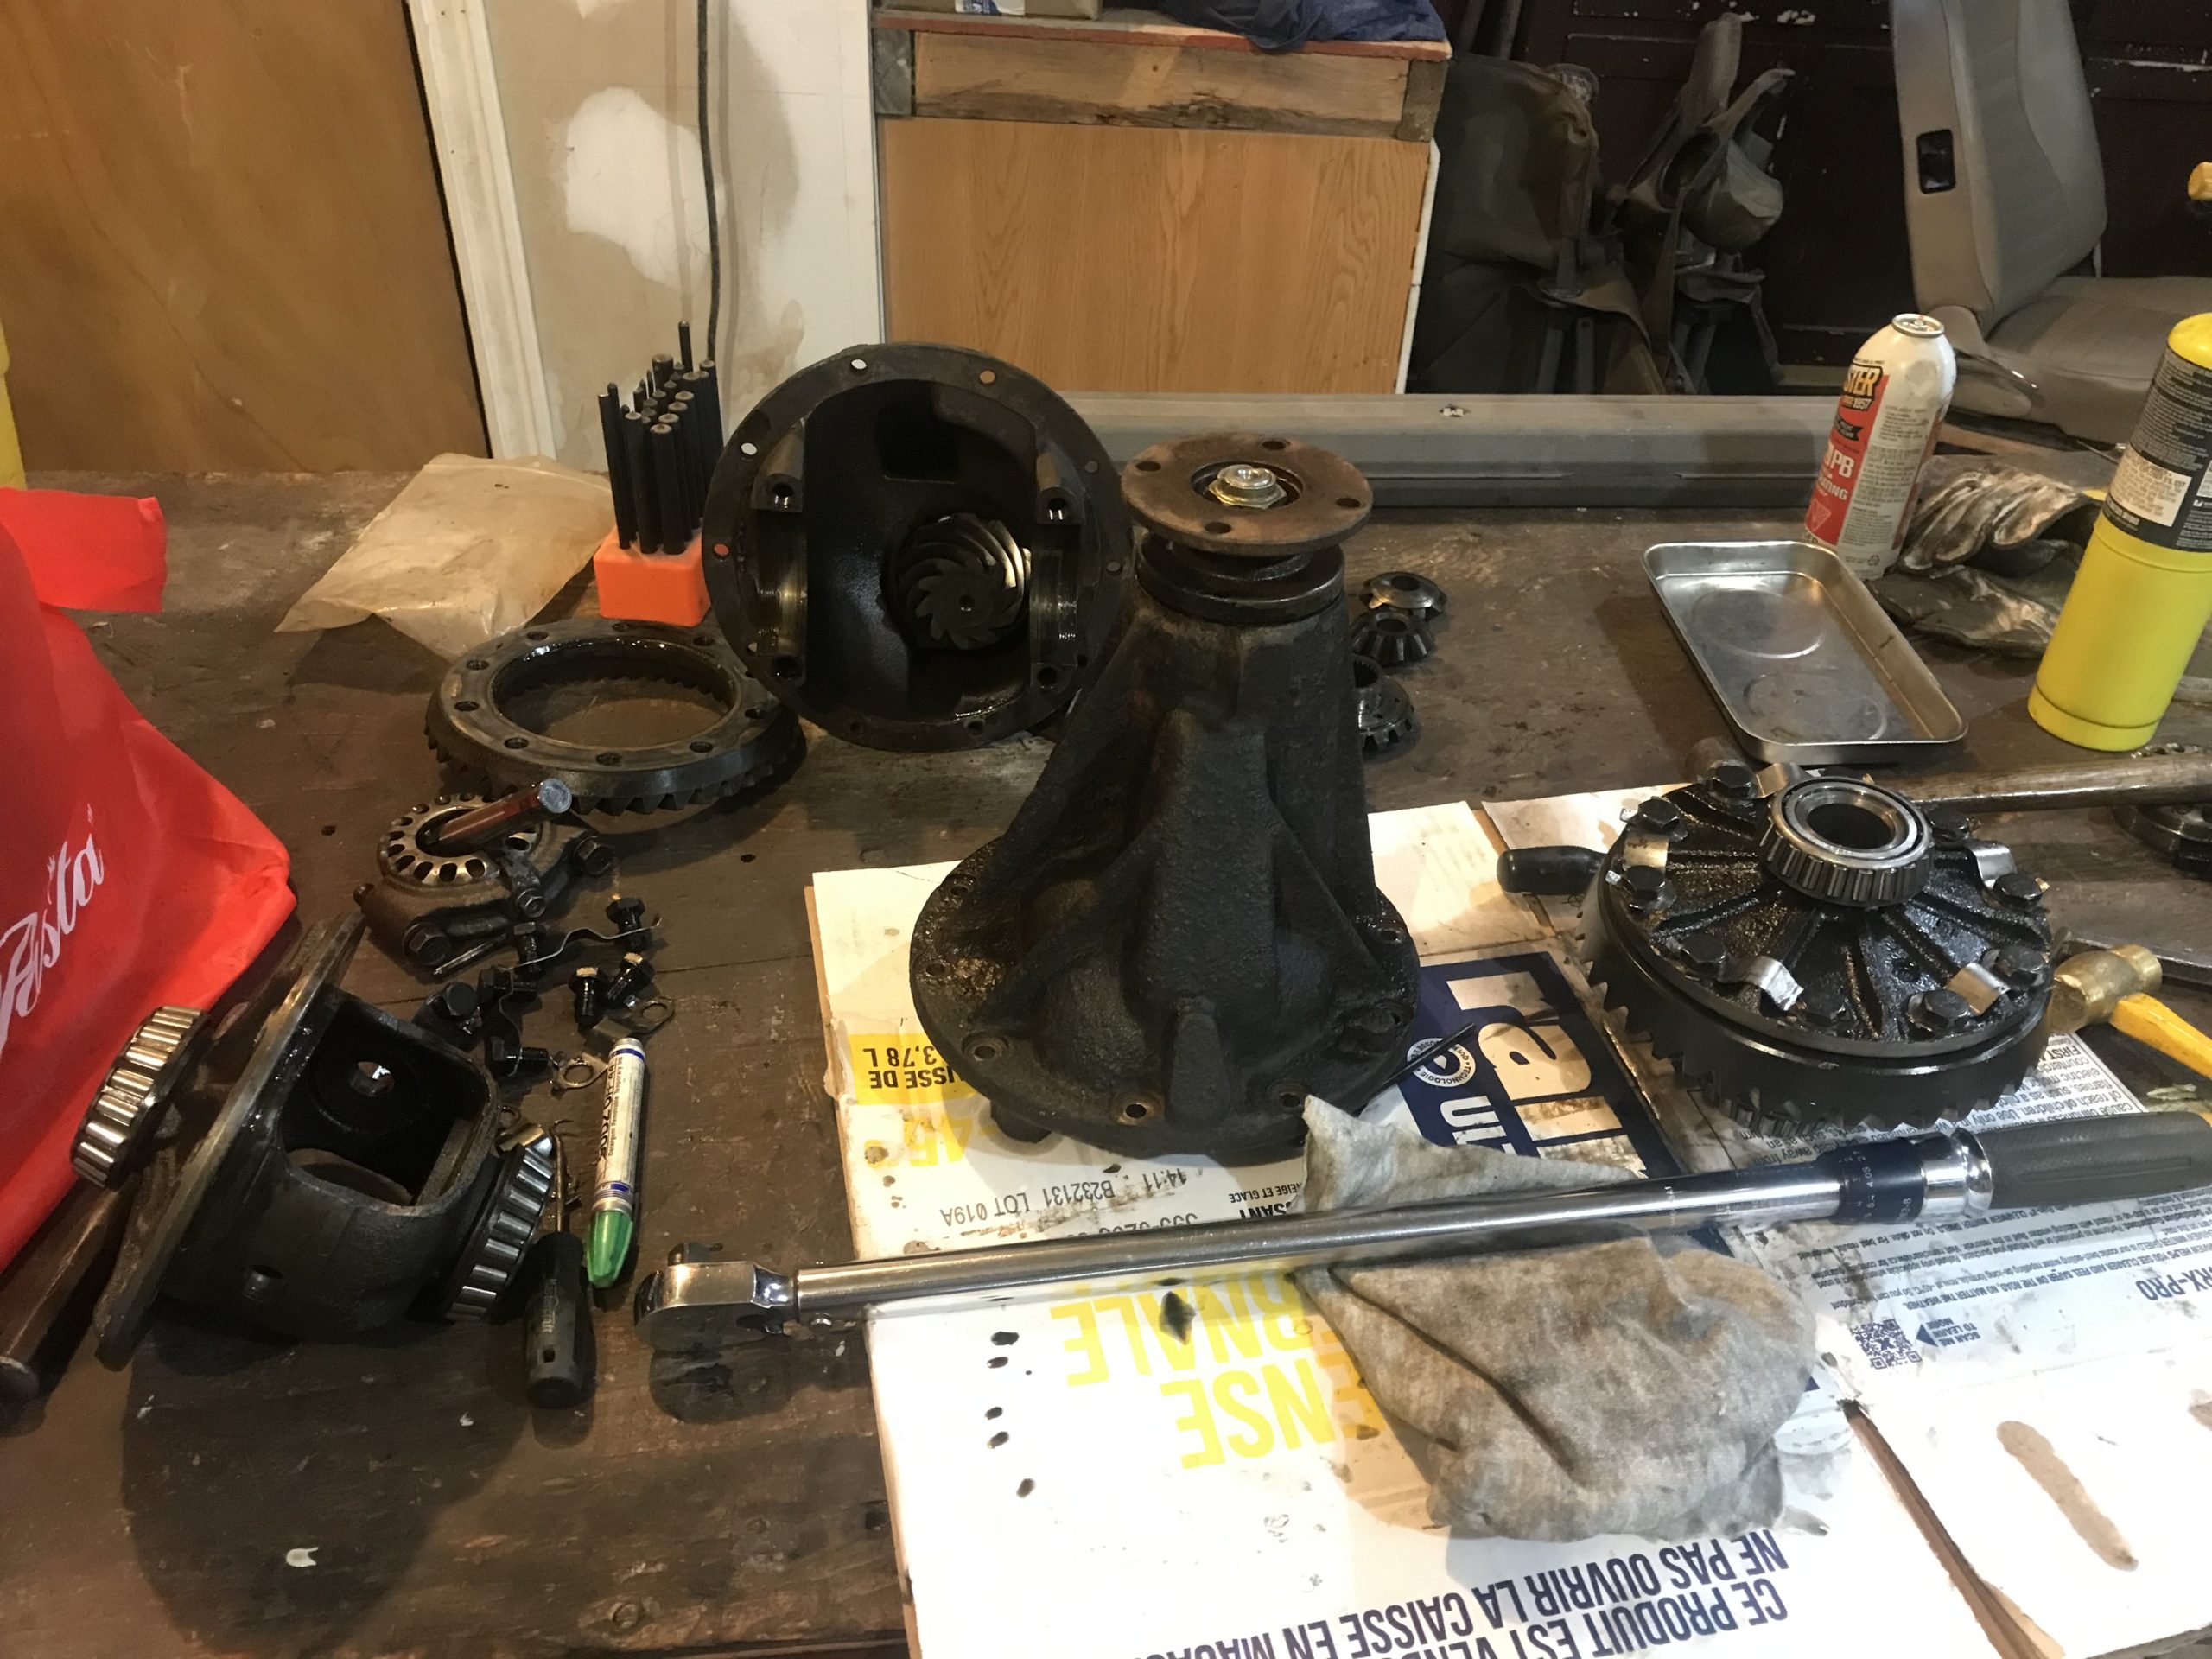
Over the past couple nights I’ve been working too refurbish the 4.88 diffs I bought off of Finn in the spring. I started on the front diff, cleaned the exterior, replaced one leaking seal, pounded out the studs…last night I managed to swap my open 4.10 diff out, and put the freshened 4.88 in. I just have 10 of 12 CV bolts to put back in, but it was already TOO LATE in the shop when i got to that point.
I don’t know how I managed to pull the 4.88 diff in Finns driveway, while snowing, on the ground with hand tools, in less time than i got my 4.10 diff out last night. Pretty sure removing the IFS lift kit would have helped, but i was trying too long to remove it as one.Over next couple nights I plan to put a lunch box locker into the rear open 4.88 I bought off Finn. I have the option to run that 4.88 open, with a lunch box, or with an ARB. I will try the lunchbox first, because I’d have to drill s small hole into the 3rd member to run the arb air line. Also, my arb doesn’t work 100% off the time, and i prefer to simplify my traction solution.
December 19, 2023 at 3:27 am #211922 FJTTSEKeymaster
Say what, Mark didn’t help you pull the diff. Gotta have a talk with that man and straighten him out, LOL Lunch box is fine seeing as its not your DD, strange though the ARB isn’t reliable.
December 19, 2023 at 12:36 pm #211923toys-n-yotasKeymasterMark provided plenty of moral support, pizza, drinks and baked goods. His contribution was plenty. Plus, he was busting his butt on the land cruiser, think it was brakes and fuel system simultaneously.
The ARB has a leaking seal inside somewhere, but until I pull it out I can’t determine what is leaking. With the locker engaged, the pump will cycle every 3-10 minutes as the pressure drops. I think the install guide said anything less than 15-mins between cycles indicates a leak. Was also a pain waiting for it to consider locking, another problem I attribute to low air pressure. Perhaps a good cleaning and re-seal is all it needs. Technically it has been sitting idle for 22 of last 25 years.
I agree on the lunchbox. Not a daily, nor a hardcore wheeler that NEEDS fully locked. Happy medium is plenty for me (i suppose). I could always repair the ARB and swap it in at a later date as well. I just can’t get that 4.10 3rd out of Redee where she’s parked in the shop.
December 20, 2023 at 1:03 am #211932FJTTSEKeymasterJust bustin Marks balls, LOL Didn’t realize the ARB air locker was that old. Just nice to have on demand lockers. Like you say though, something you can tackle down the road. Another project, say it ain’t so, LMAO!!!!
December 21, 2023 at 6:03 pm #211933toys-n-yotasKeymasterYea I’m definitely not going to part with the ARB, just shelf it till I got more time/desire to rebuild it.
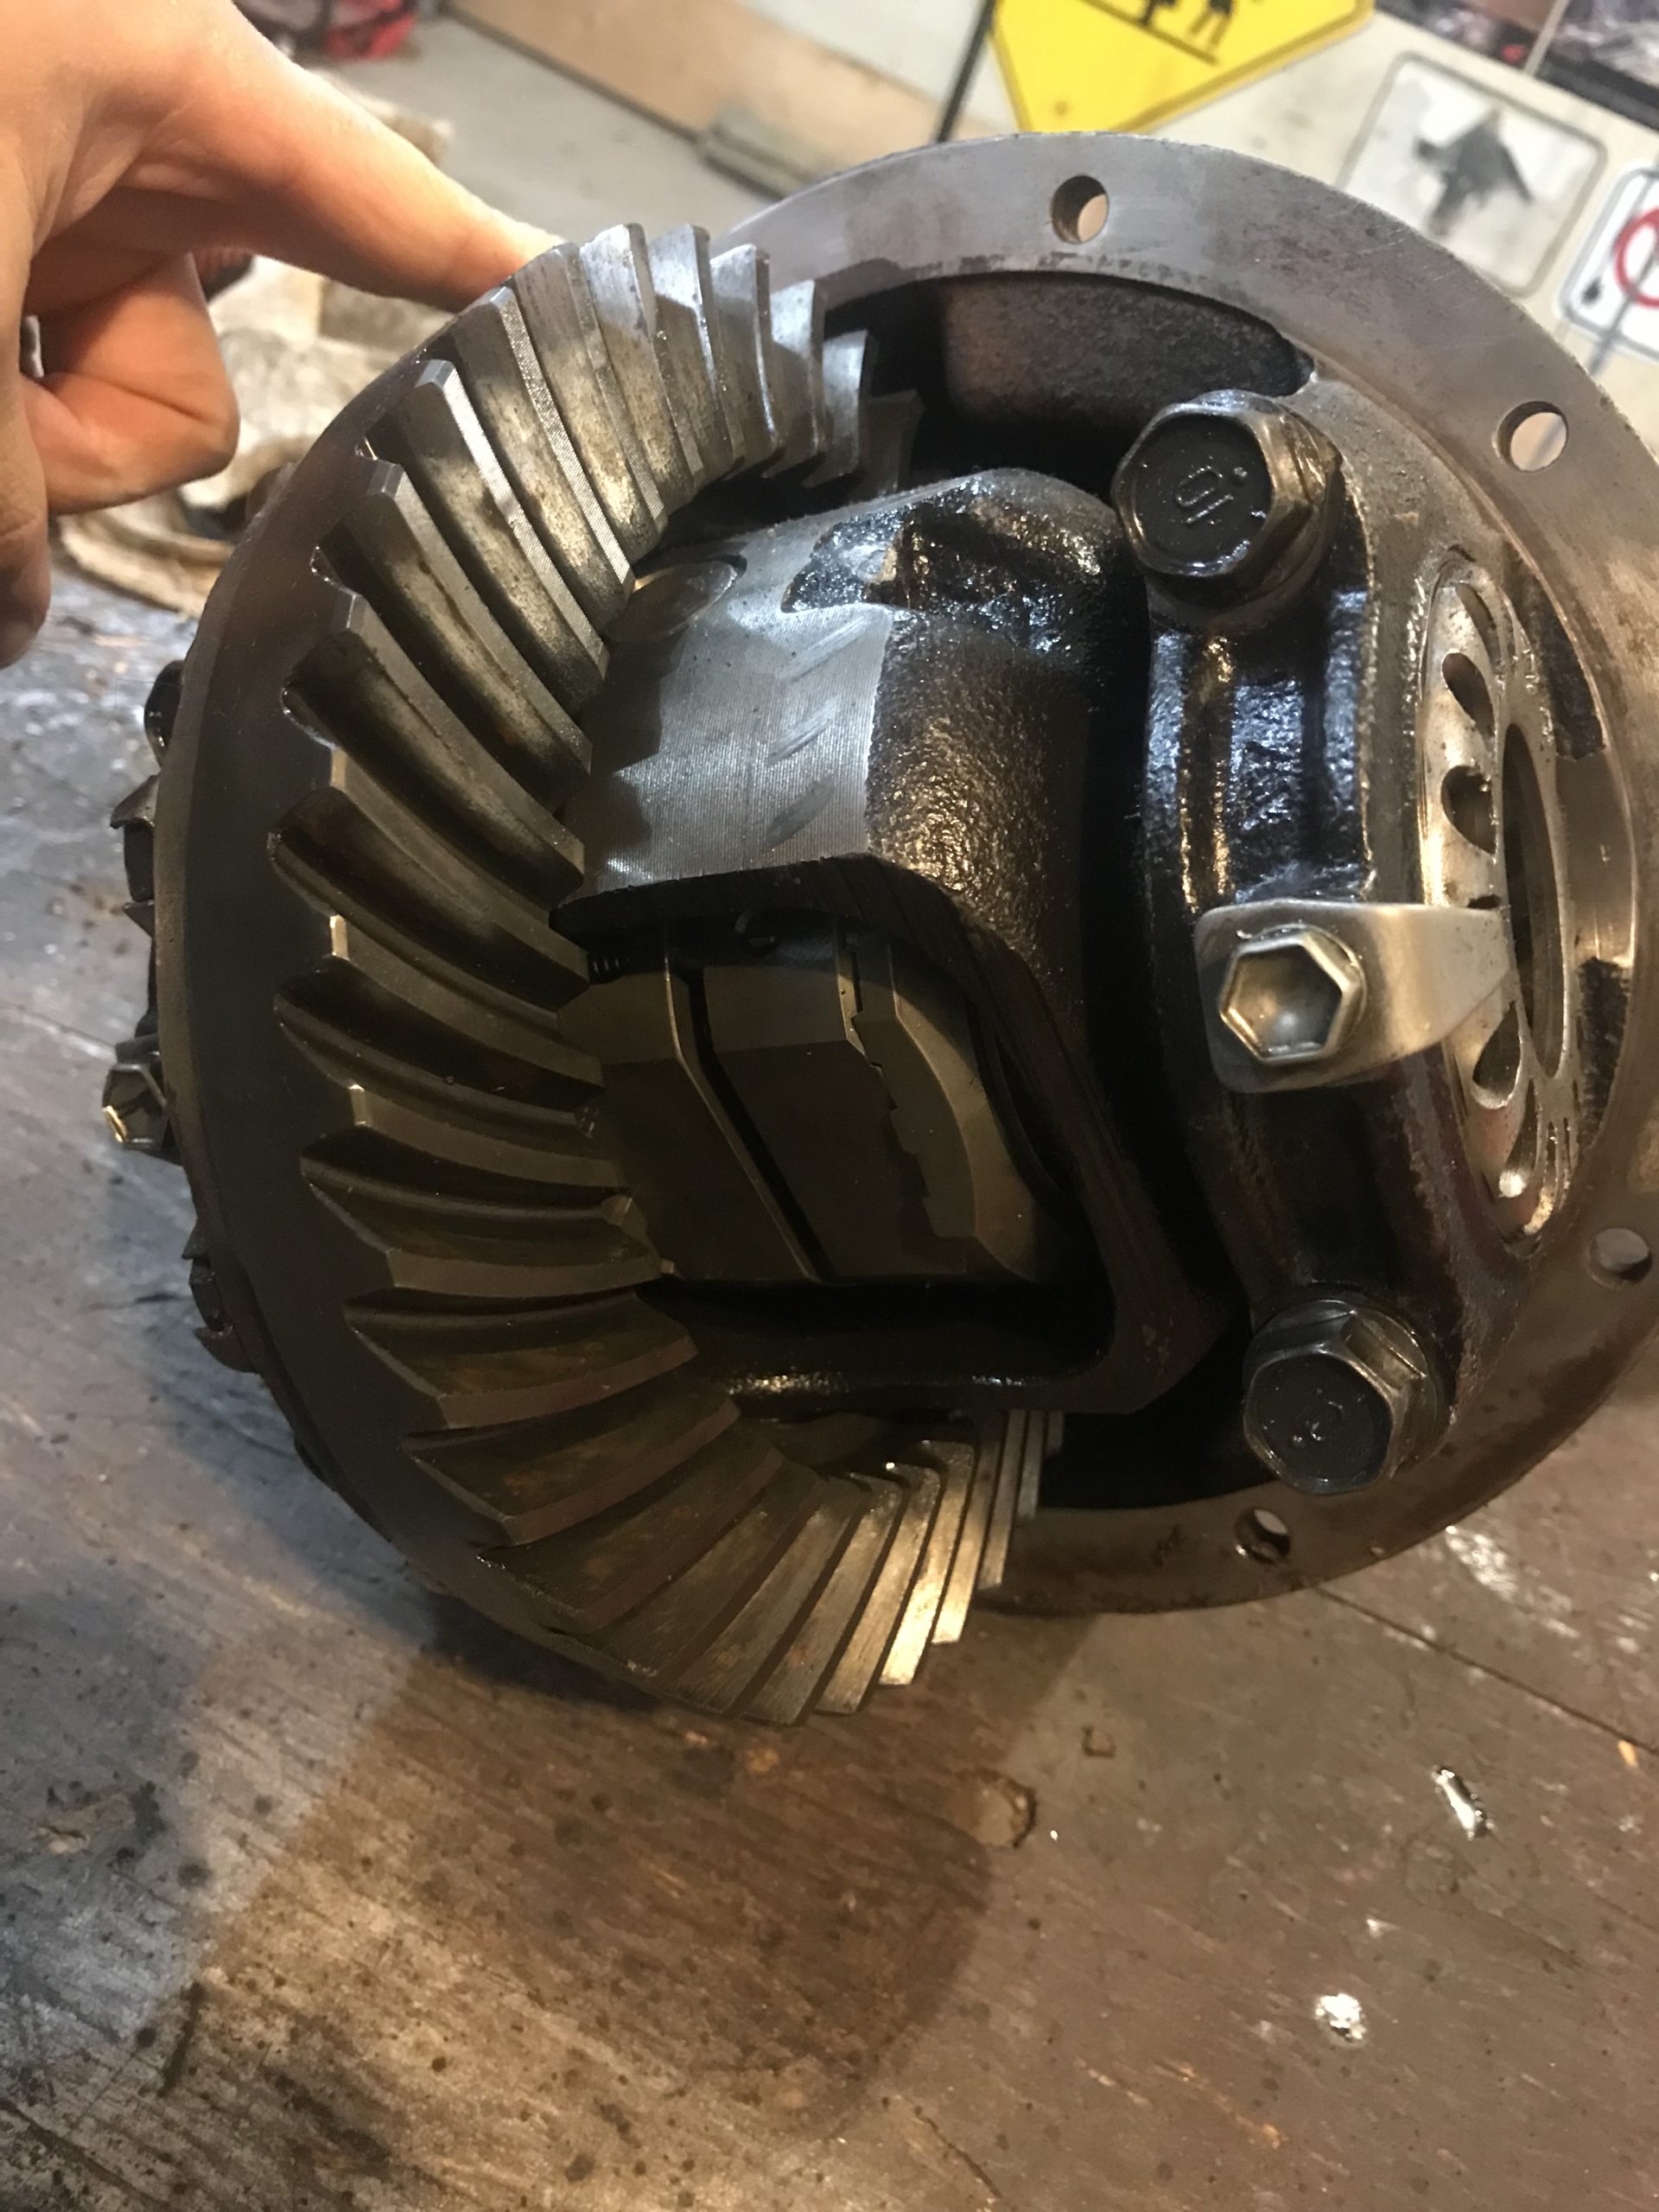
Last night i finished the lunchbox retrofit into the 4.88s. Also replaced the pinion seal which looked like it was leaking. I think the pinion flange (that the drive shaft bolts to) May be worn where the pinion seal rides. There was visible lines, very slight depth to it as well. If it still leaks, I’ll swap that pinion flange with one of the many 3rds I have kicking around.
The backlash on the 4.88 feels all wrong, so I’ll bring it to work tomorrow and borrow a magnetic base dial indicator to shift the ring gear closer to the pinion gear. I believe spec is .006” to .010”, I’m easily at 0.040” now, my calibrated fingers tell me so.
Today i dropped off the long tube header for modification. Lance said he’ll make a change, and just tack it so i can test fit before final welding. I told him I’m in no rush, enjoy Christmas and call me when ready. I am confident, def optimistic.
-
This reply was modified 1 year, 6 months ago by toys-n-yotas.
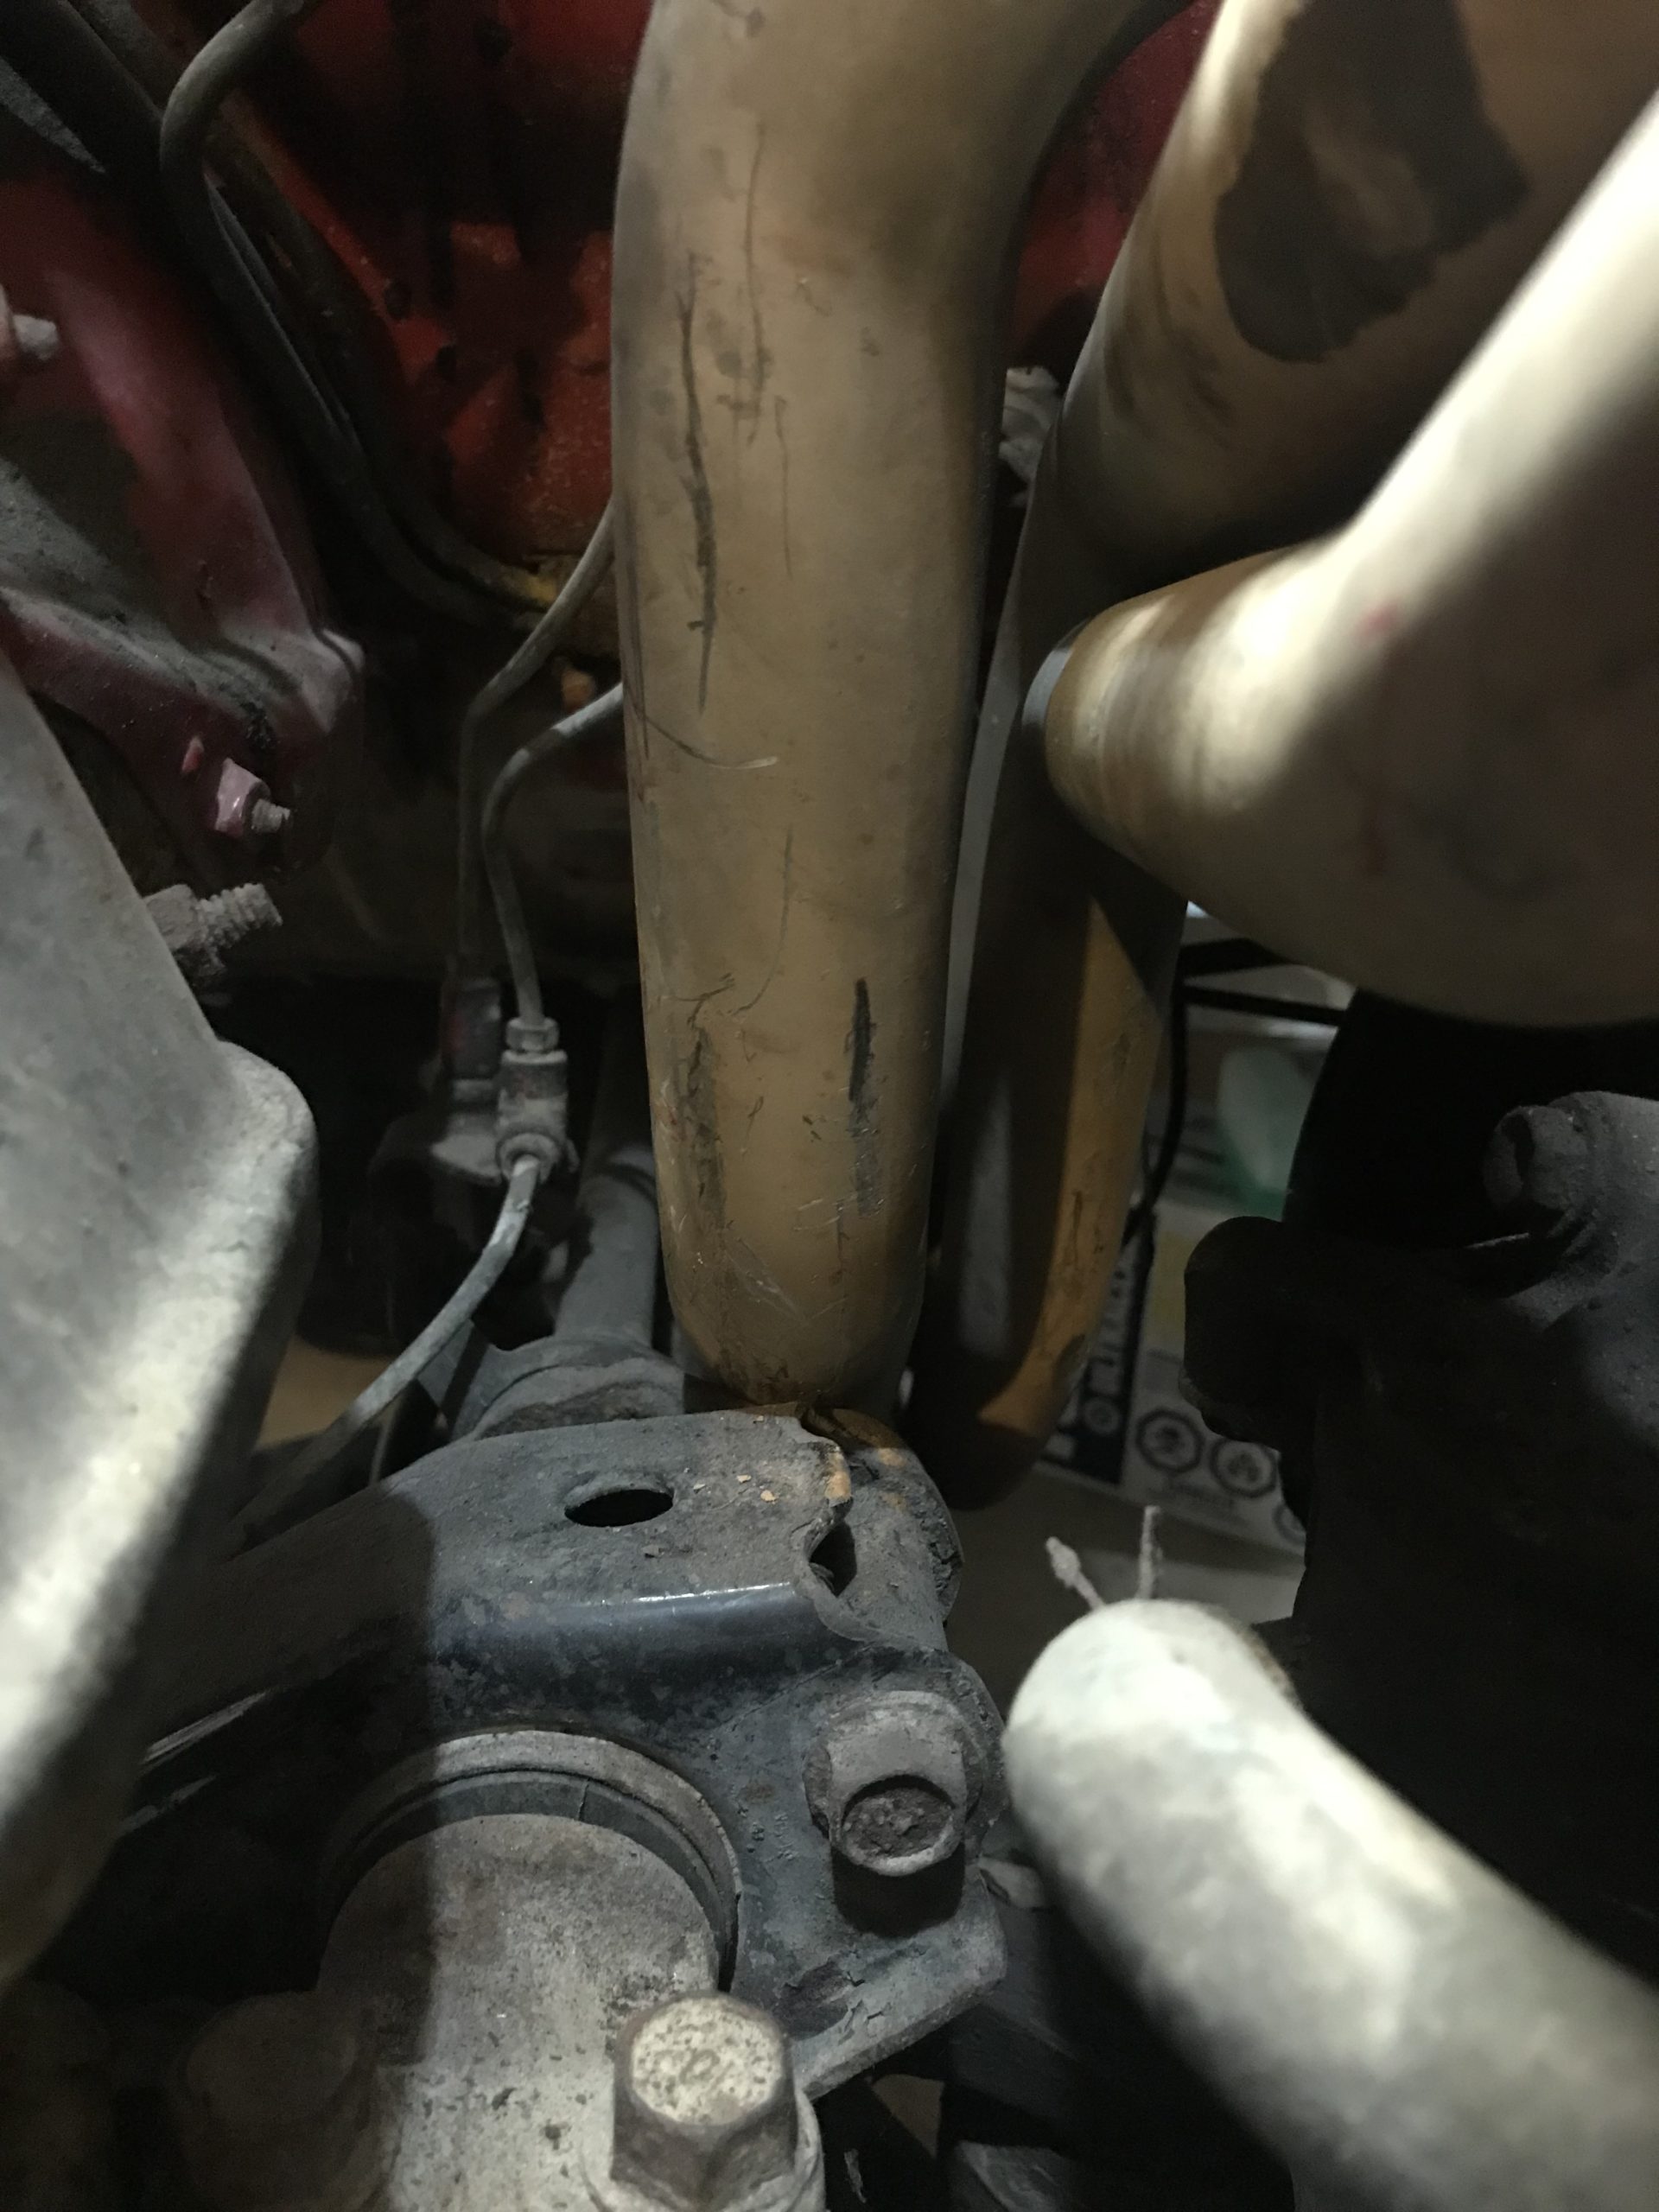
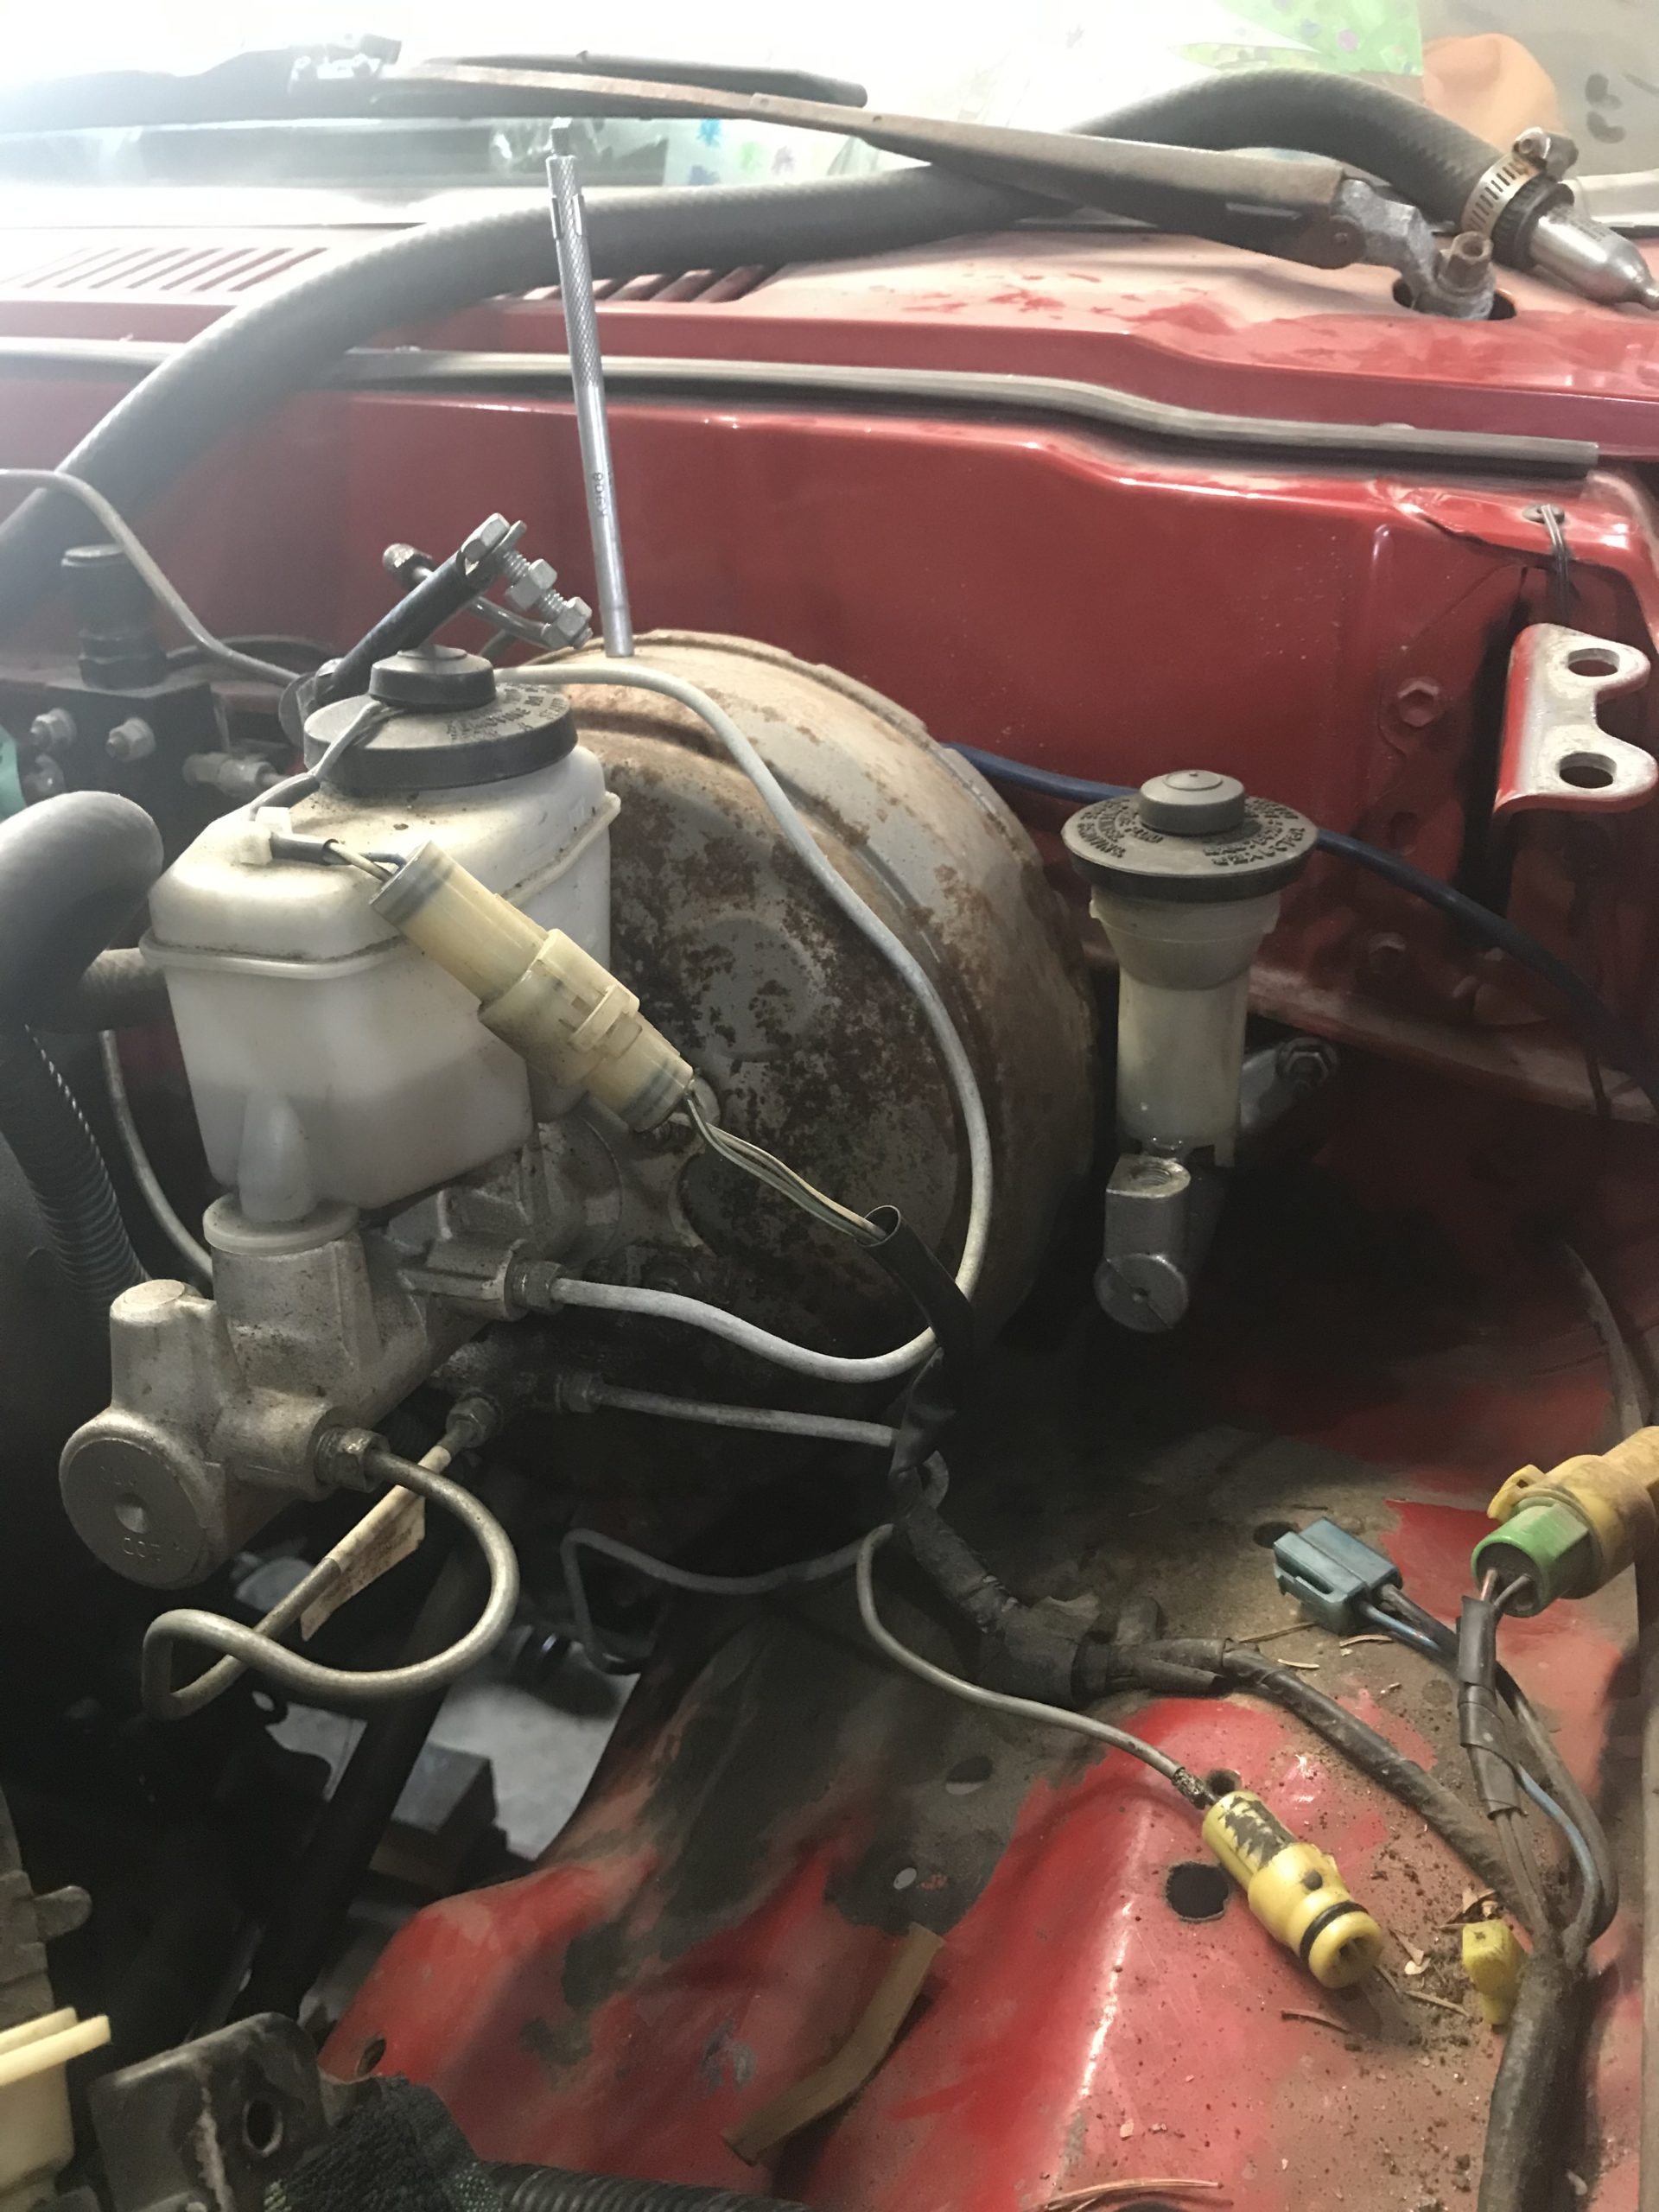
December 31, 2023 at 5:51 pm #211940toys-n-yotasKeymasterEnding the year on a high note. Last night I re-shaped the brake lines on the firewall, moving the down ward run further outboard (gaining clearance to the header). Glad the lines i ran in 2018 had enough slack to be moved.
This afternoon, Lance got in contact with me to let me know the header has been cut, reshaped and tacked, ready for a test fit. Tomorrow when i grab it I’ll let Lance know if/where any interference exists, and will return it for further mod or final welding.
Got plenty of work to do, and the clock starts ticking at midnight.
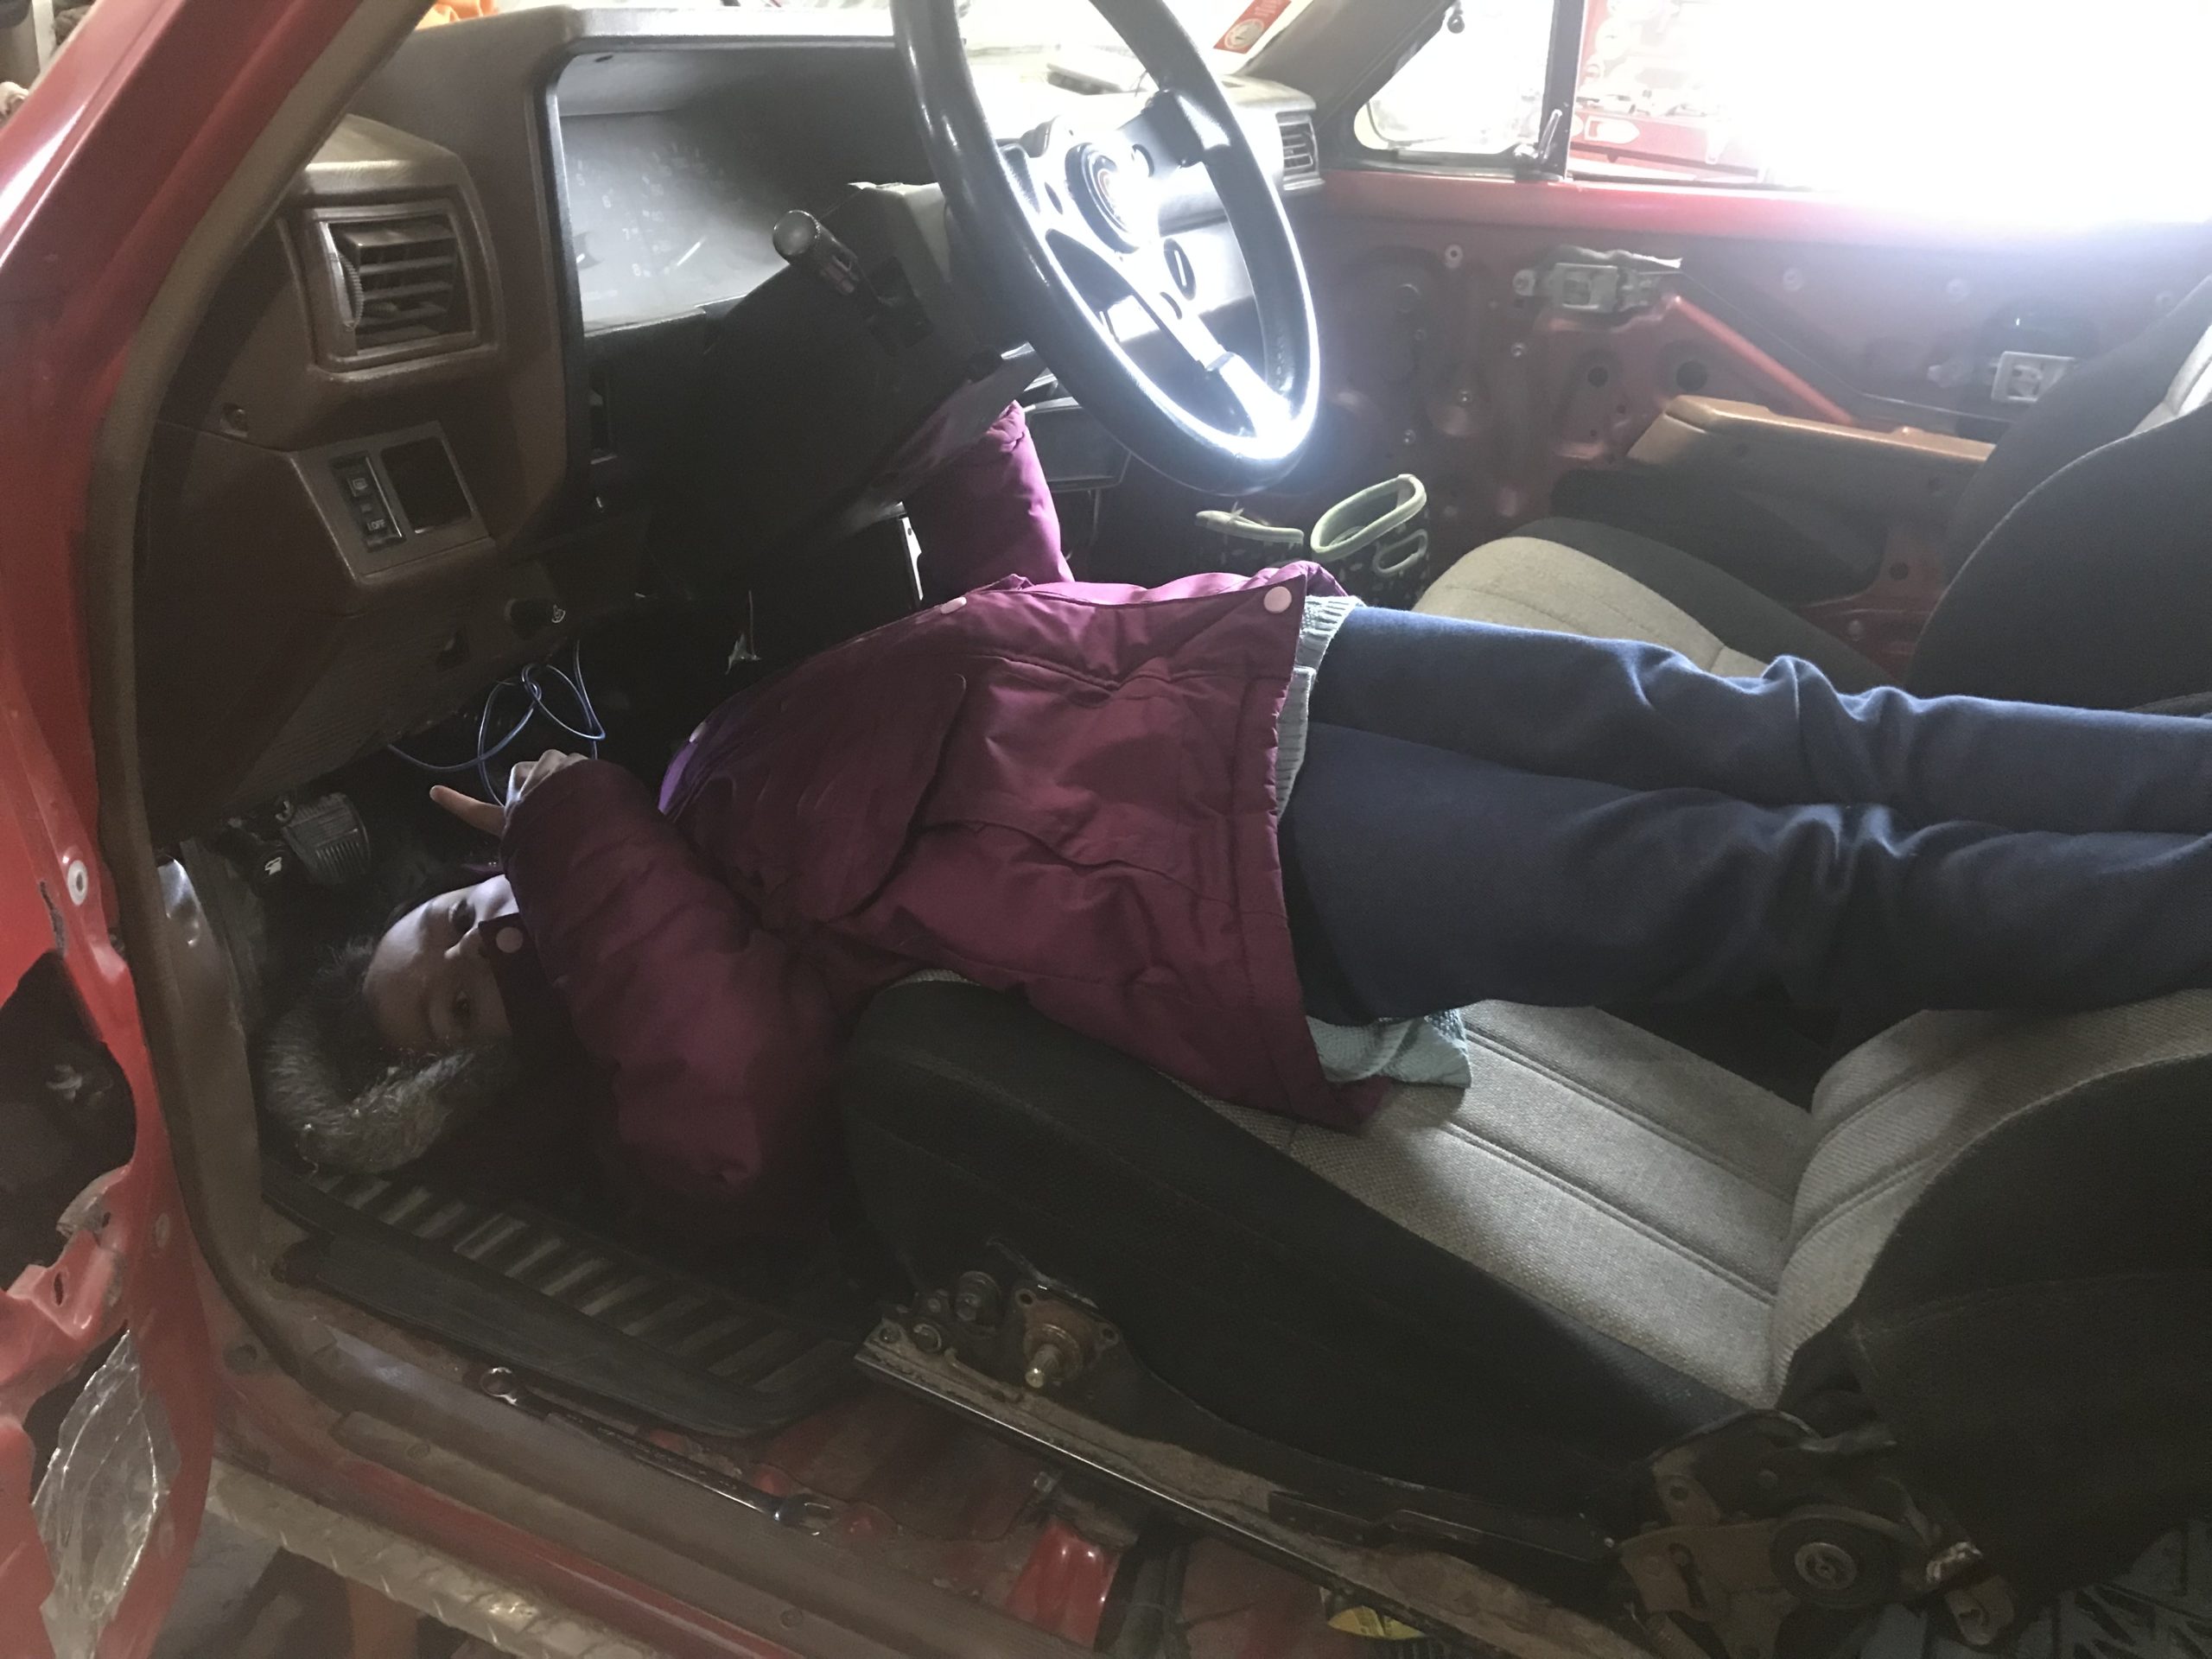
January 30, 2024 at 2:18 pm #211943toys-n-yotasKeymasterMade some progress on Redee with the help of my daughter. She has been asking me to help for weeks, but the exhaust work left no opportunity for small hands.
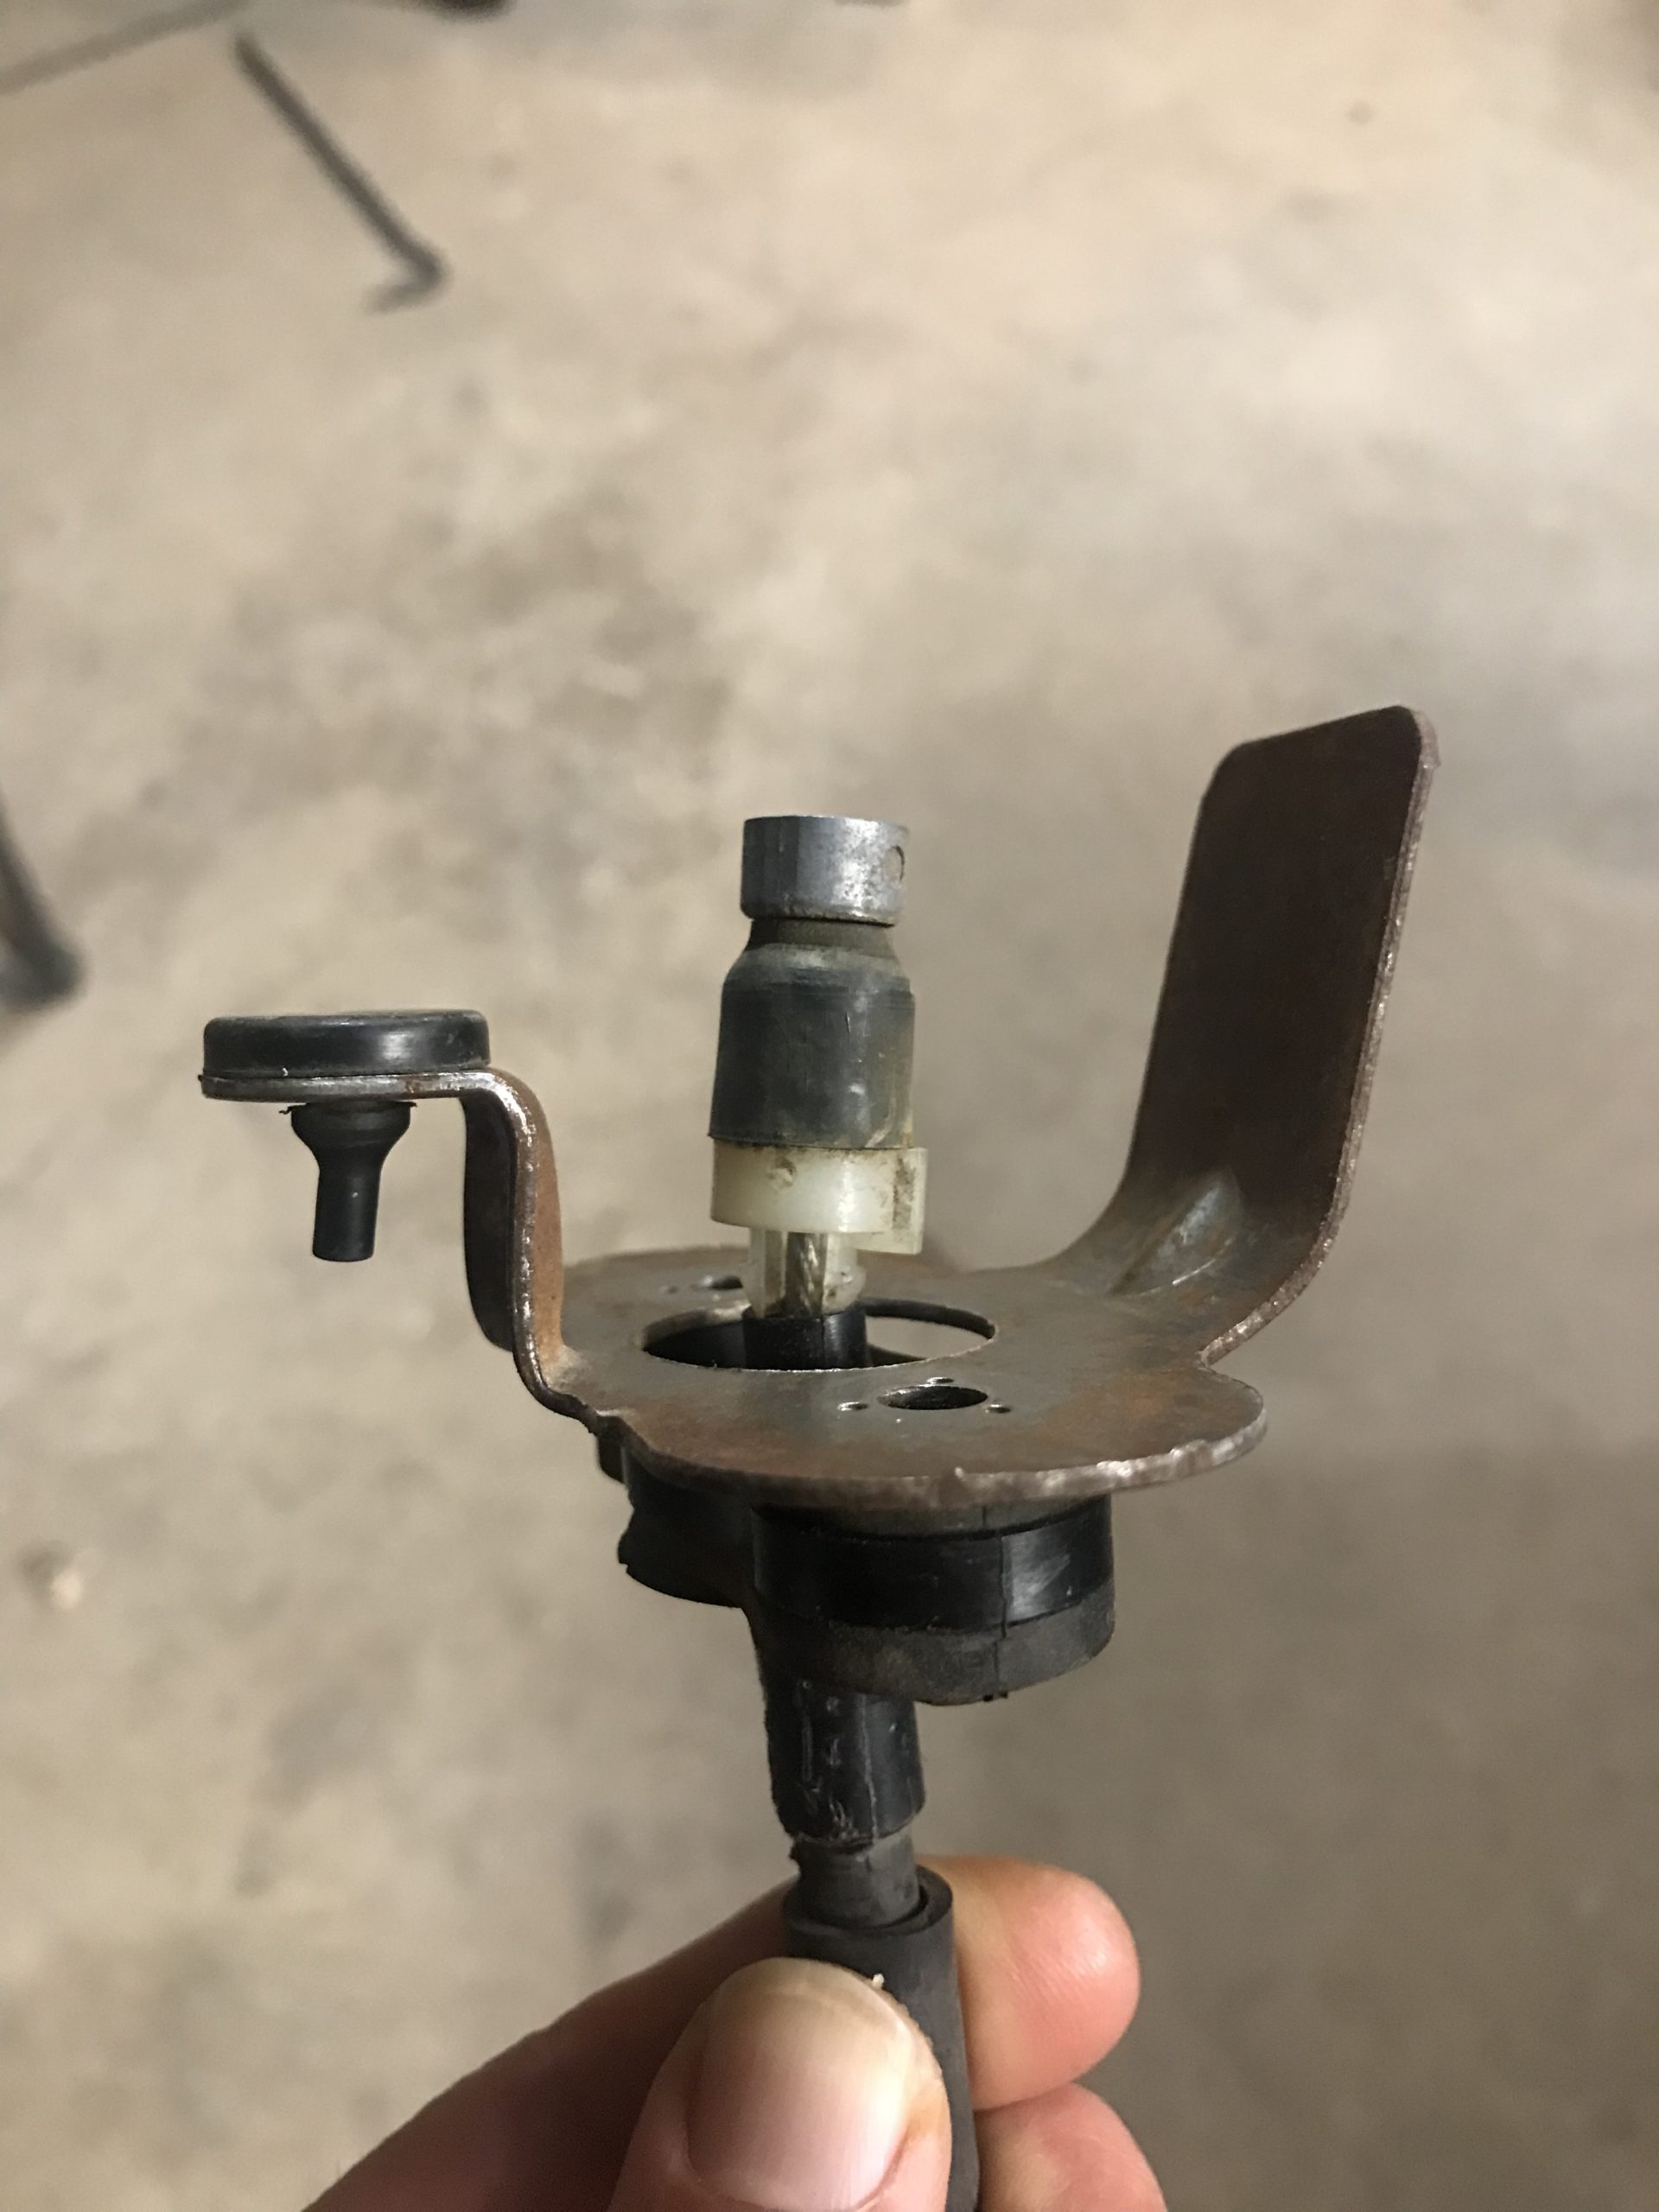
Regardless, my lil helper was more than willing to cram her body into the drivers foot well to attach the clutch pedal. Together we got the clutch pedal installed, modified a brake return spring to work for the clutch pedal, and installed the master cylinder. I’m at a loss here because I can’t determine where on the clutch pedal, the Safety Switch (for starter) is supposed to make contact. There’s no TAB for the switch to make contact with, so I’m a bit confused.
I started putting the 3RZ throttle came in place, but i have to cut a tab off the bracket first.
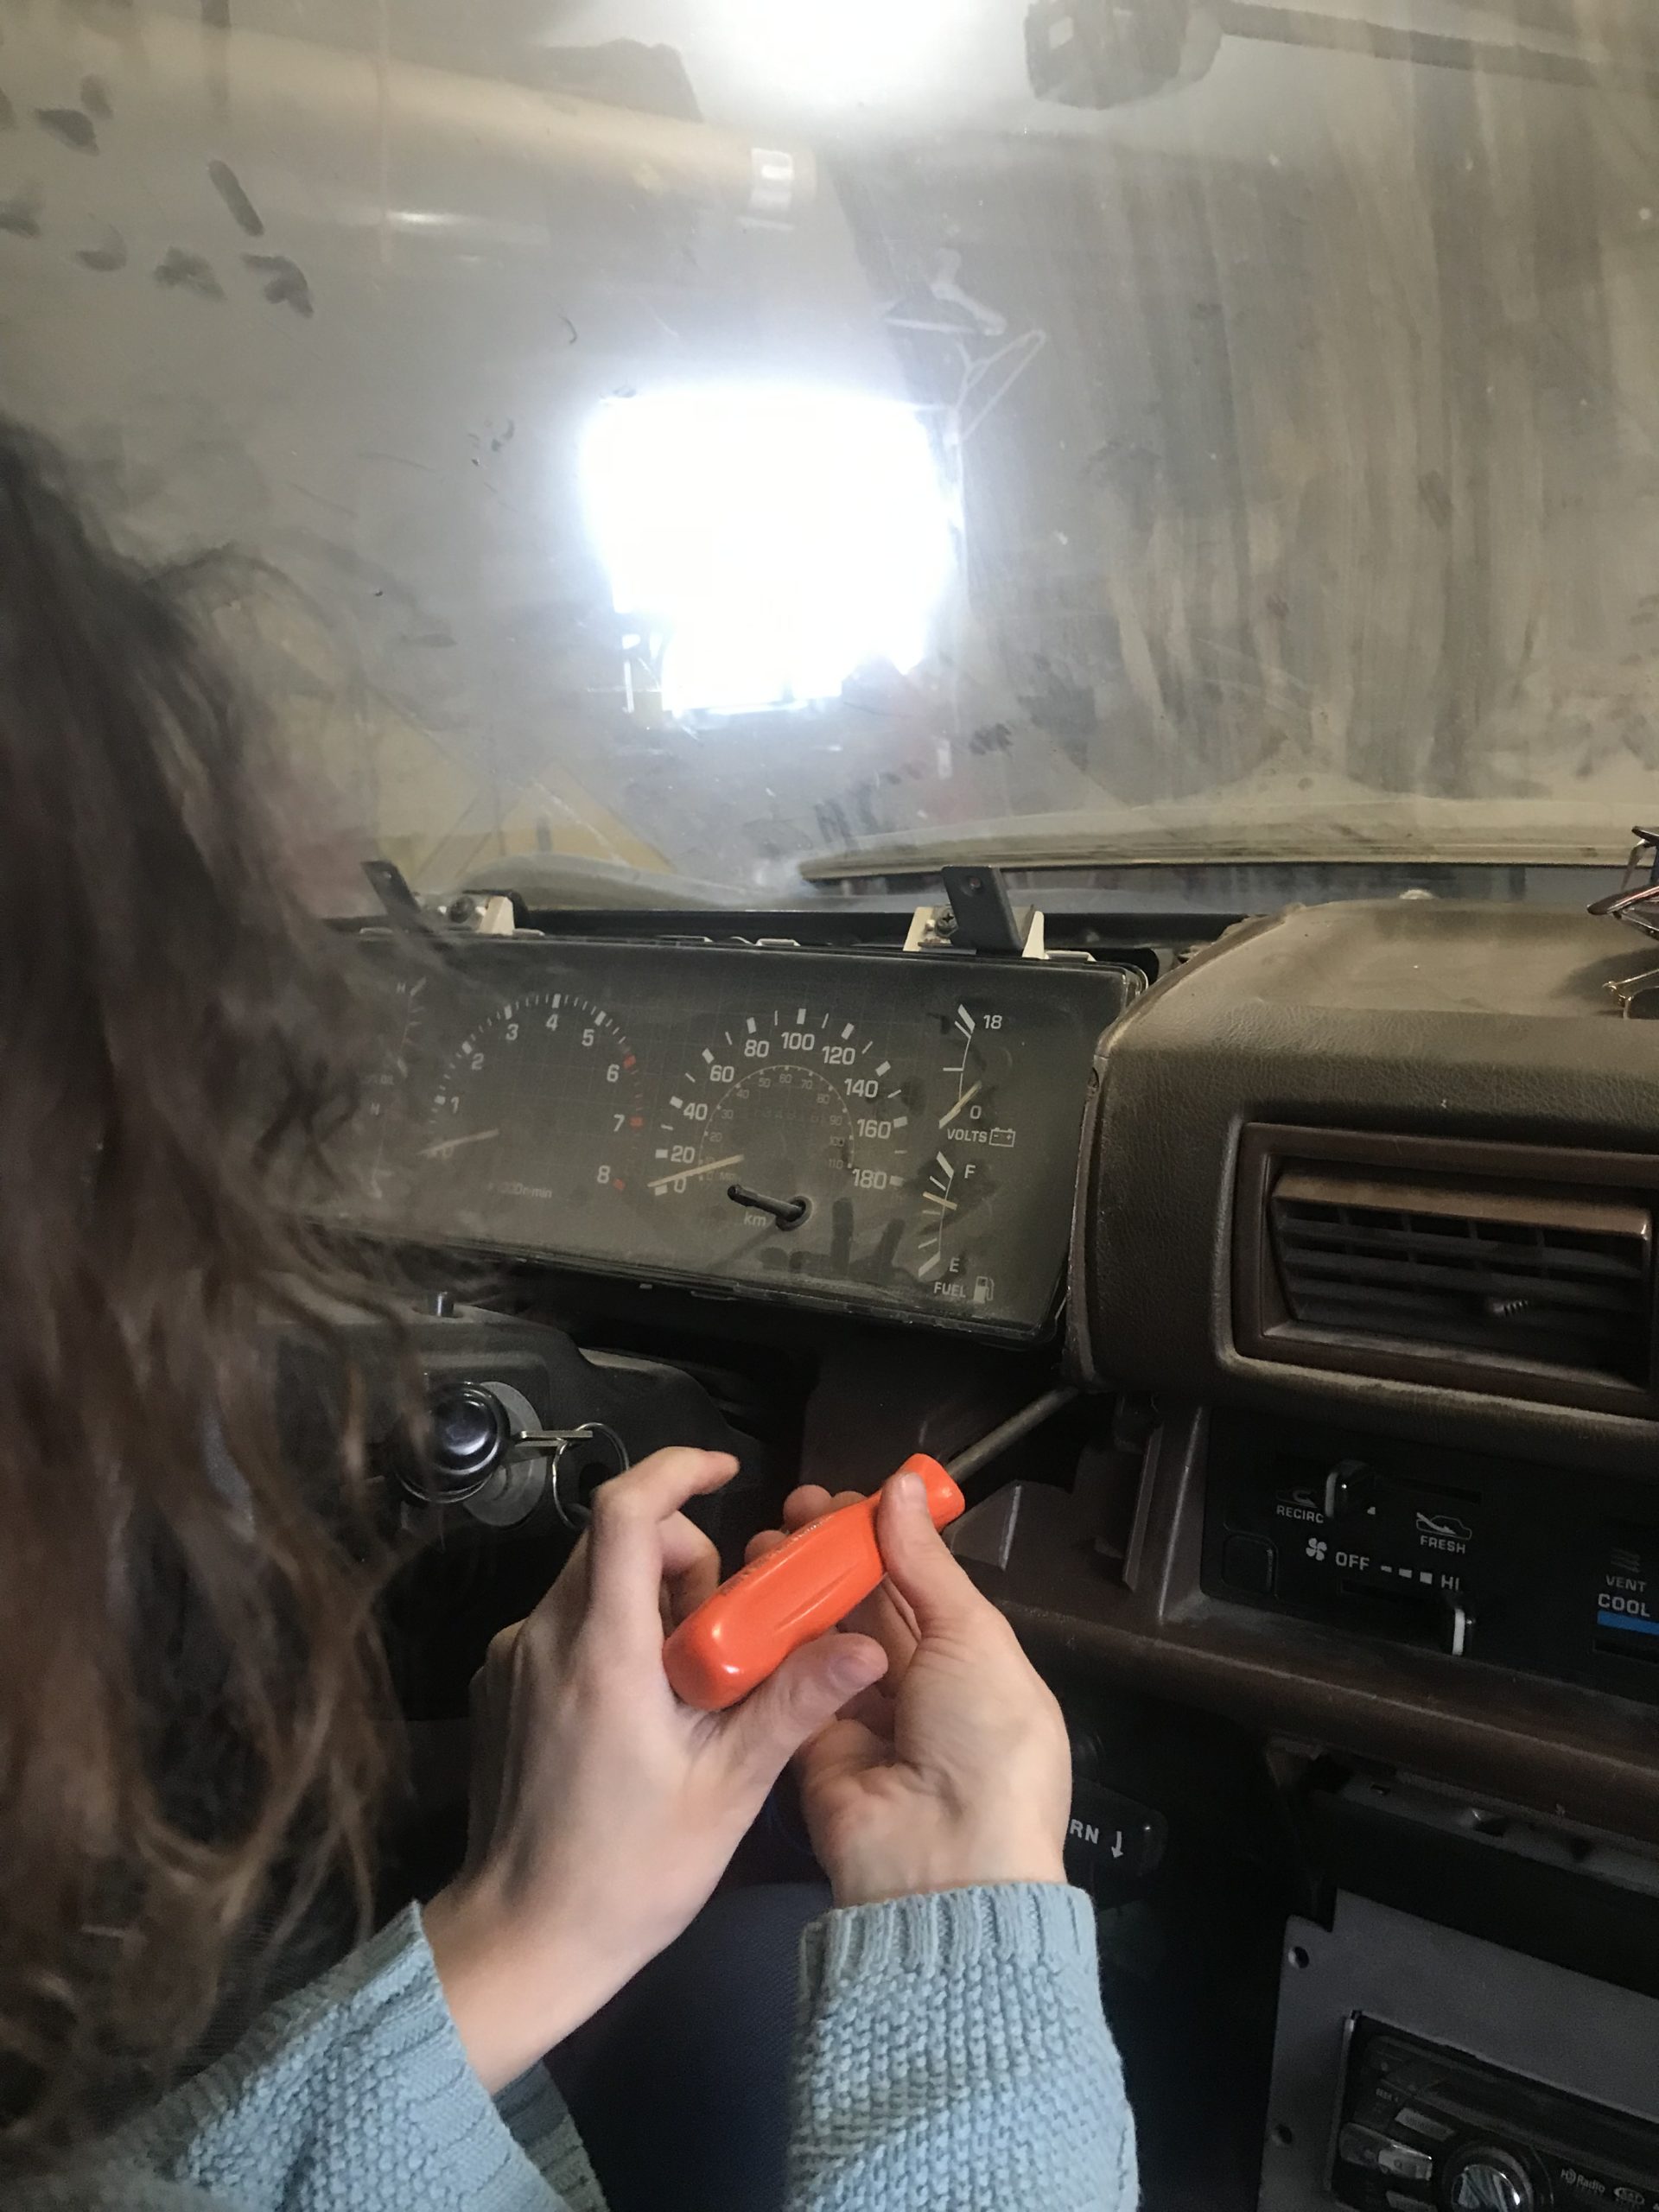
We also pulled half the dash so I can replace the speedo drive cable the next time the motor comes out. Hopefully the next time will be the last time.January 31, 2024 at 12:19 pm #211948toys-n-yotasKeymasterLast night i chopped the throttle cable mounting plate down so it’ll fit under the firewall NVH blanket. I took about 3cms off the tab on the right so it’s bit shorter than tab on left with the rubber stopper.
Attachments:
February 24, 2024 at 8:35 am #211954 Slick_YotaKeymaster
Enjoy the help! That fizzles out as they grow up!
My recollection from assembling and inspecting Corollas back in the day, the neutral safety switch is on top of the transmission. I believe the activation is at the TA, rather than the pedal. Although that was a Corolla and 4Runner is a different beast, Toyotas are generally very similar.
February 25, 2024 at 11:31 am #211955toys-n-yotasKeymasterI loved every minute of the help.
I’m not sure where the switch would be in an auto trans, but the mini truck standards have it on the pedal. I put the 3rz/w59 switch into the 22re/w56 spot, but the pedal I got from @Finn was from an unknown donor. Looks like it is missing a tab, or from a truck that predates clutch safety switches.I’ve since fully installed the throttle pedal, and cable. I replaced the speedo drive cable as well.
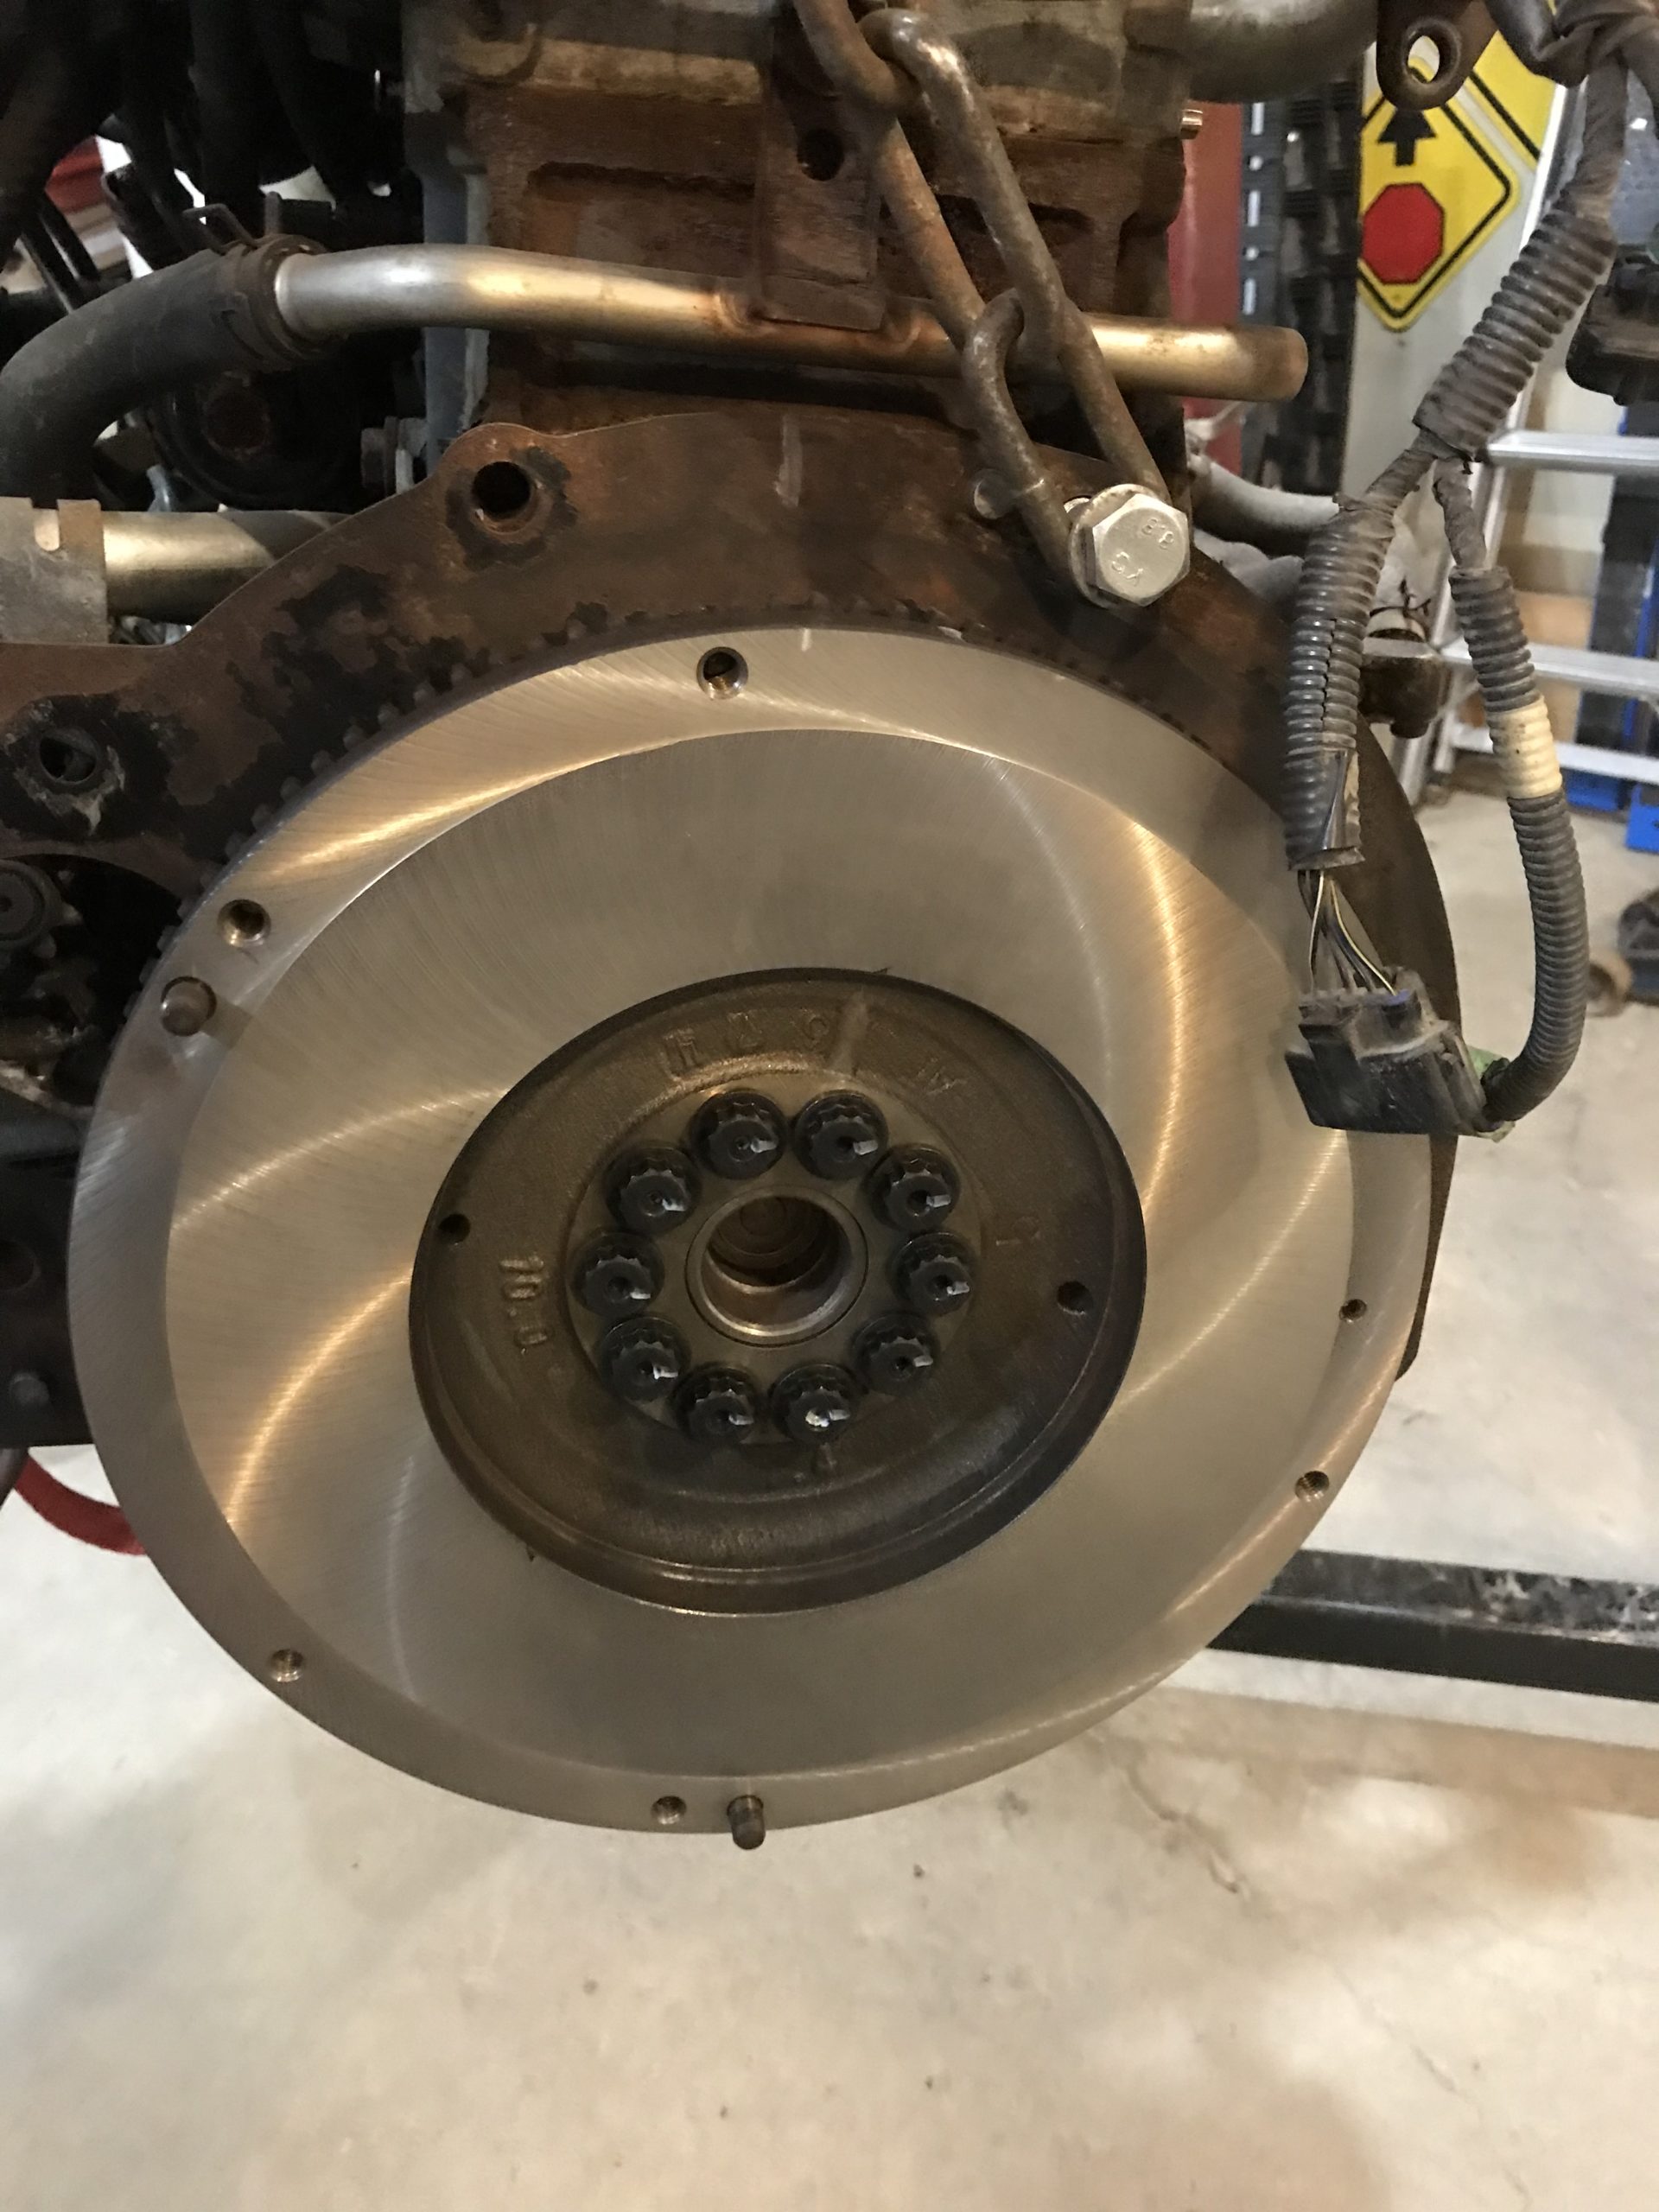
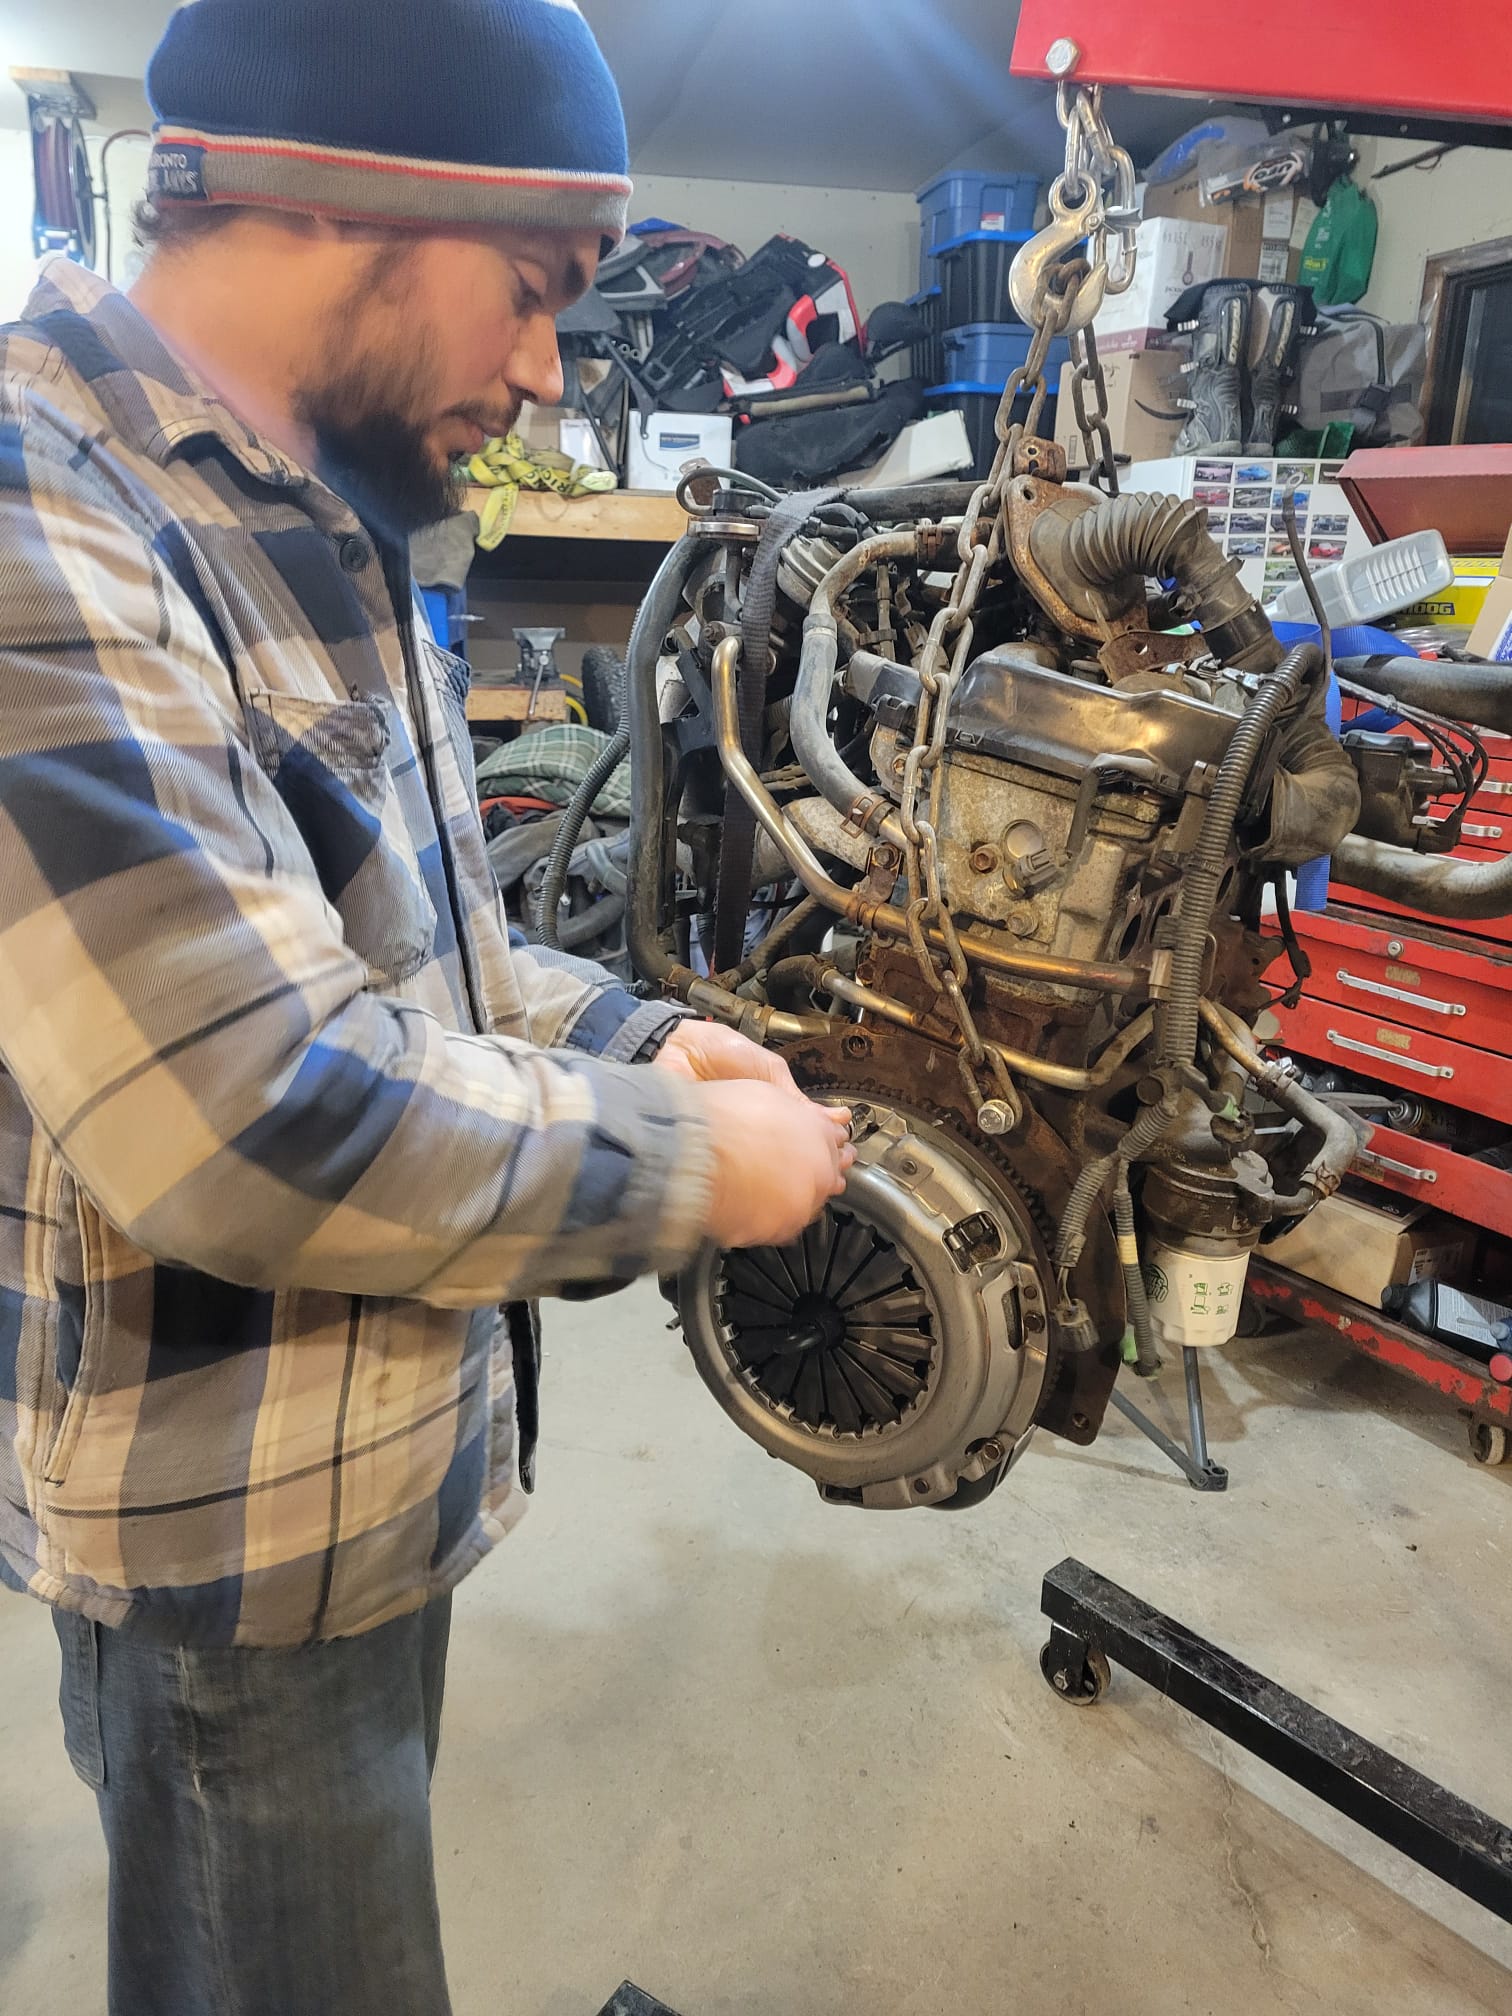
Last night with Matts help I was able to set proper torque on the flywheel bolts, which required a two-step tightening, and Matt stopping rotation on the Other side of the crank. I then installed the pilot bearing, clutch and pressure plate.
Was a good night in The Shop. At this point in time the bbq’d pizza was ready, and progress was complete for the night.
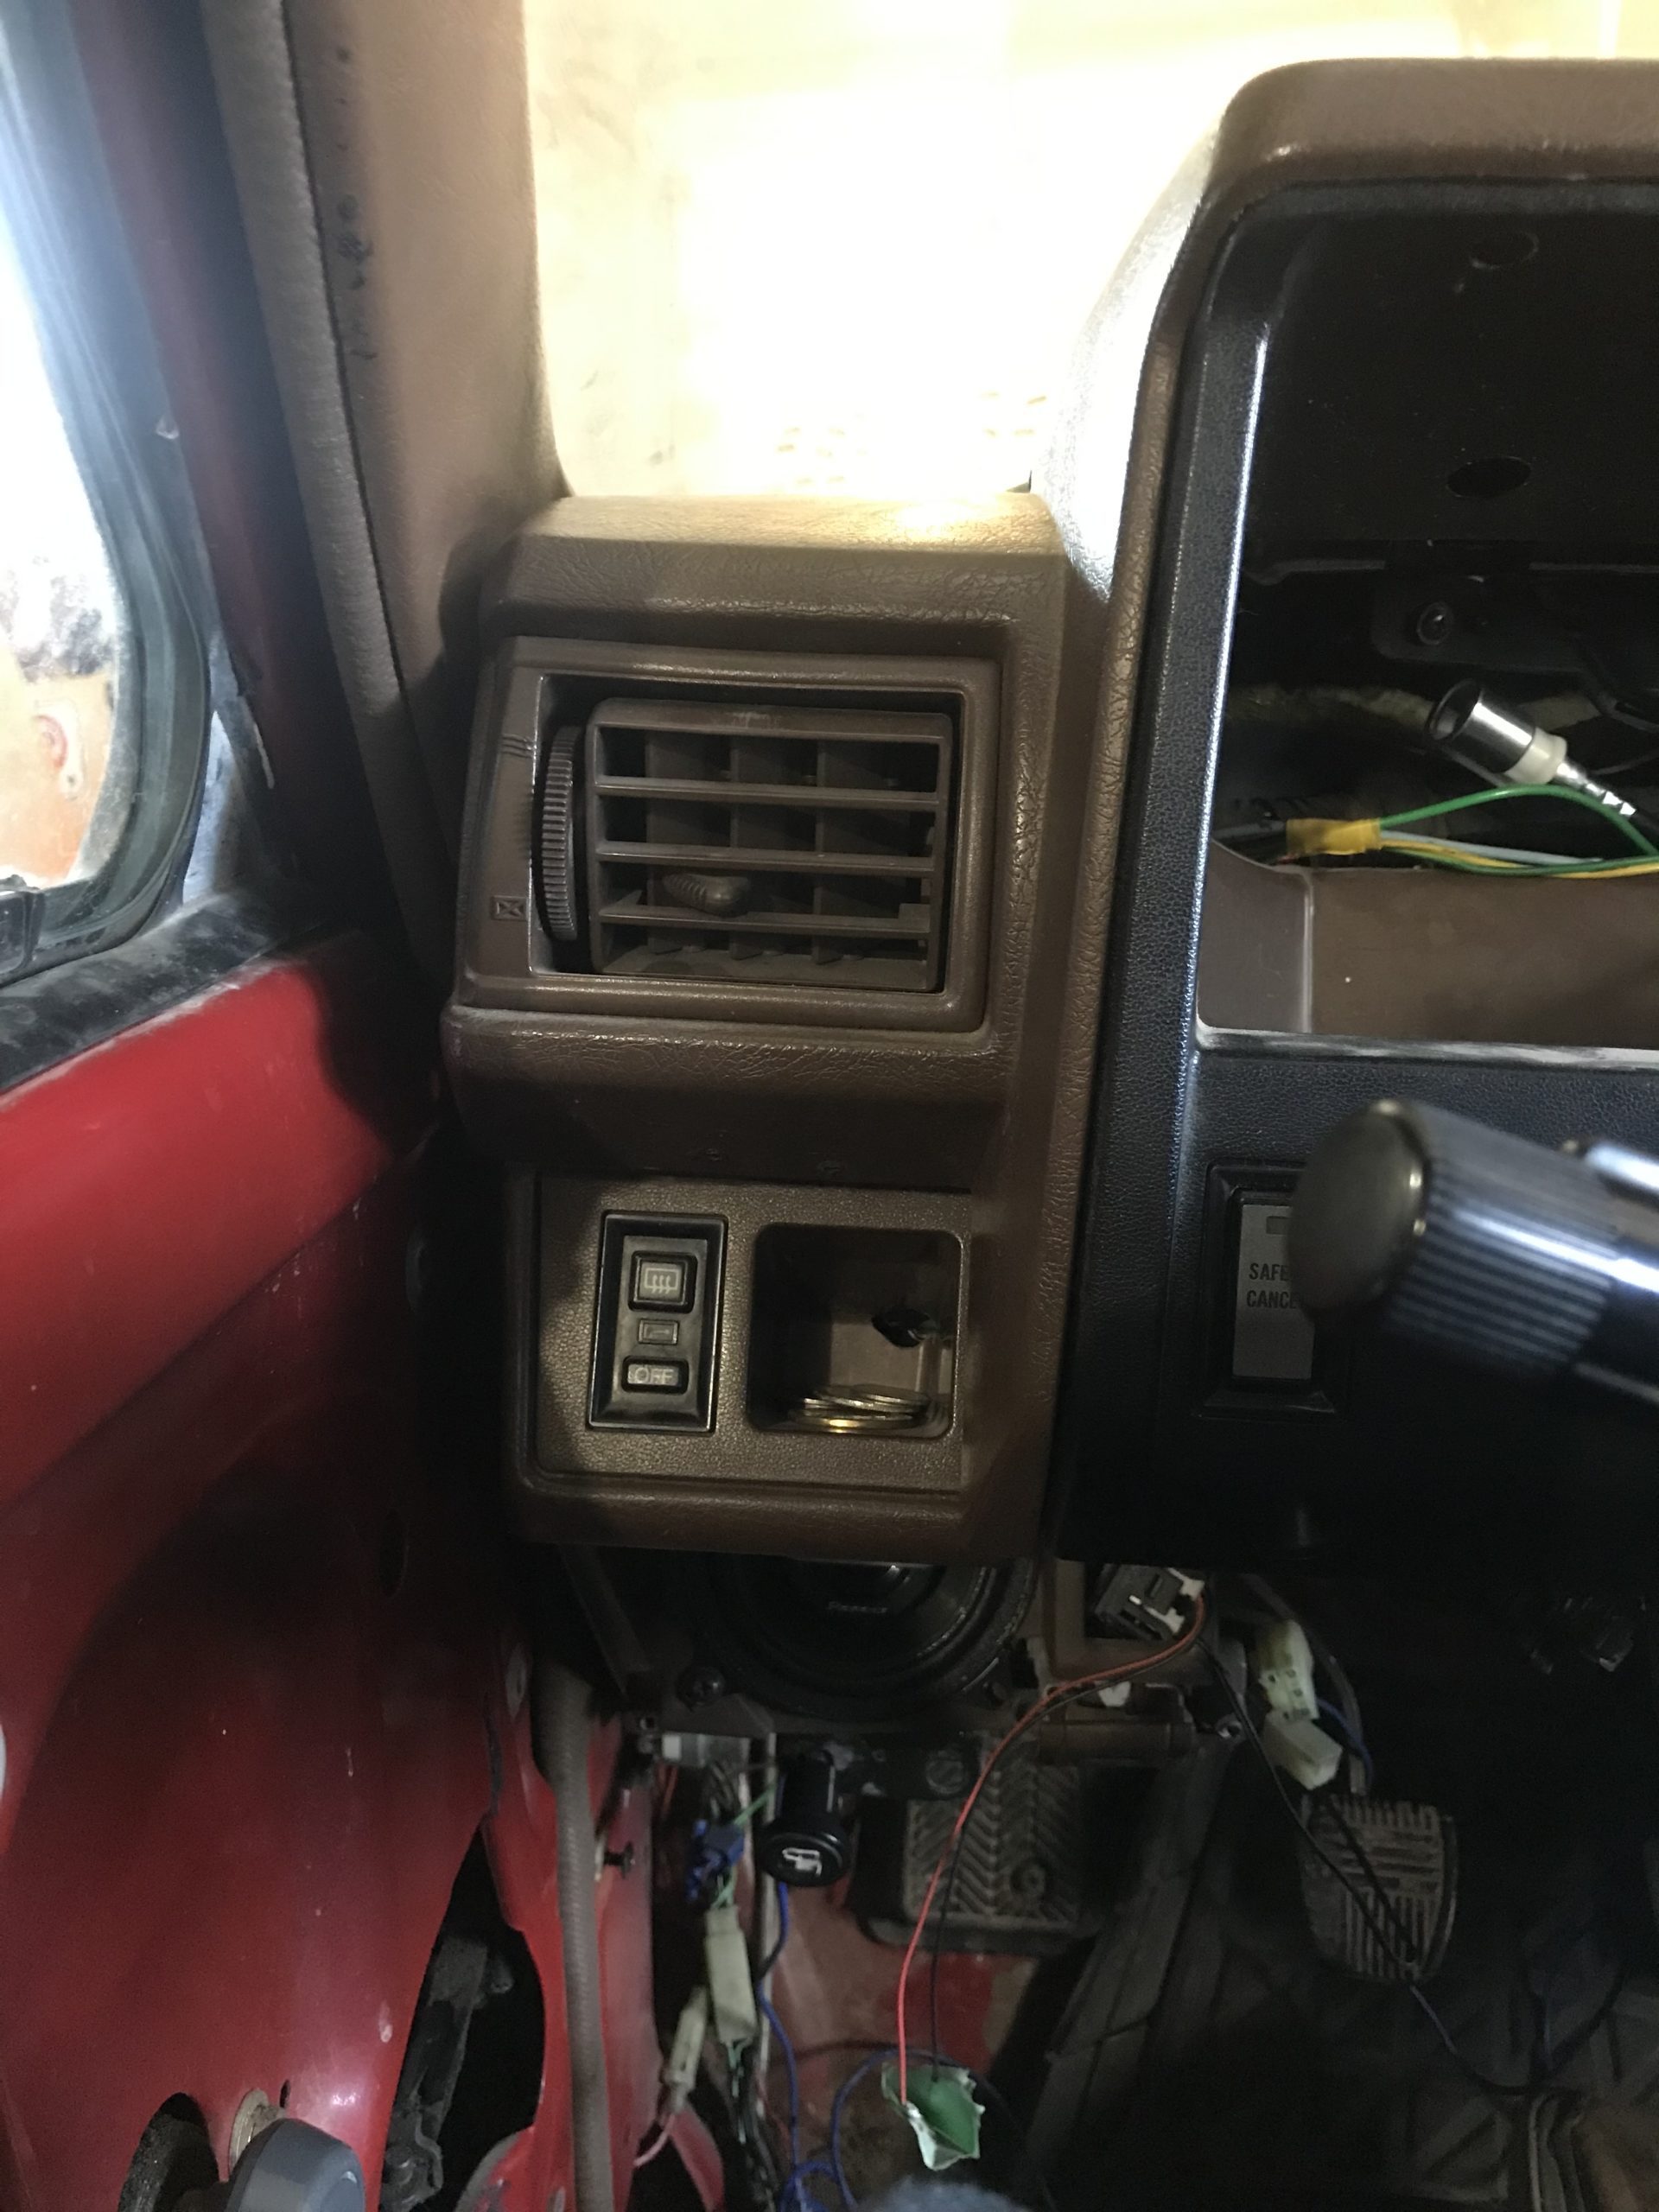
Also, a rare picture of me doing work.I’m going to install my ultra gauge display to the left and below the steering wheel in front of the rear windows defrost button. I’ll still be able to activate the button, but i won’t need to (due to fair weather driving only).
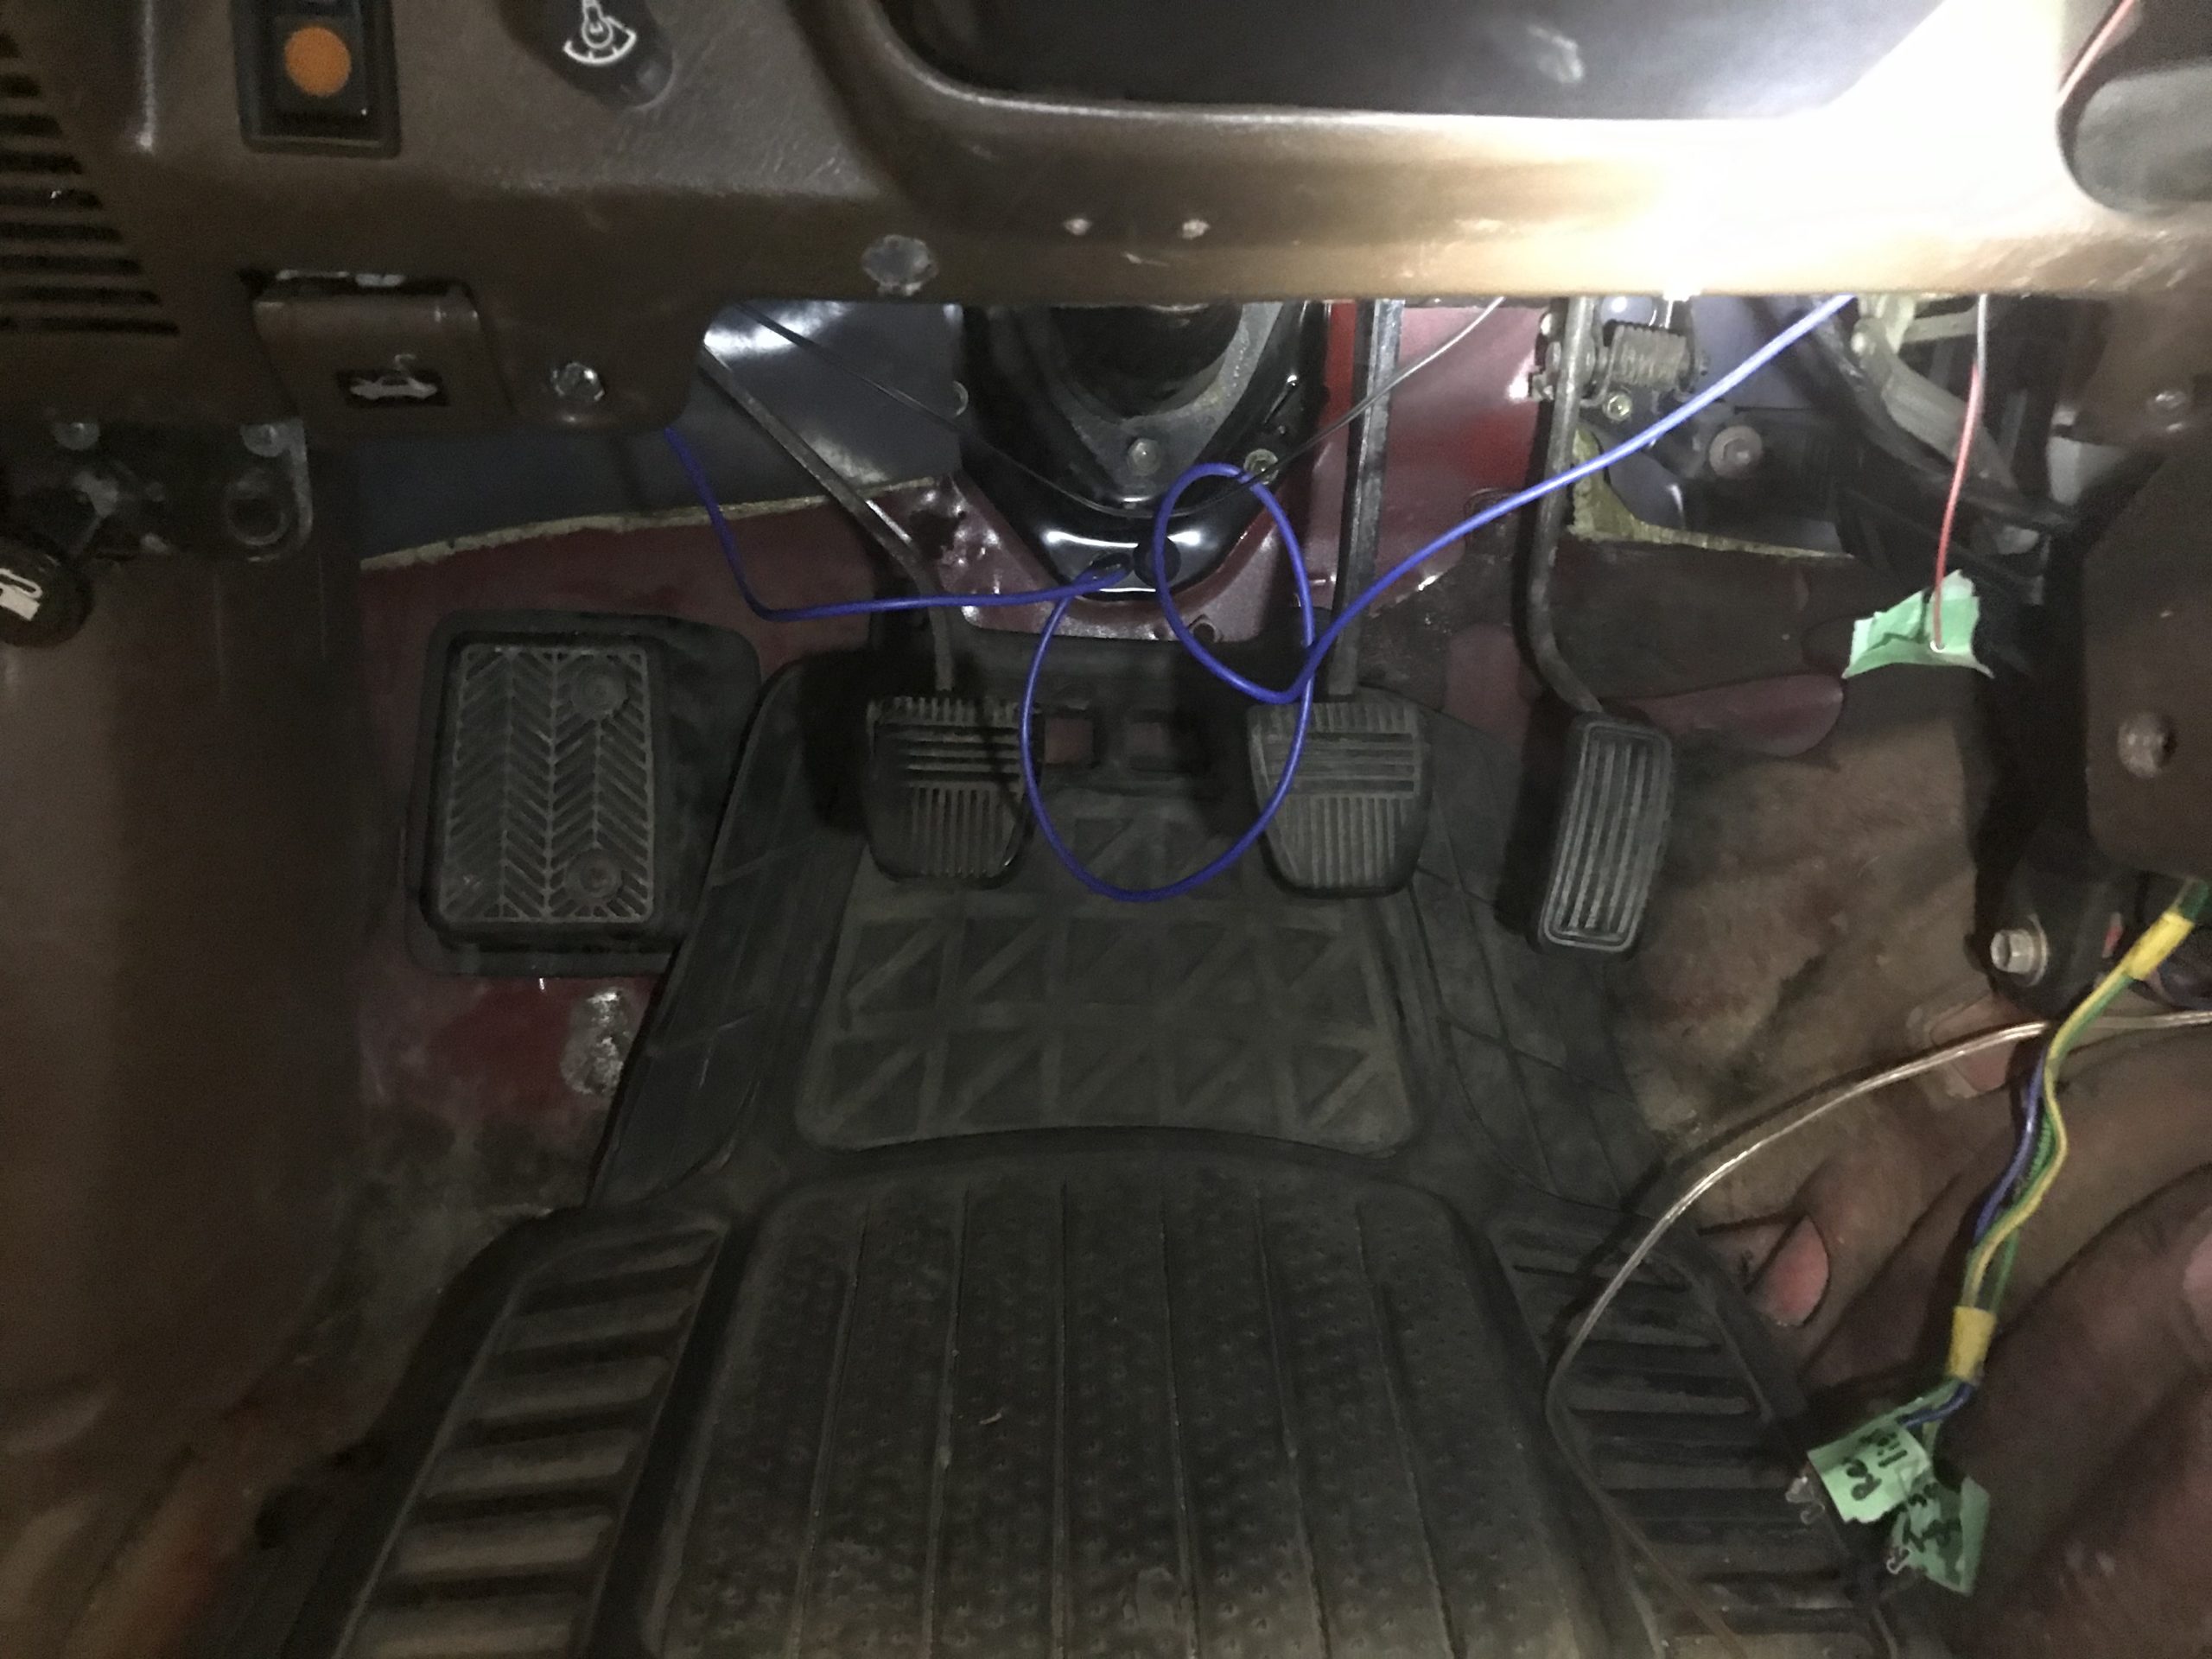
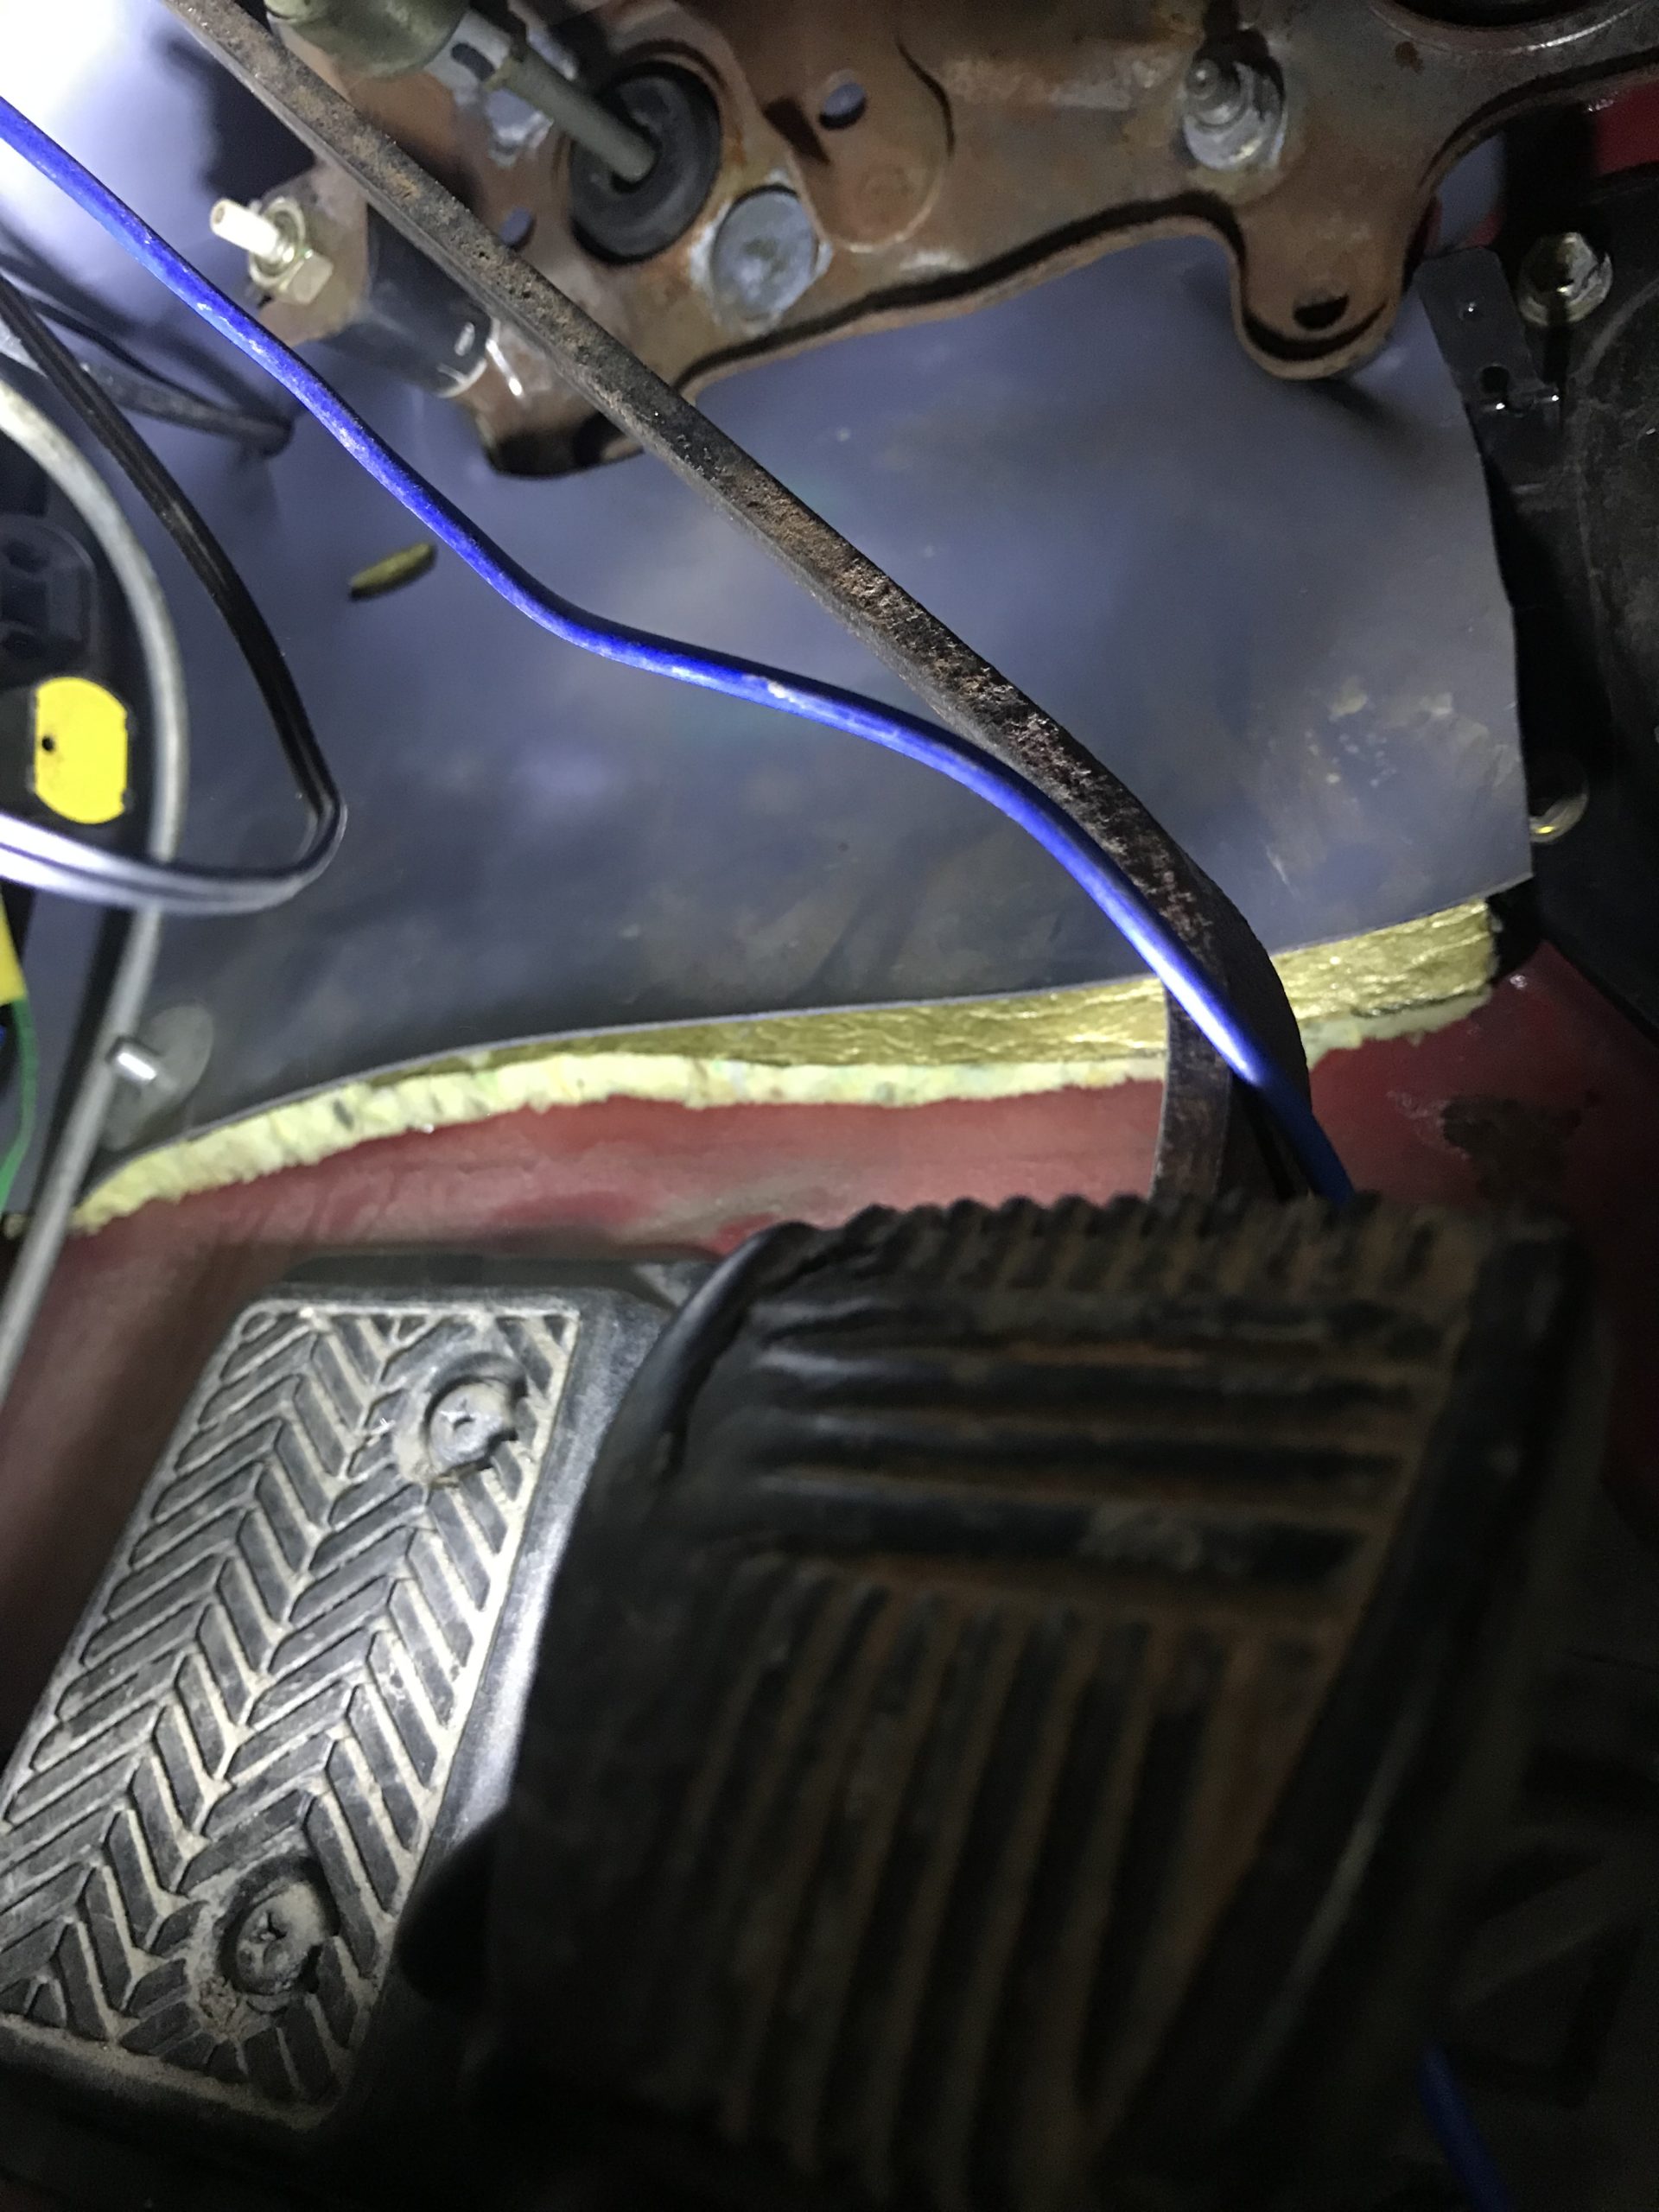
I’ve got two quick tasks before i drop the motor in for good. I must repair and locate the 4wd indicator wire, I think it goes through the firewall in the centre somewhere. All i remember is that it used to work, then the chevy melted the wire, so i removed it. But I have no idea of its route from tcase to dash. The other being the same task for the reverse light wire.
-
This reply was modified 1 year, 8 months ago by
-
AuthorPosts


- You must be logged in to reply to this topic.