Forum Replies Created
-
AuthorPosts
-
 toys-n-yotasKeymaster
My sister-in-law is in need of a first car, my wife and I are pushing to get her into my wifes 5-spd Focus for two good reasons. Firstas you said, it FORCES you to pay attention and my sis/law NEEDS that. Secondly, Sam wants back into a Caravan, and her super clean low-mileage Focus has no resale value. May as well get ripped off by a family member, as opposed to a dealership or kijiji person. The sale would have to be accompanied by driving lessons. I’ve taught 4-ppl already, and Focus practically drives itself. Hoping it pans out.
If you ever build ANOTHER rear bumper, lemme know what you want for the current one. Tempted to drop cash on the Marlin Crawler rear, but no tire/fuel carrier. Or drop cash on welder, bender, consummables, ppe, etc and build something.
Adjust the rear shoe to drum clearance again, Crank up the rear pressure, and try bleeding the rear drums again. Start “fresh” in one go.
toys-n-yotasKeymasterHaven’t been in the shop since I grabbed the scale. Hopefully tonight.
toys-n-yotasKeymasterThat’s awesome wifey wants to learn standard. I taught Sam to drive in 4Runneree. Stuck it in Low range, hubs unlocked, and worked through the motions for a few km of back roads. A month later she bought a 5-spd Chevy Aveo from her future brother-in-law and continued on to master the skills on her own.
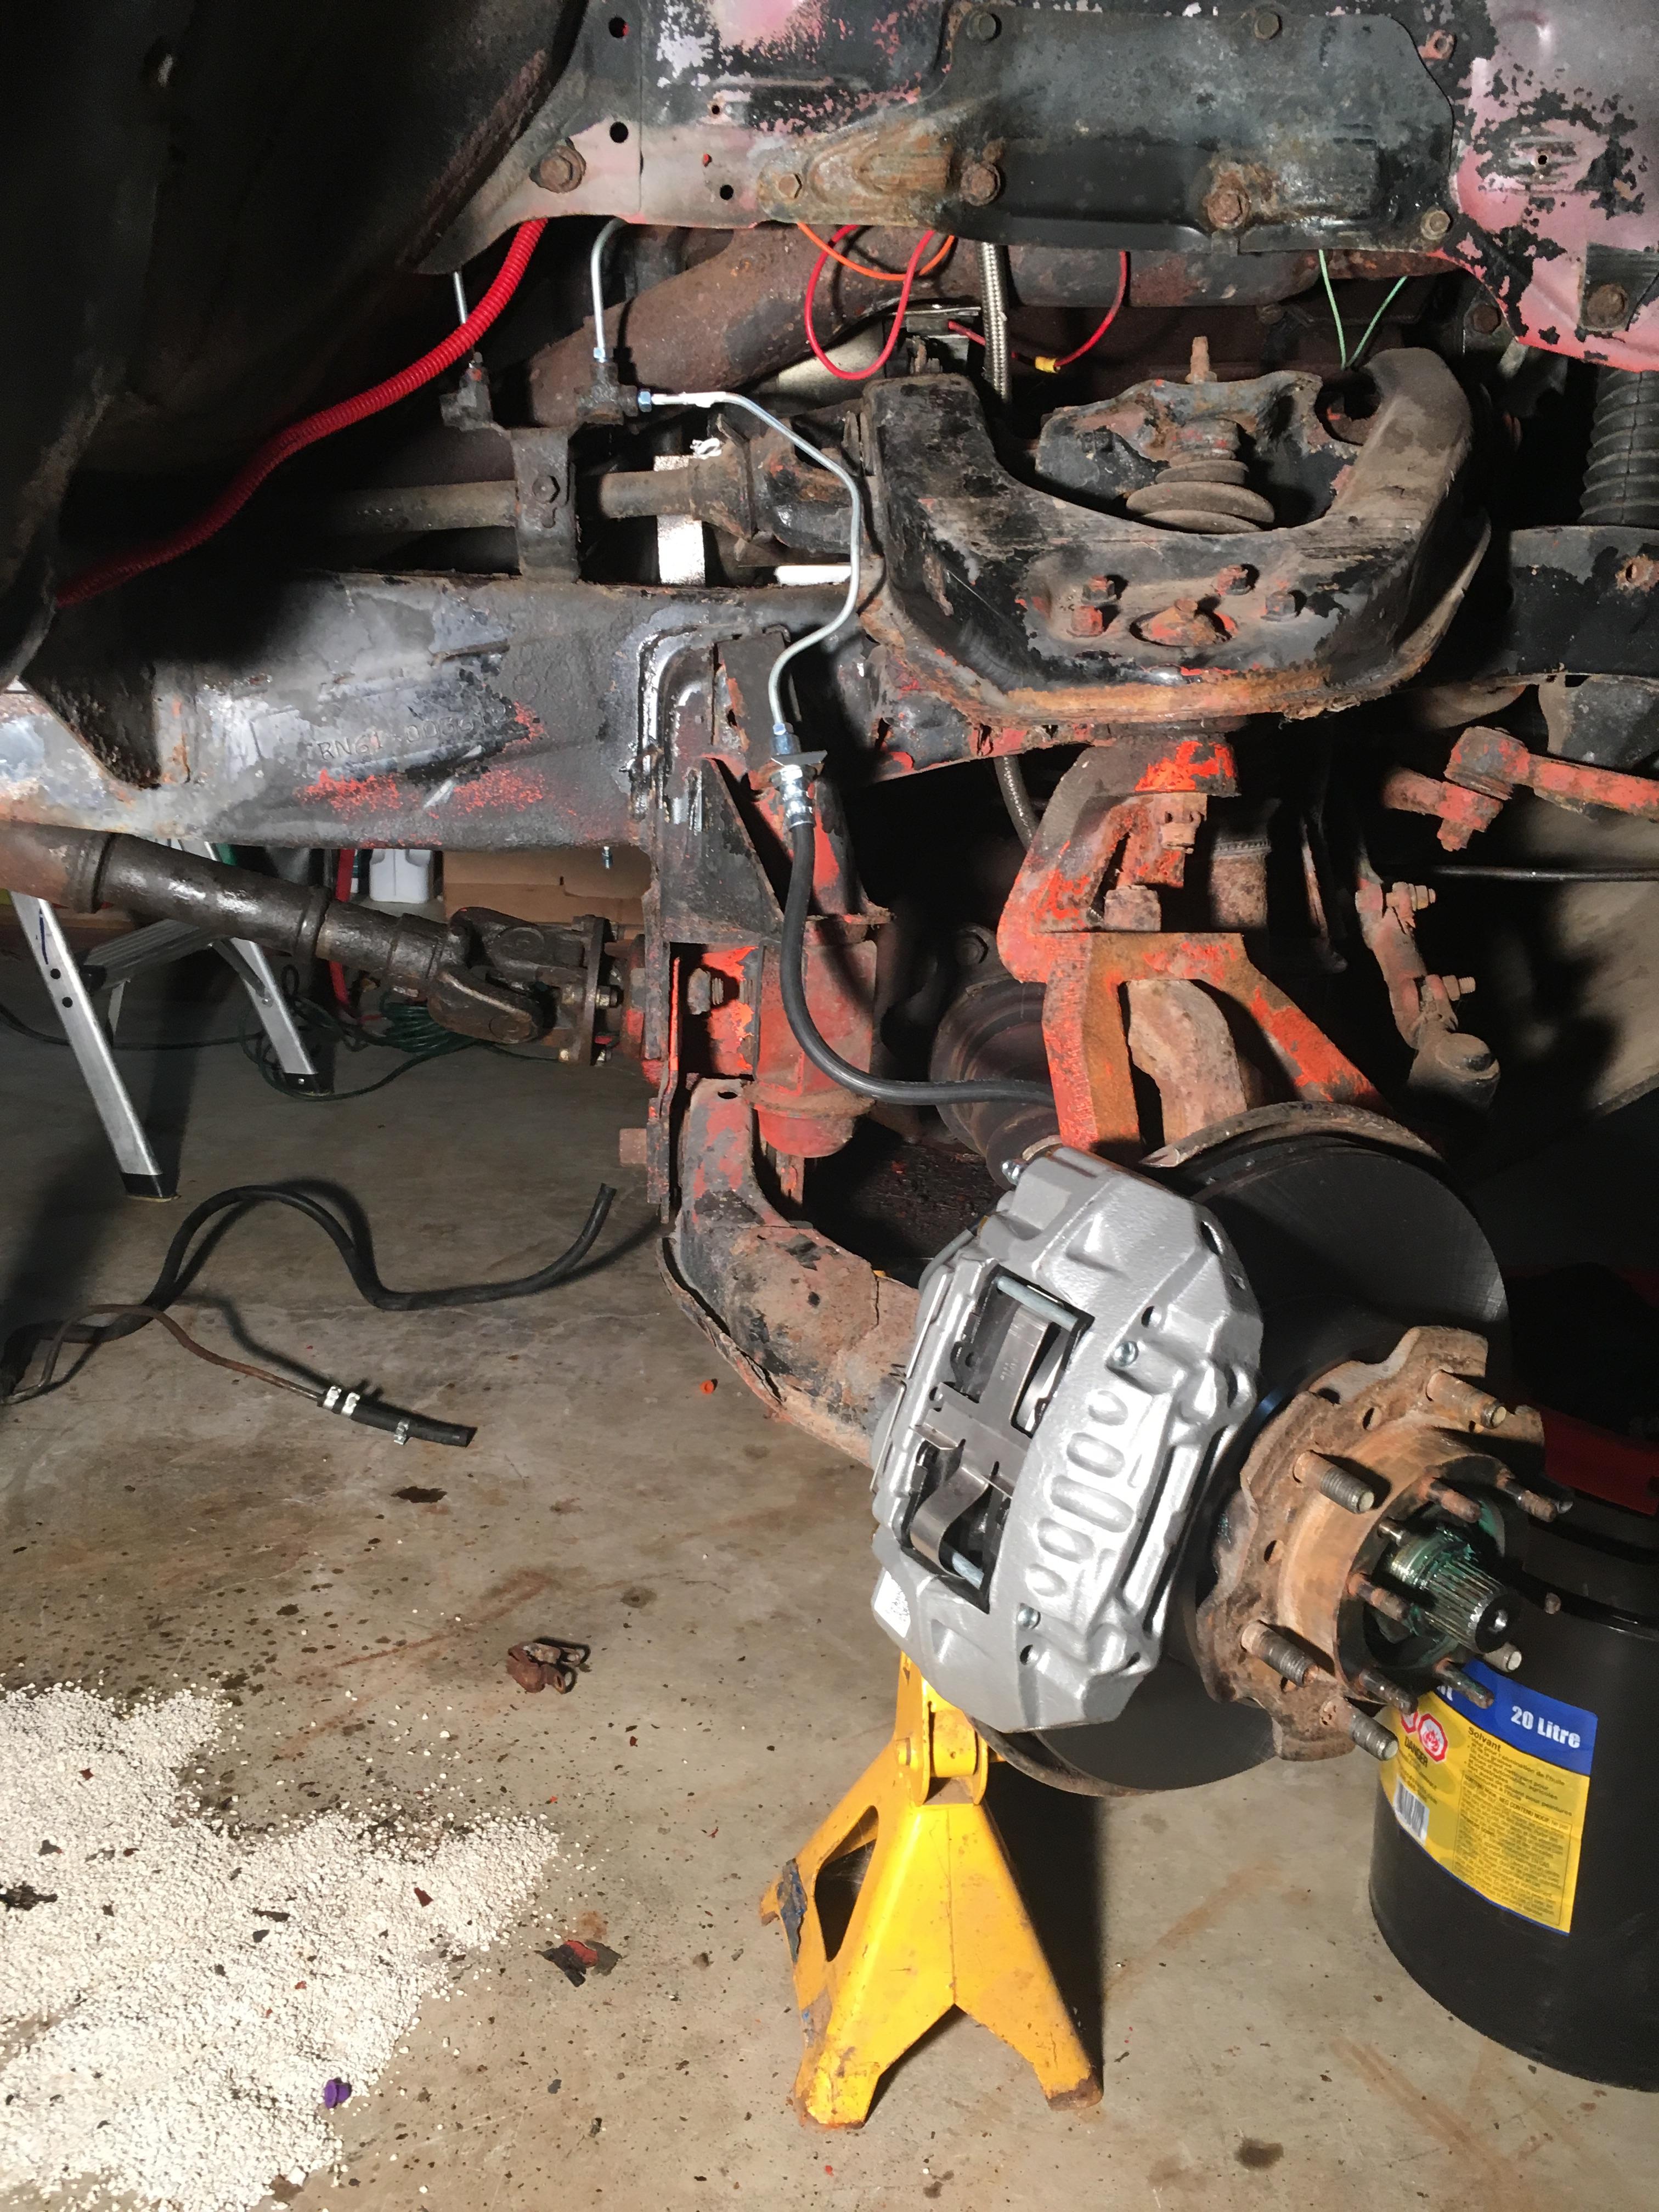
That front end dive means you must be getting tons of bite on the calipers. Can you lock up the 35s yet?
I really dig your rear bumper, clean fit and effective.
toys-n-yotasKeymaster@Toy-Yota I sure hope spring is coming, and that Shelburne gets the memo. I’m tired of shovelling this heavy white shit. 5cm of frozen BS landed overnight.
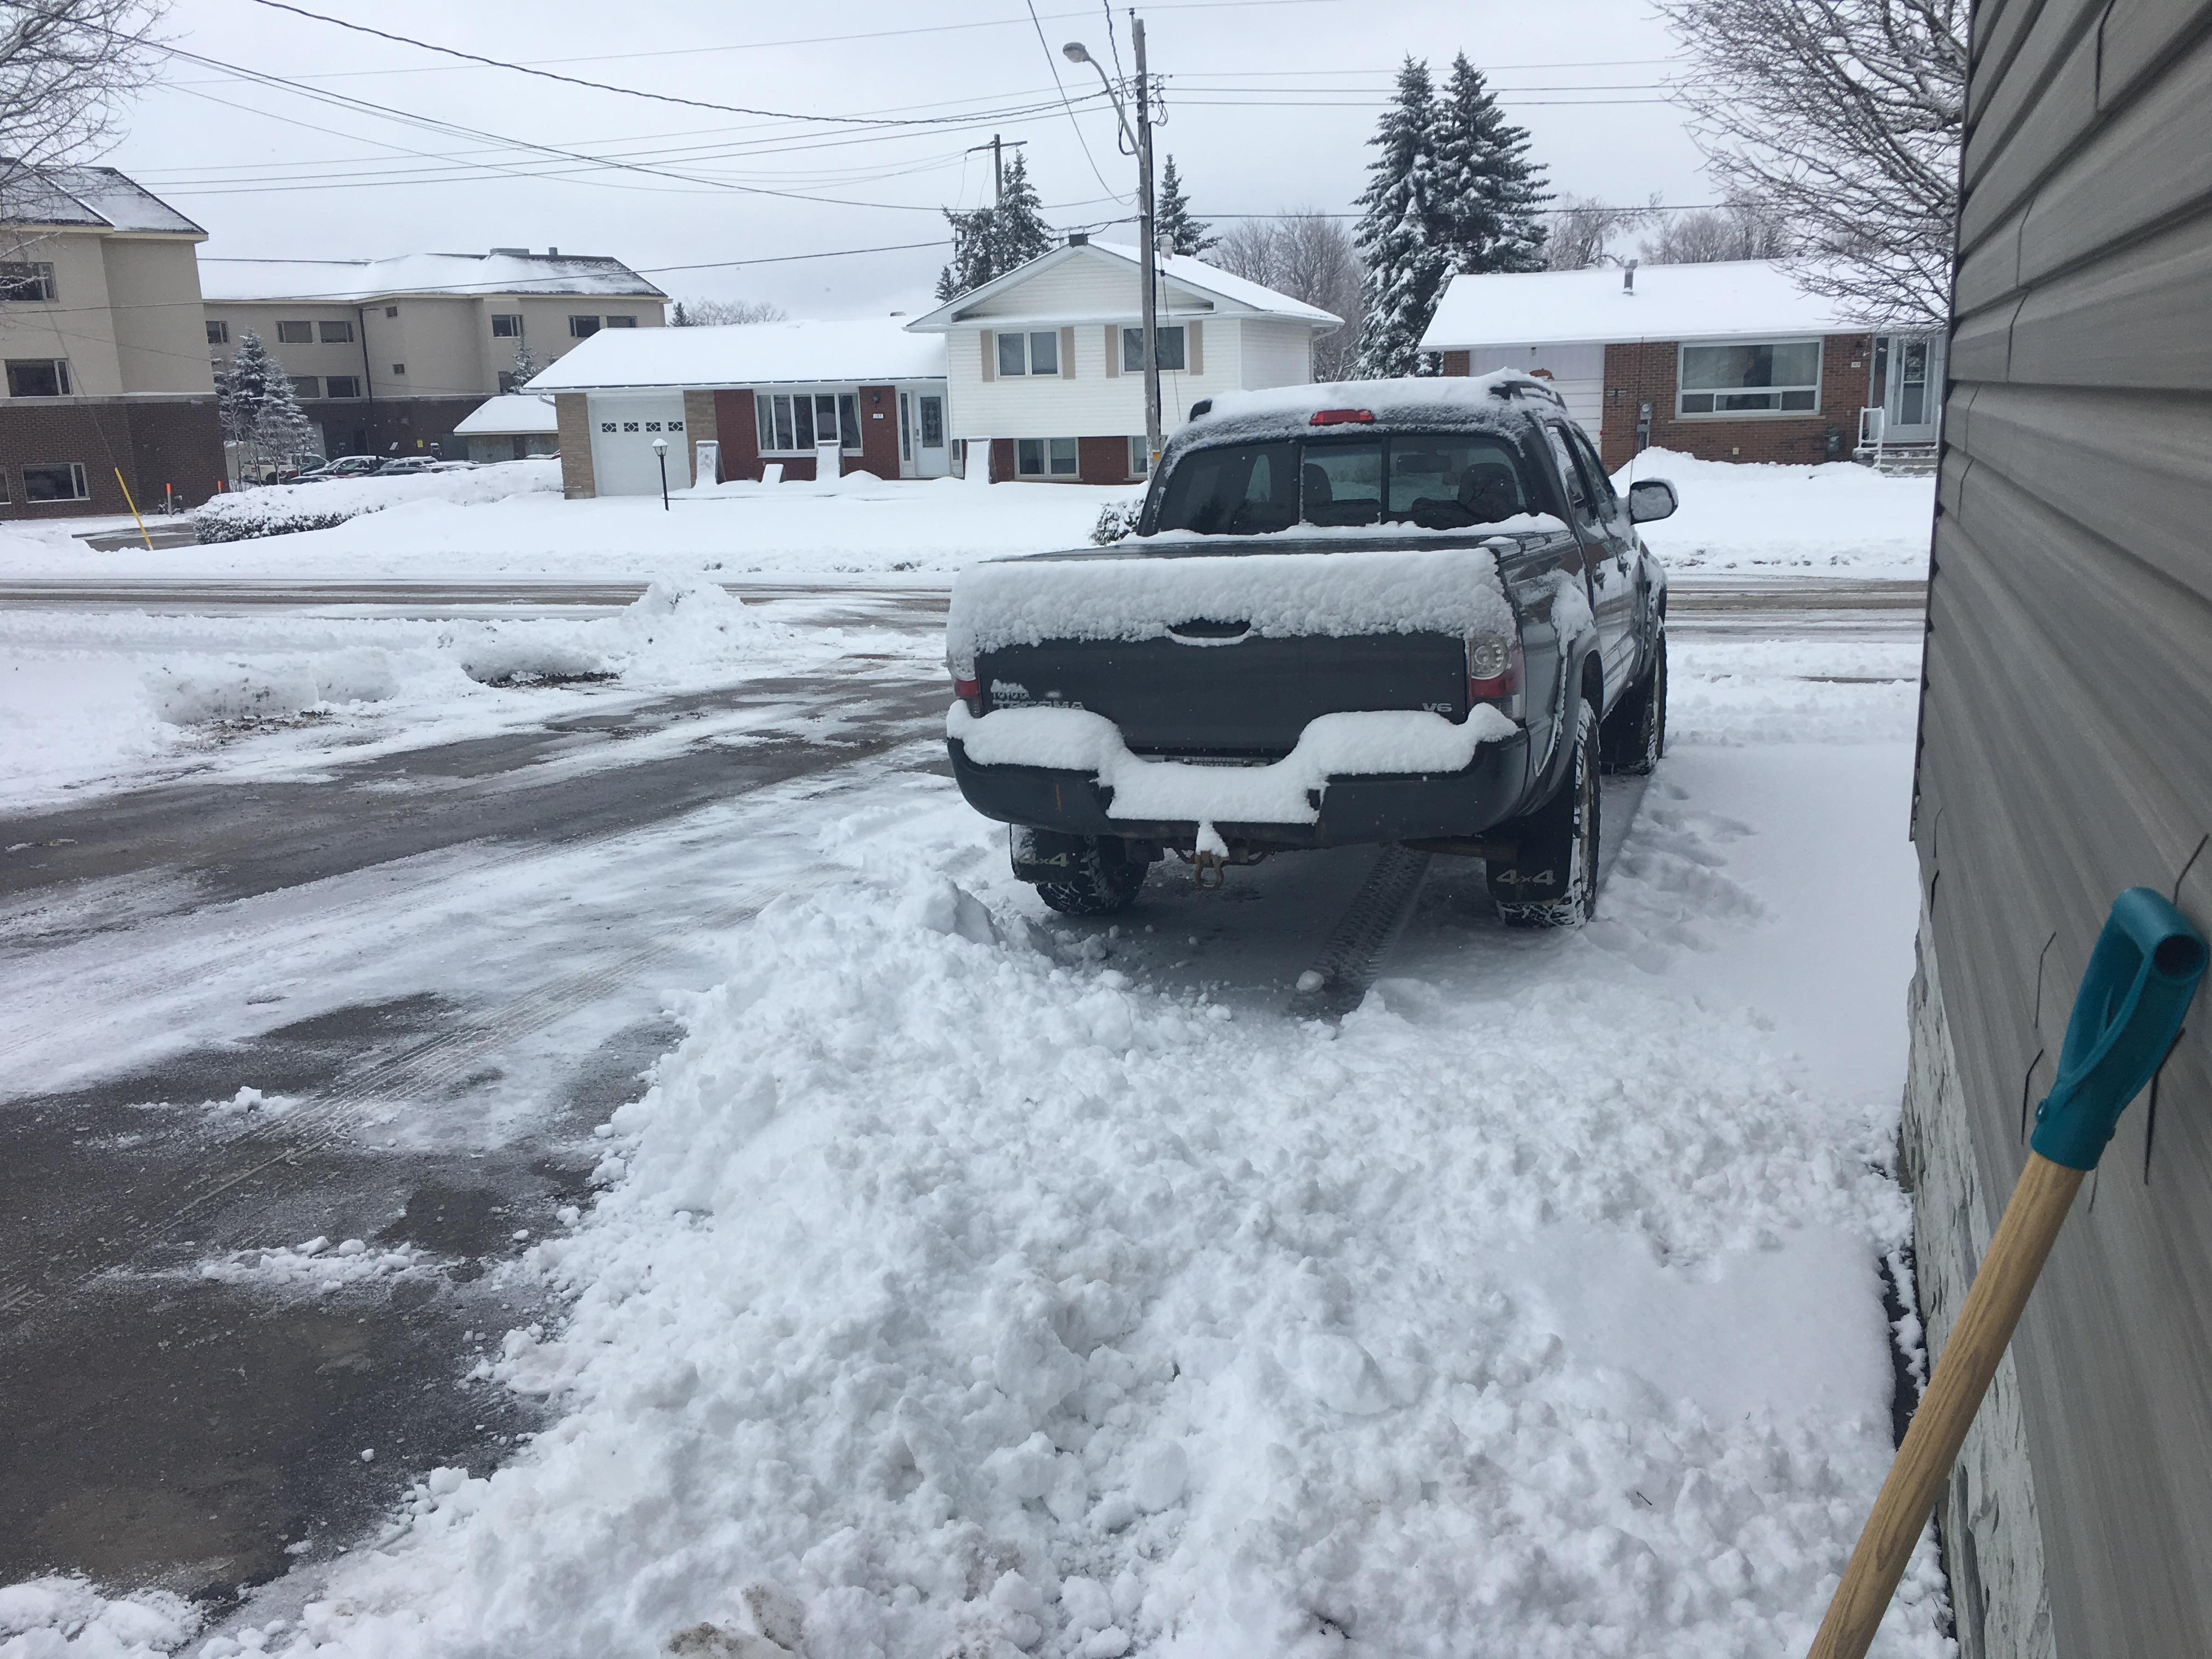
Home from a week in Cuba (not my idea, but getting a tan in March is never a bad thing), so it’s time to hammer down and finish Stage 1 – Road Prep. I picked up my spring scale to verify bearing pre-load the day before we left, so hopefully I have all the parts and tools I need to button up the front axle.
toys-n-yotasKeymasterSad to see toys go, but a Z1000 is mass produced, vs a RatRod which is pure pleasure! Suuper excited to see what joins the fleet next.
What do you have in mind? Got a decade settled on at least?
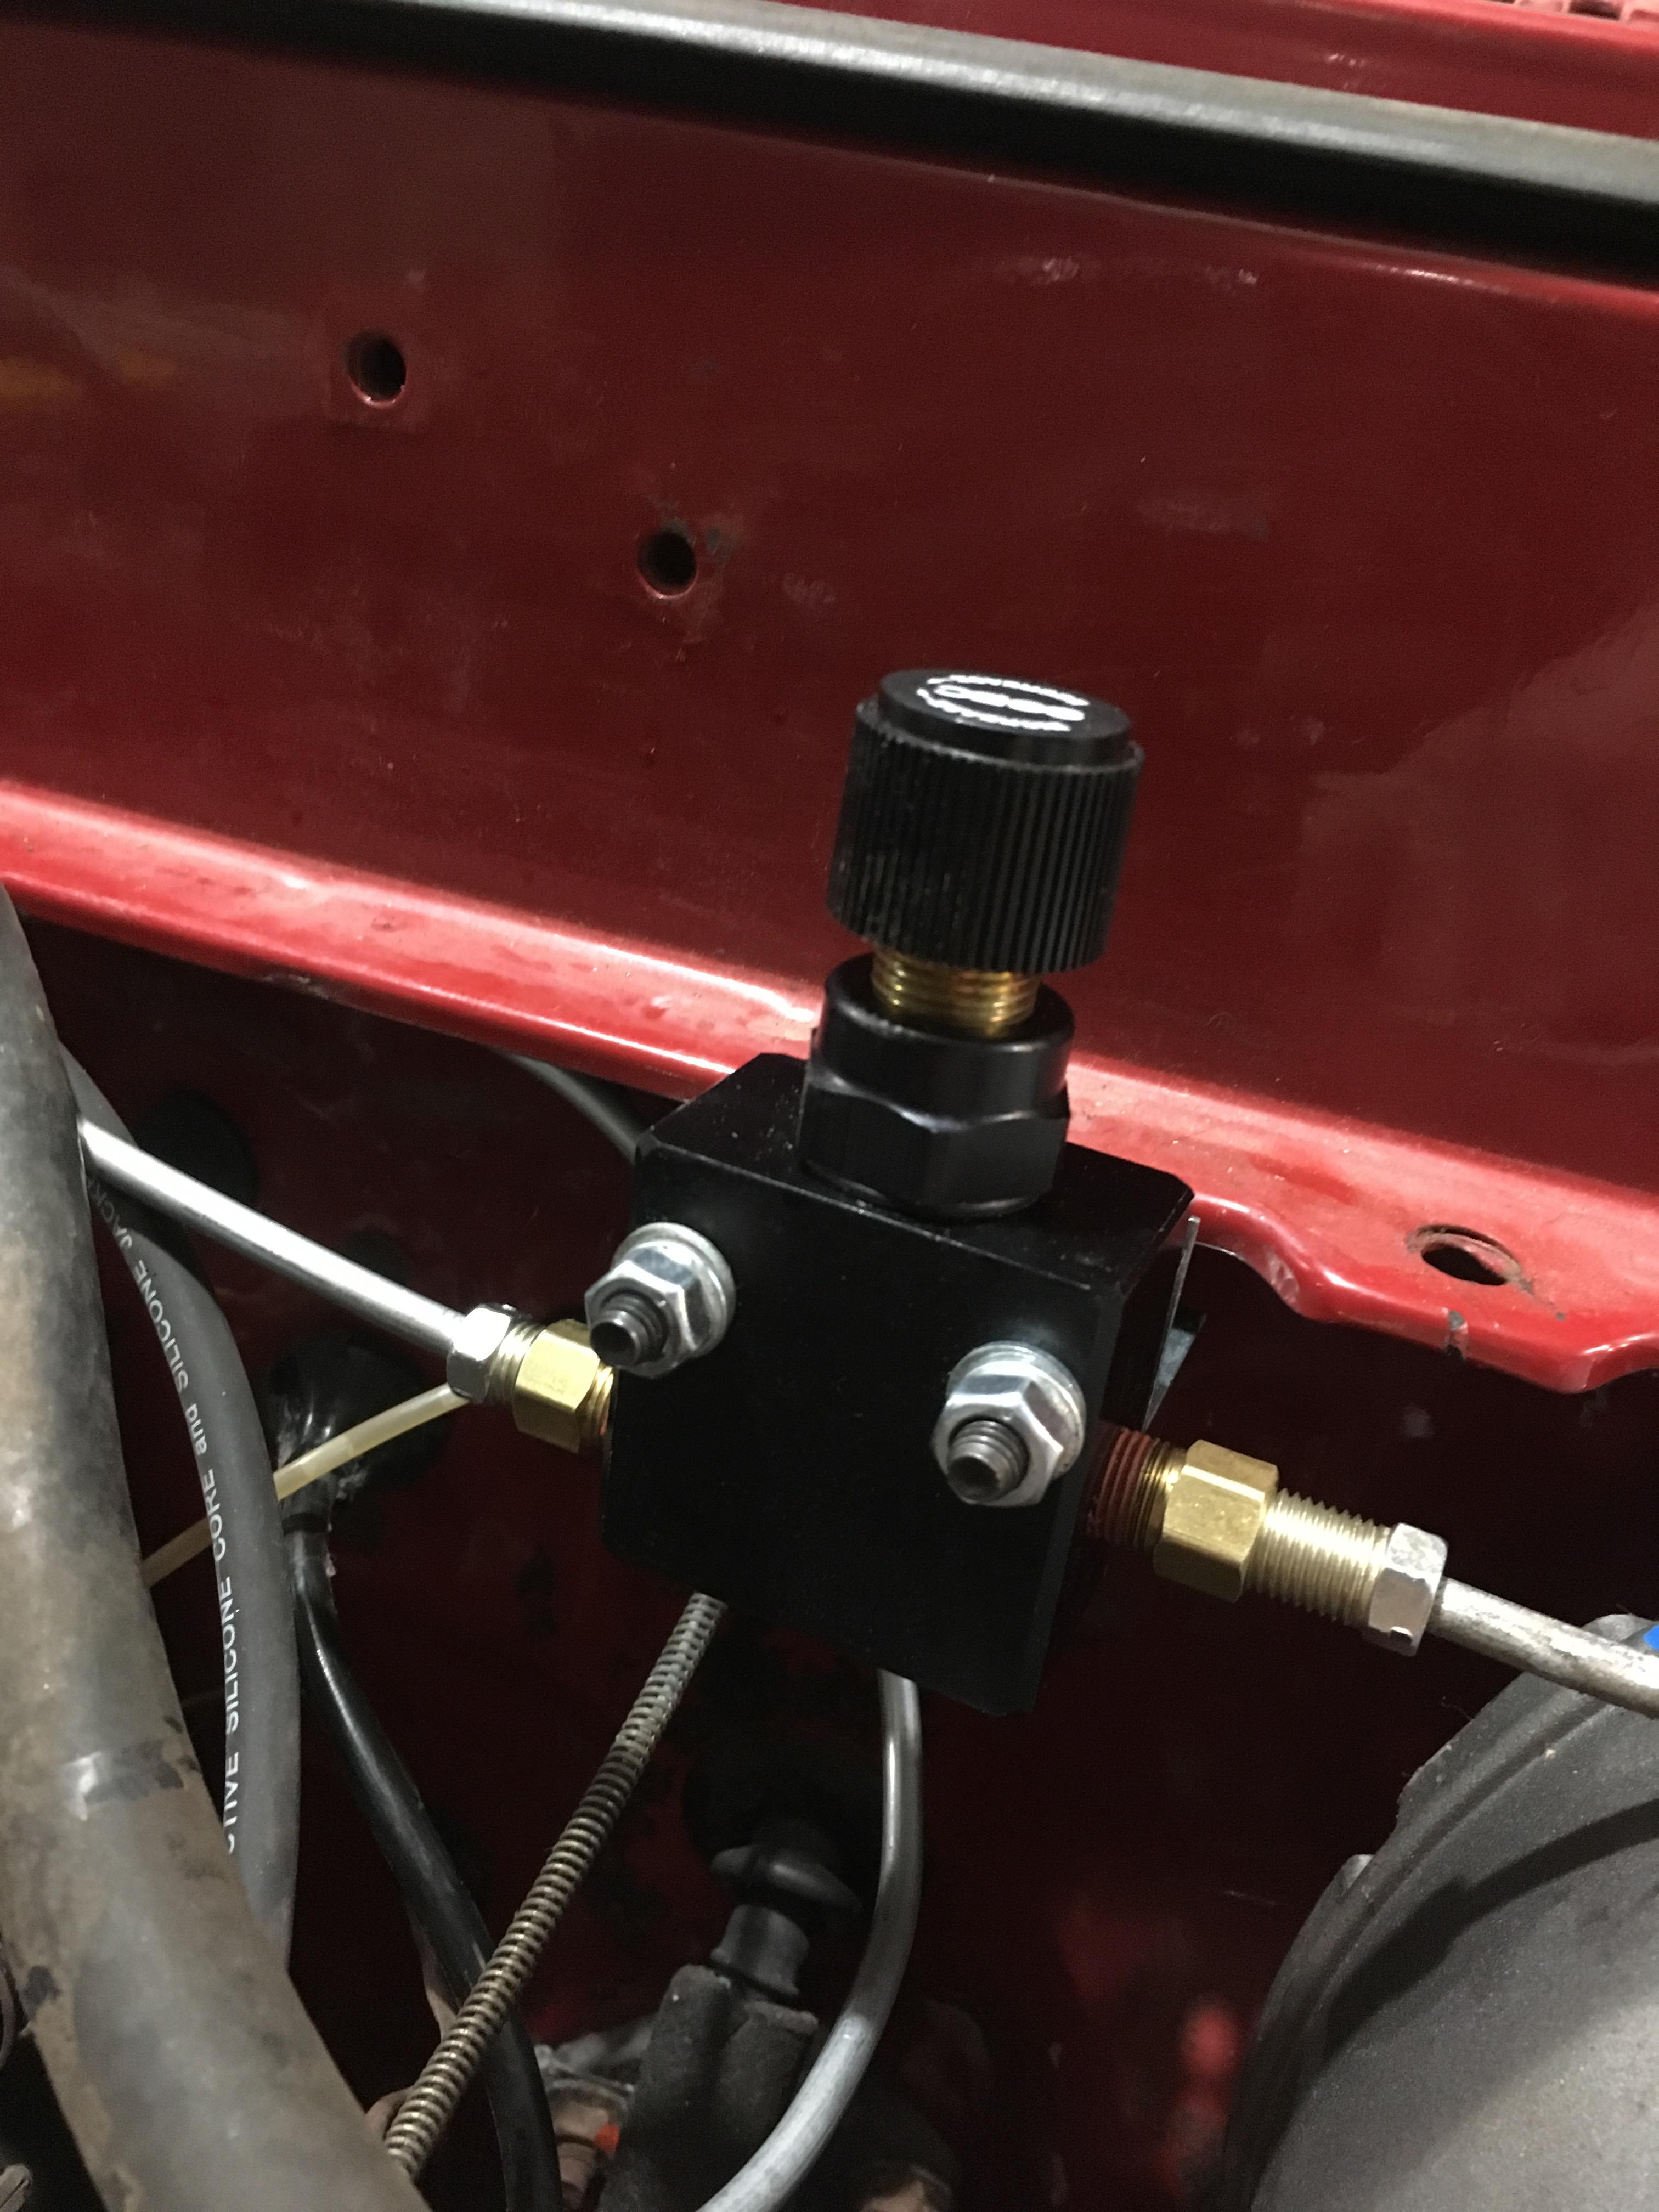
toys-n-yotasKeymasterI put together a bracket off an existing M8 nut on the firewall for the Prop valve. Original mounted to the rear frame rail, but lucky me I found a spot I liked and can easily reach under the hood, just a bit inboard of the hydraulic booster
Tonight I ran more hardlines, pretty much consumed my night. I only have one short stretch, in a dead straight line to do tomorrow. Ran out of line for tonight.
I also freed up the idle speed adjustor screw that was too stuck to adjust in the summer. I’ve been giving it a spray of PB Blaster once in a while since September, I guess tonight was my lucky night.
Also found troubles with the throttle cable / kick-down plate, it is rotating on application of Wide Open Throttle. When it rotates, the throttle cable gets a bit of slack in it, and isnt taut enough to hit WOT a second time. So that won’t do. Still pondering an anti-rotation solution.
To the parts store tomorrow…1 brake line, 1 big jug of DOT3, 1 air filter for chev. Still waiting patiently for my fishing scale to arrive in-store.
toys-n-yotasKeymasterAnother successful day in the shop yesterday, really feels like I’m picking up momentum, as my “Due Date” arrives.
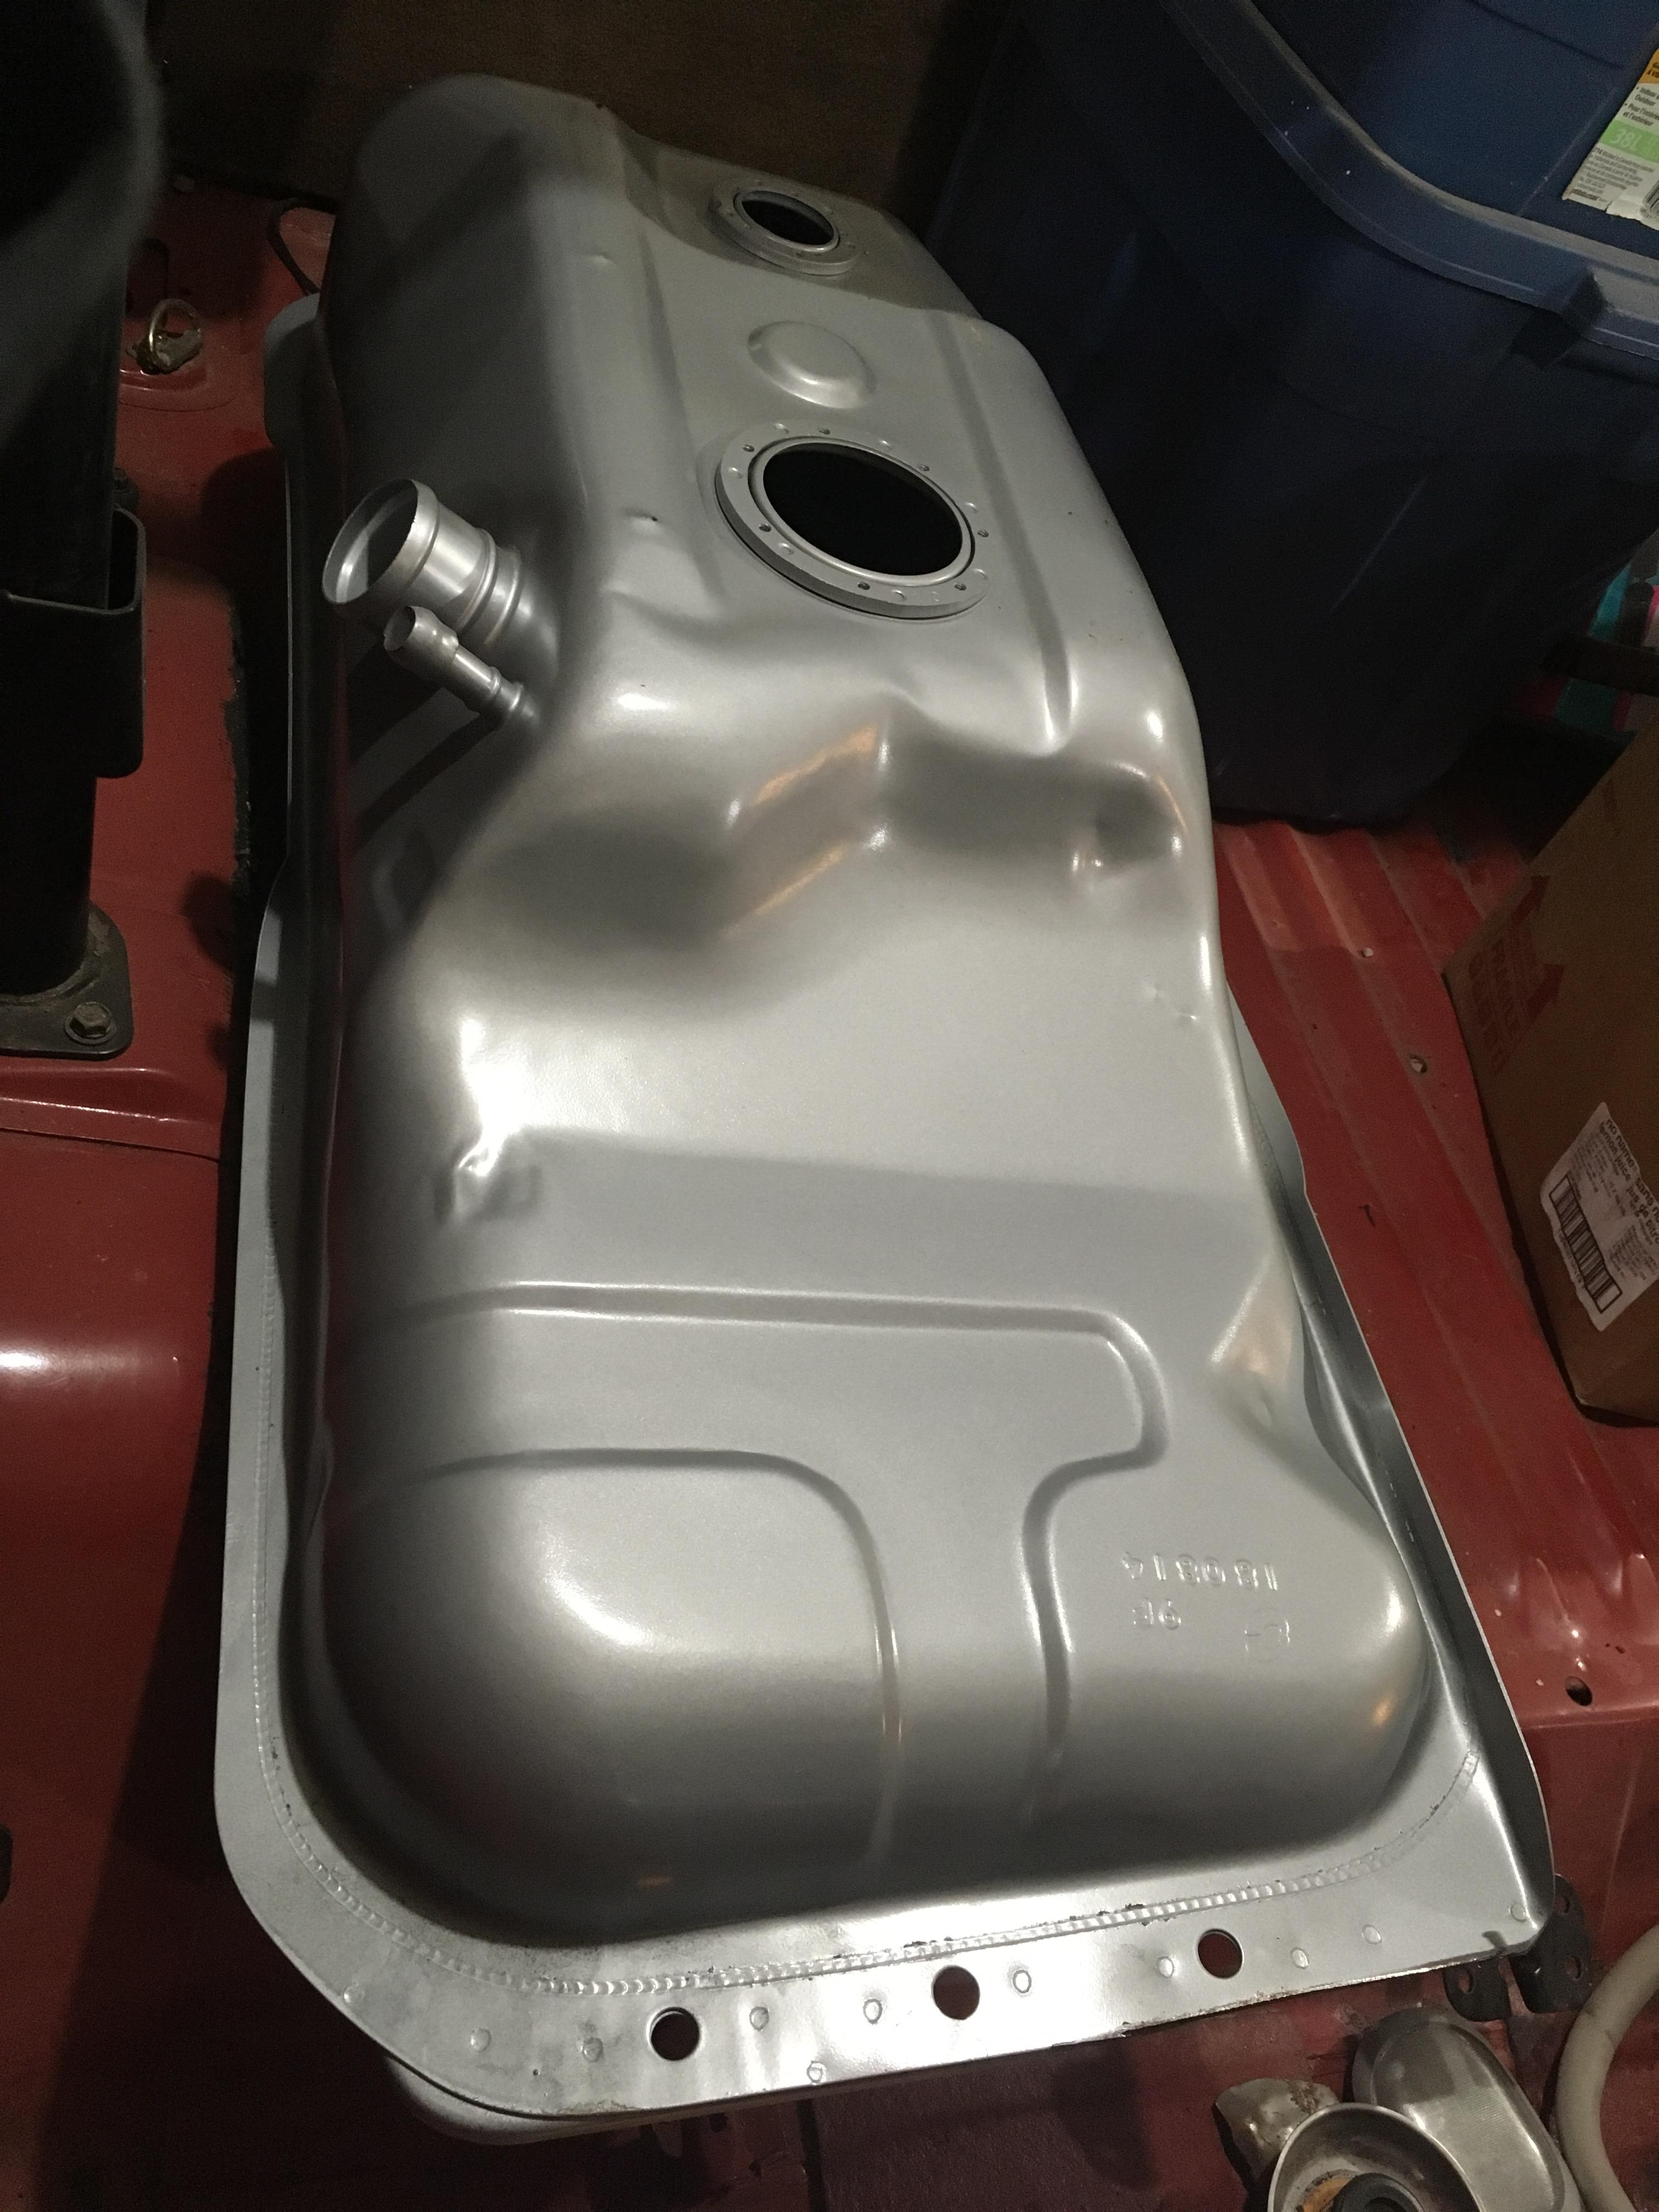
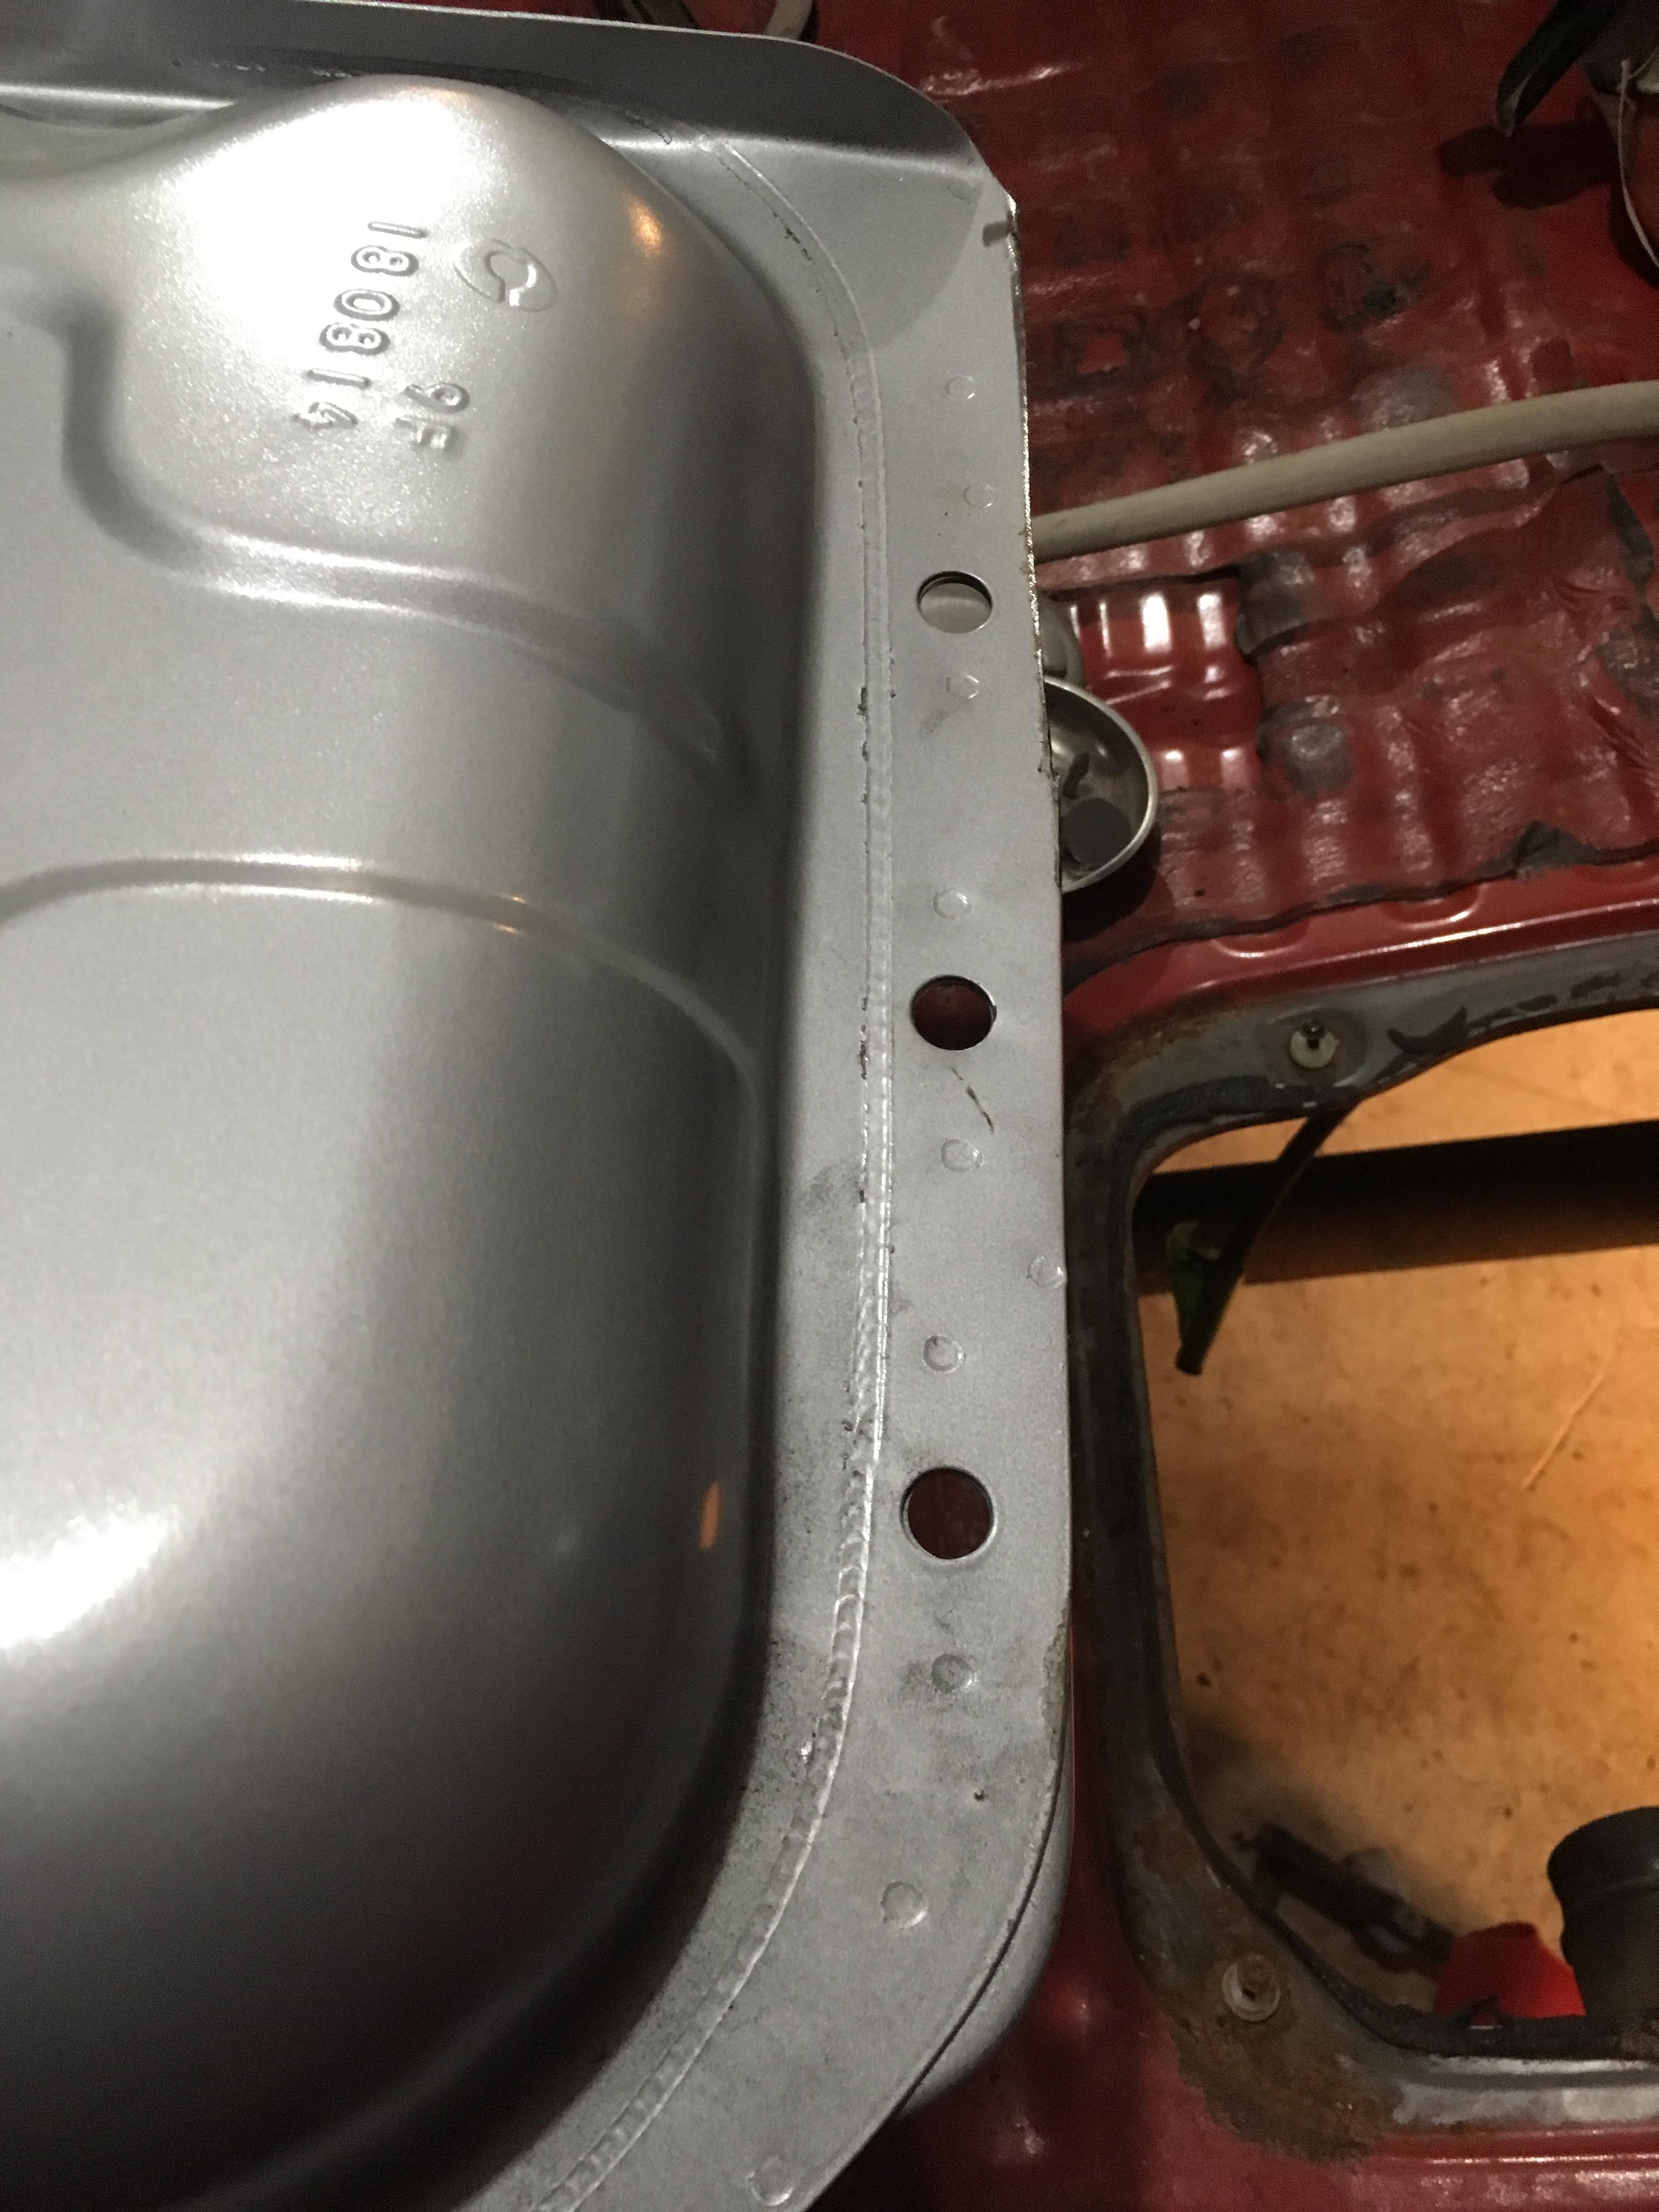
I unboxed my new gas tank, and only had to trim a small flange off to get it to fit. Pretty nerve wracking taking a cutoff wheel to a brand new tank, but I measured 378 times prior, and the cut looked decent afterwards. Fits like a charm now.
I pulled all old hard and flex lines for fuel and brakes. I mounted, bent and flared hard lines for the front brakes. The only outstanding hard lines to replace are between the master cylinder and Manual proportioning valve on the rear circuit, and the hard line which runs the length of the frame rail to the rear flex hose (or where LSPV used to be).
I replaced all the rubber fuel lines under the hood, and have a couple short runs from the tank to the Passenger side fender to run hard lines.
I still have to mount the manual prop valve under the hood, hope to do a better job fabricating the bracket than I did the fuel tank retainer 😉
 toys-n-yotasKeymaster
@Slick_Yota what non-shop projects are occupying your free time this winter? Gotta put some hours on that Mastercraft mig welder for me, let me know how it performs. My Mastercraft sandblasting cabinet is working well, just way more dusty externally than I was hoping. Cone spring time I’ll likely relocate it outdoors before I use it, won’t have to concern myself so much with dust control.
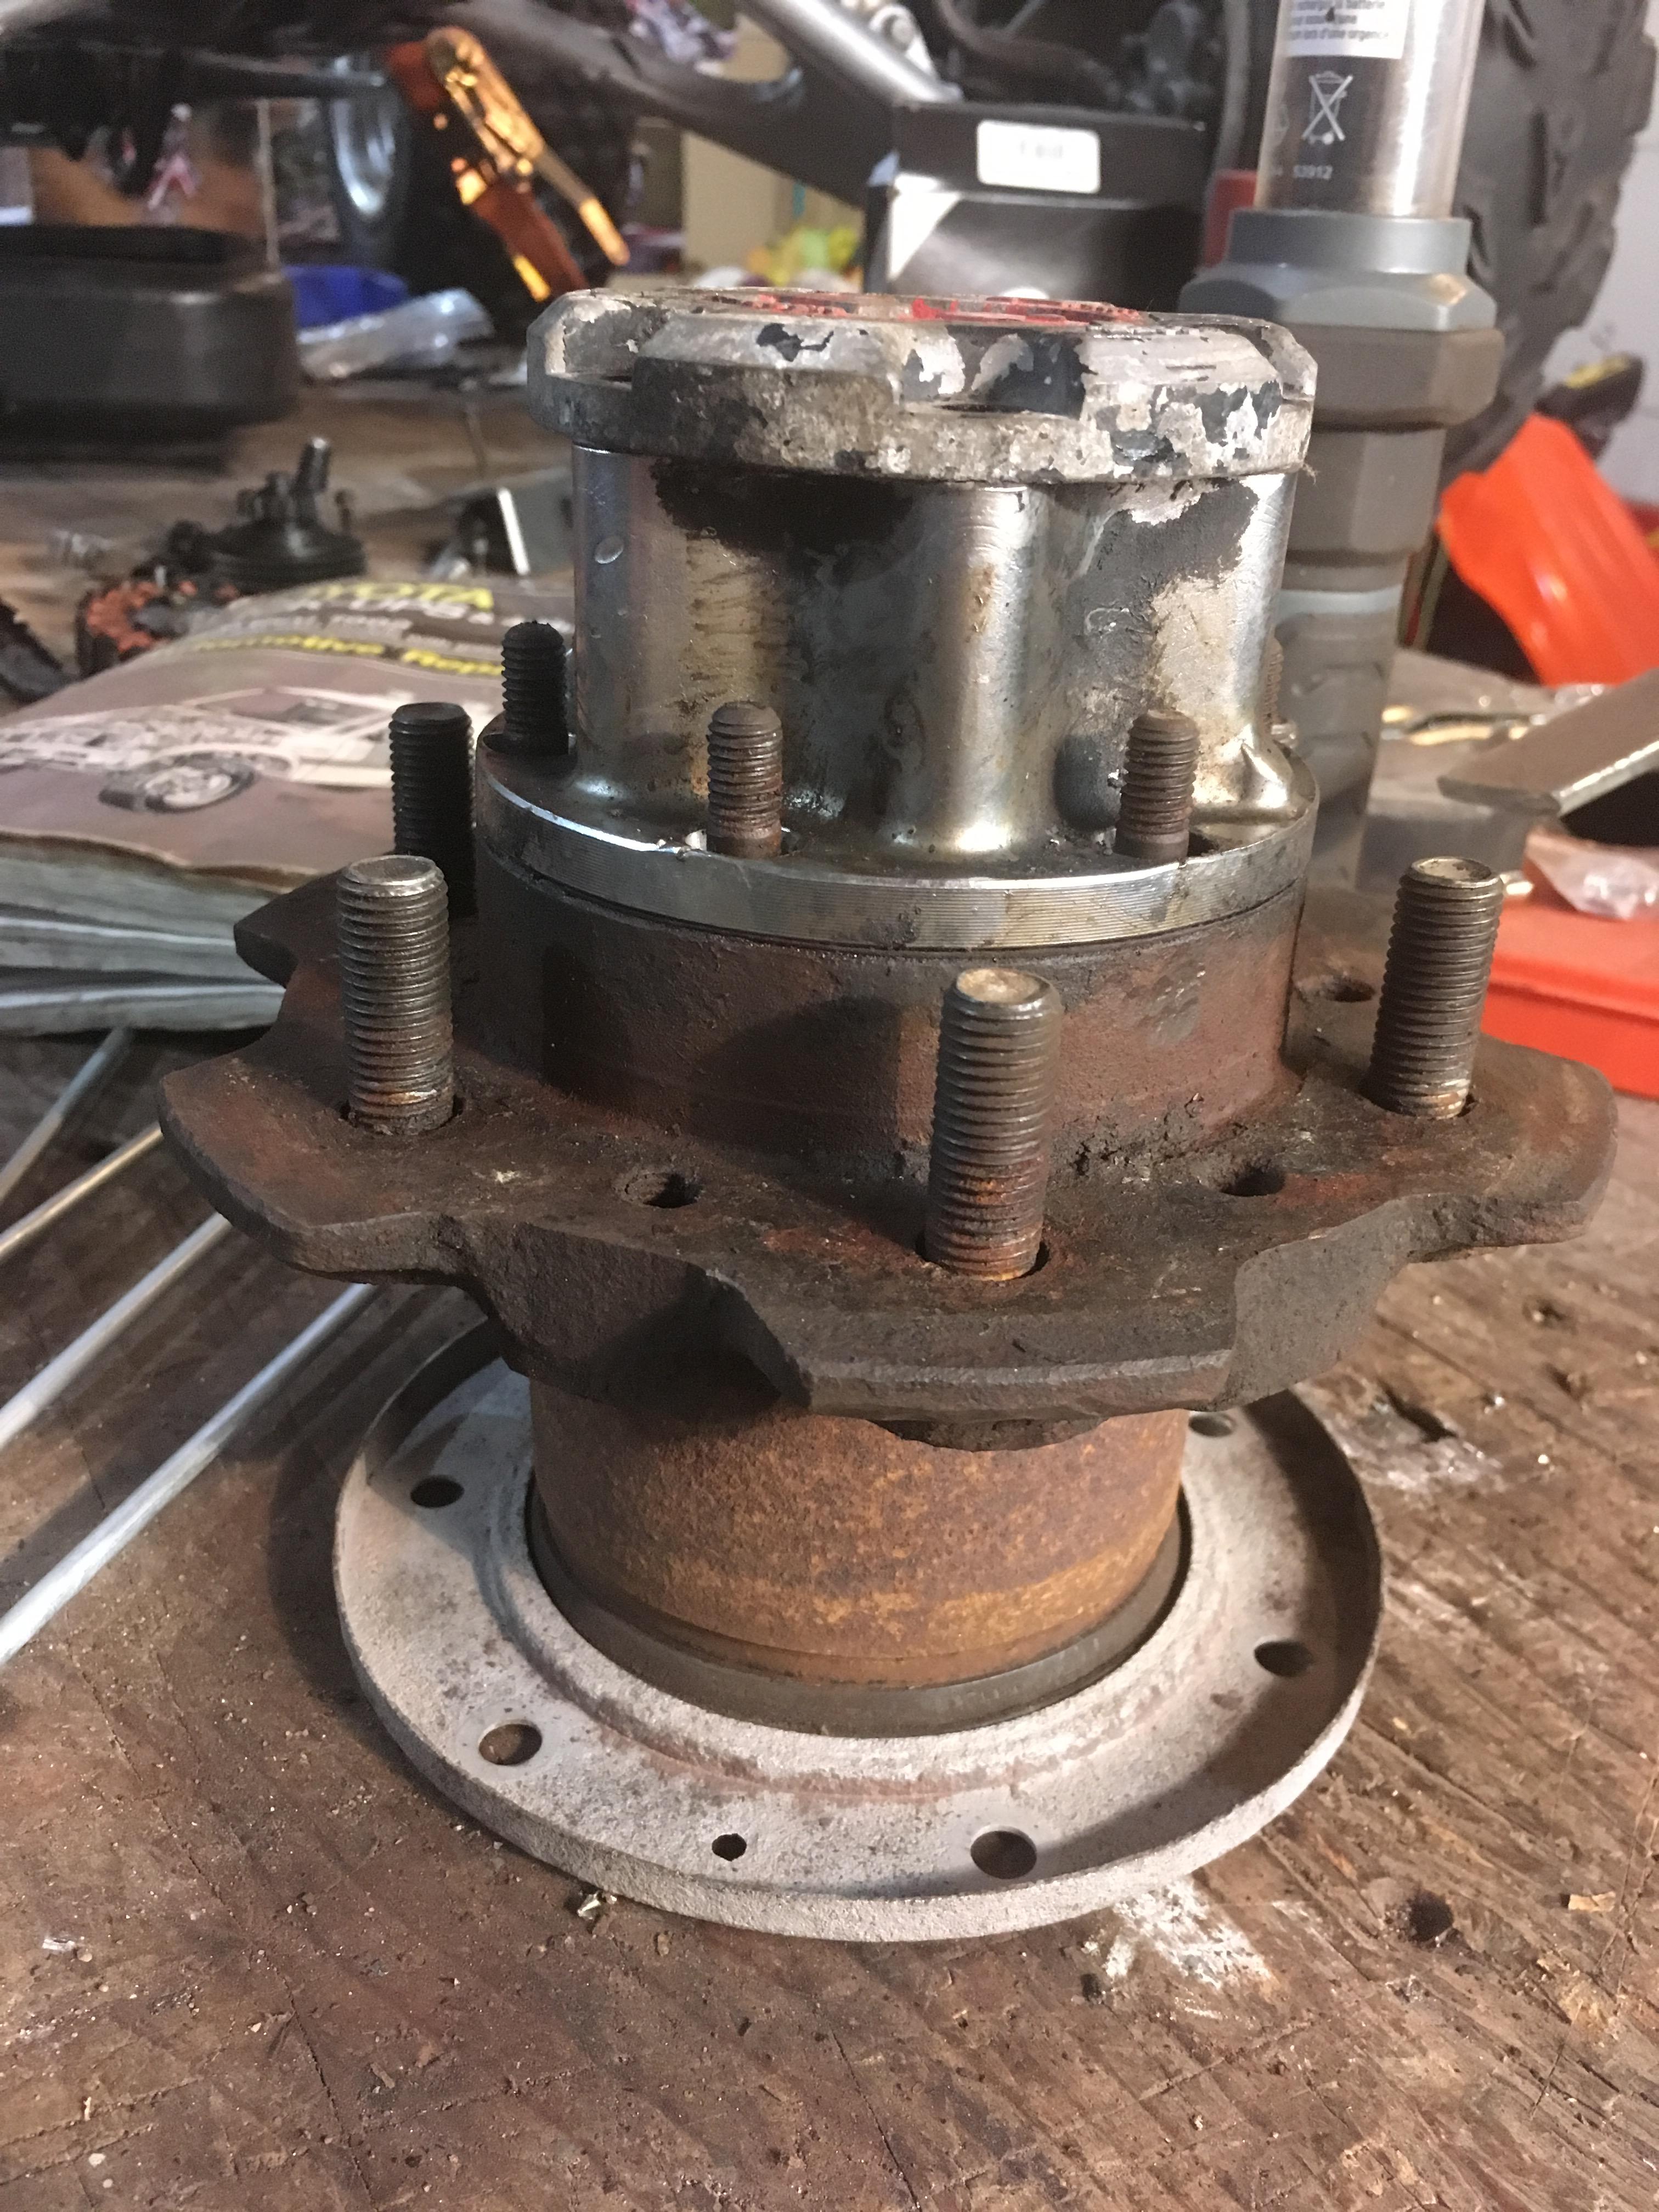
Yesterday in the shop I tore apart the passenger side front wheel hub, removed the rotor, trimmed the dust shield and put everything through the parts washer. Those friggen cone washers are always the worst part of a hub teardown in my opinion. Progress has halted while everything drips dry of varsol, and the “fish spribg scale” arrives @ HomeHardware so I can set the bearing drag preload properly (for the first time in my life). I also gotta grab brake line retainer clips locally so I can finish installing brake hard lines.
No pictures to upload today. Phone died from the cold in the shop.
toys-n-yotasKeymasterMade some progress today with my buddy James providing some assistance while Sam and the girls were out at the Science Centre.
James swapped tires over on his Mazda before he trades it in next week. Once he was setup with proper tools, I started on Redee.
Today I bent up and flared the hardline to FINISH up the brakes on the rear axle. I noticed today that I’m missing the “spring clips” which retain the flex lines to the mounts, so I’ll try to pick some up locally tomorrow.
After that, I moved to the front axle and began reassembly of the drivers side brakes and hub. I took a slice off the dust shield, and reinstalled it with the new inner wheel seal with a smear of grease in the lip. Repacked the inner and outer wheel bearing, replaced inner hub seal, and tried to set the bearing pre-load without a spring scale. I’ll buy a fishing scale to verify my preset before I snug everything down for good.
Lastly, for good meaure I temp set the hub, threw on a 33” tire and made sure the rims didnt interfere with the new bigger brakes. As expected, all fits well. So my wheel/tire dilemma is settled. Replace dry rotten 33×12.5×15 Geolander A/T, with some freah 33×12.5×15 Duratracs. Now to wait for sale pricing.


Another successful day in the shop.
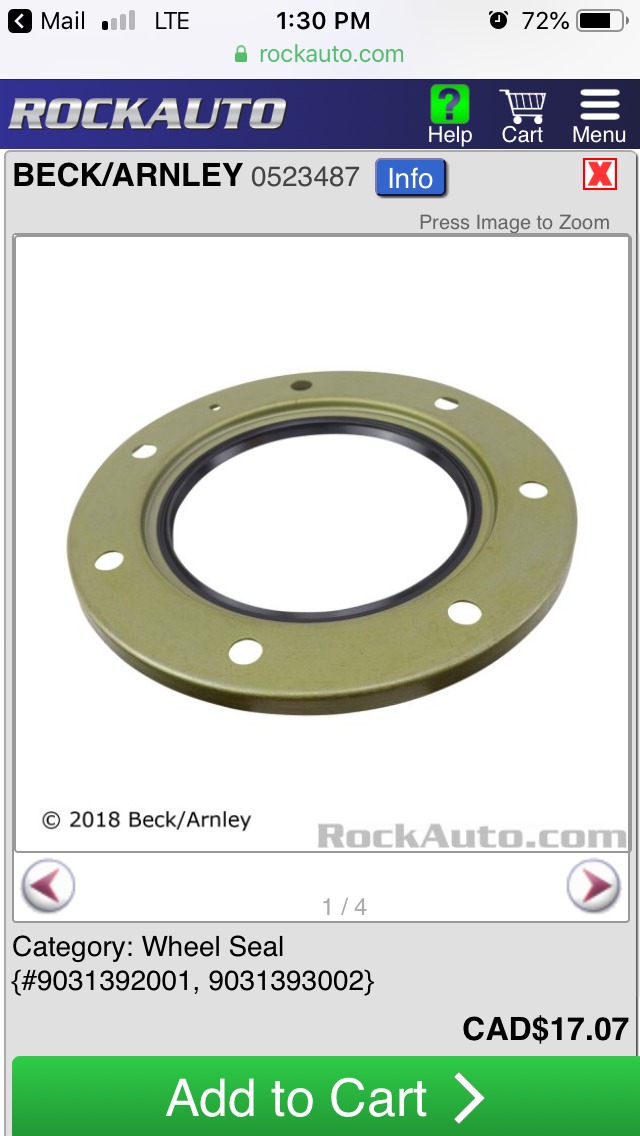
toys-n-yotasKeymasterMr Fedex dropped off my wheel seals, brake assembly may resume once again.
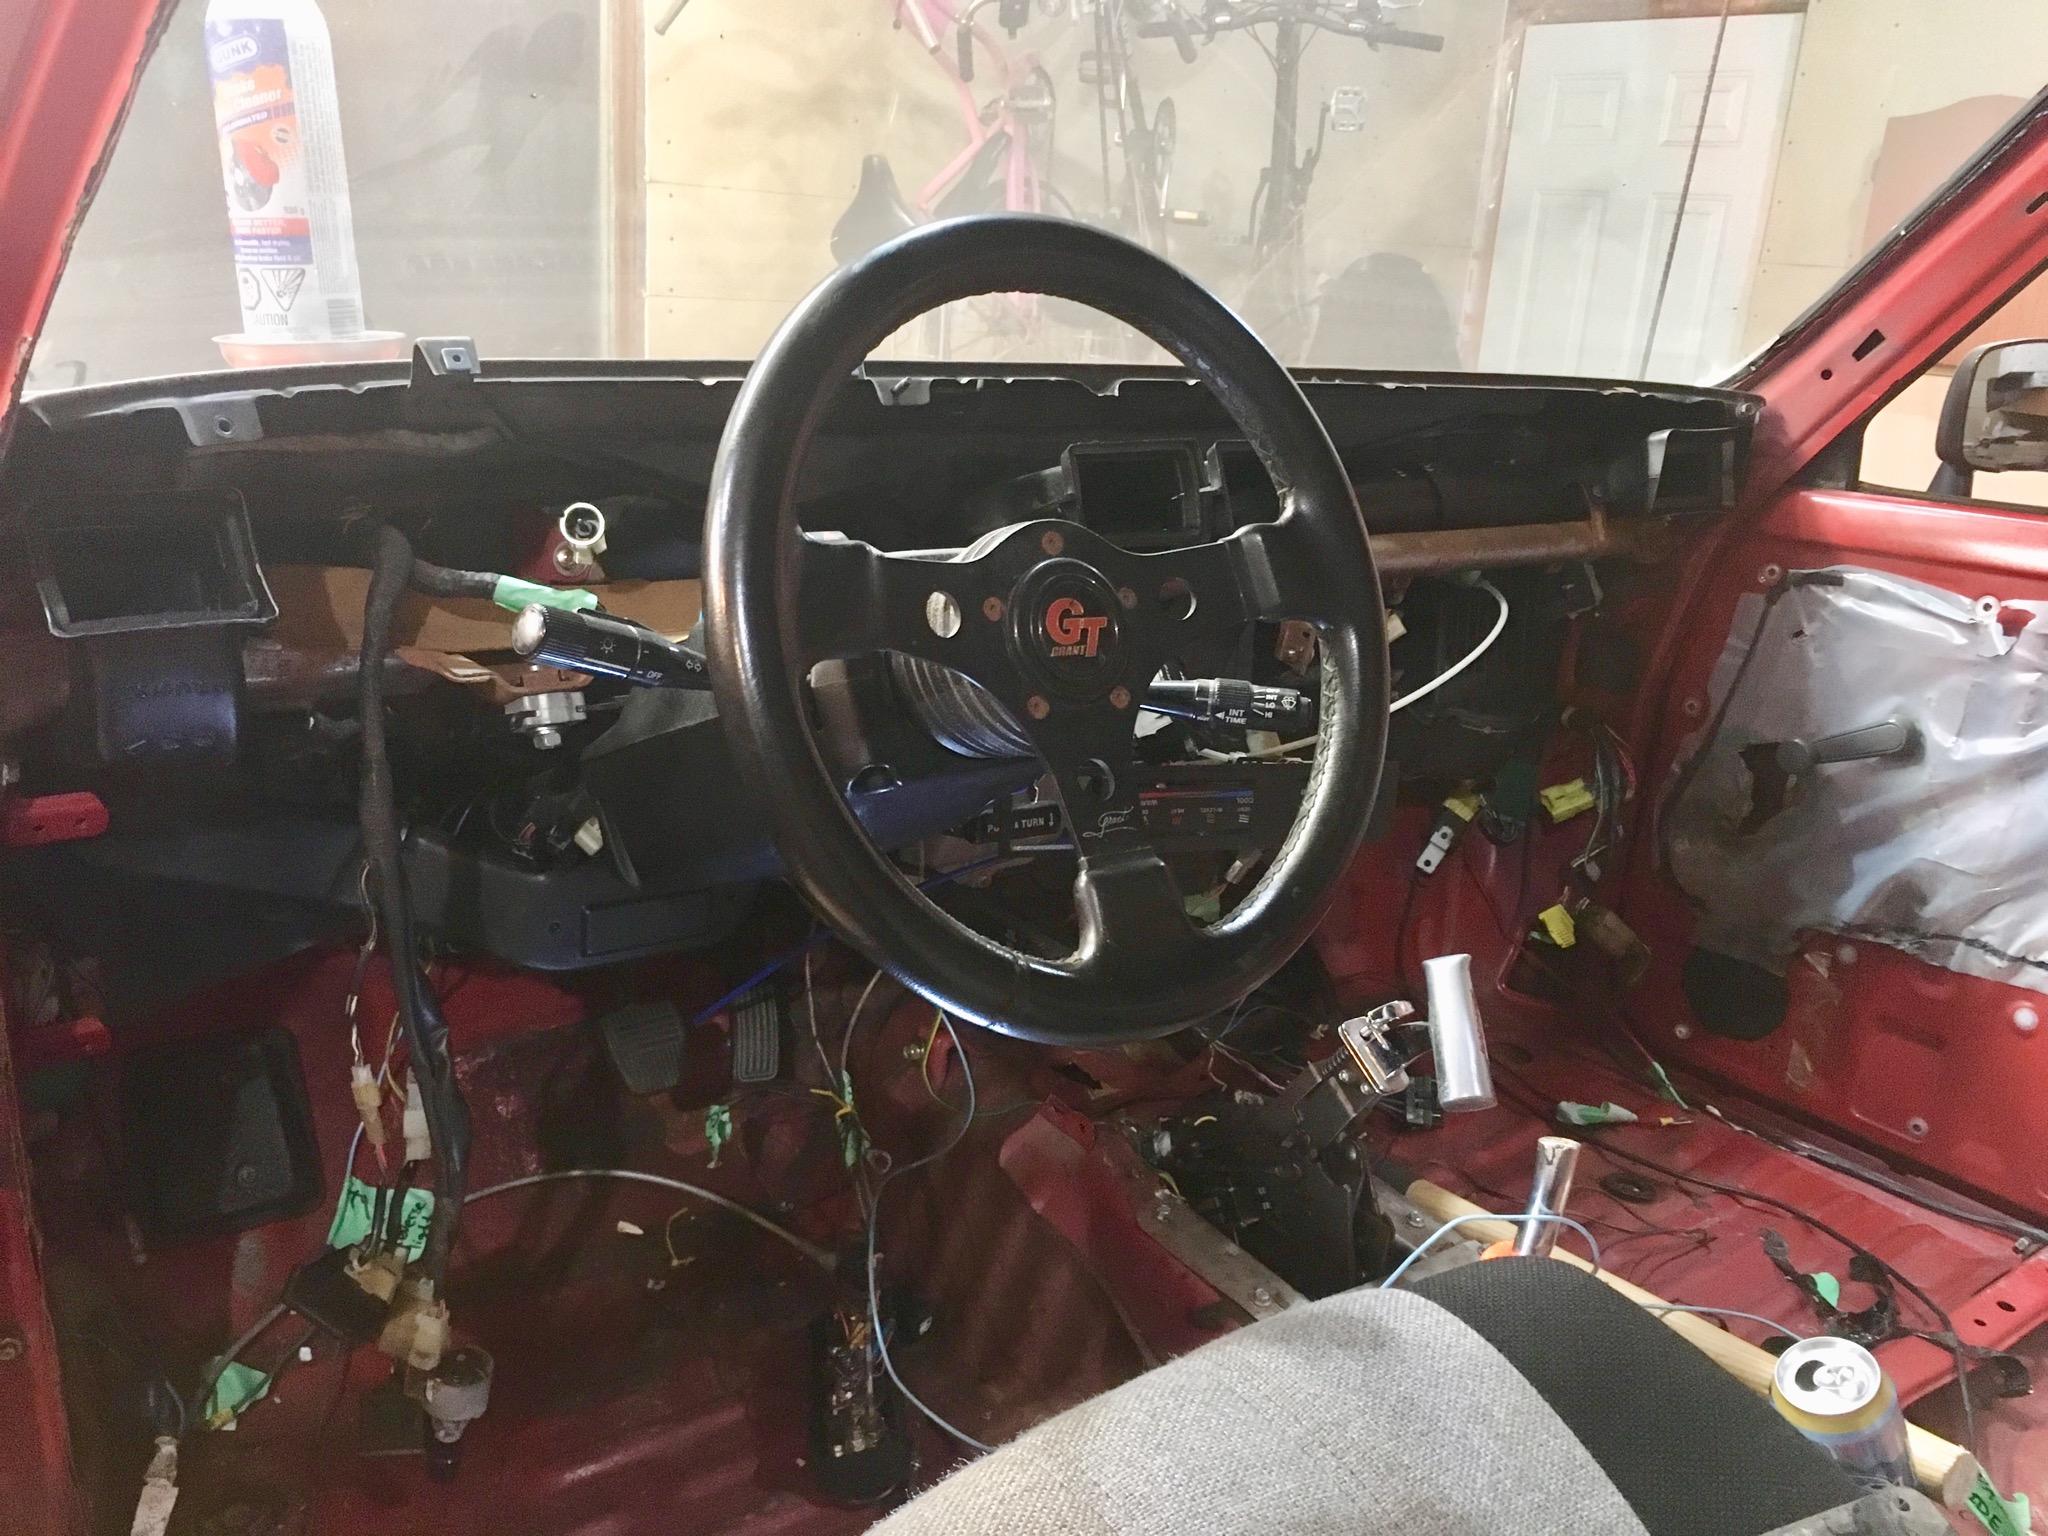
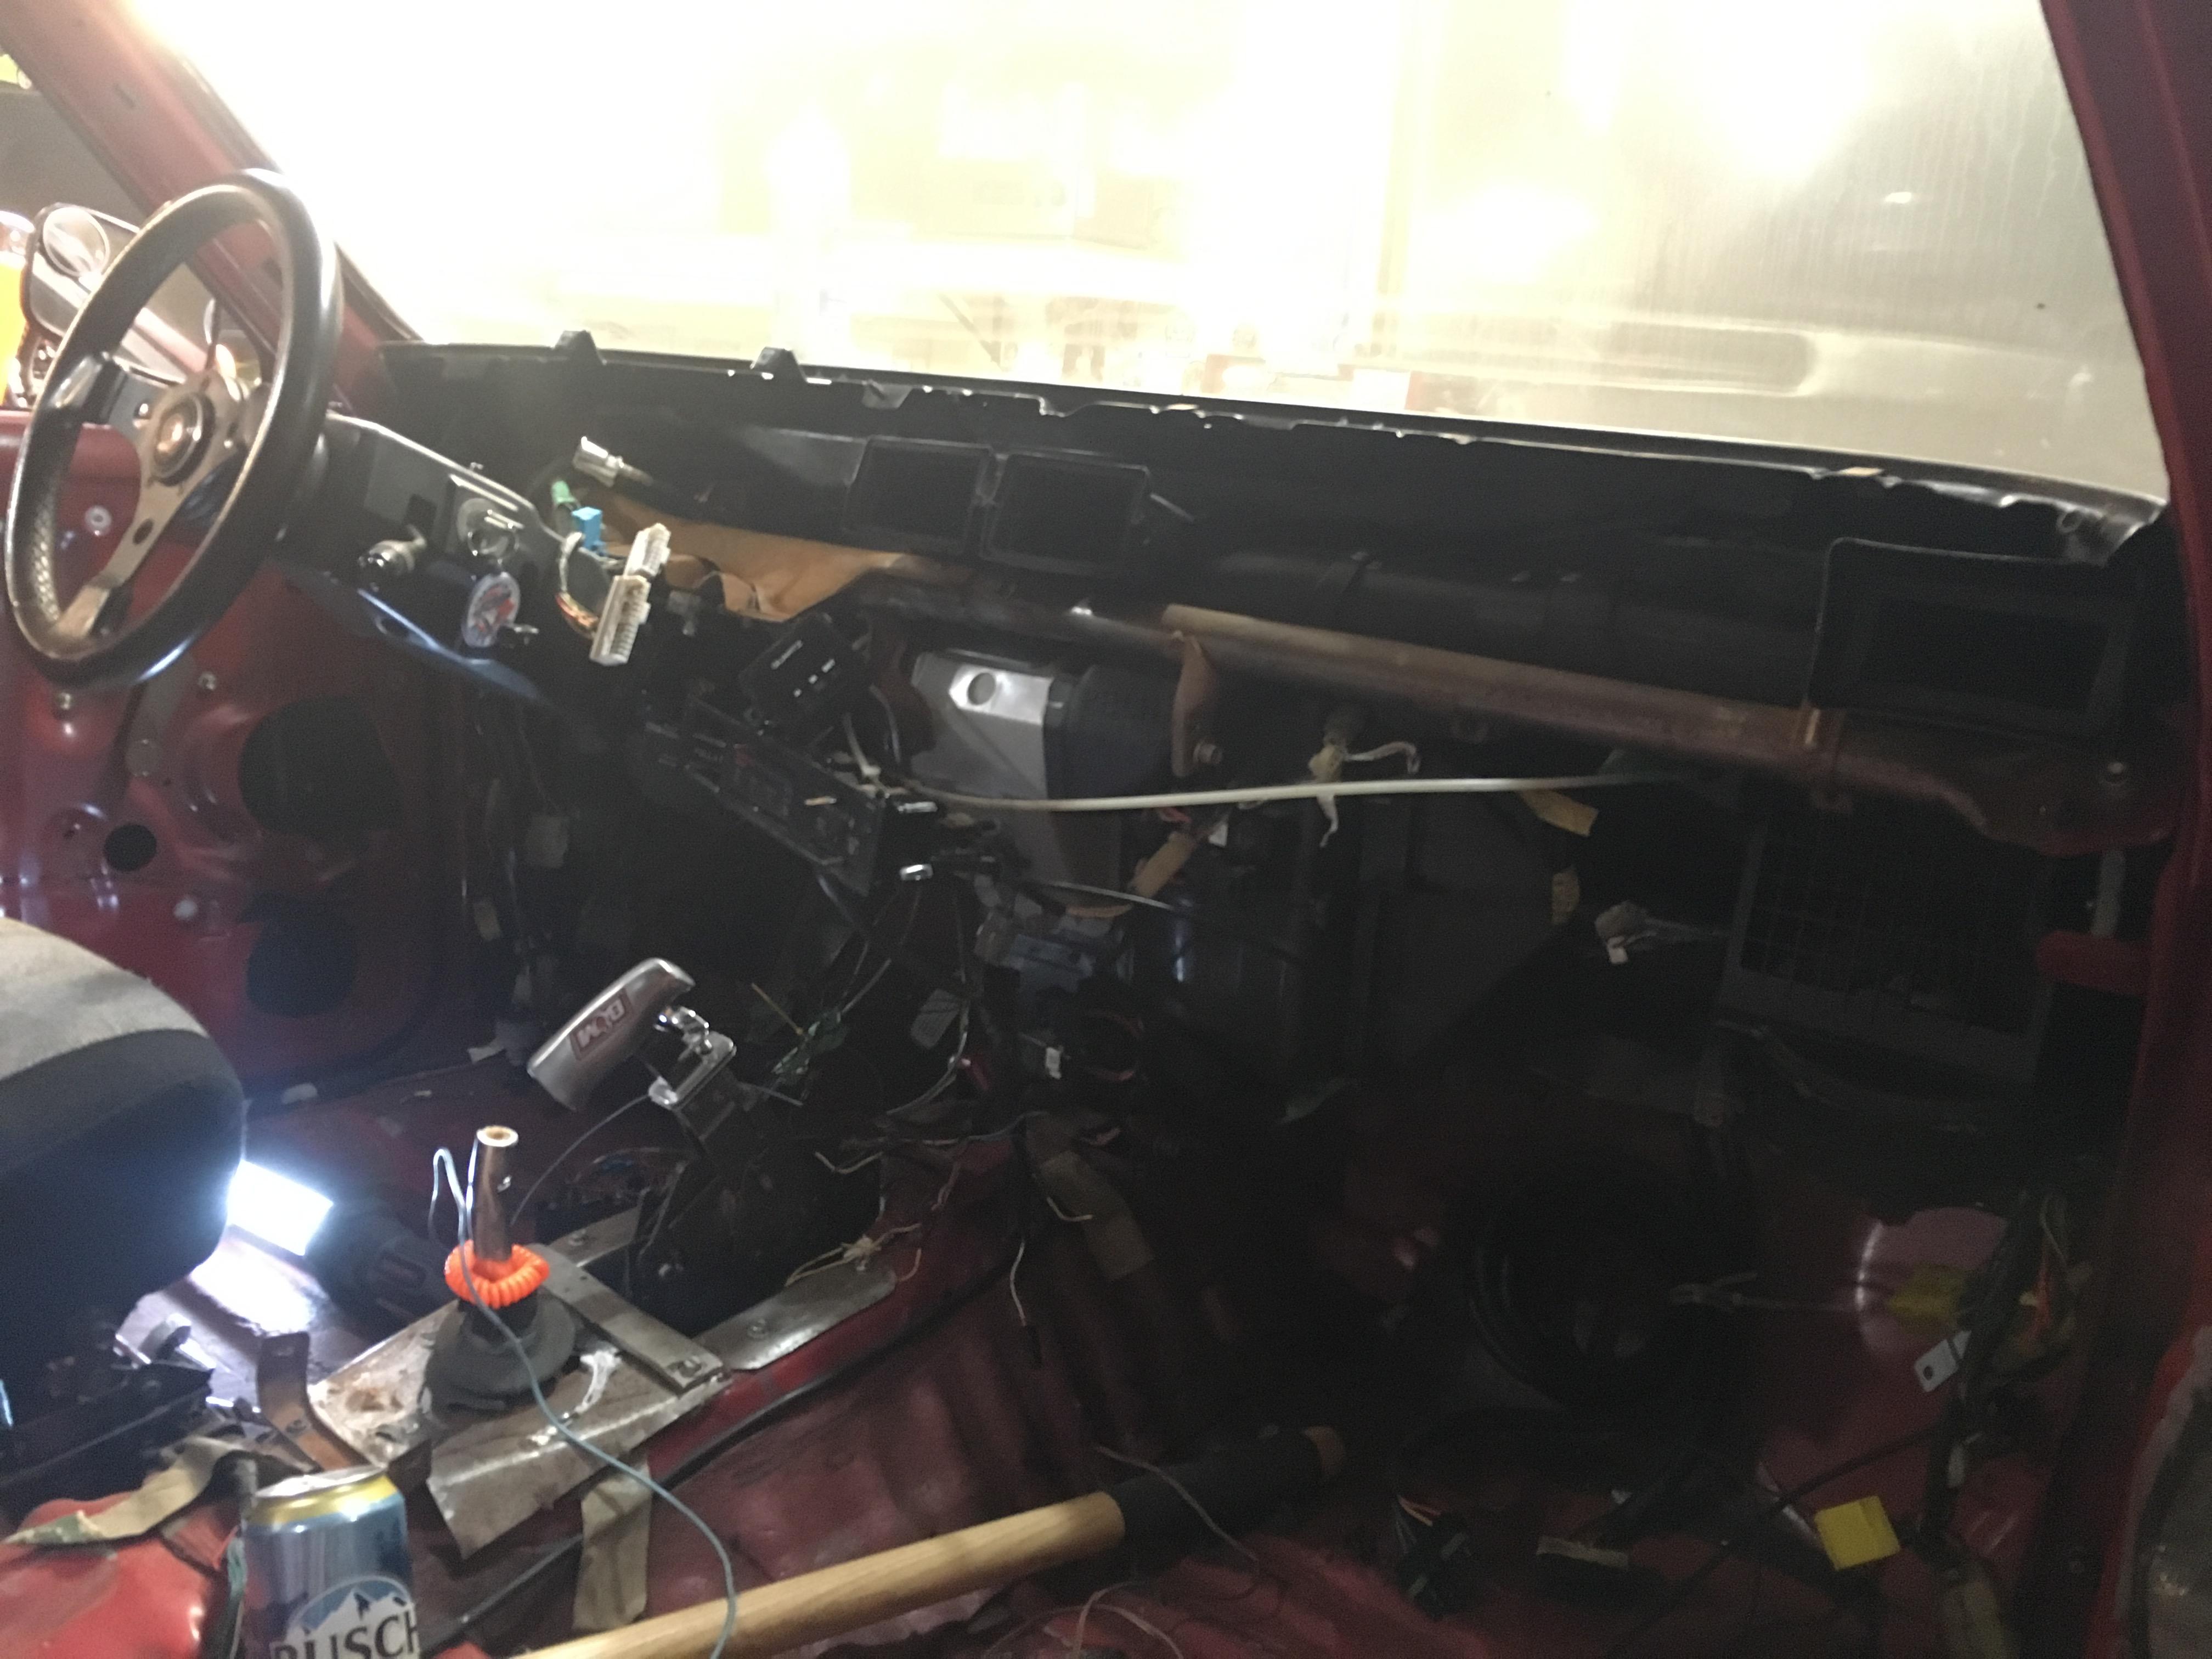
On Friday & Monday night I made great strides in assembling…*ahem* <b>ASSEMBLING</b> most of the inner dash. I got my new firewall nvh blanket put in, ran and secured tbe wiring harmess, installed the hvac box and all the ducting runs and control cables, the throttle and brake pedal assemblies, dash crossbar and steering column. I also identified <i>most</i> of the wiring connections, and a few mystery wires dangling.
I still need to re-crimp some broken butt connectors, and run new wires for my very old (but free) headunit and speakers.
Lunch is over, more typing later.
toys-n-yotasKeymasterThe seals had potential to arrive by Friday night, but Fedex truck never showed up. So I spent friday night putting the firewall nvh blanket up, hvac defrost vent, dash cross bar, brake pedal assembly, and steering column. Redees interior is finally in better condition than when she arrived.
A new 65L tank (17 gal) is worth $150 on RockAuto, plus $80 shipping (duty included) and tax comes to about $250-260 to your door. Still contemplating buying one.
toys-n-yotasKeymasterOnce again RockAuto saves the day. I was able to order OEM equivalent parts for $51 after shipping, duty & tax. Parts should arrive in a couple days.
I was tempted to order a new gas tank while I was at it, but I’m still convinced I will attempt to salvage the one I got.
toys-n-yotasKeymasterThe wonderful world of Honda also embraces Jinglish. Tons of fun stumbling across these easter eggs
toys-n-yotasKeymasterThree small spot welds to drill out to separate the dust shield from its mounting ring.

The ring is about 2.0 mm thick, and I believe it’s reguired to allow the hub appropriate depth into the seal.
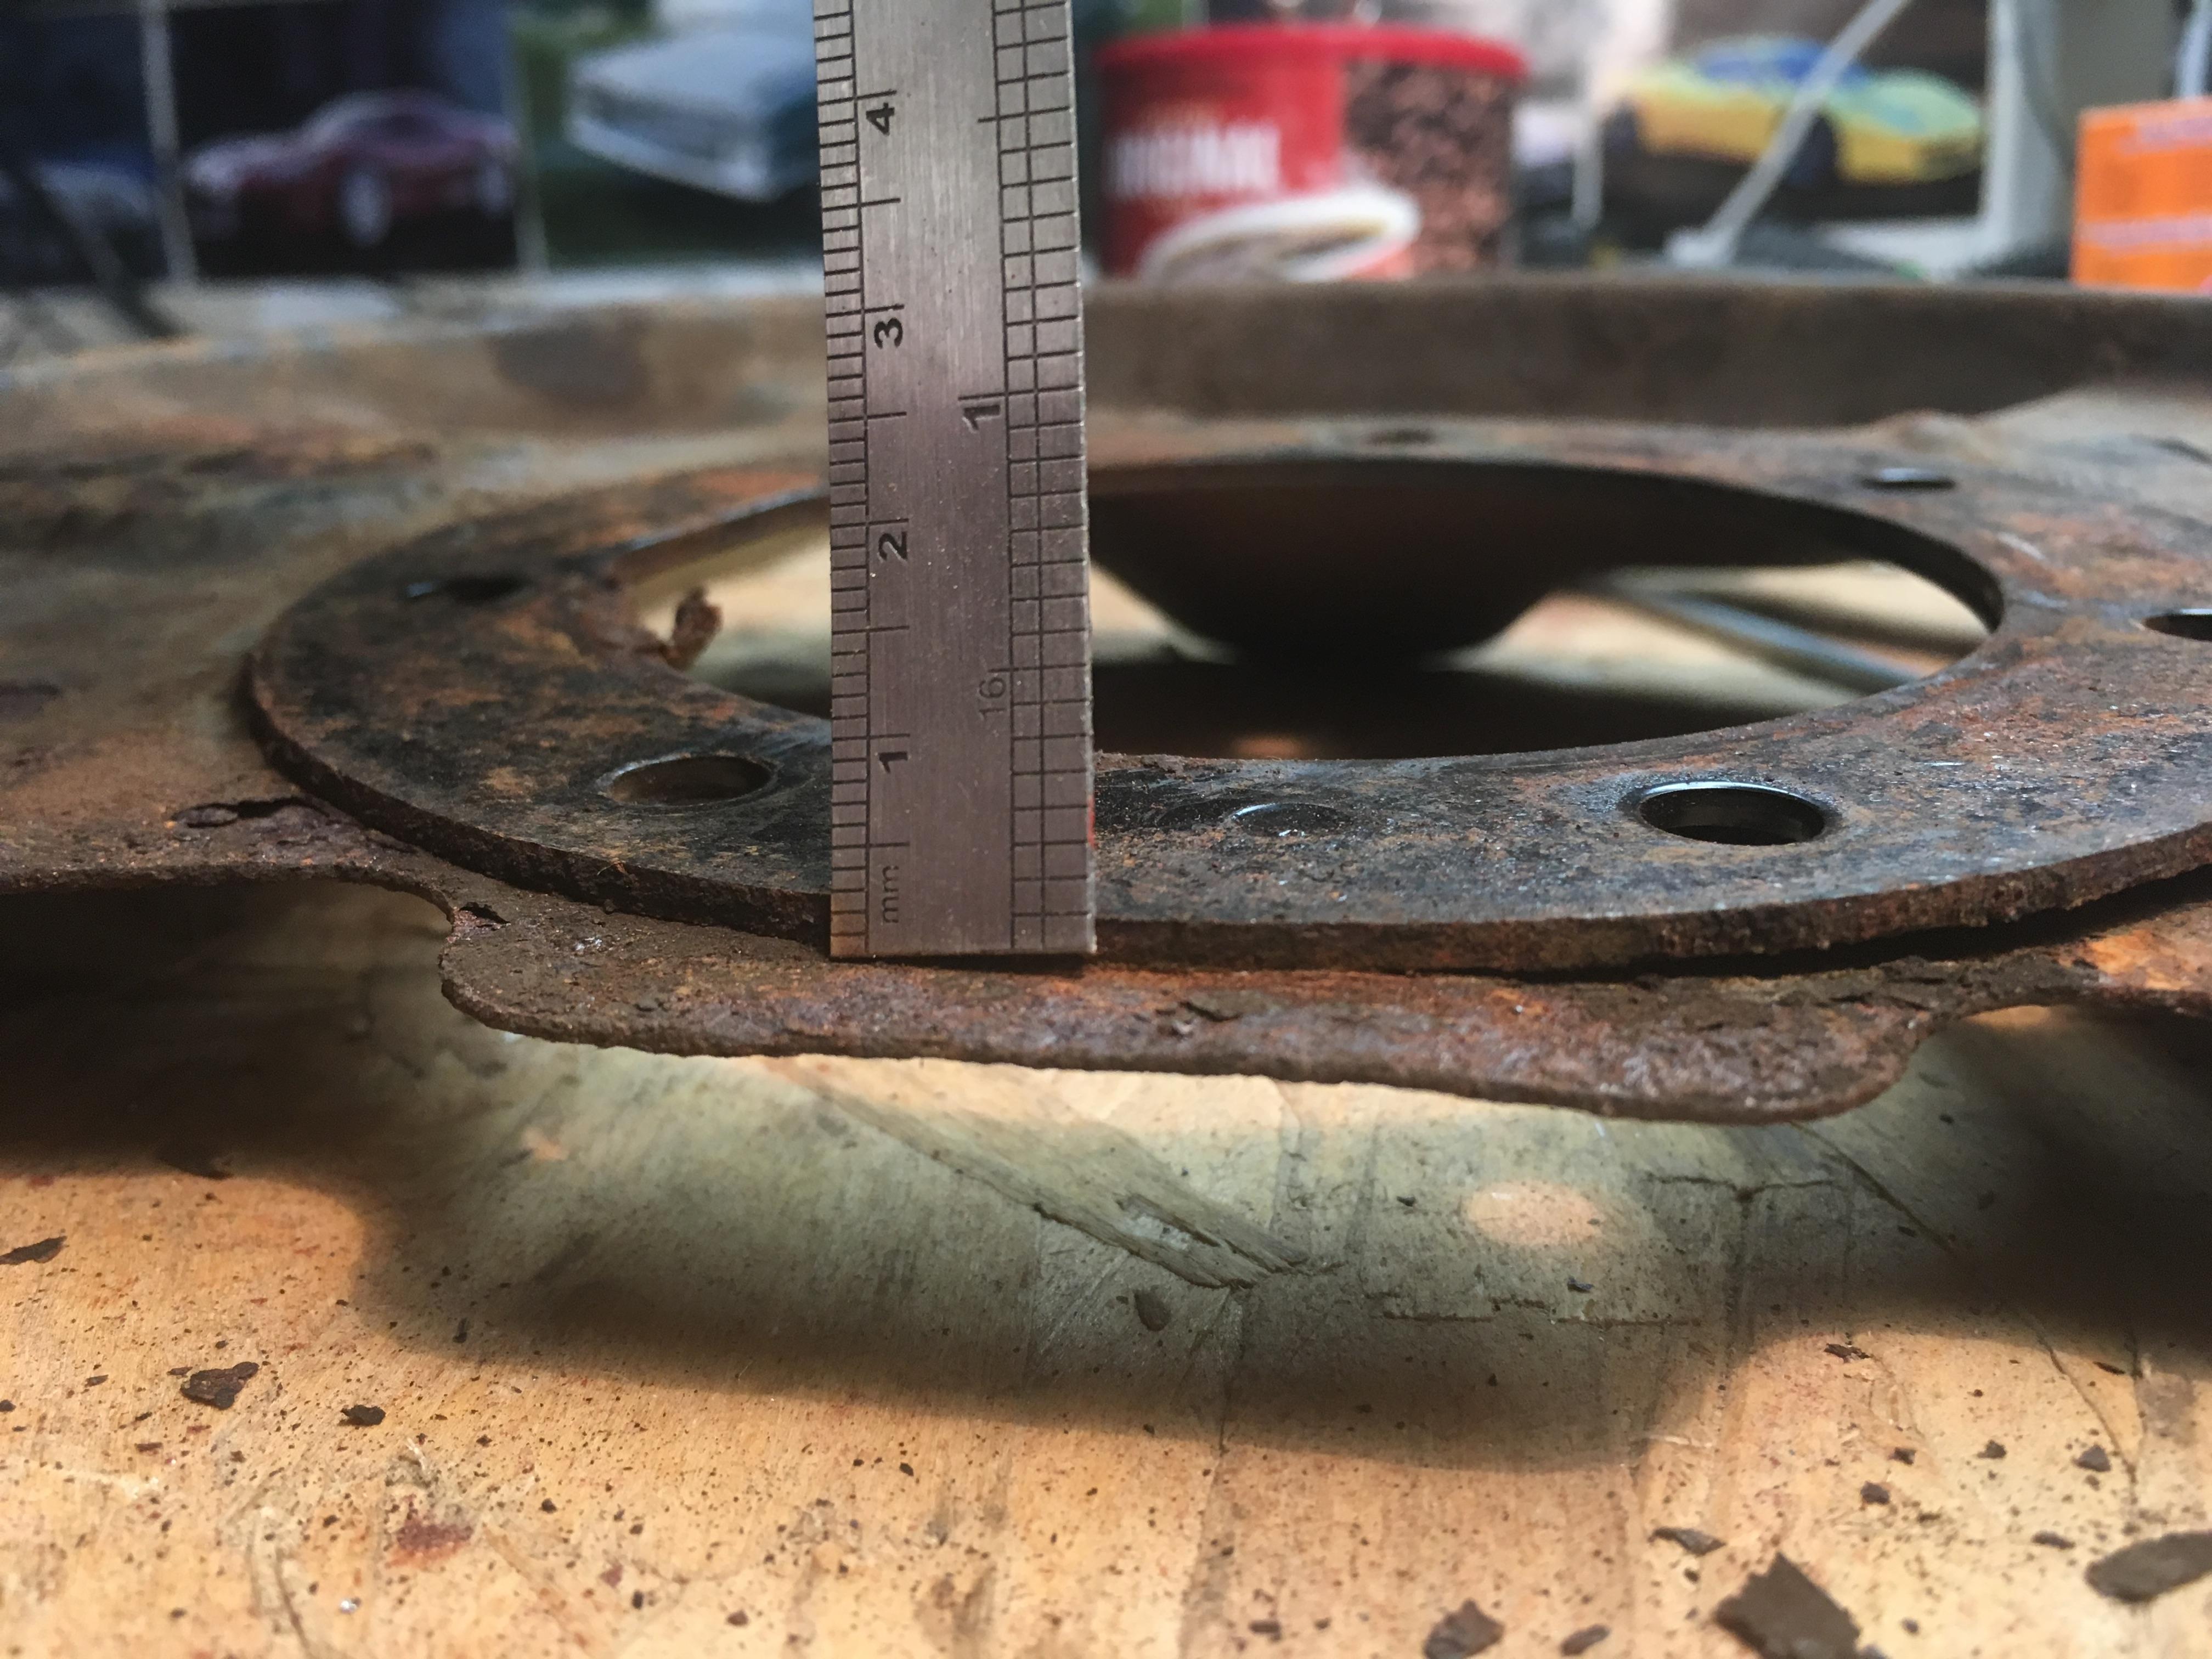

Without the “spacer”, I fear the seal wouldn’t engage deep enough on the hub, and be prone to failure.
 toys-n-yotasKeymaster
Yay!! Found the seal!!
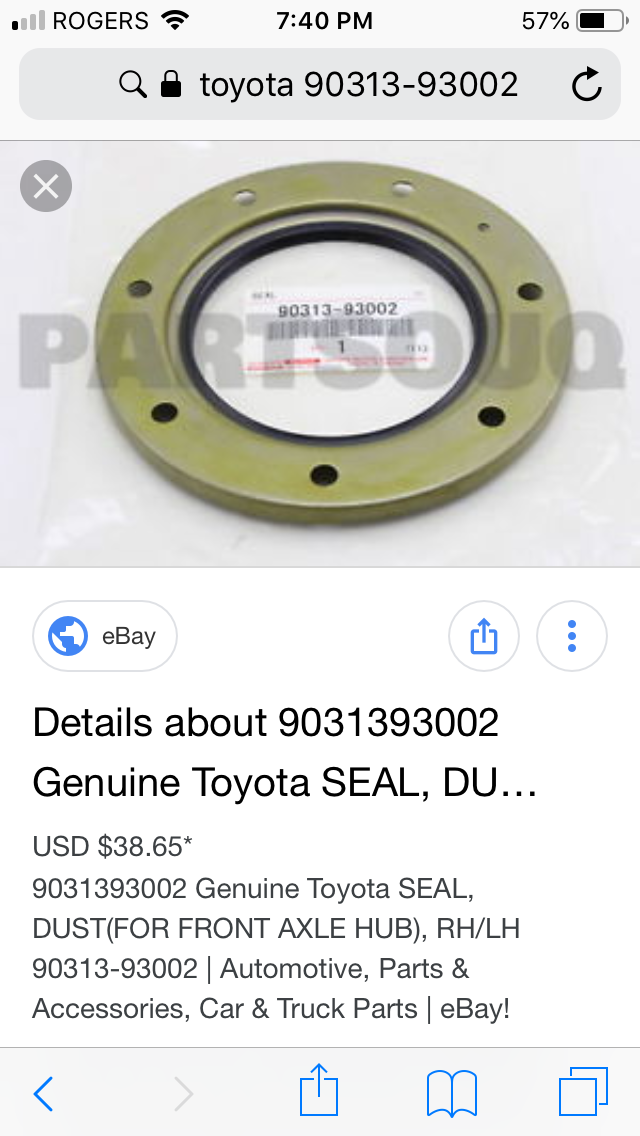
Booooo….ebay wants $70 per side.
But, yay for no need to sandblast the passenger side once I get there. Small victory? Or still losing @ $150-ish.
-
AuthorPosts