Home › Forums › TRUCK BUILDS › Redee – 1986 4Runner
- This topic has 691 replies, 9 voices, and was last updated 5 days ago by
 toys-n-yotas.
-
AuthorPosts
-
March 13, 2025 at 12:35 pm #212332
 toys-n-yotasKeymaster
Thanks Kevin! I thought it sounded pretty good too for being open at the collector off the Tri-Y header. Was expecting it to be a lot louder. Still plenty loud enough to shake decorations off the shelf, so not sustainable for my ear drums haha.
Received my third catalytic converter in the mail yesterday, and it fits soooo much better. Will take a side-by-side comparison tonight. I’ll be able to route my exhaust over the trans crossmember as opposed to under the cross member with the larger cat.
Gotta start accumulating exhaust pipe, bends, flanges and gaskets. Think I’ll bring my cat and the collector flange to National Exhaust to size up the pipe diameter i need there. 2″ ID flange, 2.25″ ID on the cat. Thinking a 45* bend, 2.25″ pipe could fit with maybe a slight flare on one end. Next week problem, after payday.
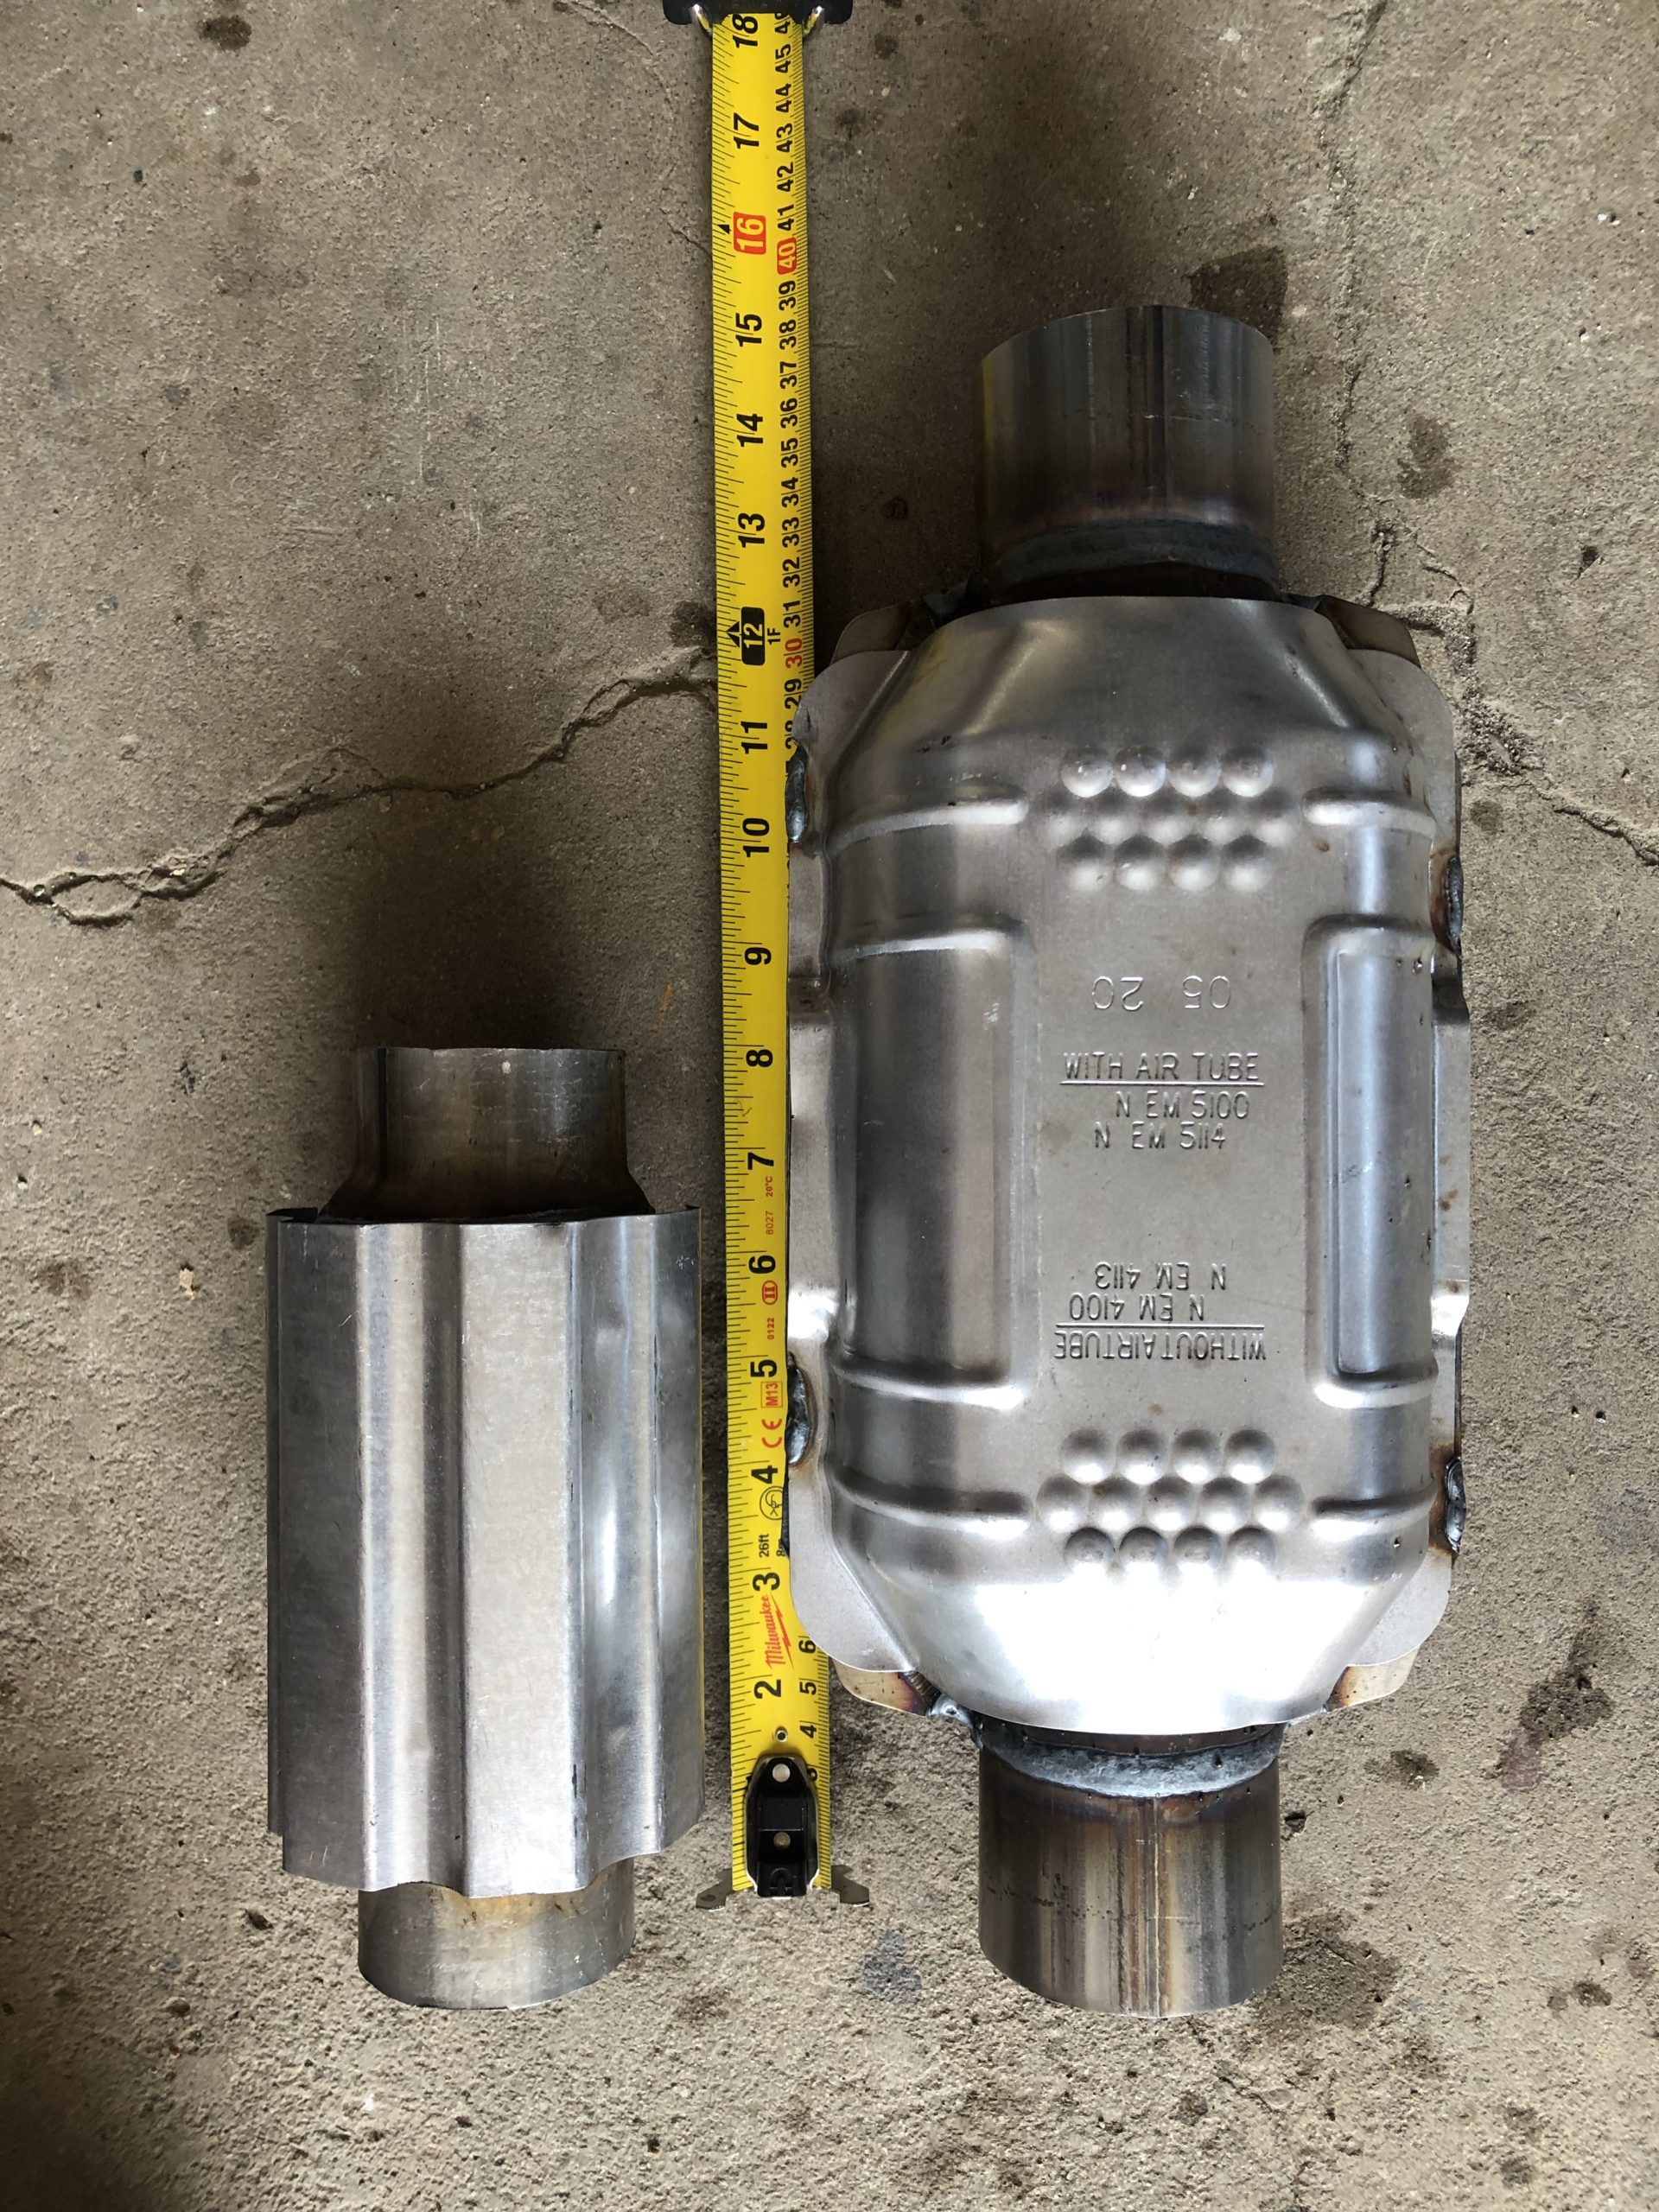
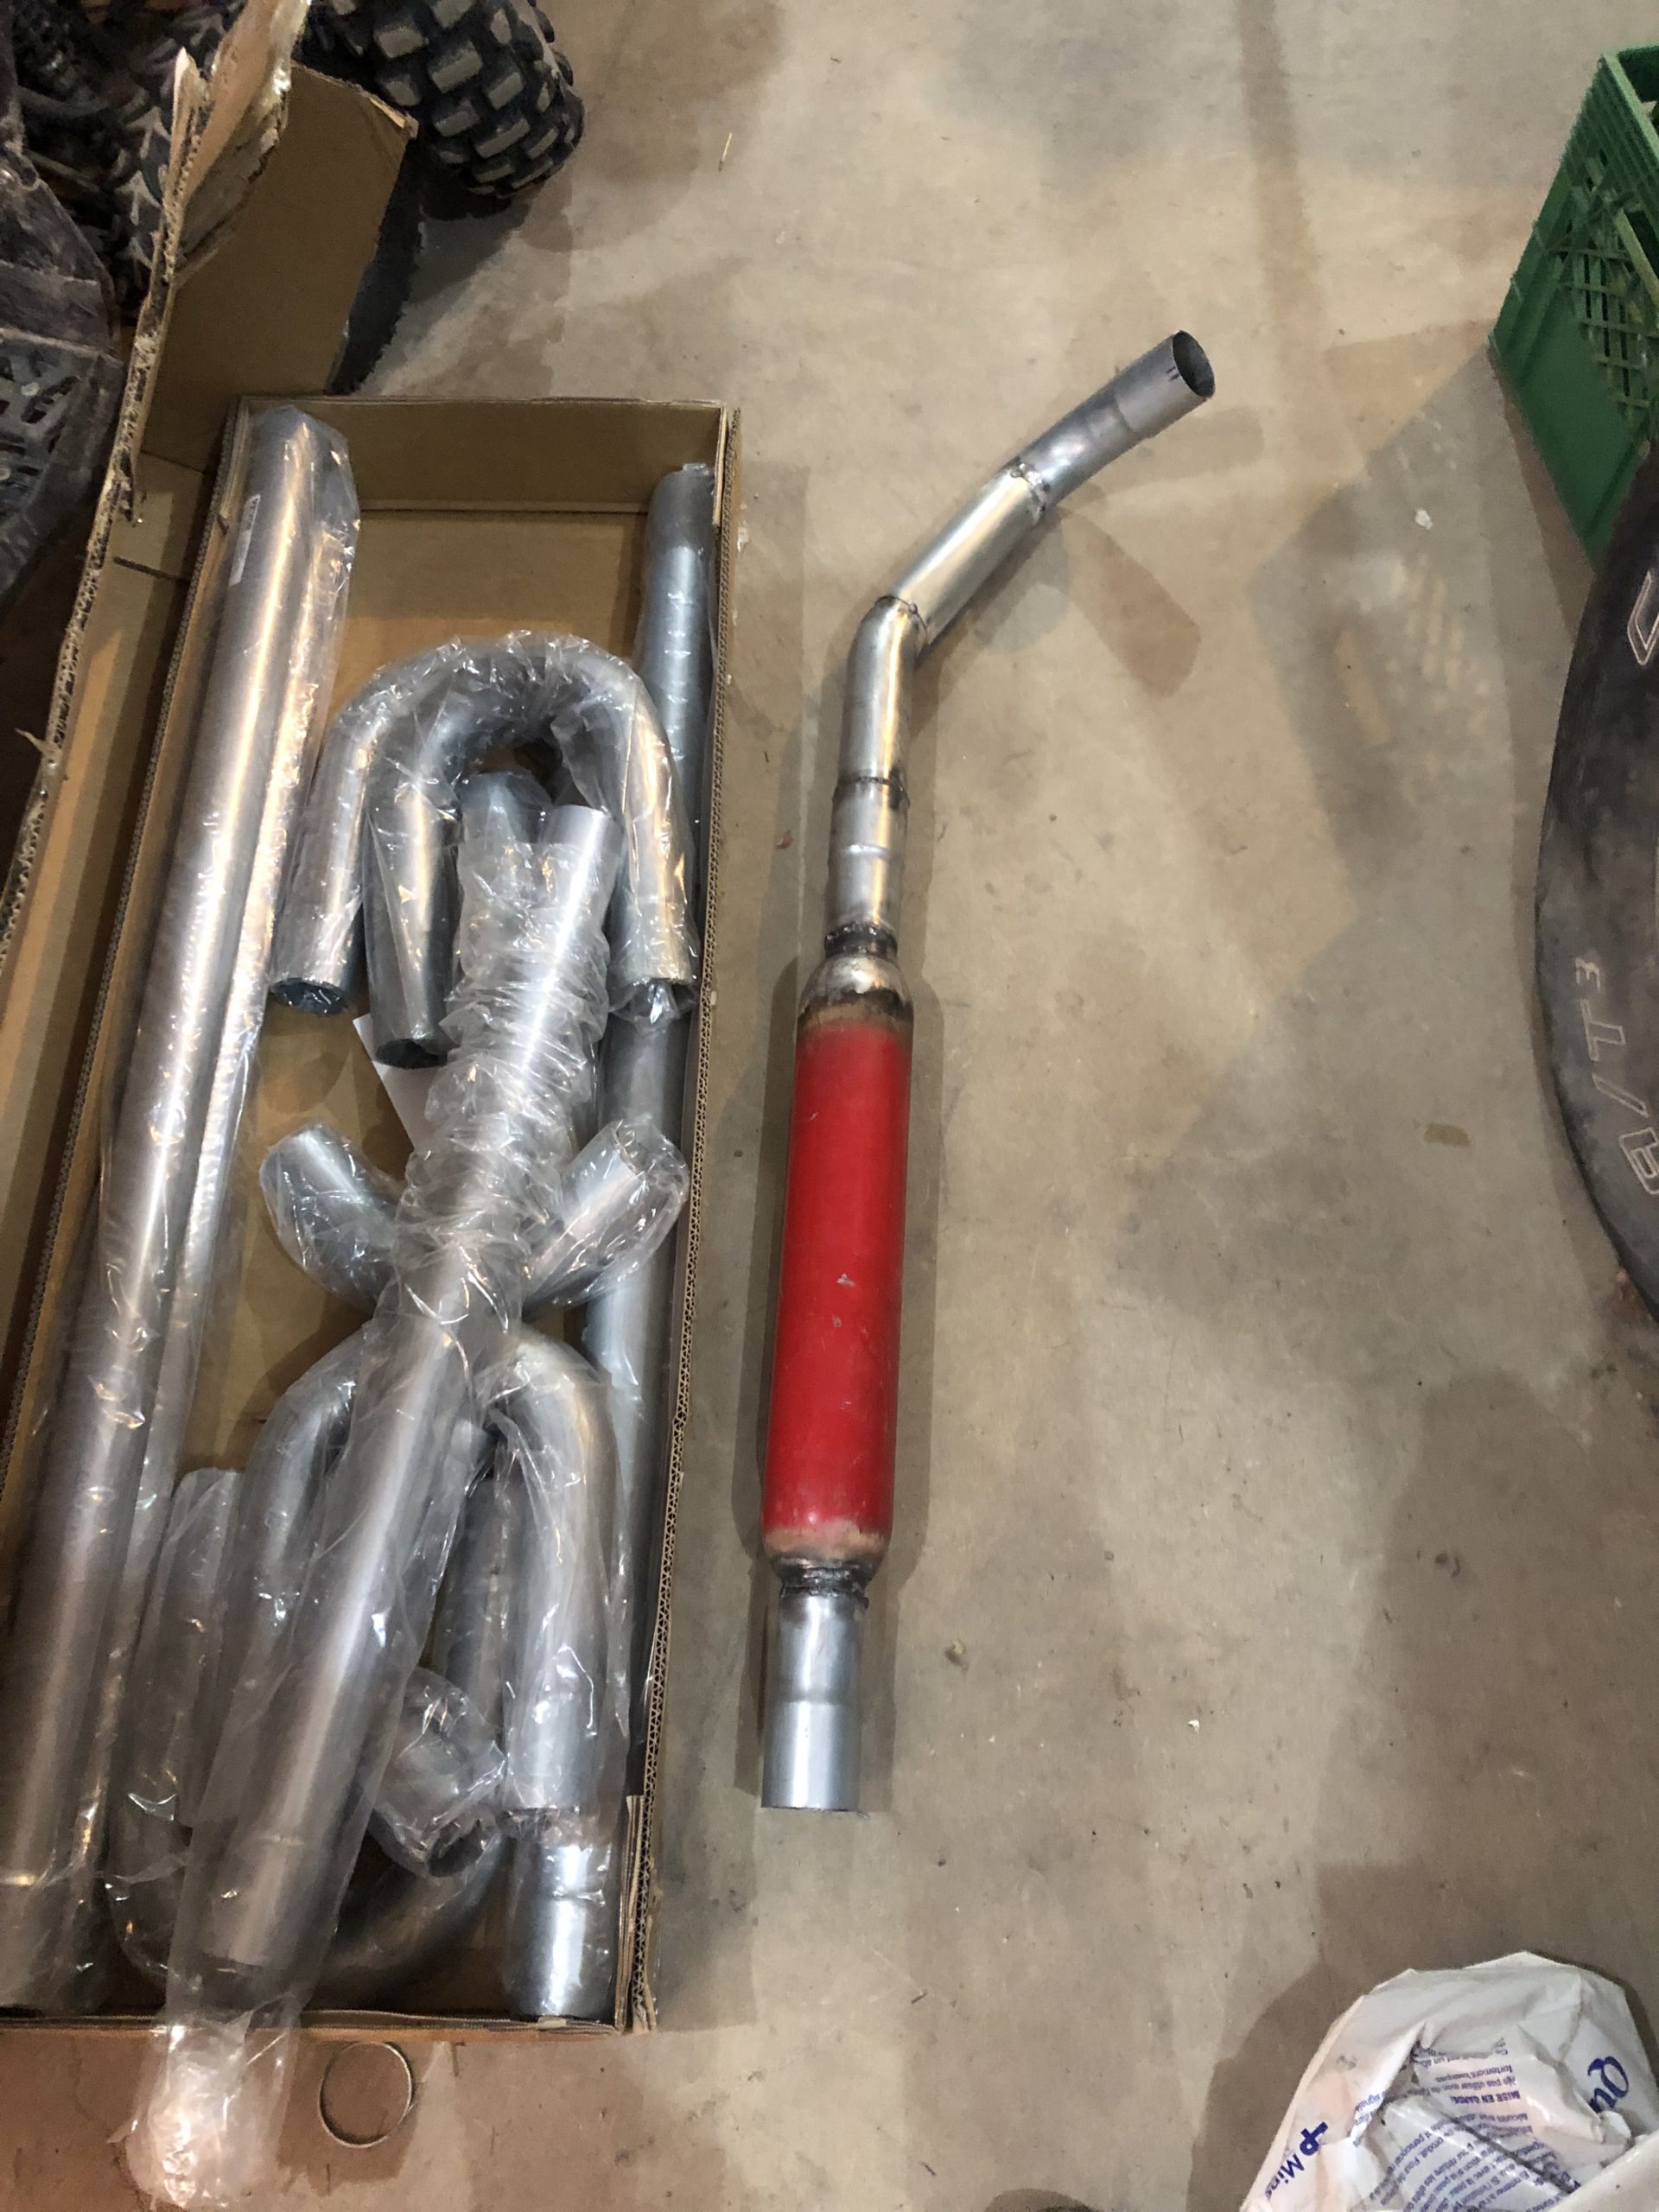
March 13, 2025 at 5:57 pm #212333toys-n-yotasKeymasterHere’s the two cats side by side.
The old one is 15″ long, new one just under 8″. Gives me enough space to get both O2 sensors in before the crossmember (I think).Attachments:
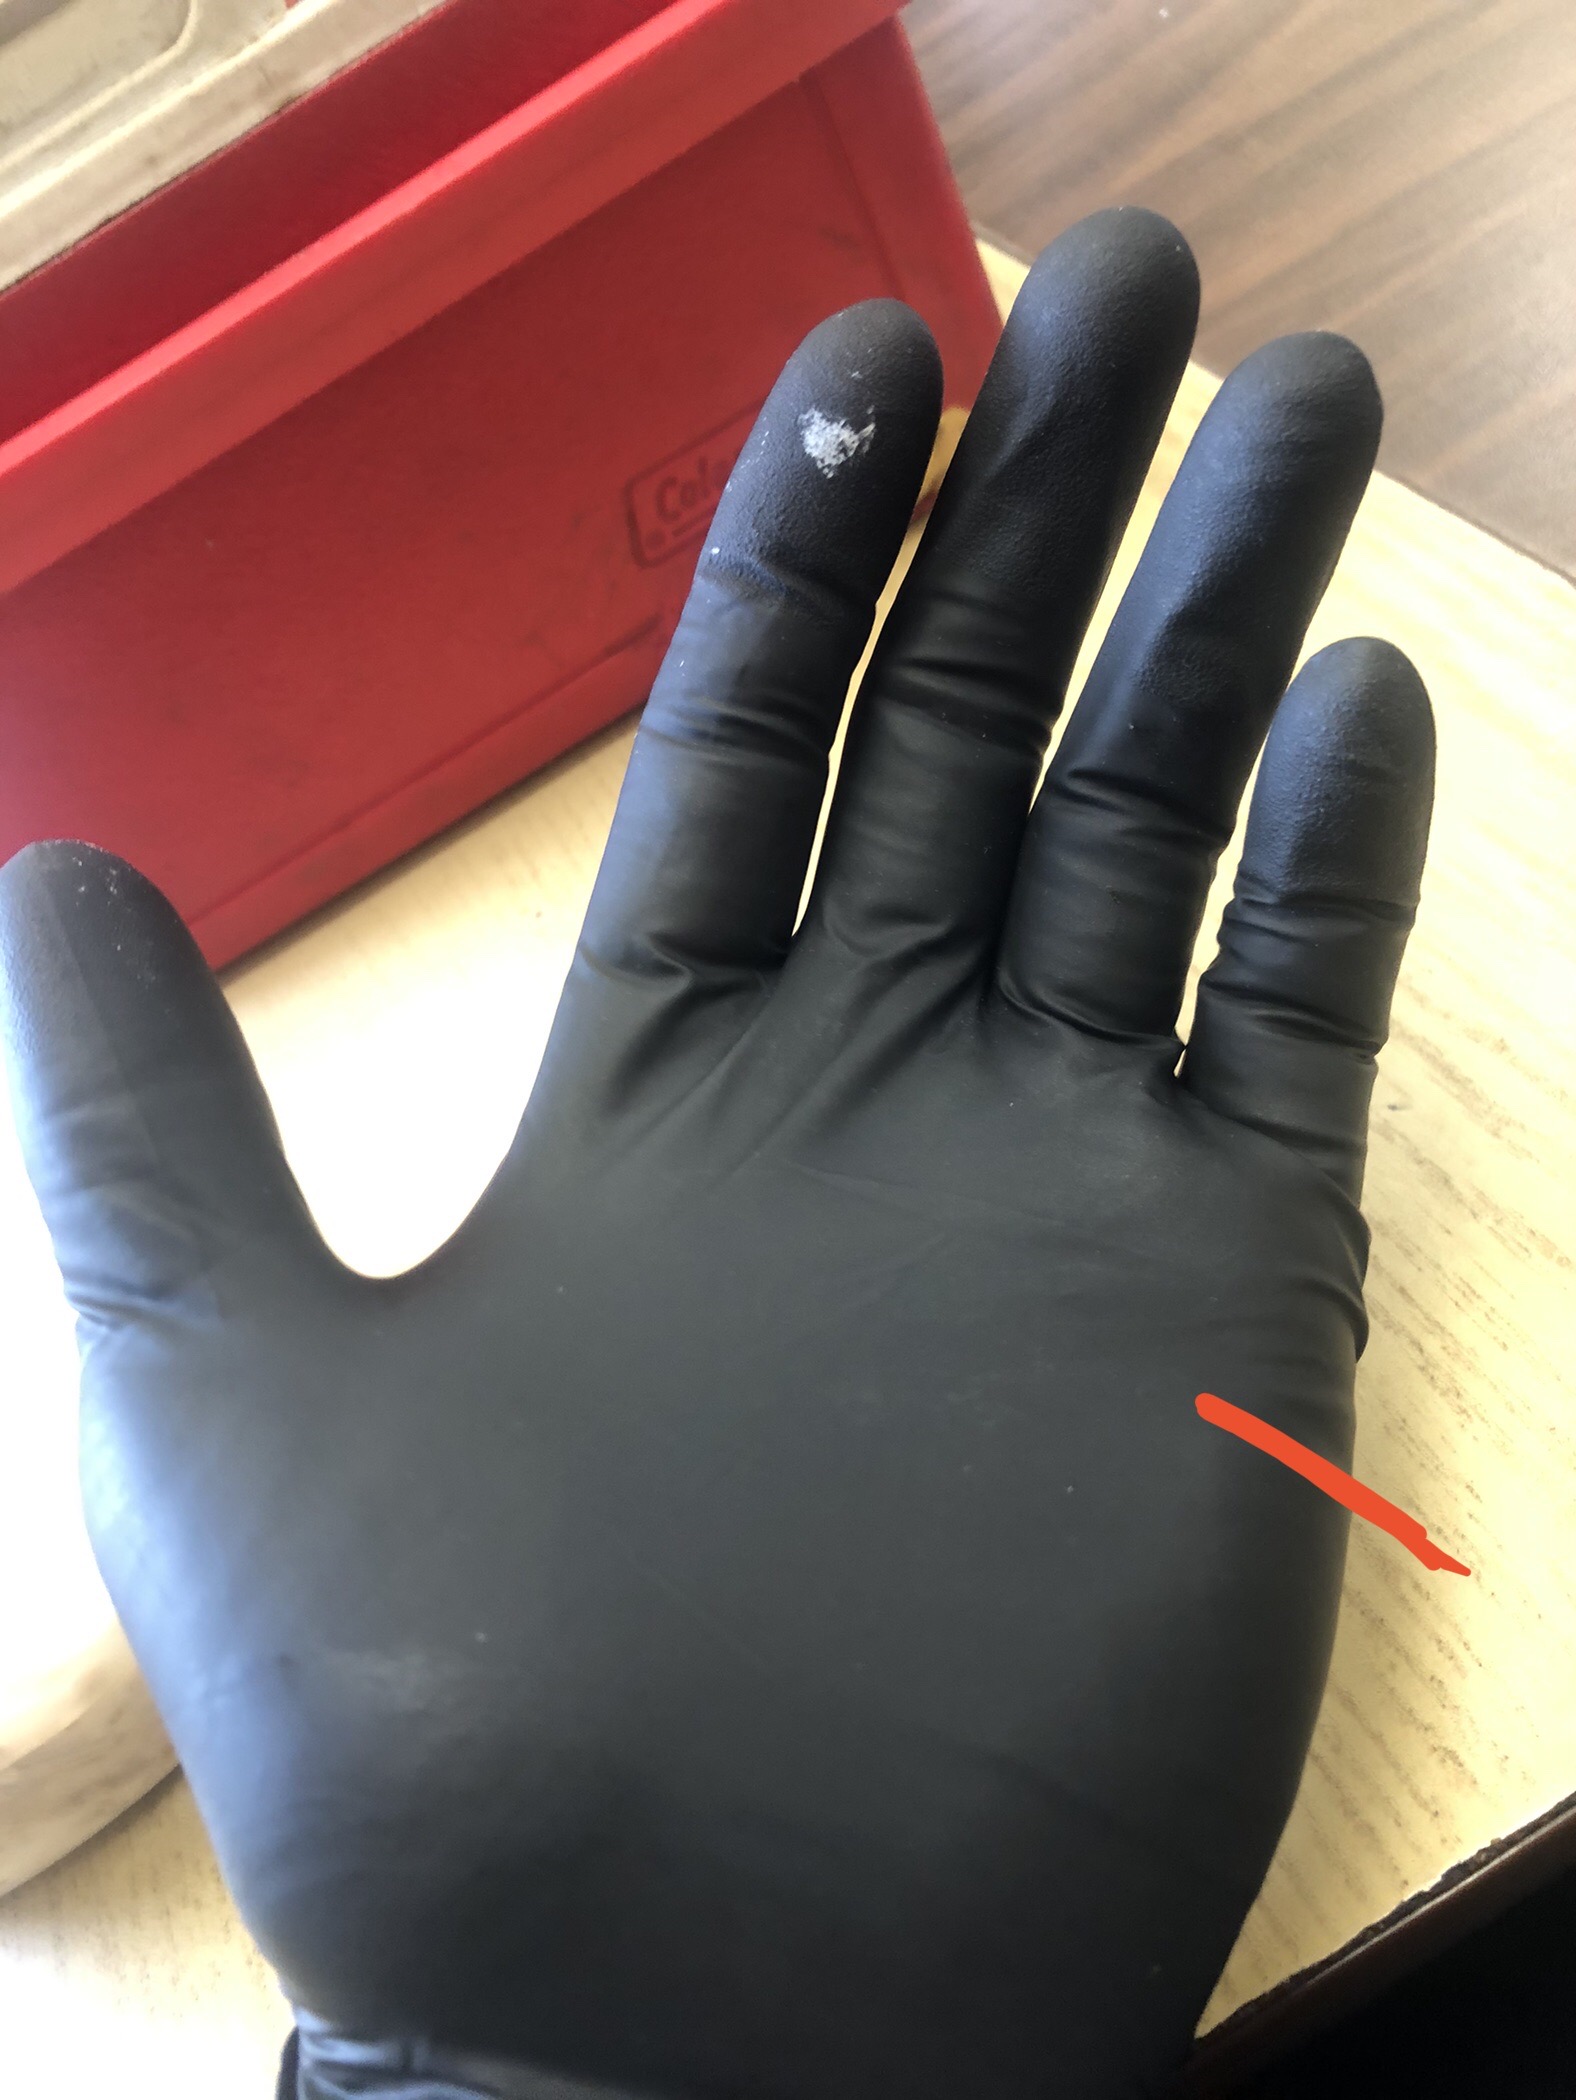
March 19, 2025 at 6:49 am #212338toys-n-yotasKeymasterGot myself a good ouchie last night, managed to put a broken drillbit into the meat of my hand on my pinky side. I knew instantly I required first aid,Sam hooked me up with some cleaner And a big band aid. 9-hours later, this mo-fo hurts.
Yesterday in the mail I got my Fiberglass exhaust wrap. Unreal it arrived from China faster than my cell phone screen protector from Markham.
I think i need to order an additional 50′ at 2″ width to finish wrapping the exhaust south of the header, south of the catalytic to where it finishes wrapping past the t-case.
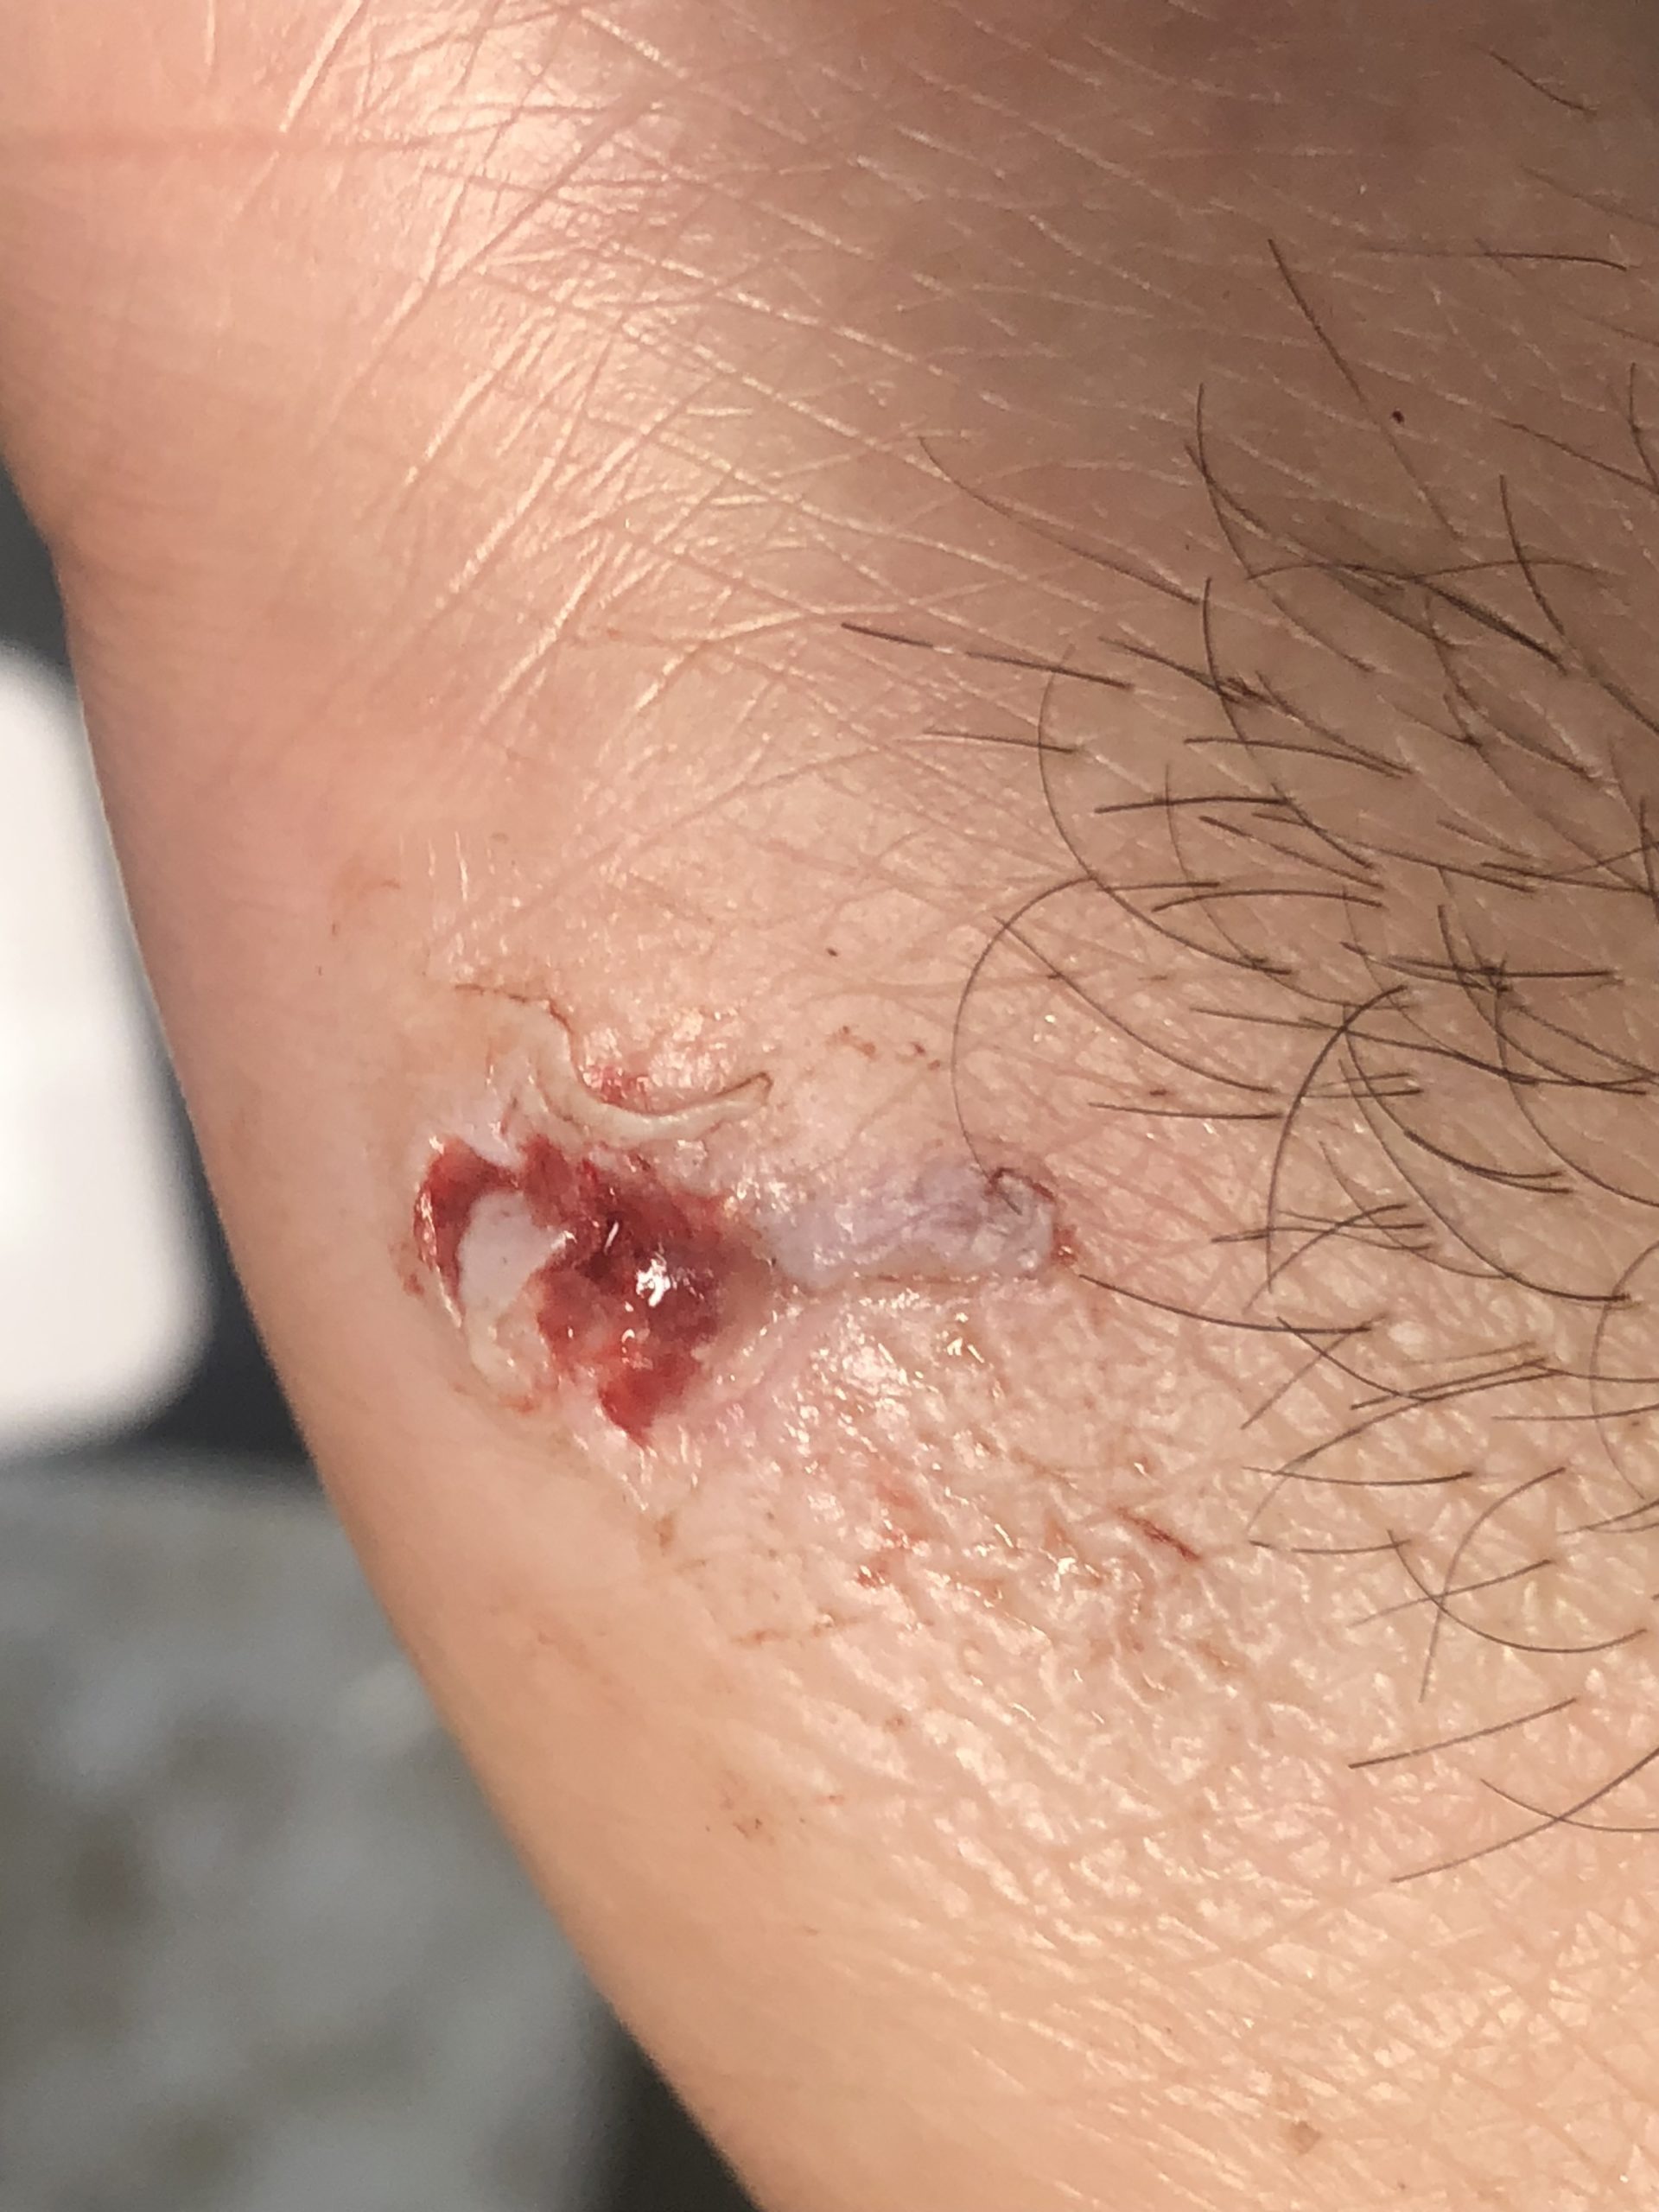
March 21, 2025 at 9:15 am #212342toys-n-yotasKeymasterThe ouchie is healing, think I dodged infection as pain and swelling has gone down two consecutive days. Even yesterday it was feeling much better. Gonna try to buy some exhaust pieces today and get to fabricating the first of many pieces from header to tailpipe.
Attachments:
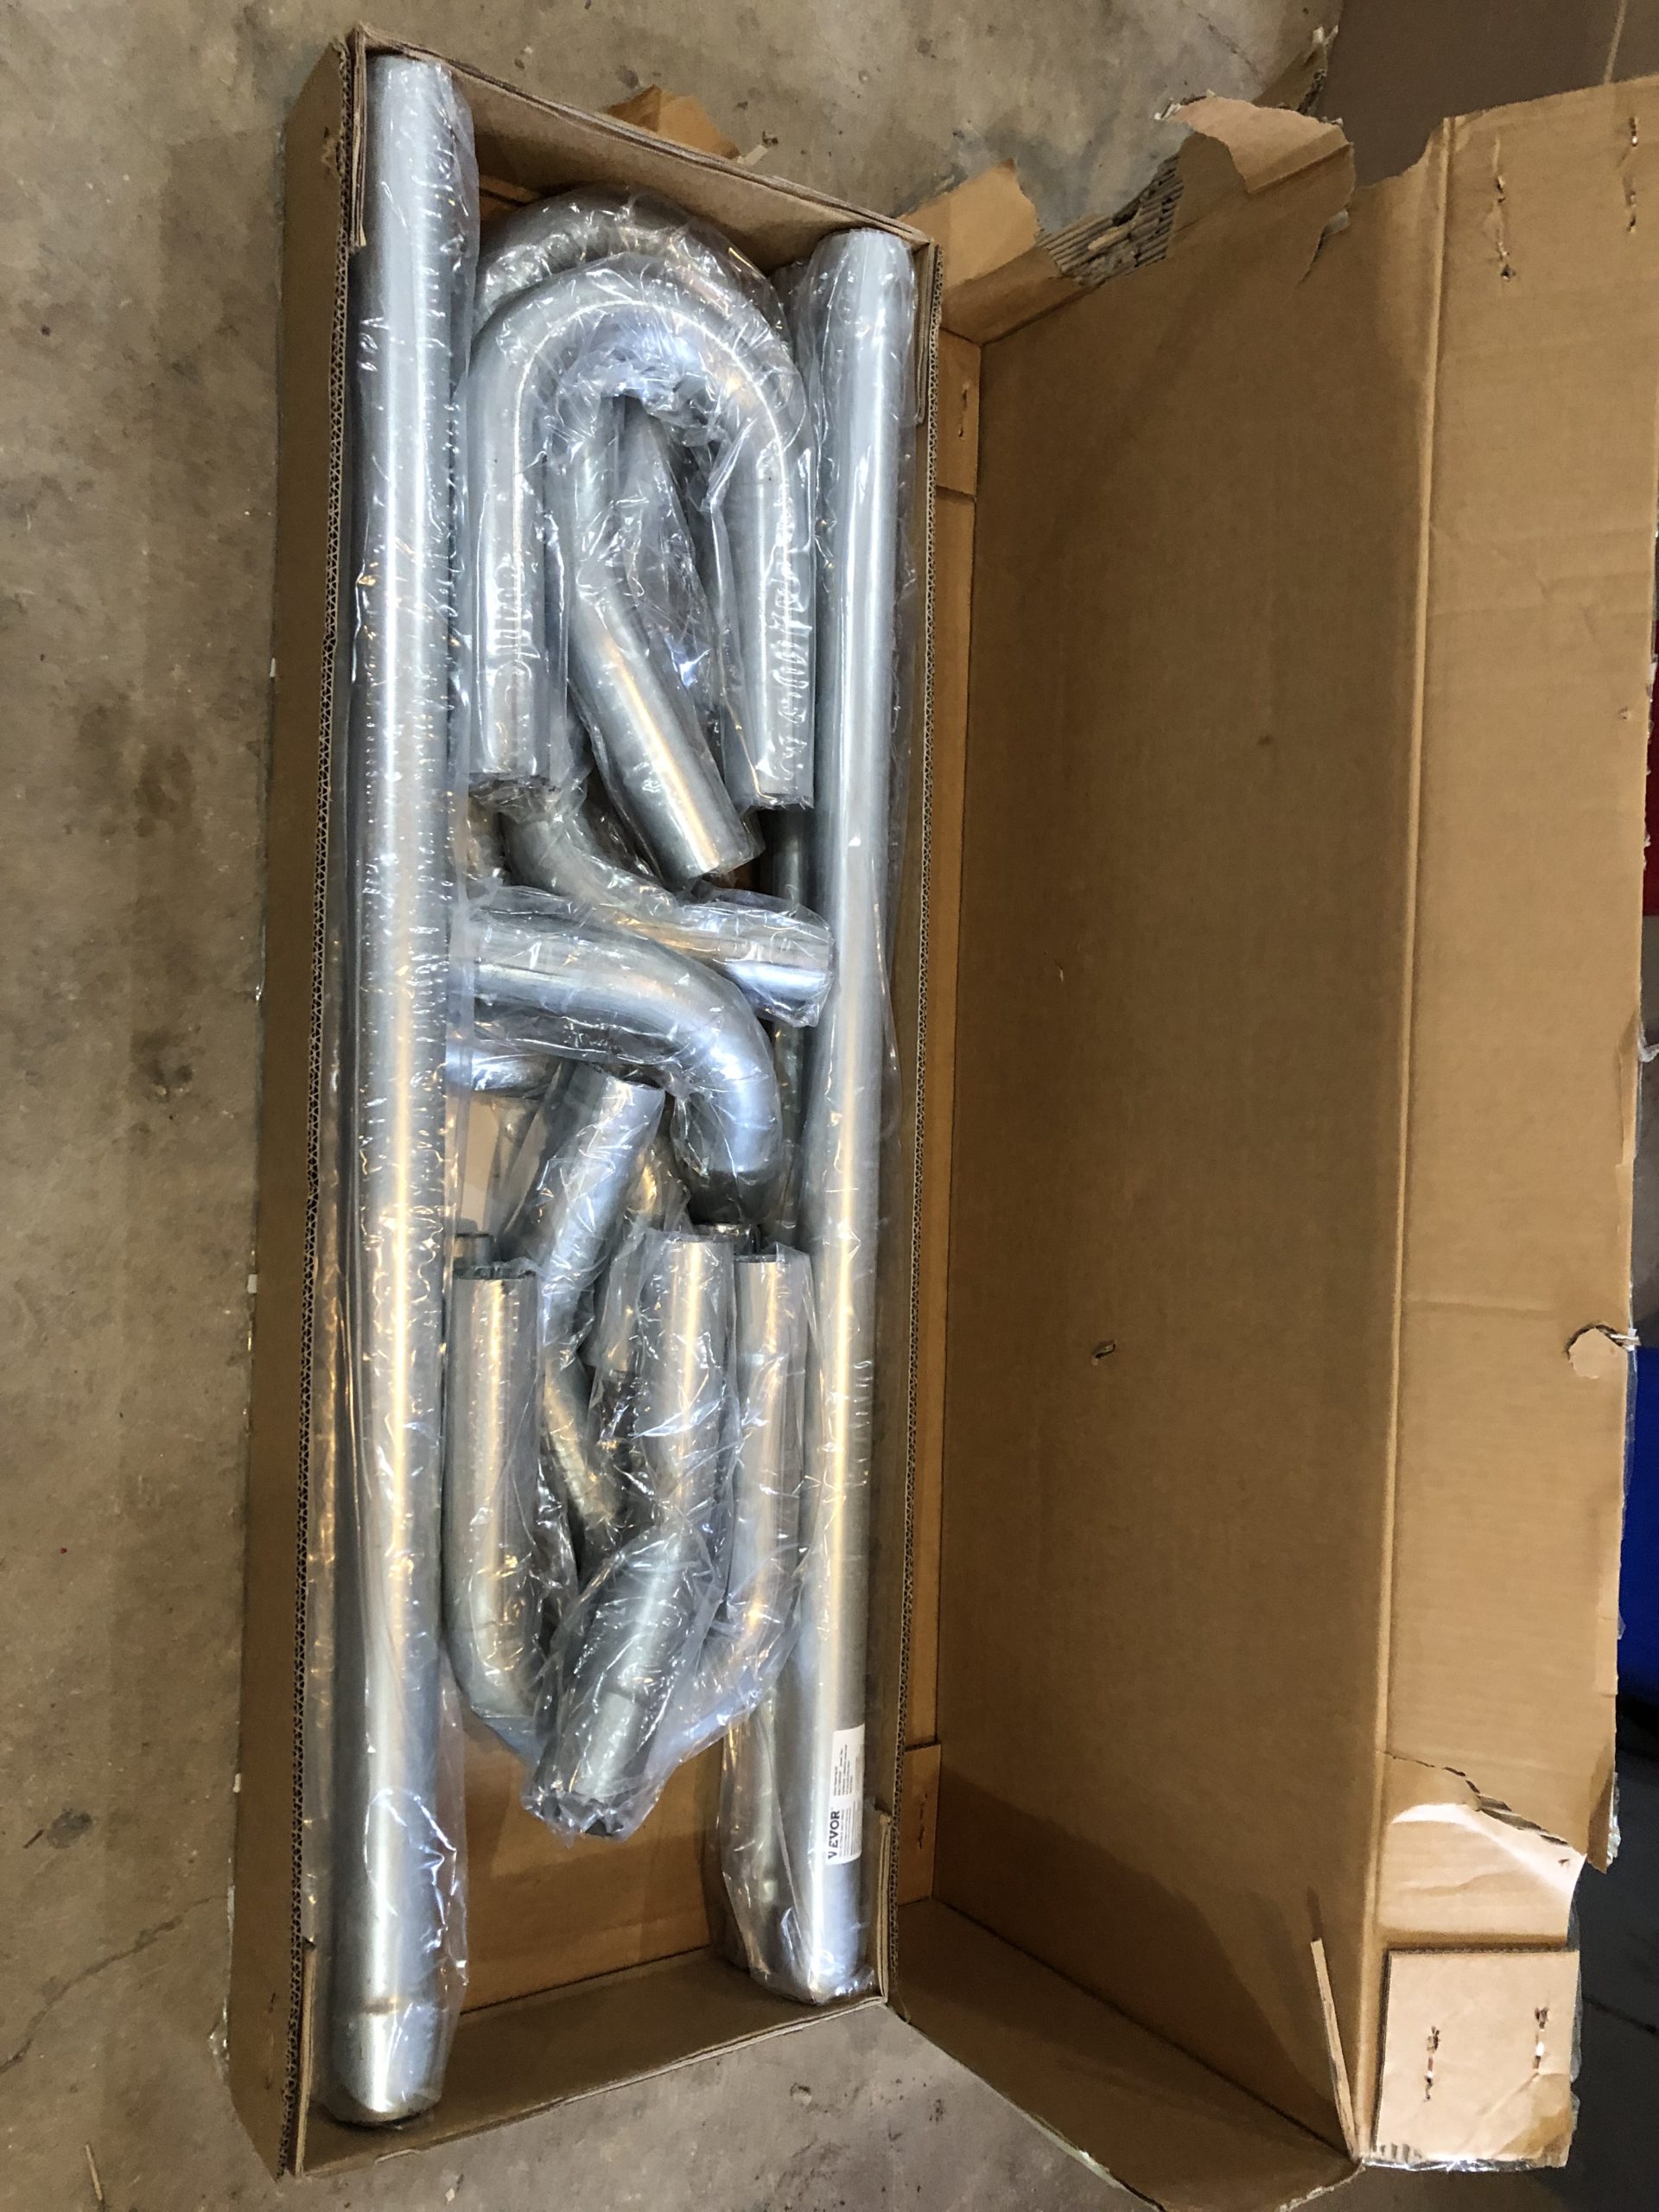
April 11, 2025 at 7:50 pm #212348toys-n-yotasKeymasterMy custom exhaust arrived today…. some assembly required. I got 4x 45degree bend, 4x 90s, 4x 180s, and 4 four ft straight sections of 2.25″ DOM pipe, hope to start working on it tonight.
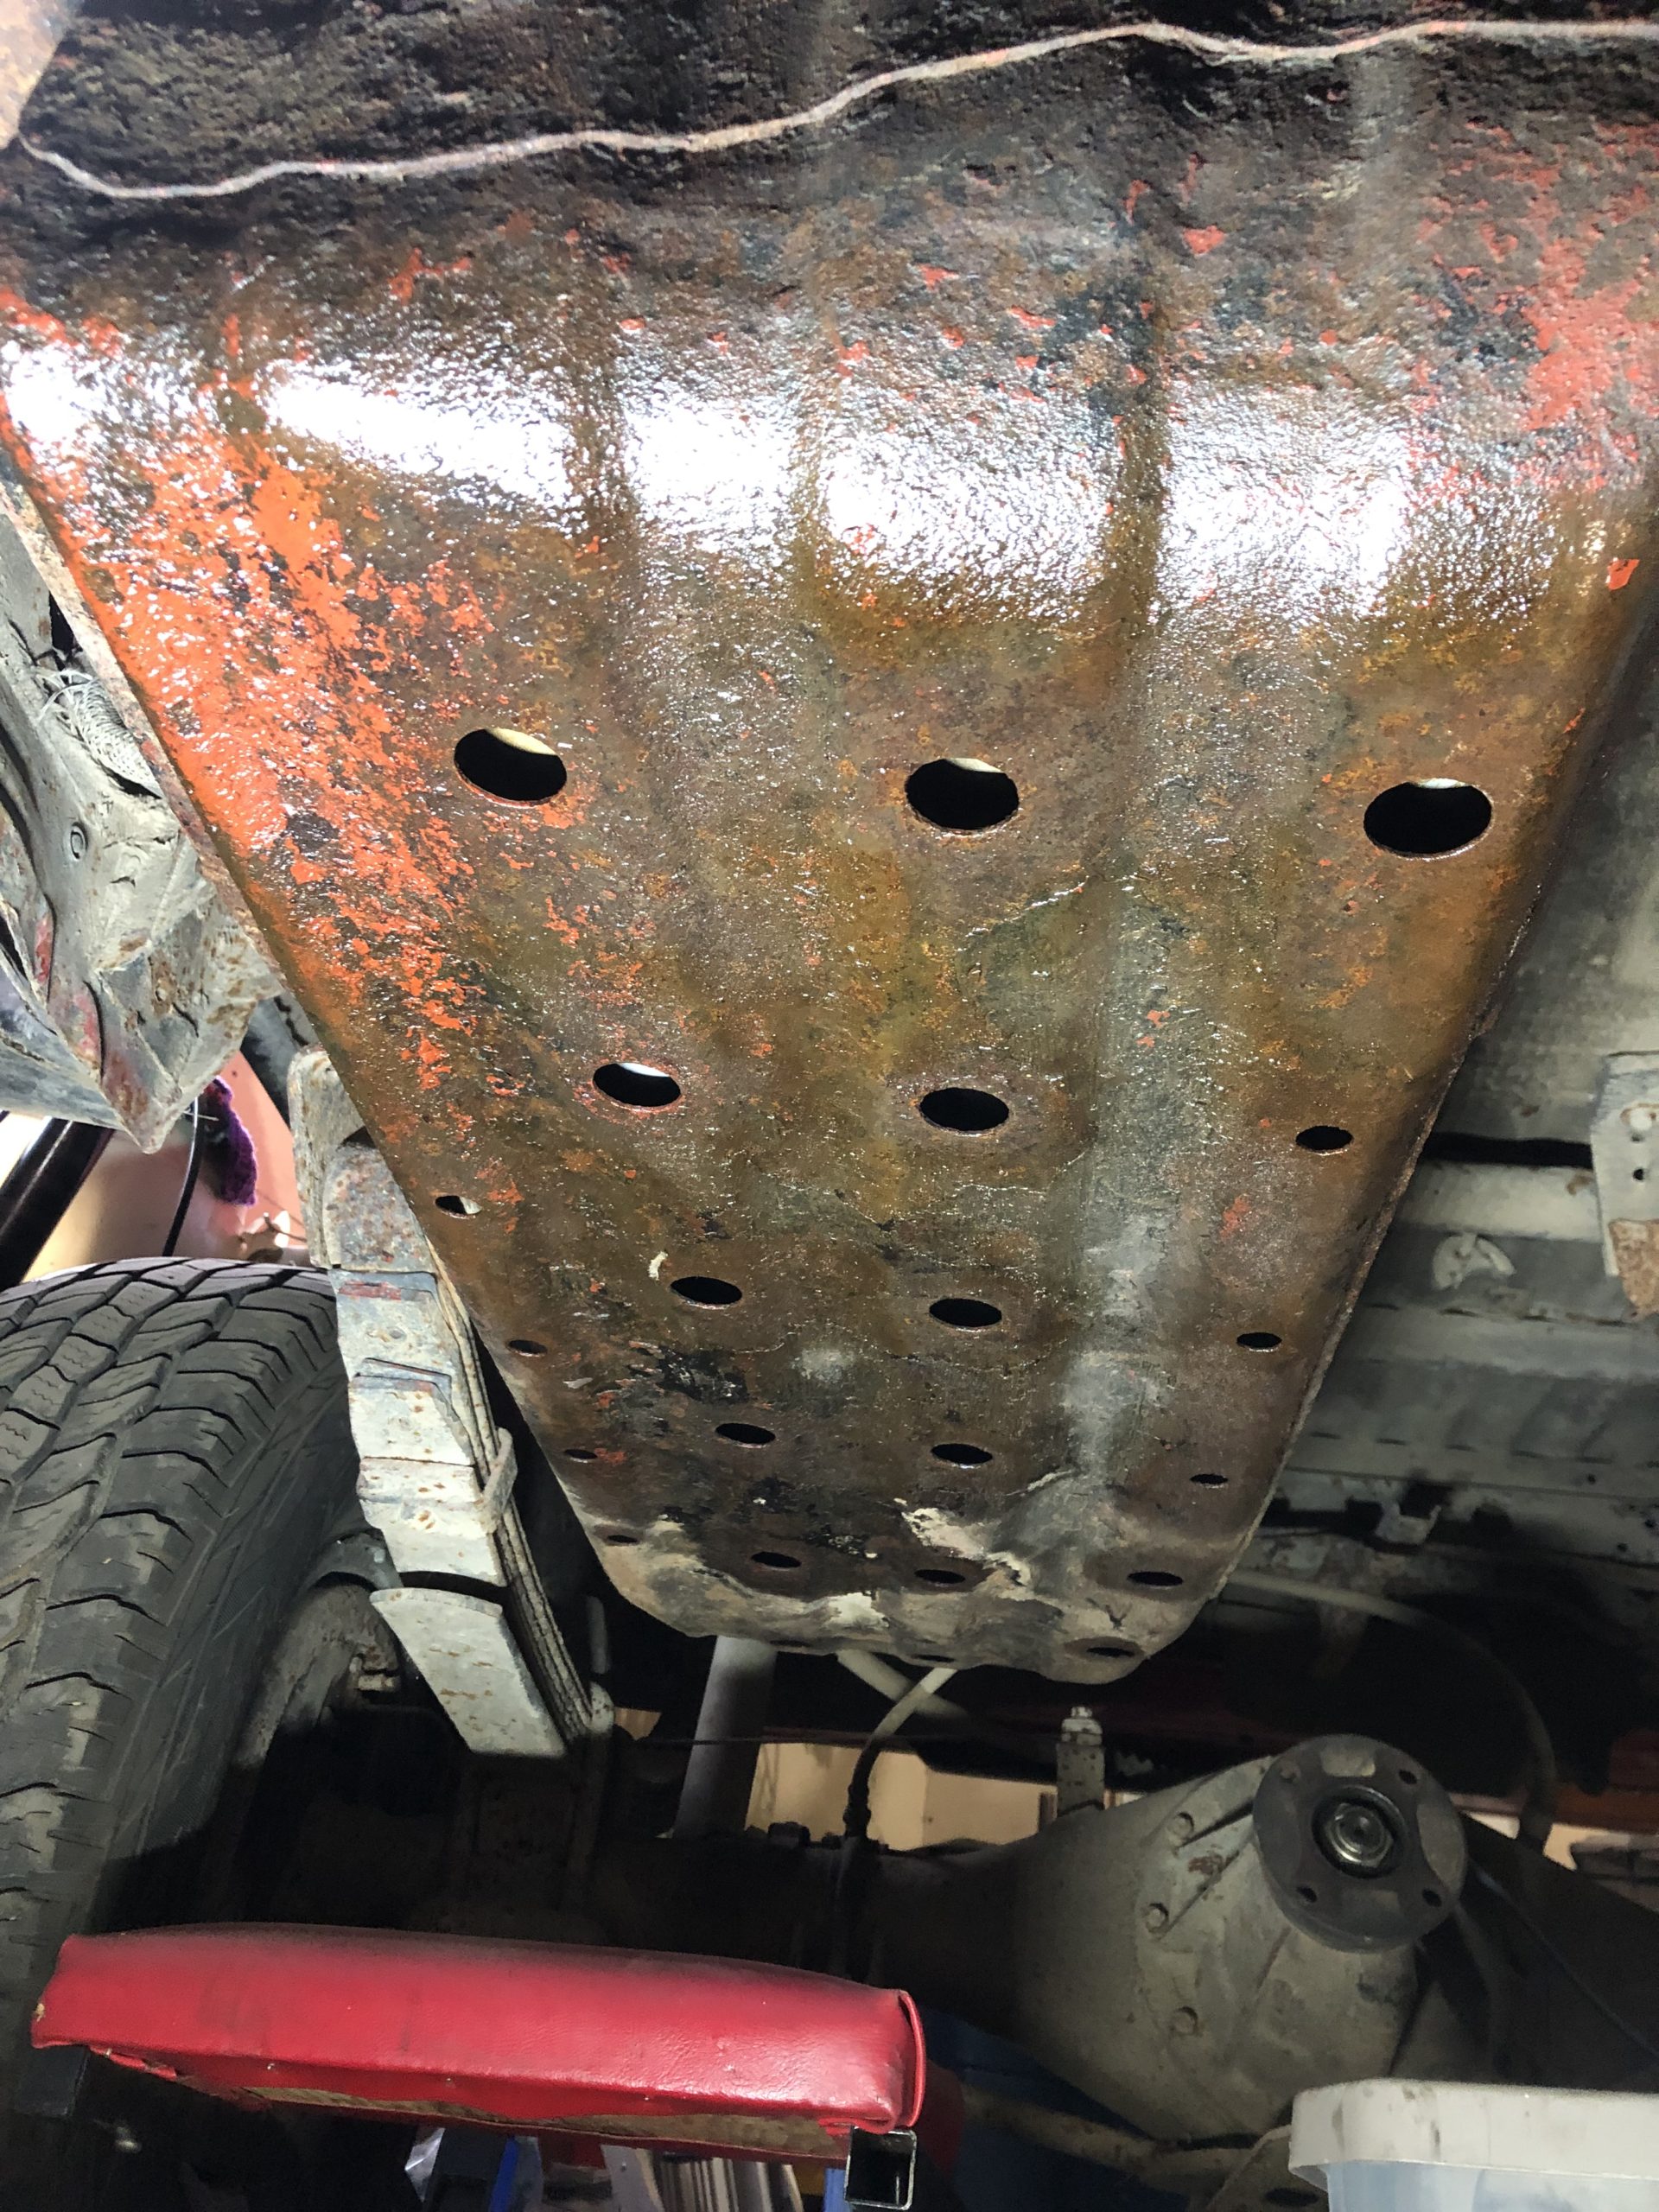
Also, I’ve finally discovered the source of raw fuel in The Shop, turns out 2 or 3 of the patches on the gas tank are not holding fuel. I’ll have to seal it from the inside at a later date. For now I’ve taken the skid plate outside so it can evaporate, and will wipe up the leak before i start welding.
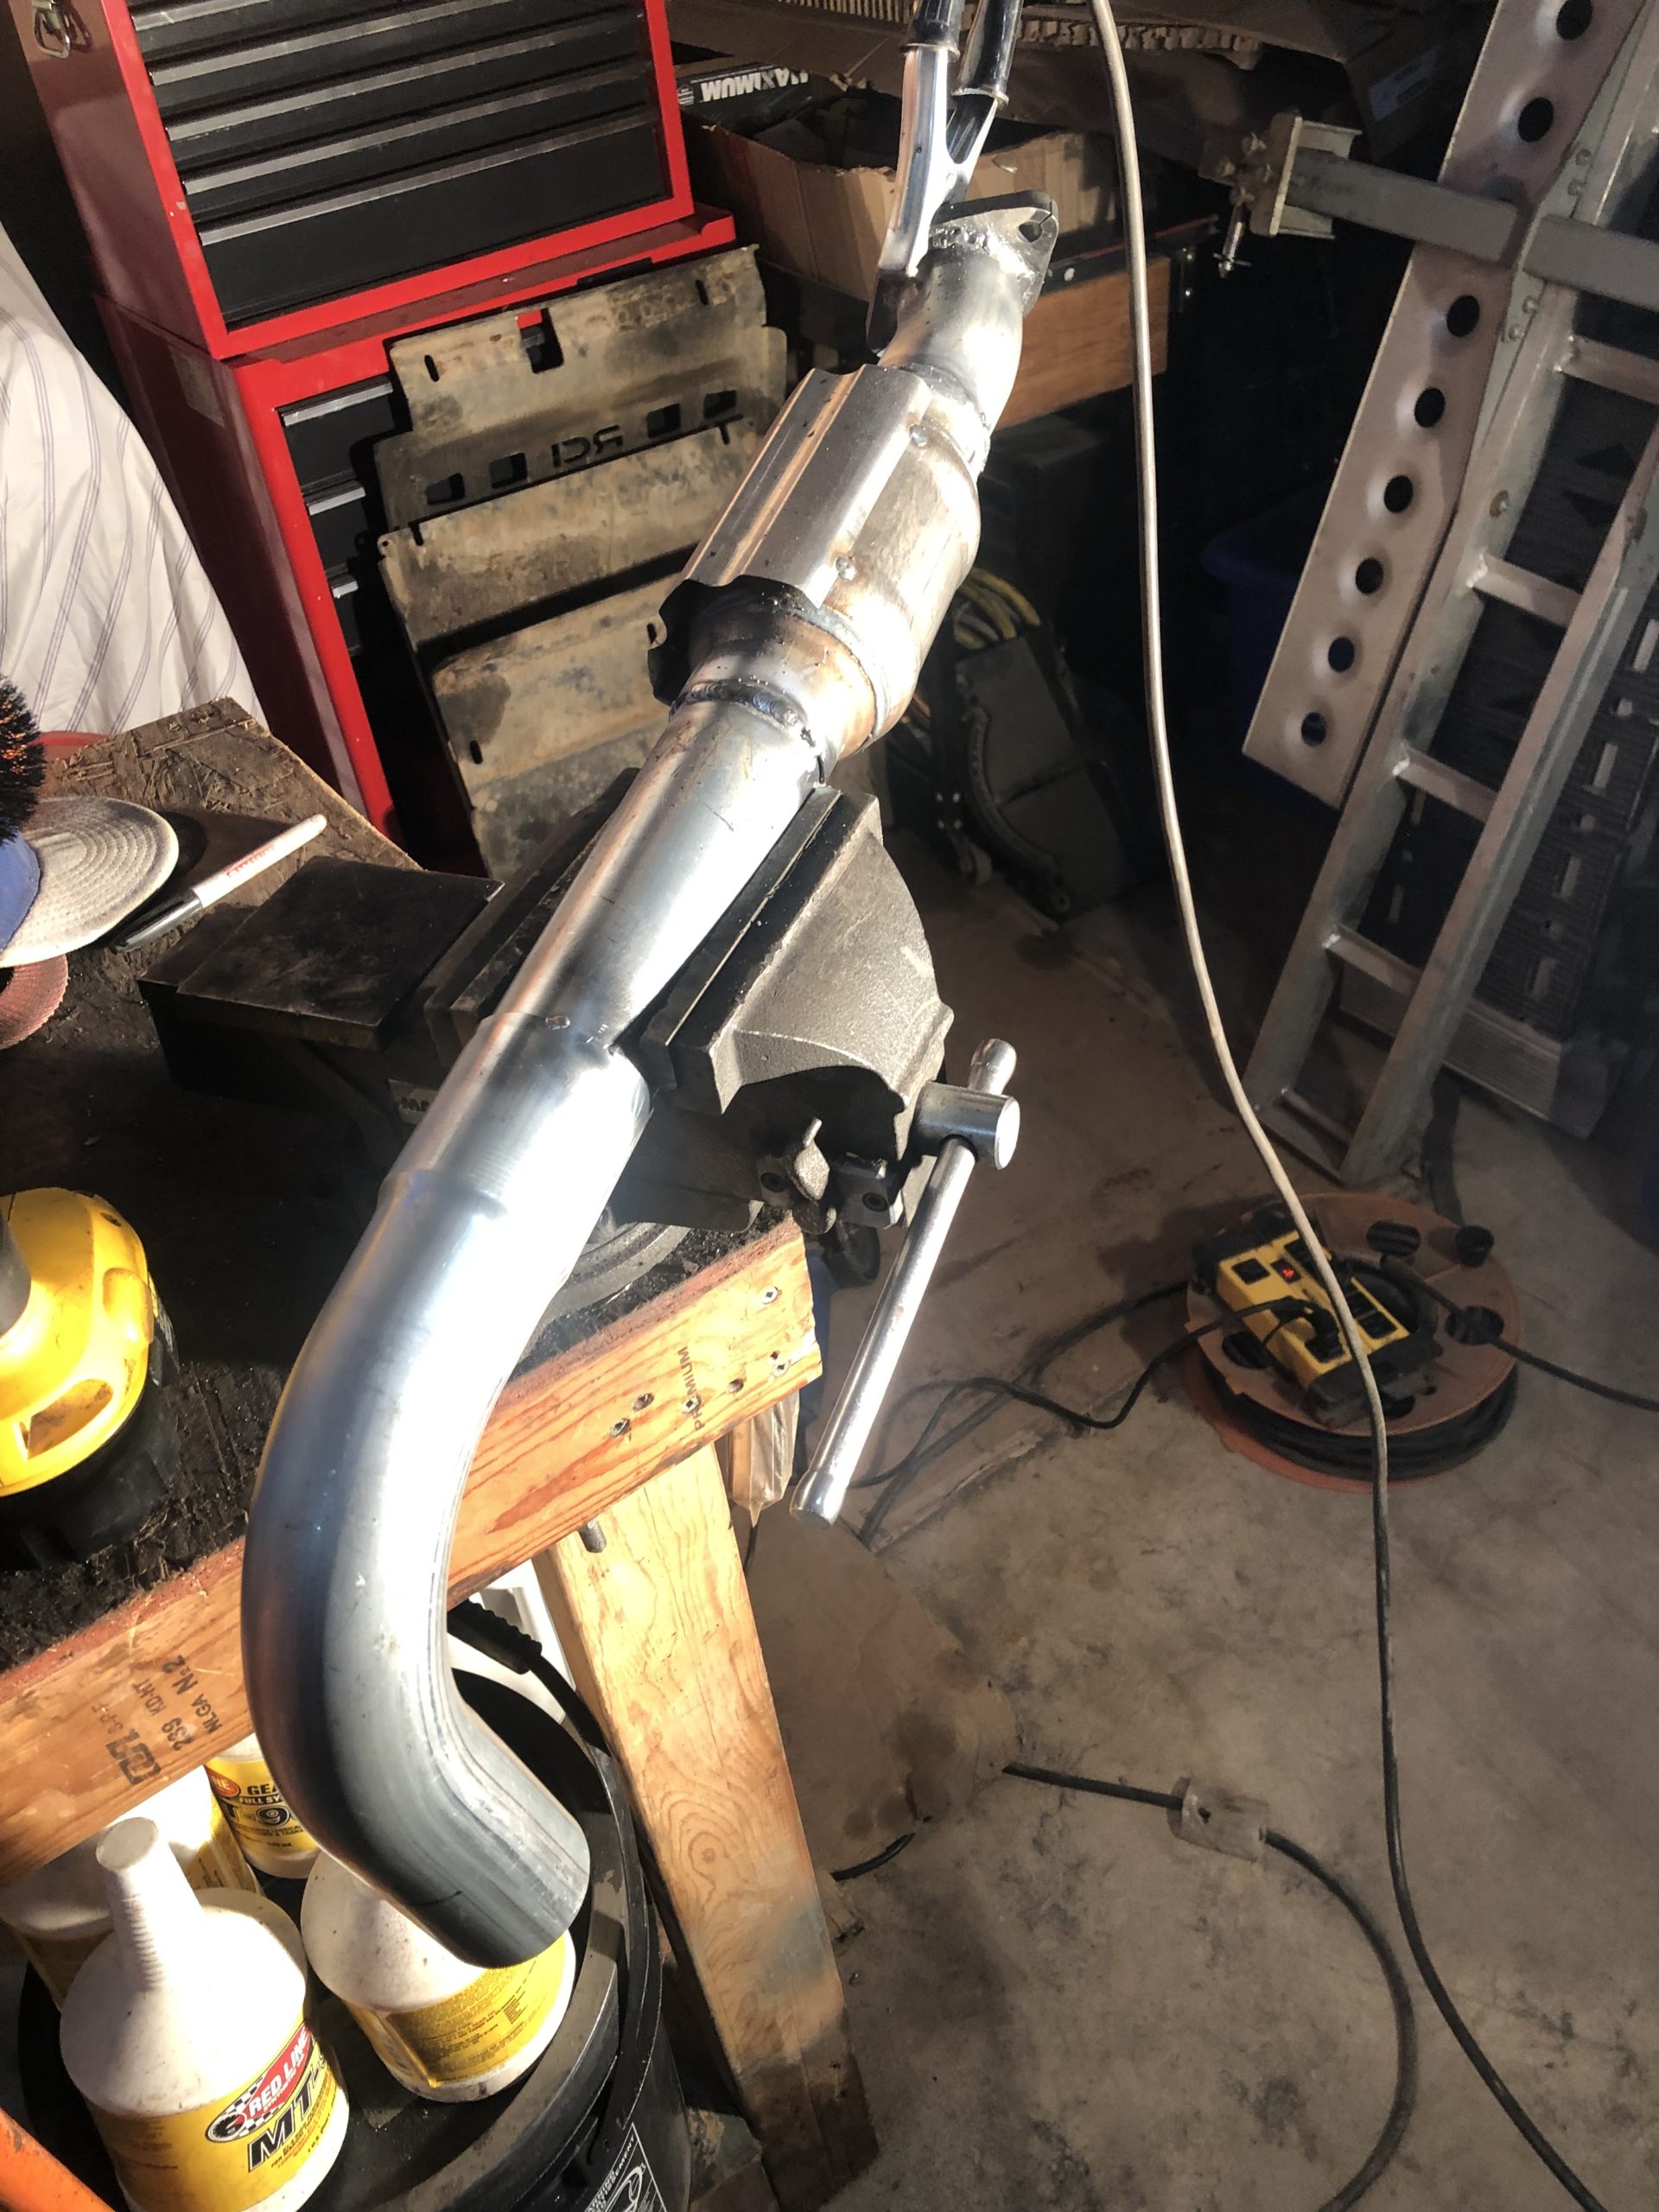
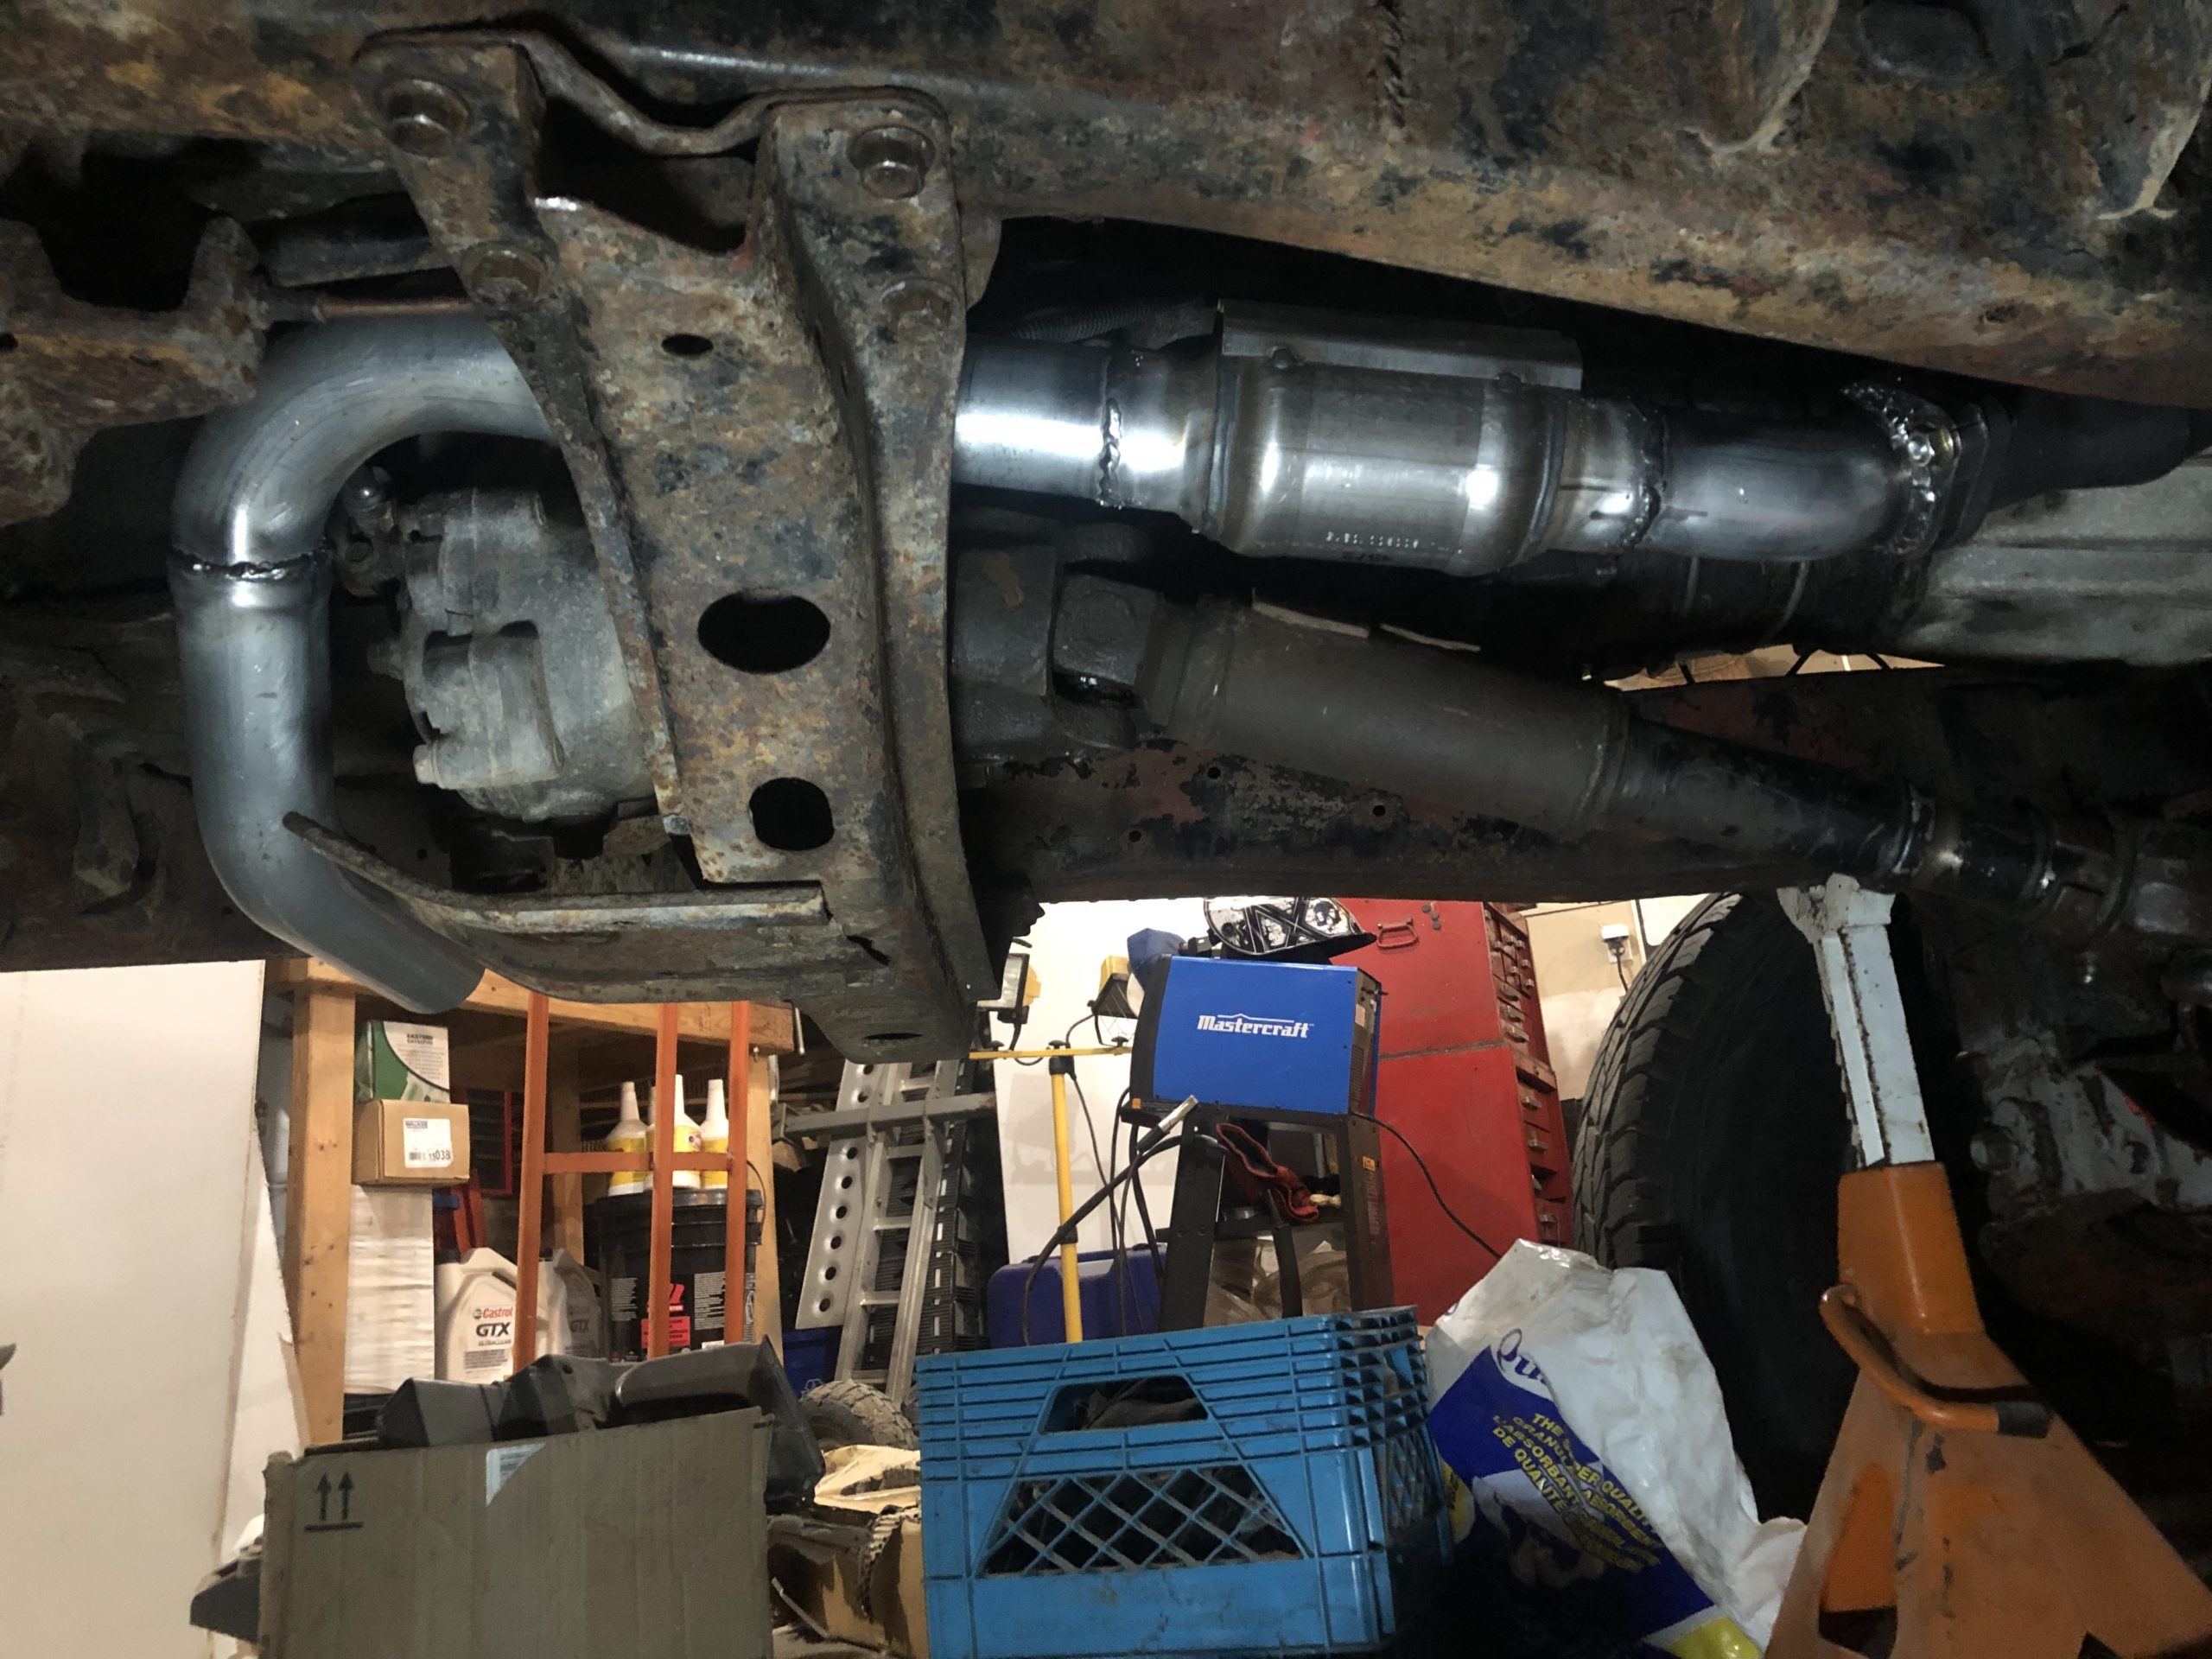
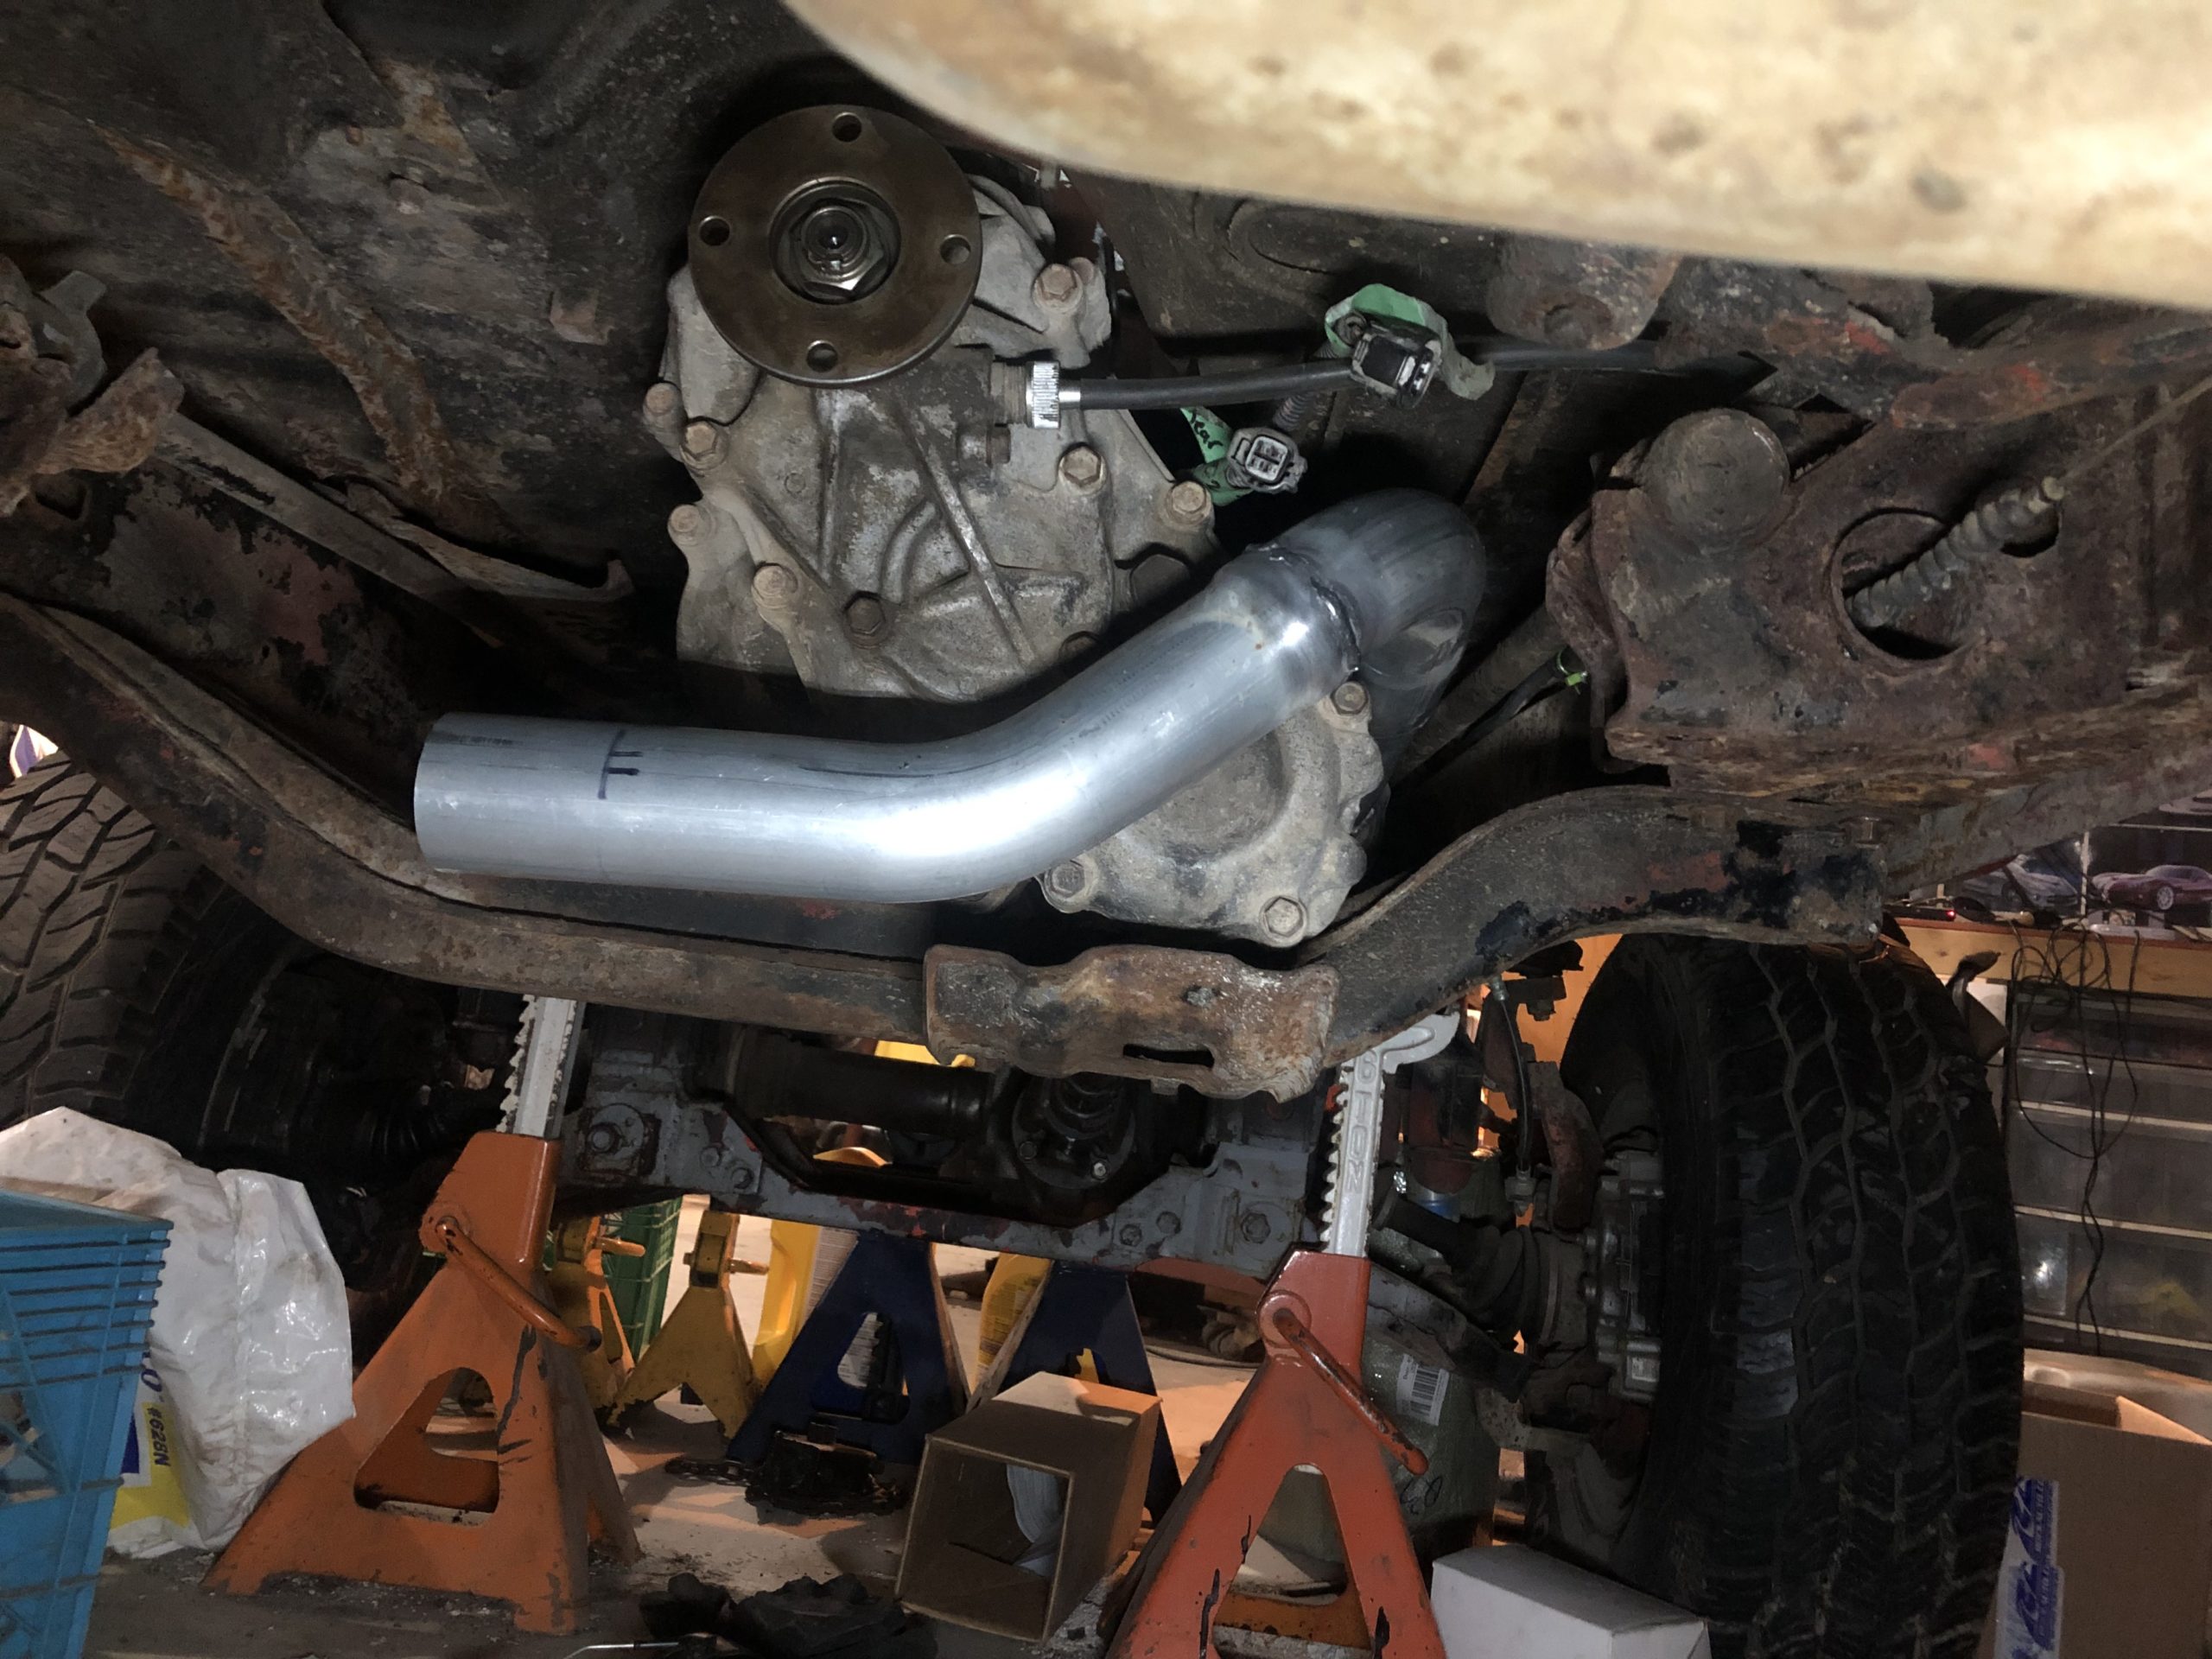
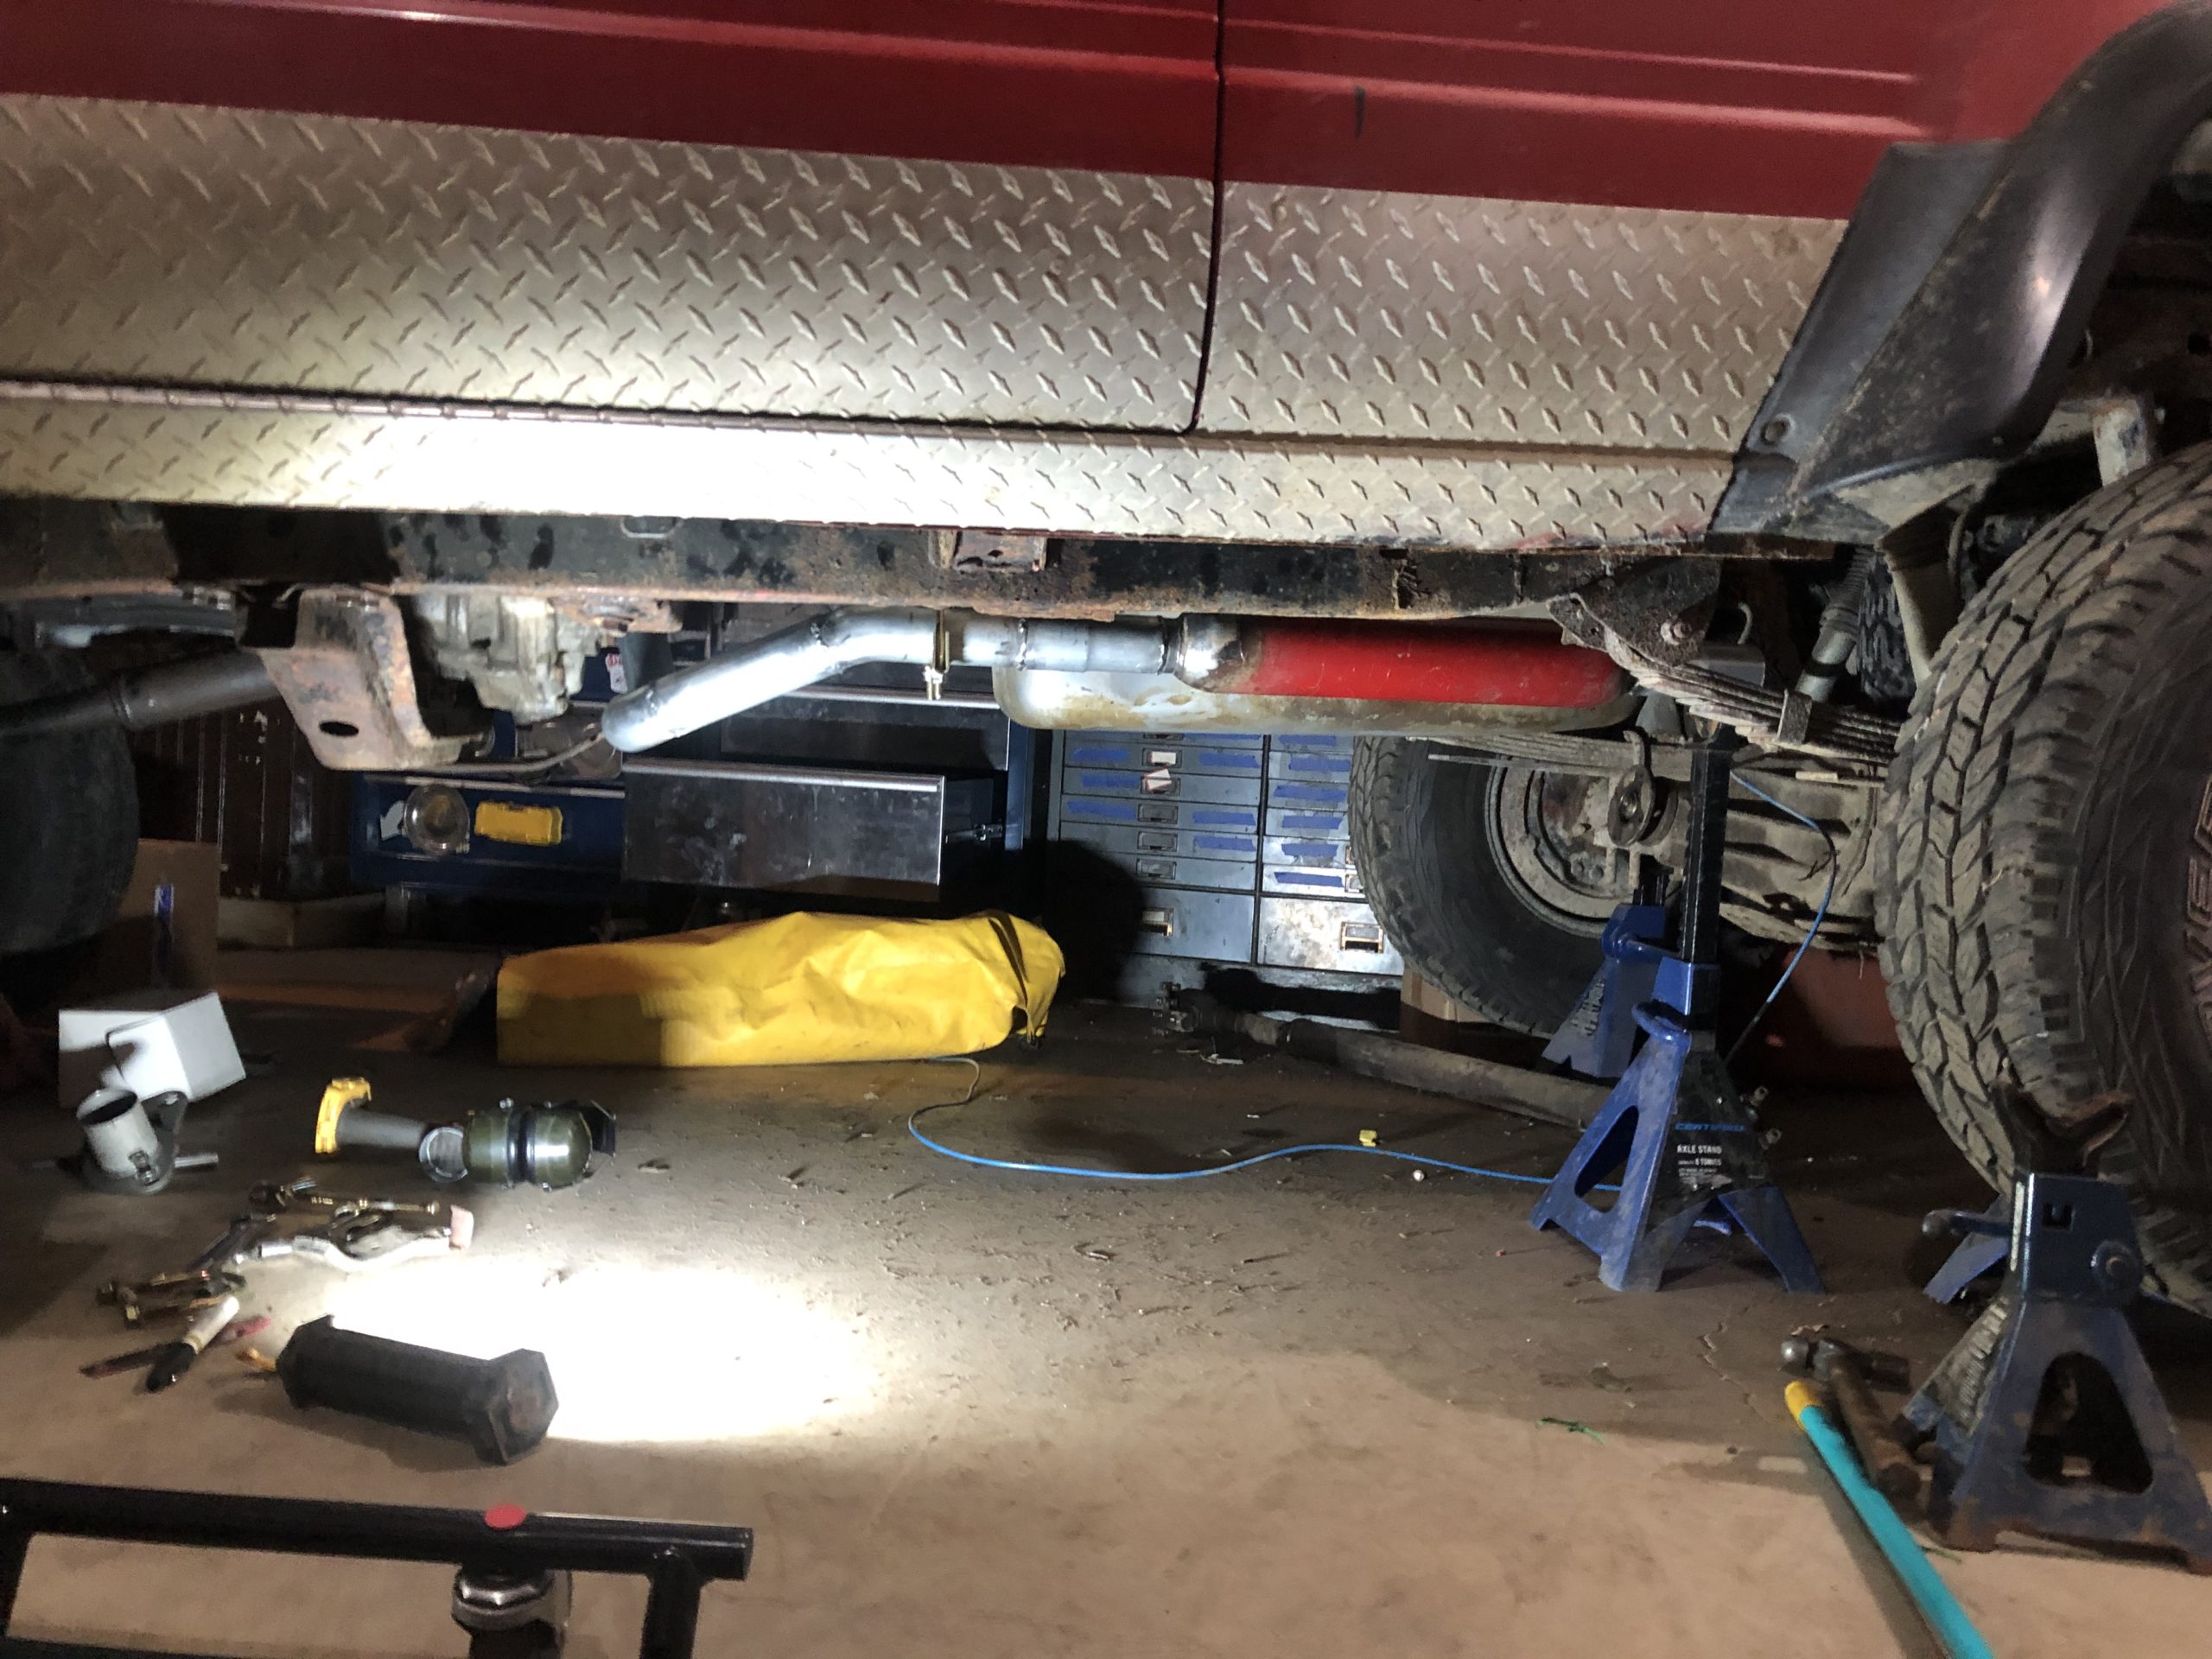
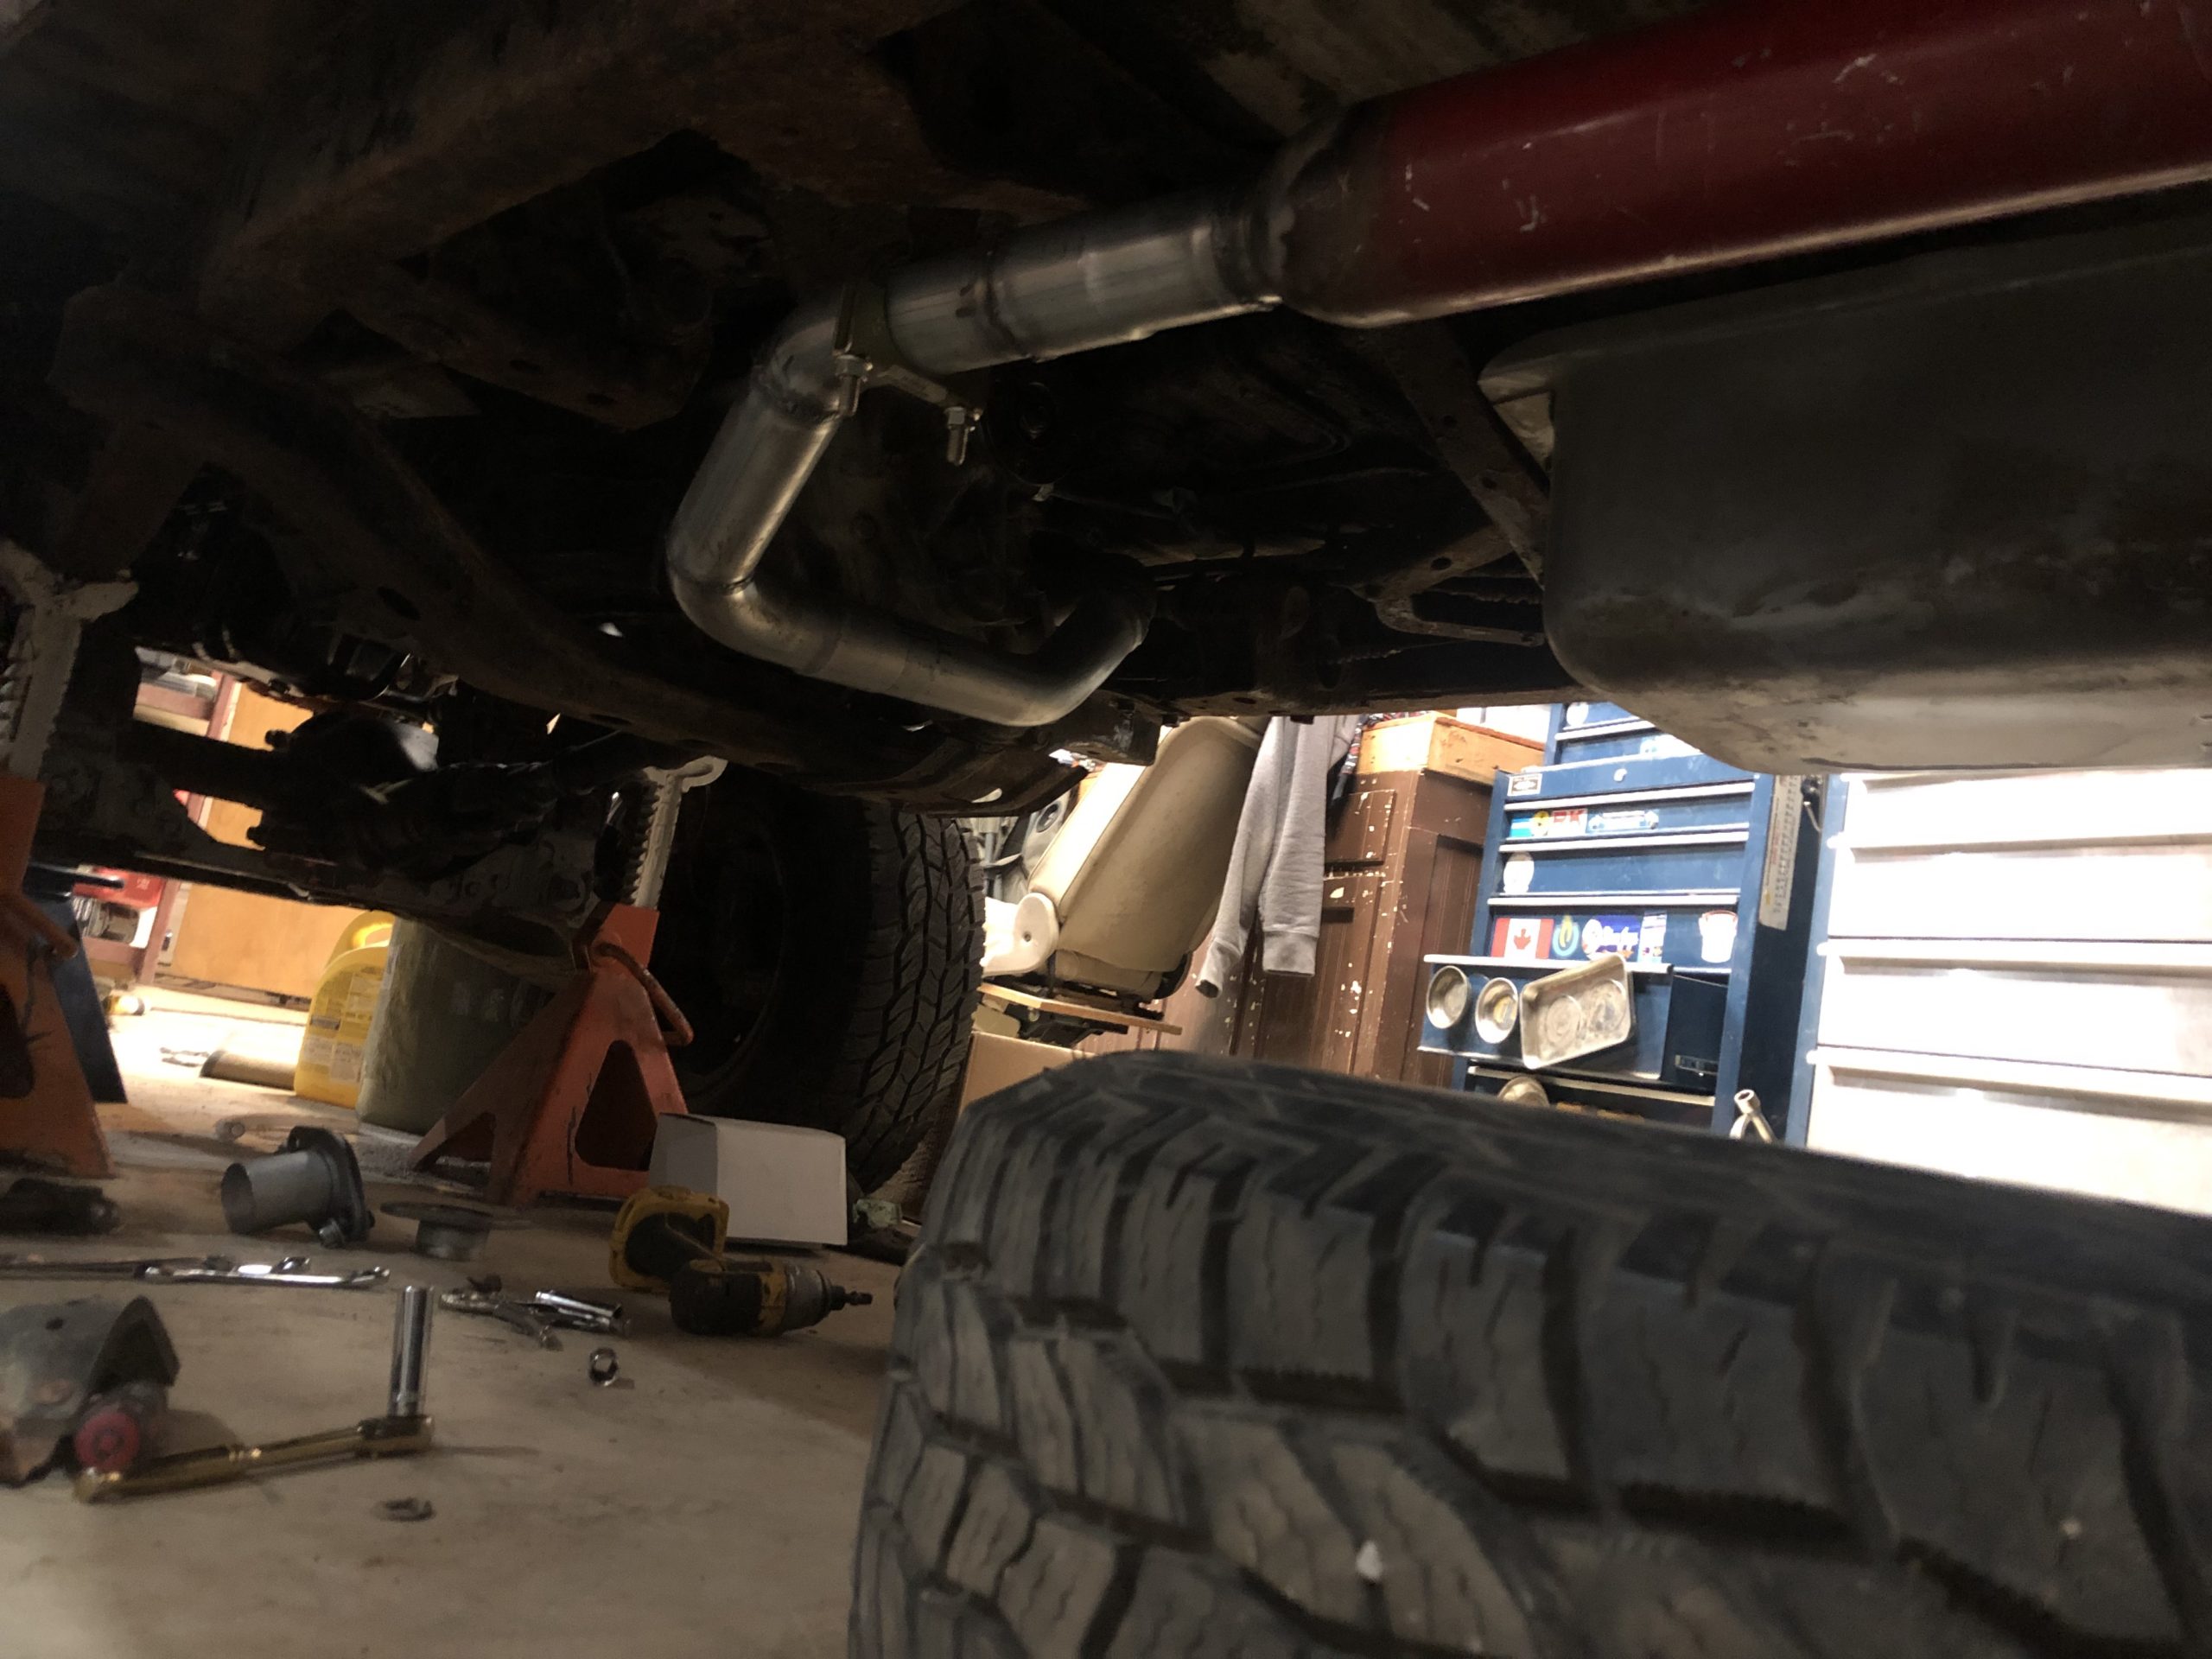
April 18, 2025 at 9:14 am #212357toys-n-yotasKeymasterLast night I stayed up late fabricating some of the exhaust. I have nearly finished the first pipe with catalytic converter, it started after the header and will finish behind the T-case with a two-bolt flange. Thus far (without the flange) I can easily twist this piece into place above the crossmember and beside tcase. I can get my hand around the pipe everywhere.
To finish this pipe I need to add the flange, and a pair of O2 flanges. I still have to grind the O2 flanges to contour their shape, gonna do it at work on the belt sander. The whole thing will get painted and wrapped in Fiberglass.The next piece will go from the tcase to back of the muffler. Might be my goal for tonight.
April 19, 2025 at 2:19 pm #212363toys-n-yotasKeymasterGot a little more of the exhaust built today, not bad for pre-lunch progress!
Fired up Redee, sounds pretty mean (AND LOUD!!) through the Cherry bomb. I will ensure the tailpipe clears the body to prevent interior drone. Will aim to exit the tailpipe in the OEM location behind the rear tire
Attachments:
April 19, 2025 at 6:30 pm #212365toys-n-yotasKeymasterDid a little more welding today, still need to add the flanges. I want to cut a section I already made, and add a 2″ spacer to bring everything closer to the floor. I am trying to decide if it’s worth it or not, I’ll chew on it a bit longer.
-
This reply was modified 2 months, 2 weeks ago by toys-n-yotas.
Attachments:
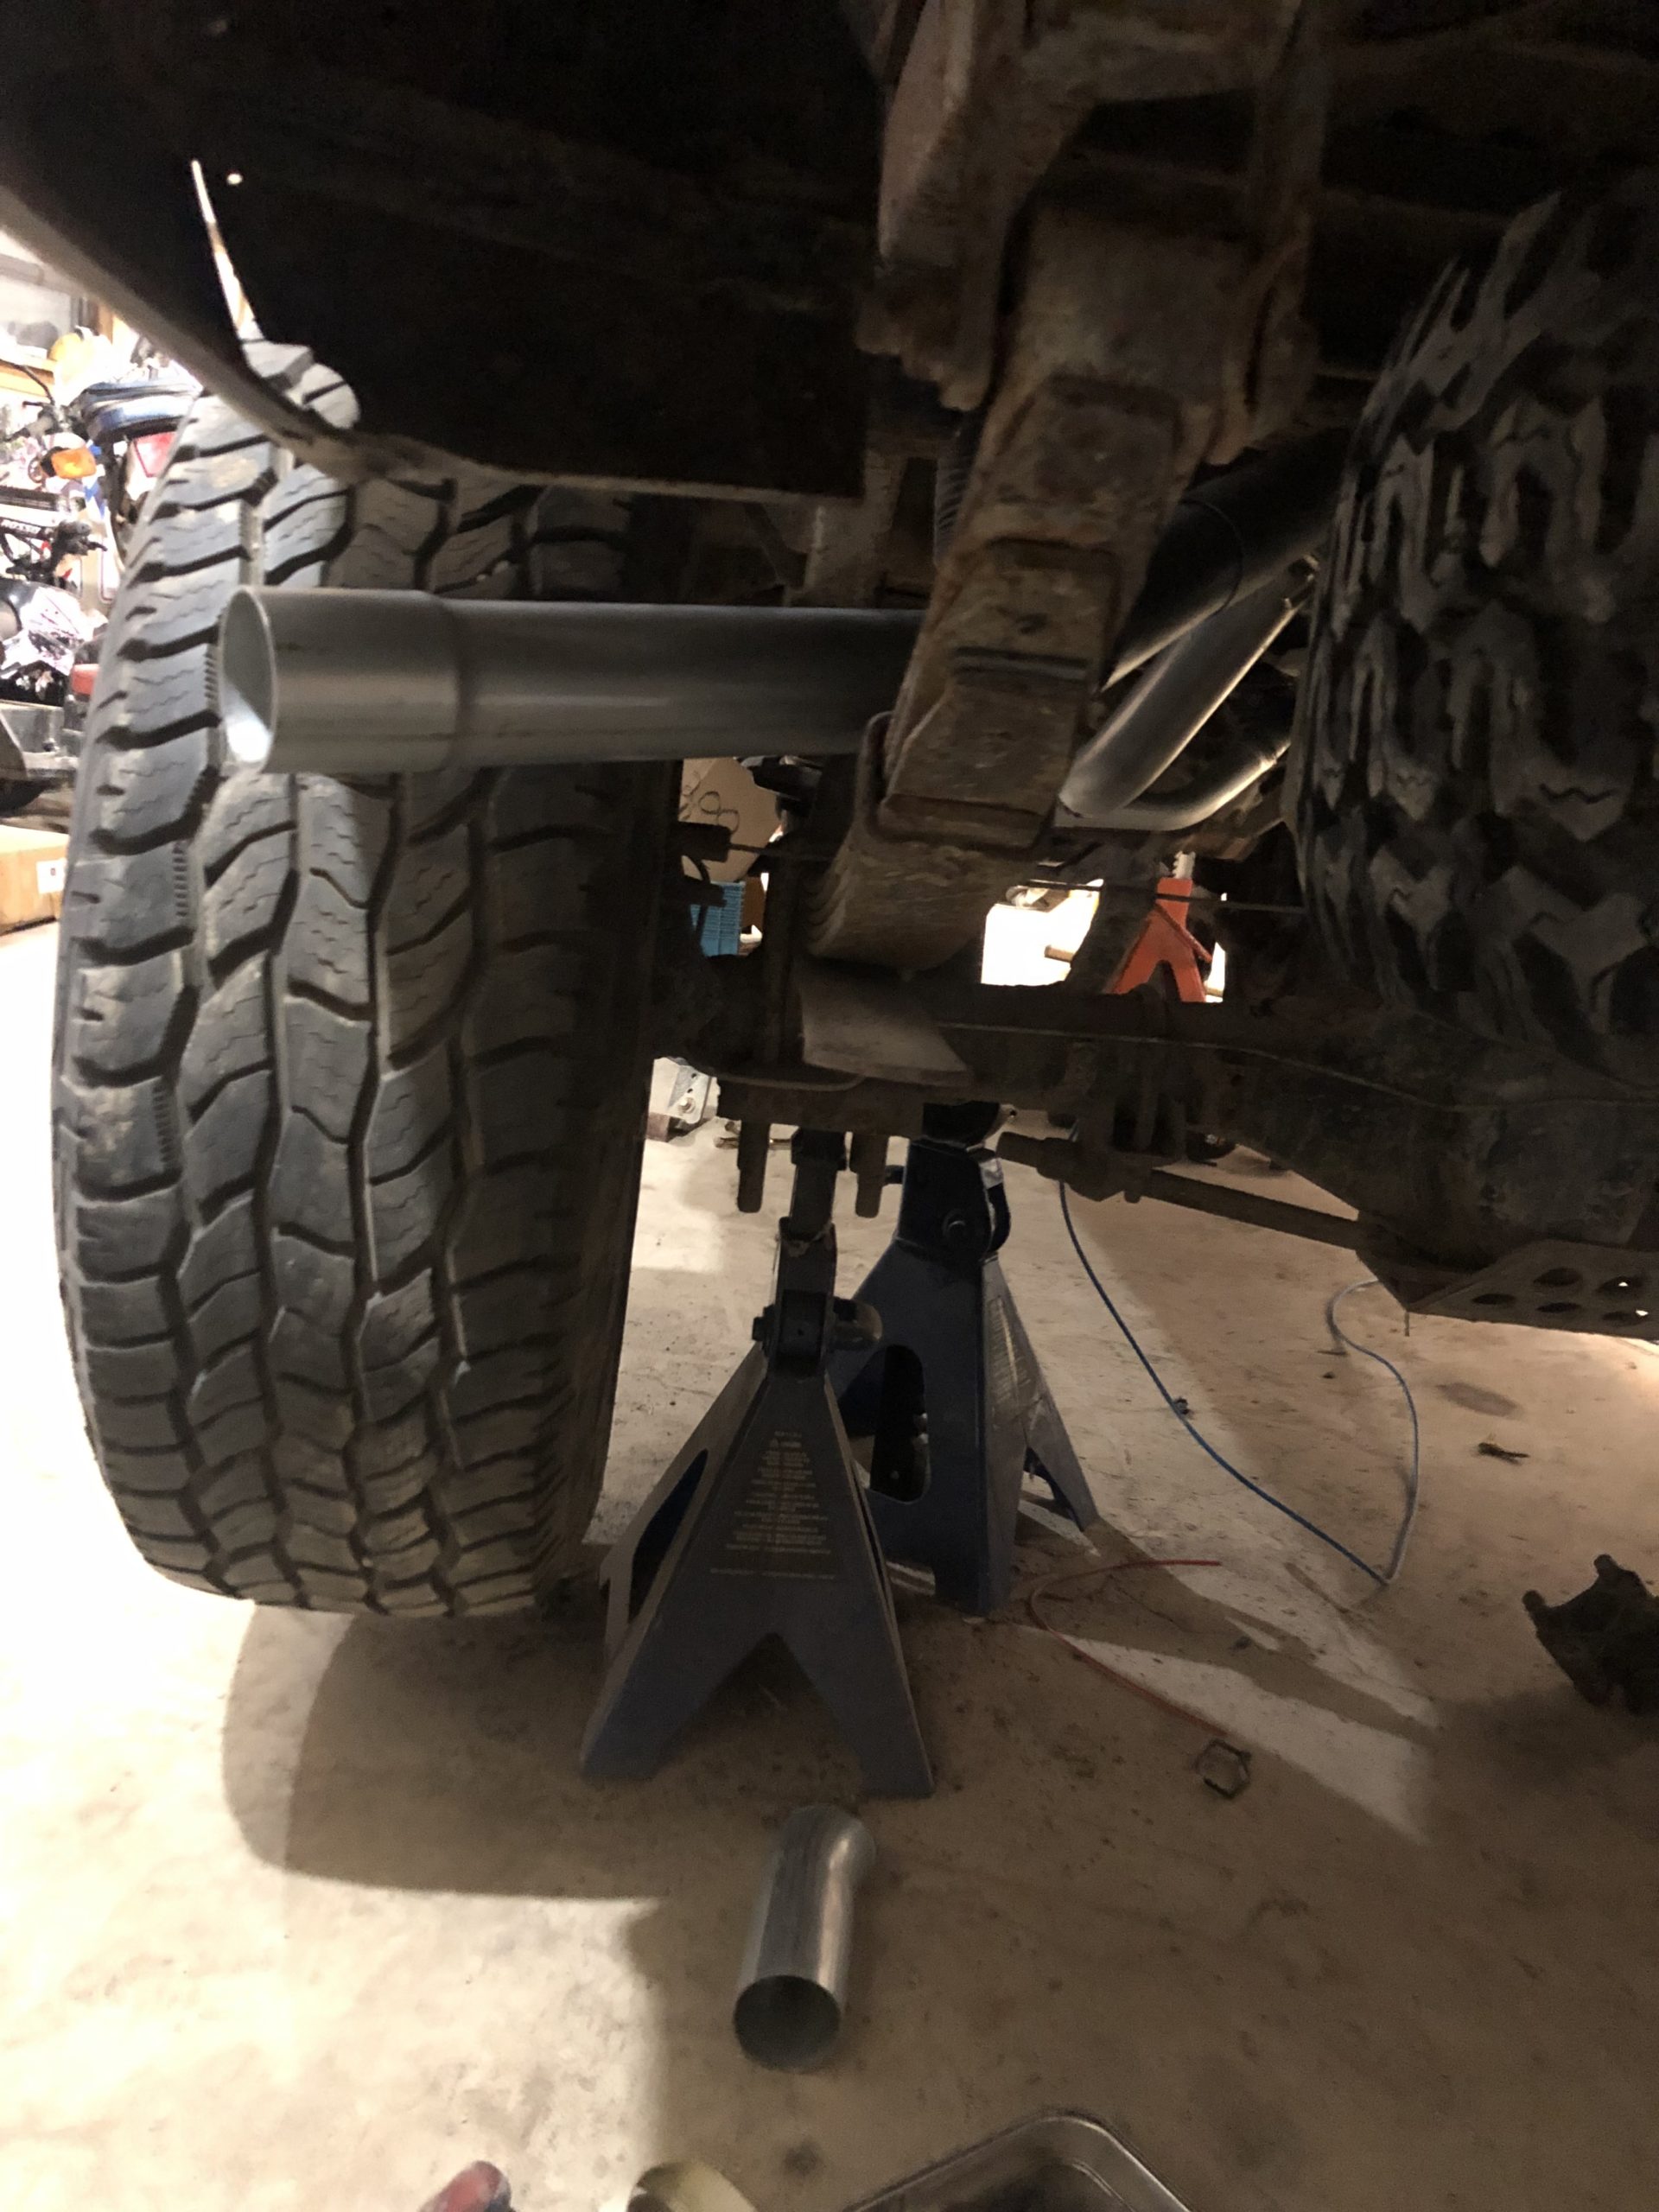
April 20, 2025 at 1:02 am #212368toys-n-yotasKeymasterMuch happier with the fit now that I added a 7″ run in the 45* bend, raised everything about 2″. The weld is quite ugly, but I’m tired and it’s strong enough.
Next time up I’ll start on the tailpipe.
Attachments:
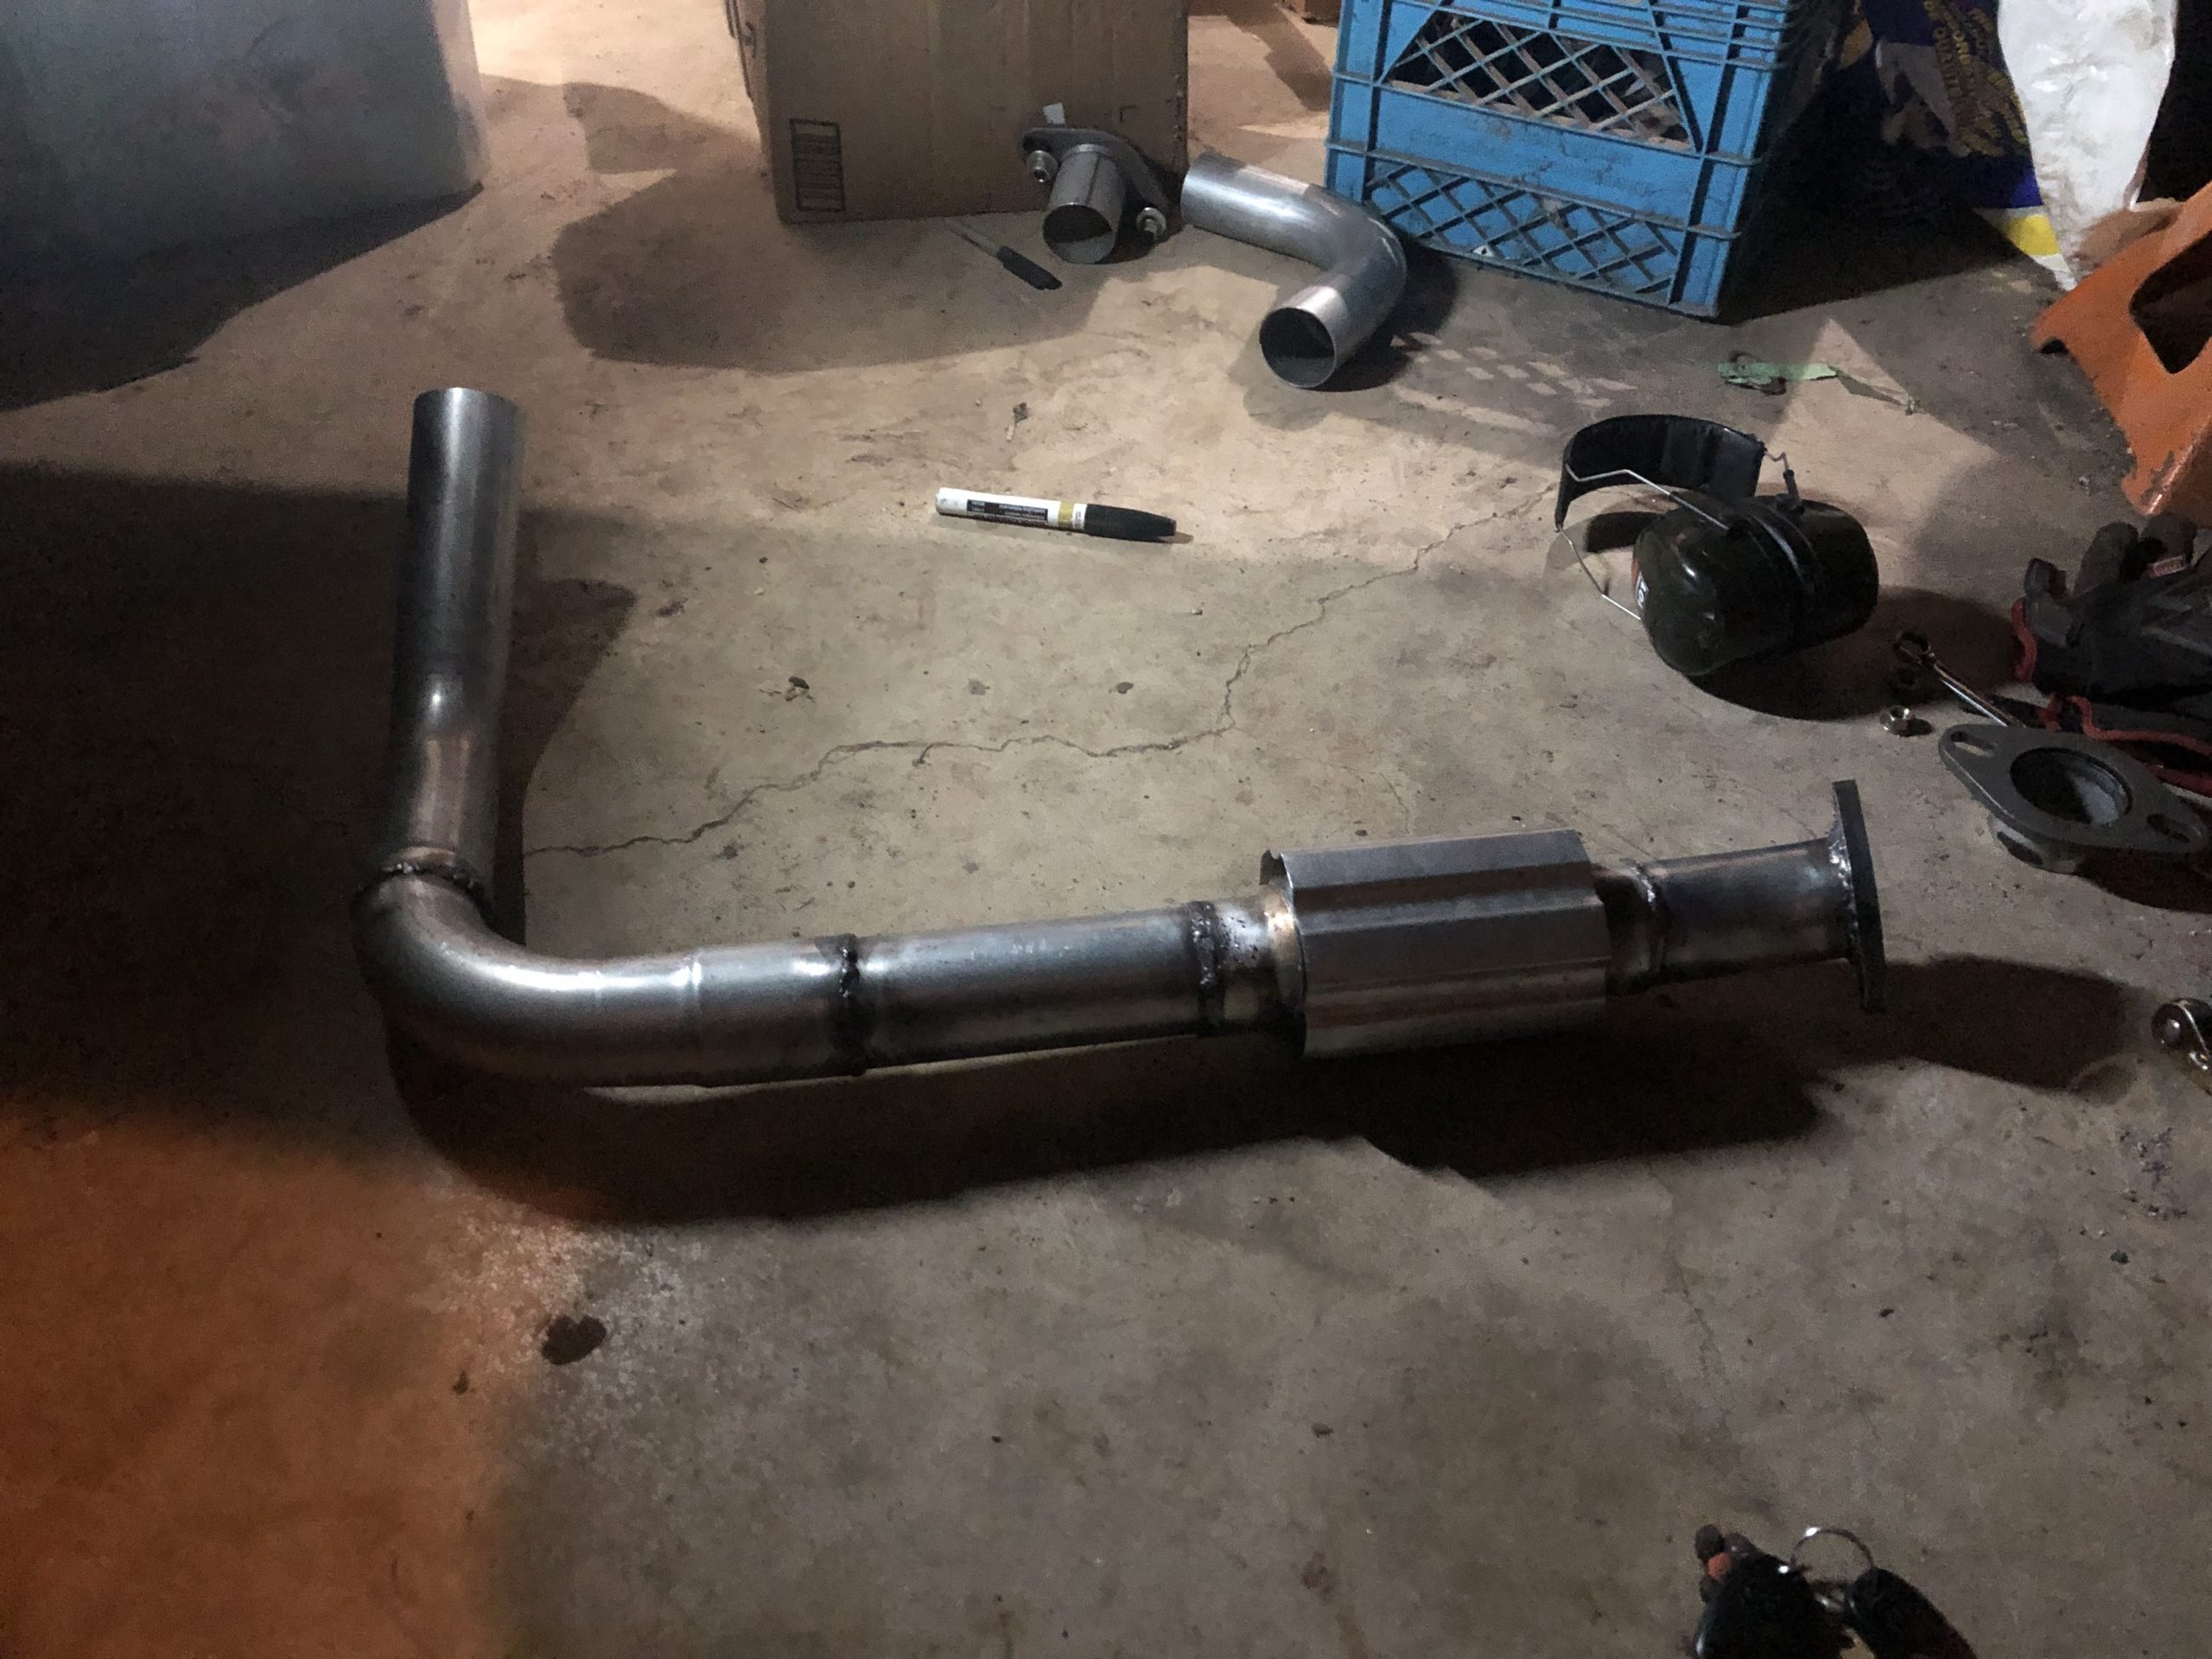
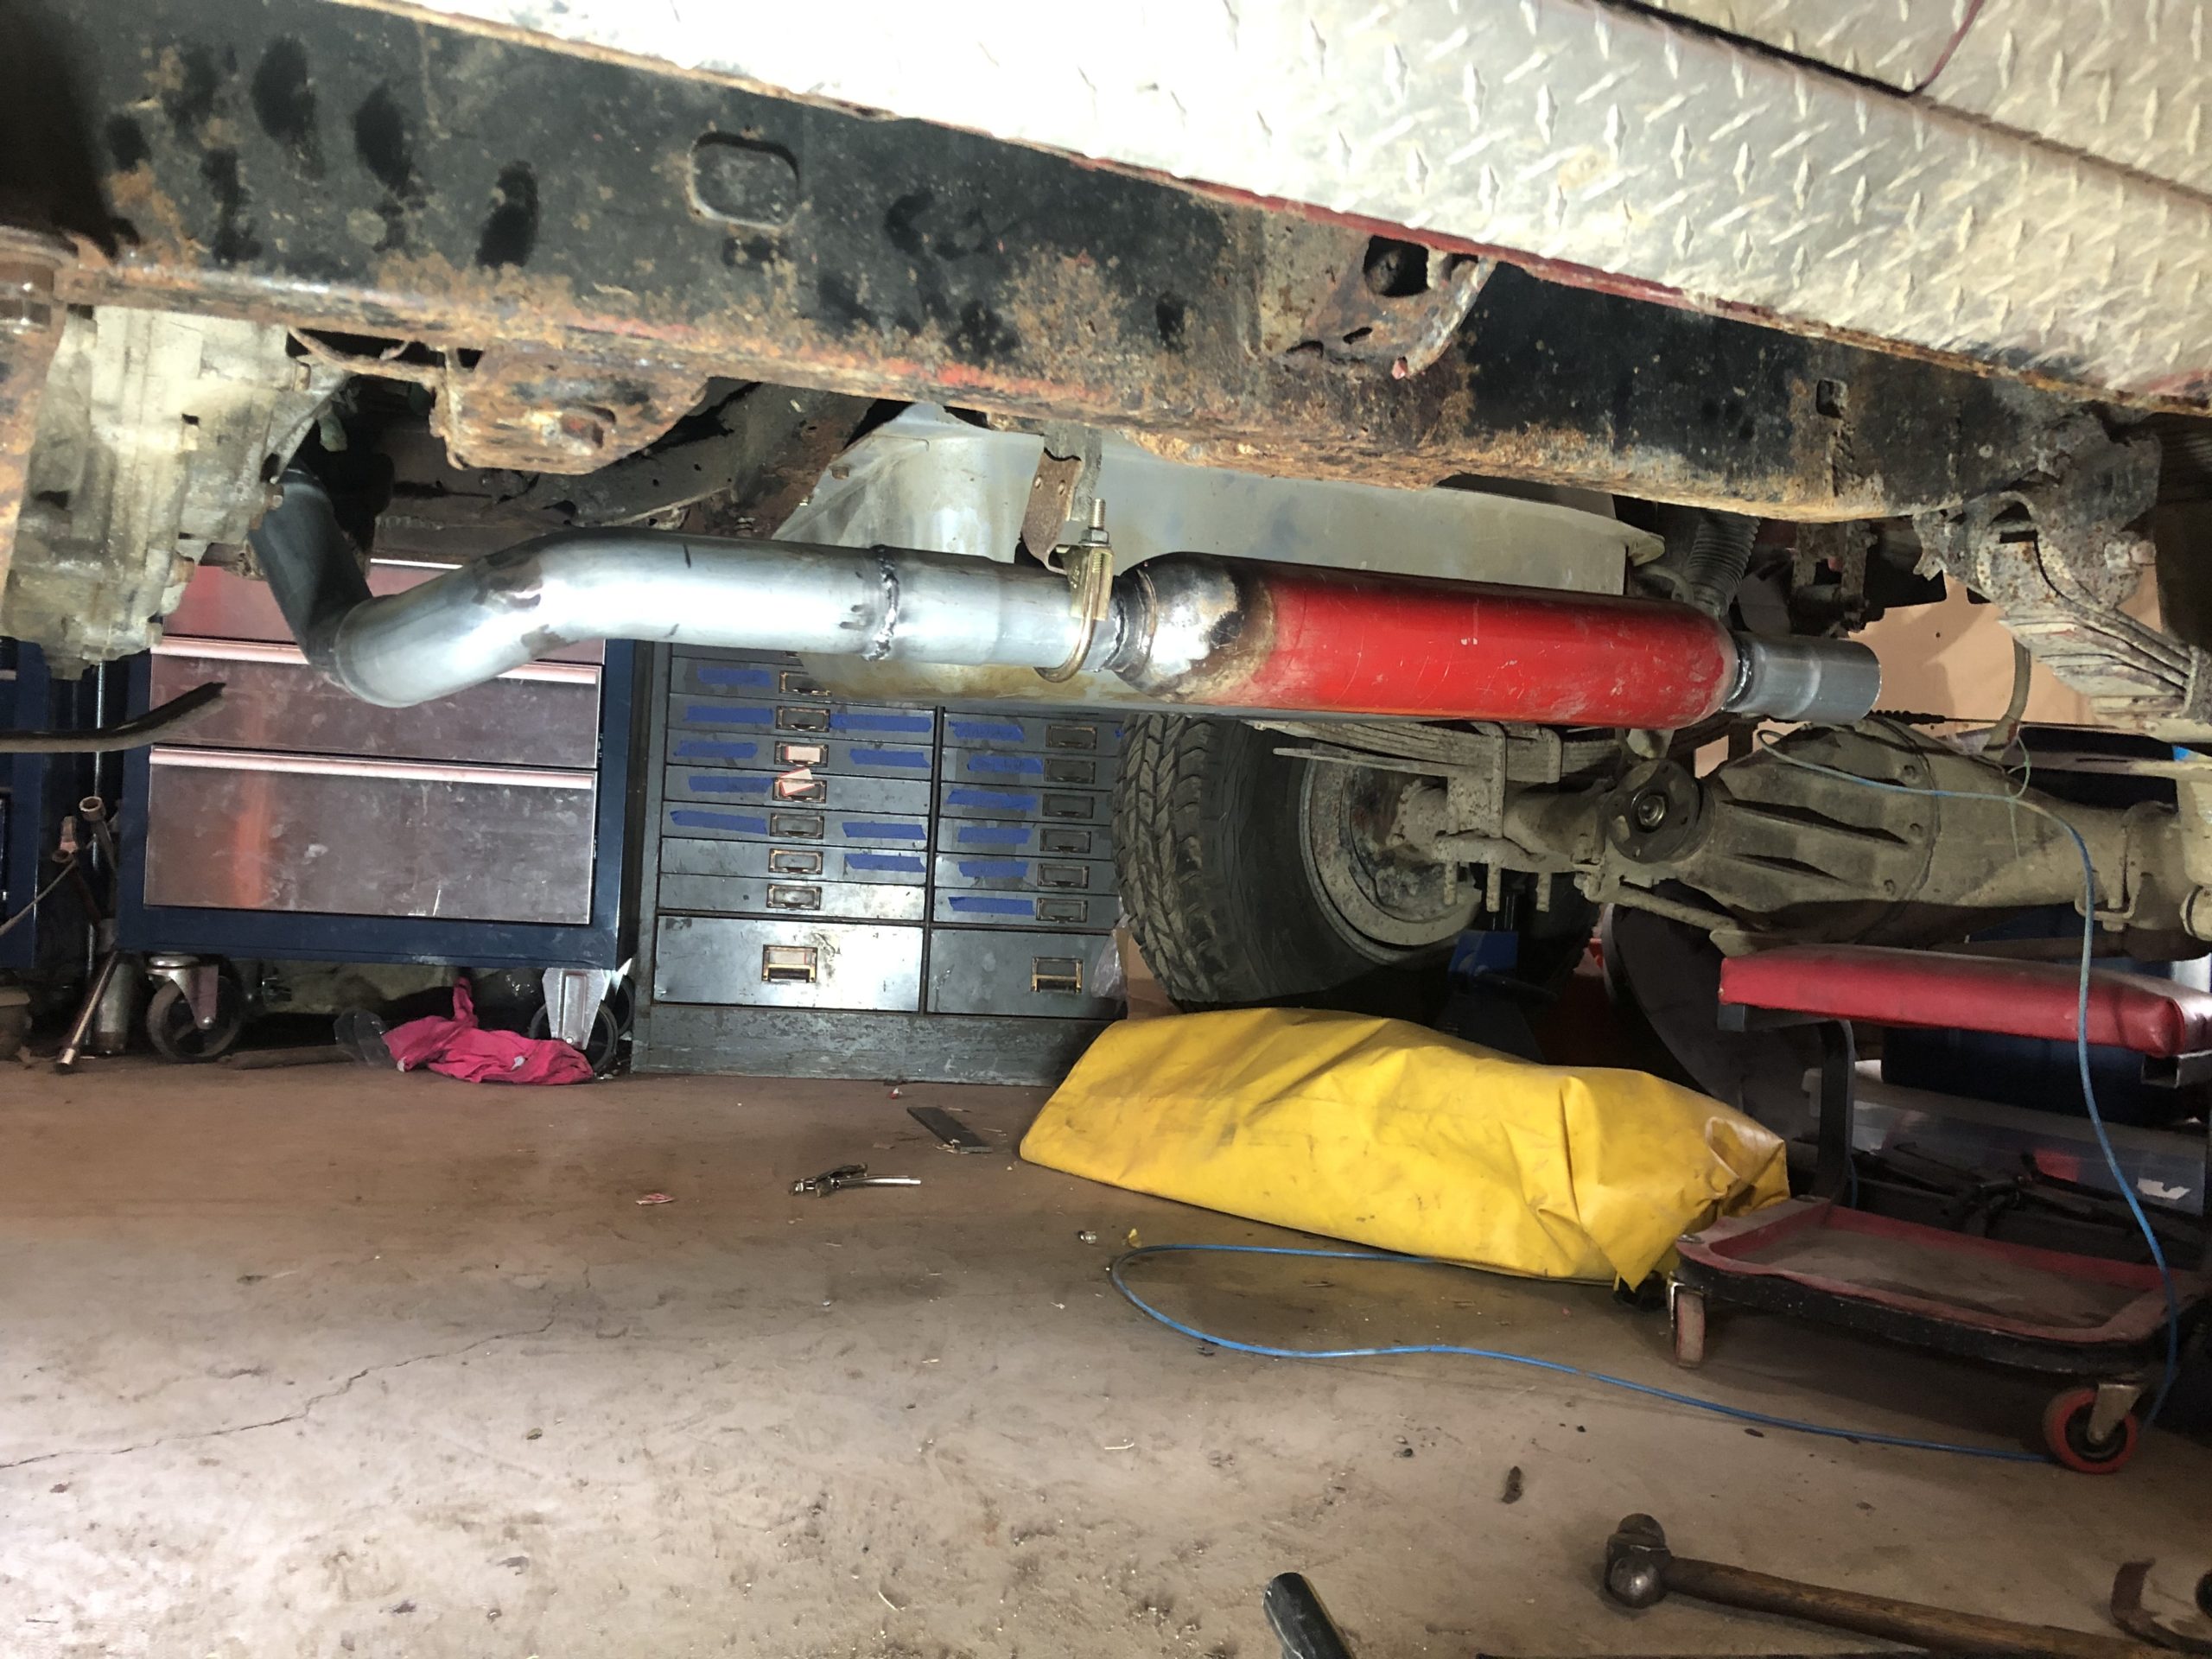
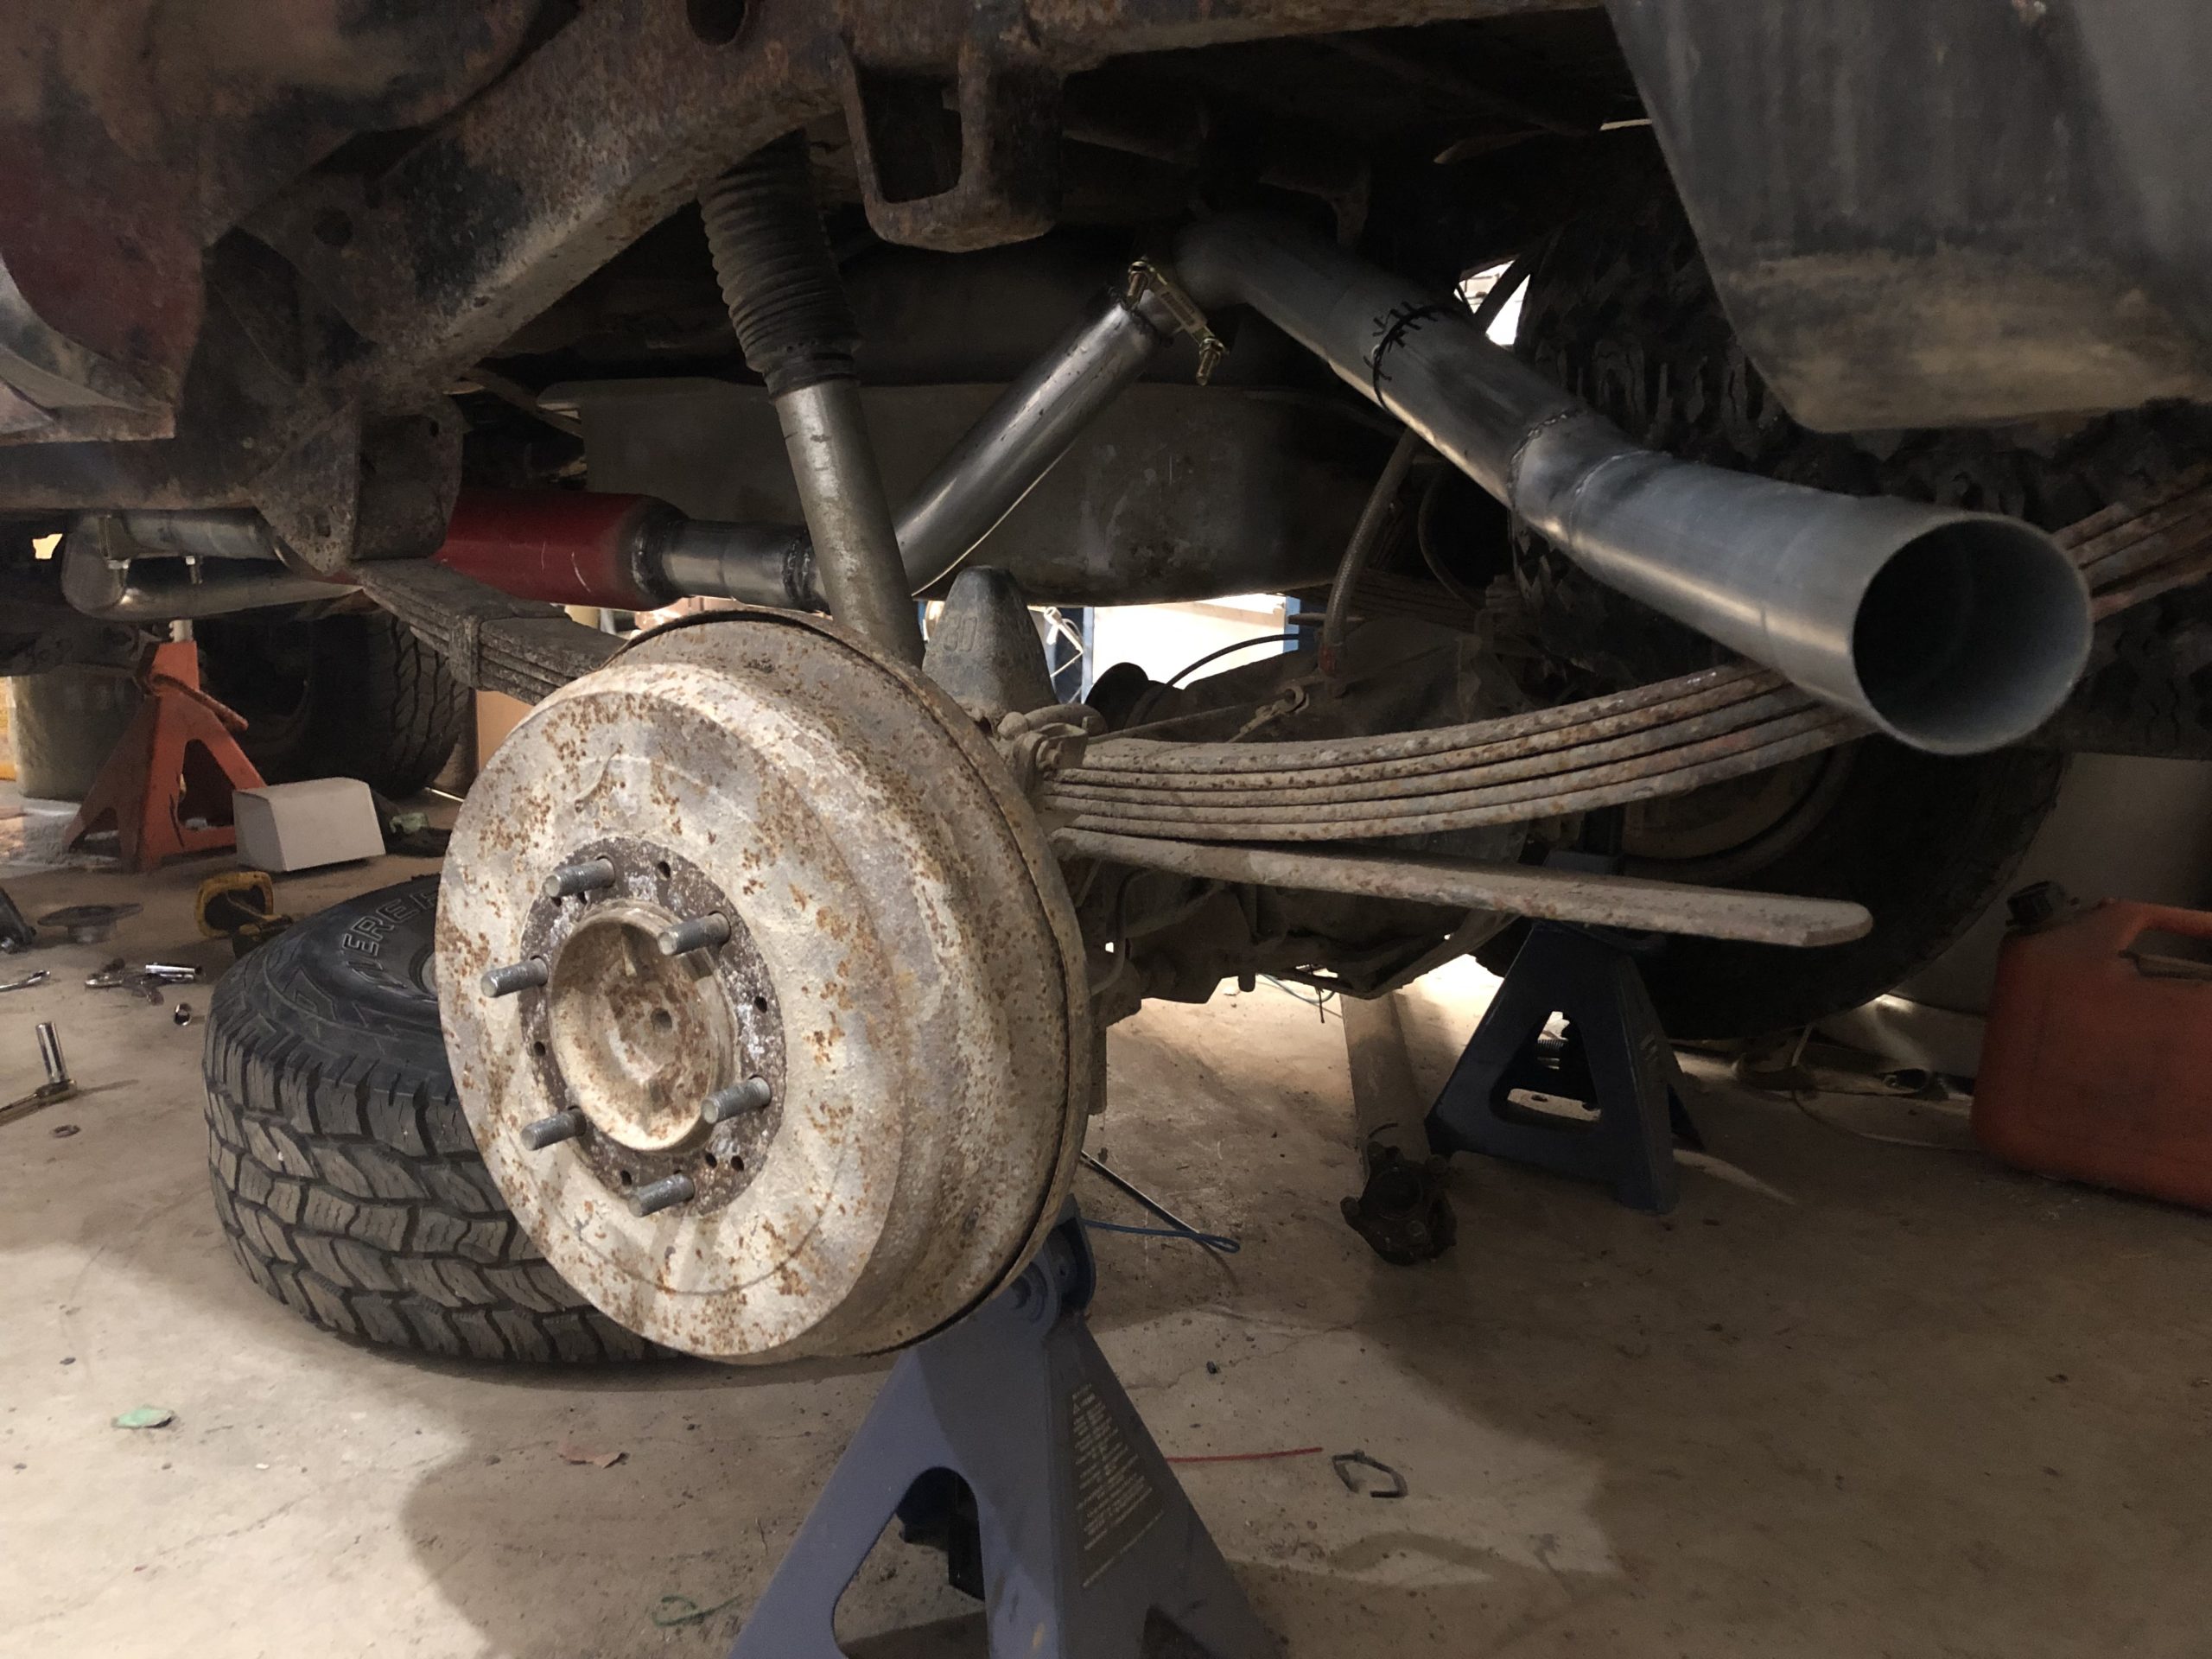
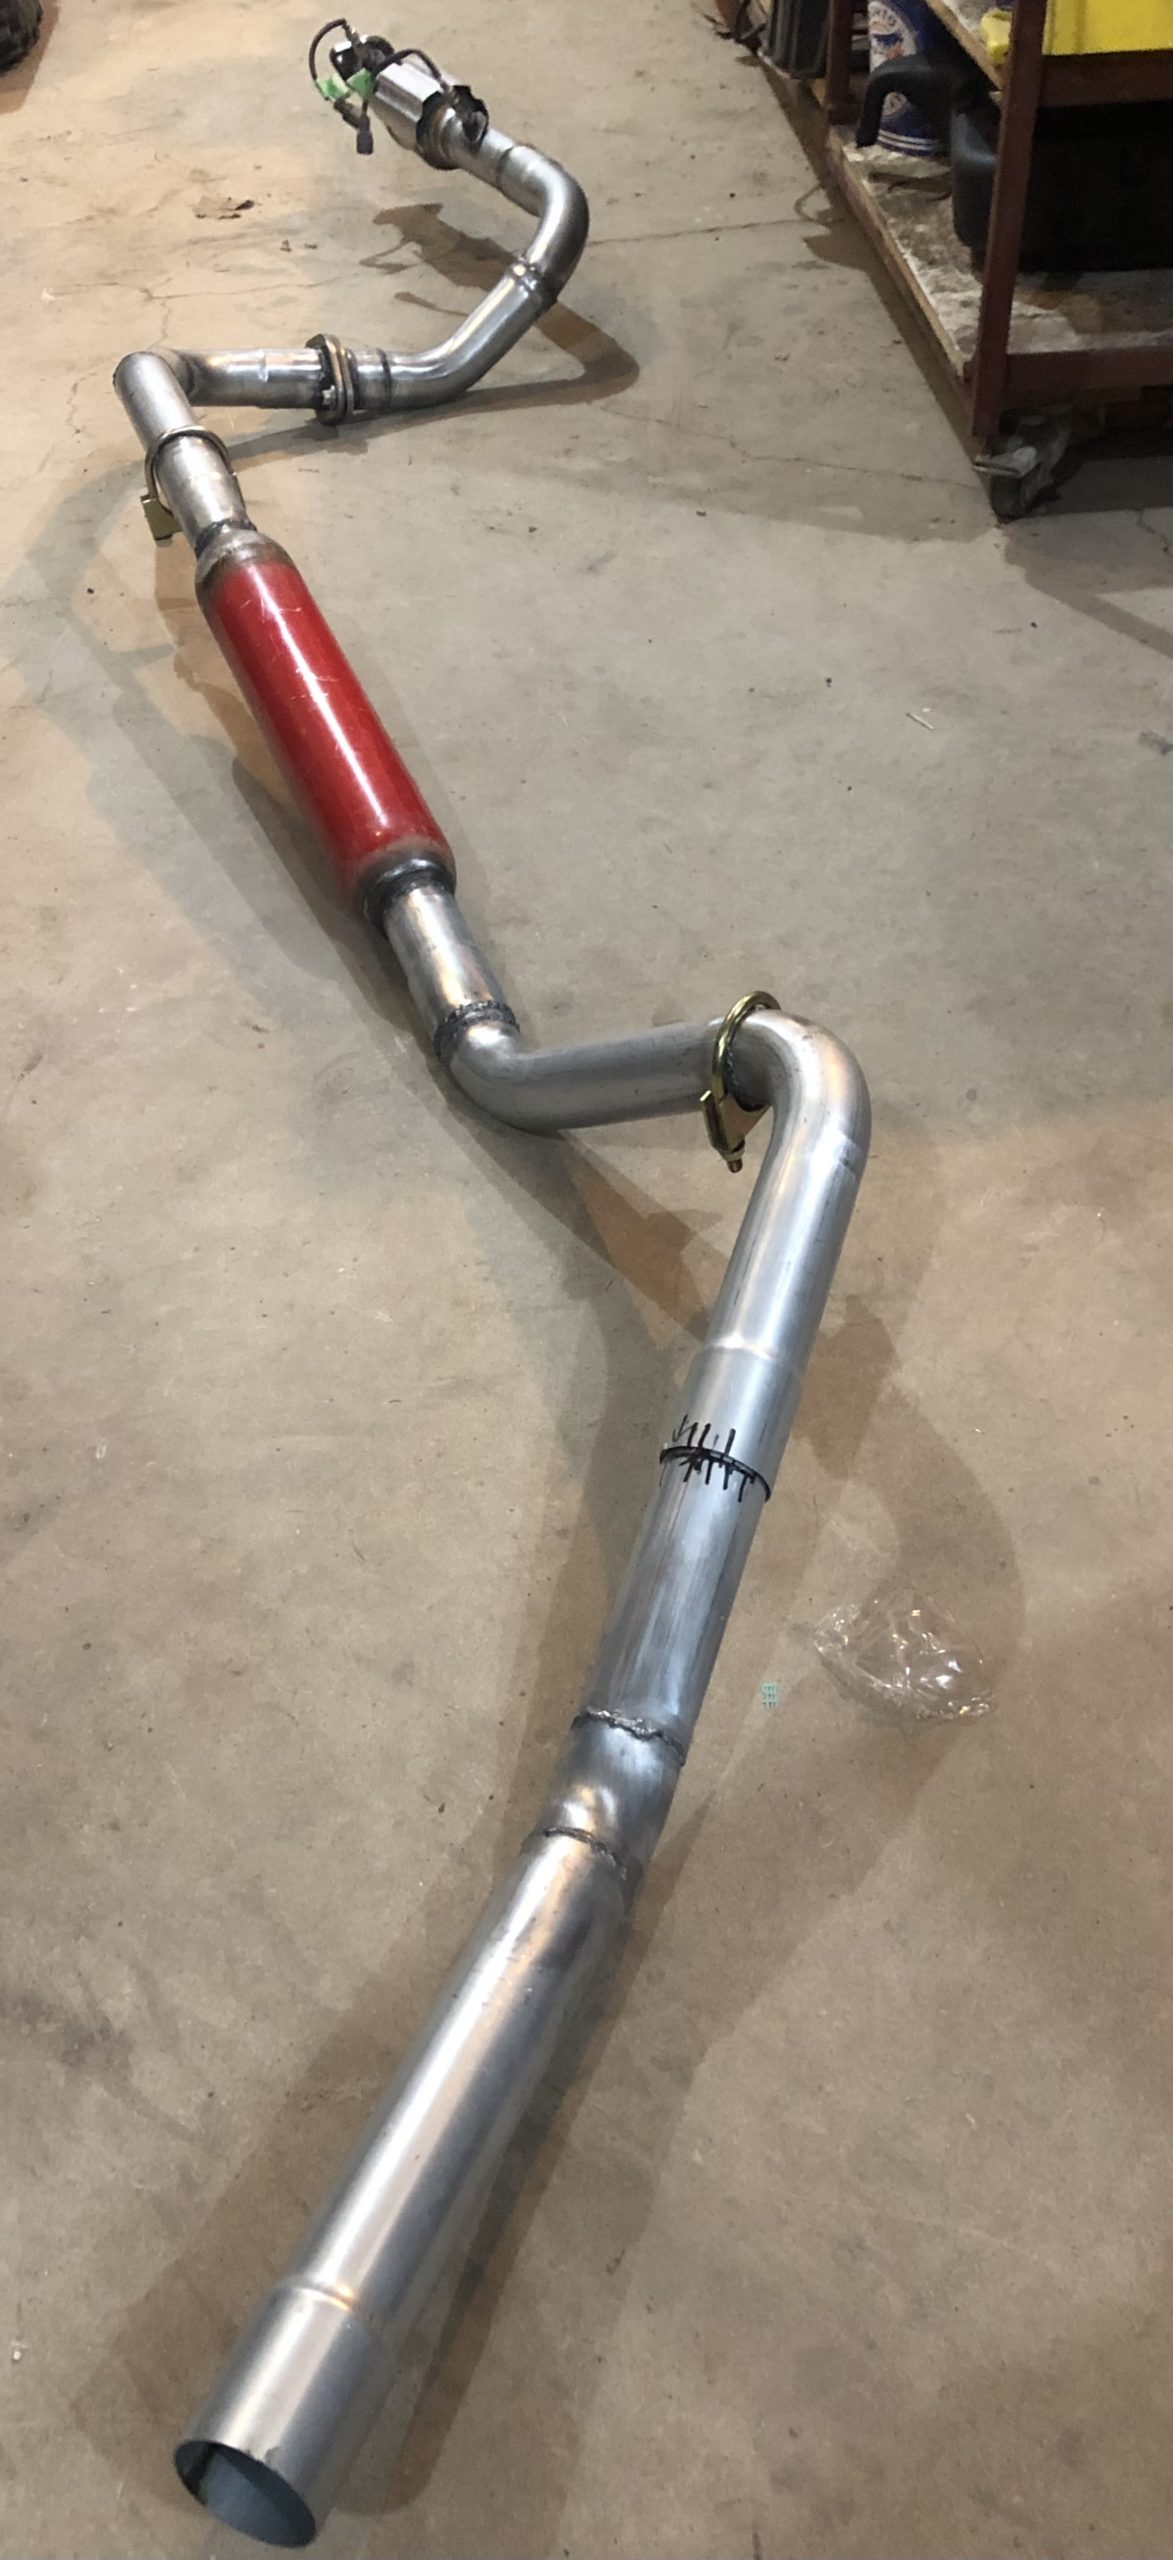
April 21, 2025 at 12:02 am #212371toys-n-yotasKeymasterAnother long night of welding, but the exhaust is nearly finished now.
All that’s left for fabrication is to add the two O2 ports, and the flange union behind the tcase. After I add the union, I’ll finish weld the last piece of the tailpipe. But currently, it’s welded and hanging on two rubber isolators.Im motivated to wrap the front section so I can let the motor warm up without melting stuff. A few seconds is the longest Ive ran the motor with the exhaust in place.
Another great day of progress
April 22, 2025 at 12:13 am #212376toys-n-yotasKeymasterWell here it is, approximately 11 linear feet of custom exhaust. My kit was $184, and in total I used 7 of the 16 pieces in the kit. Not much scrap at all.
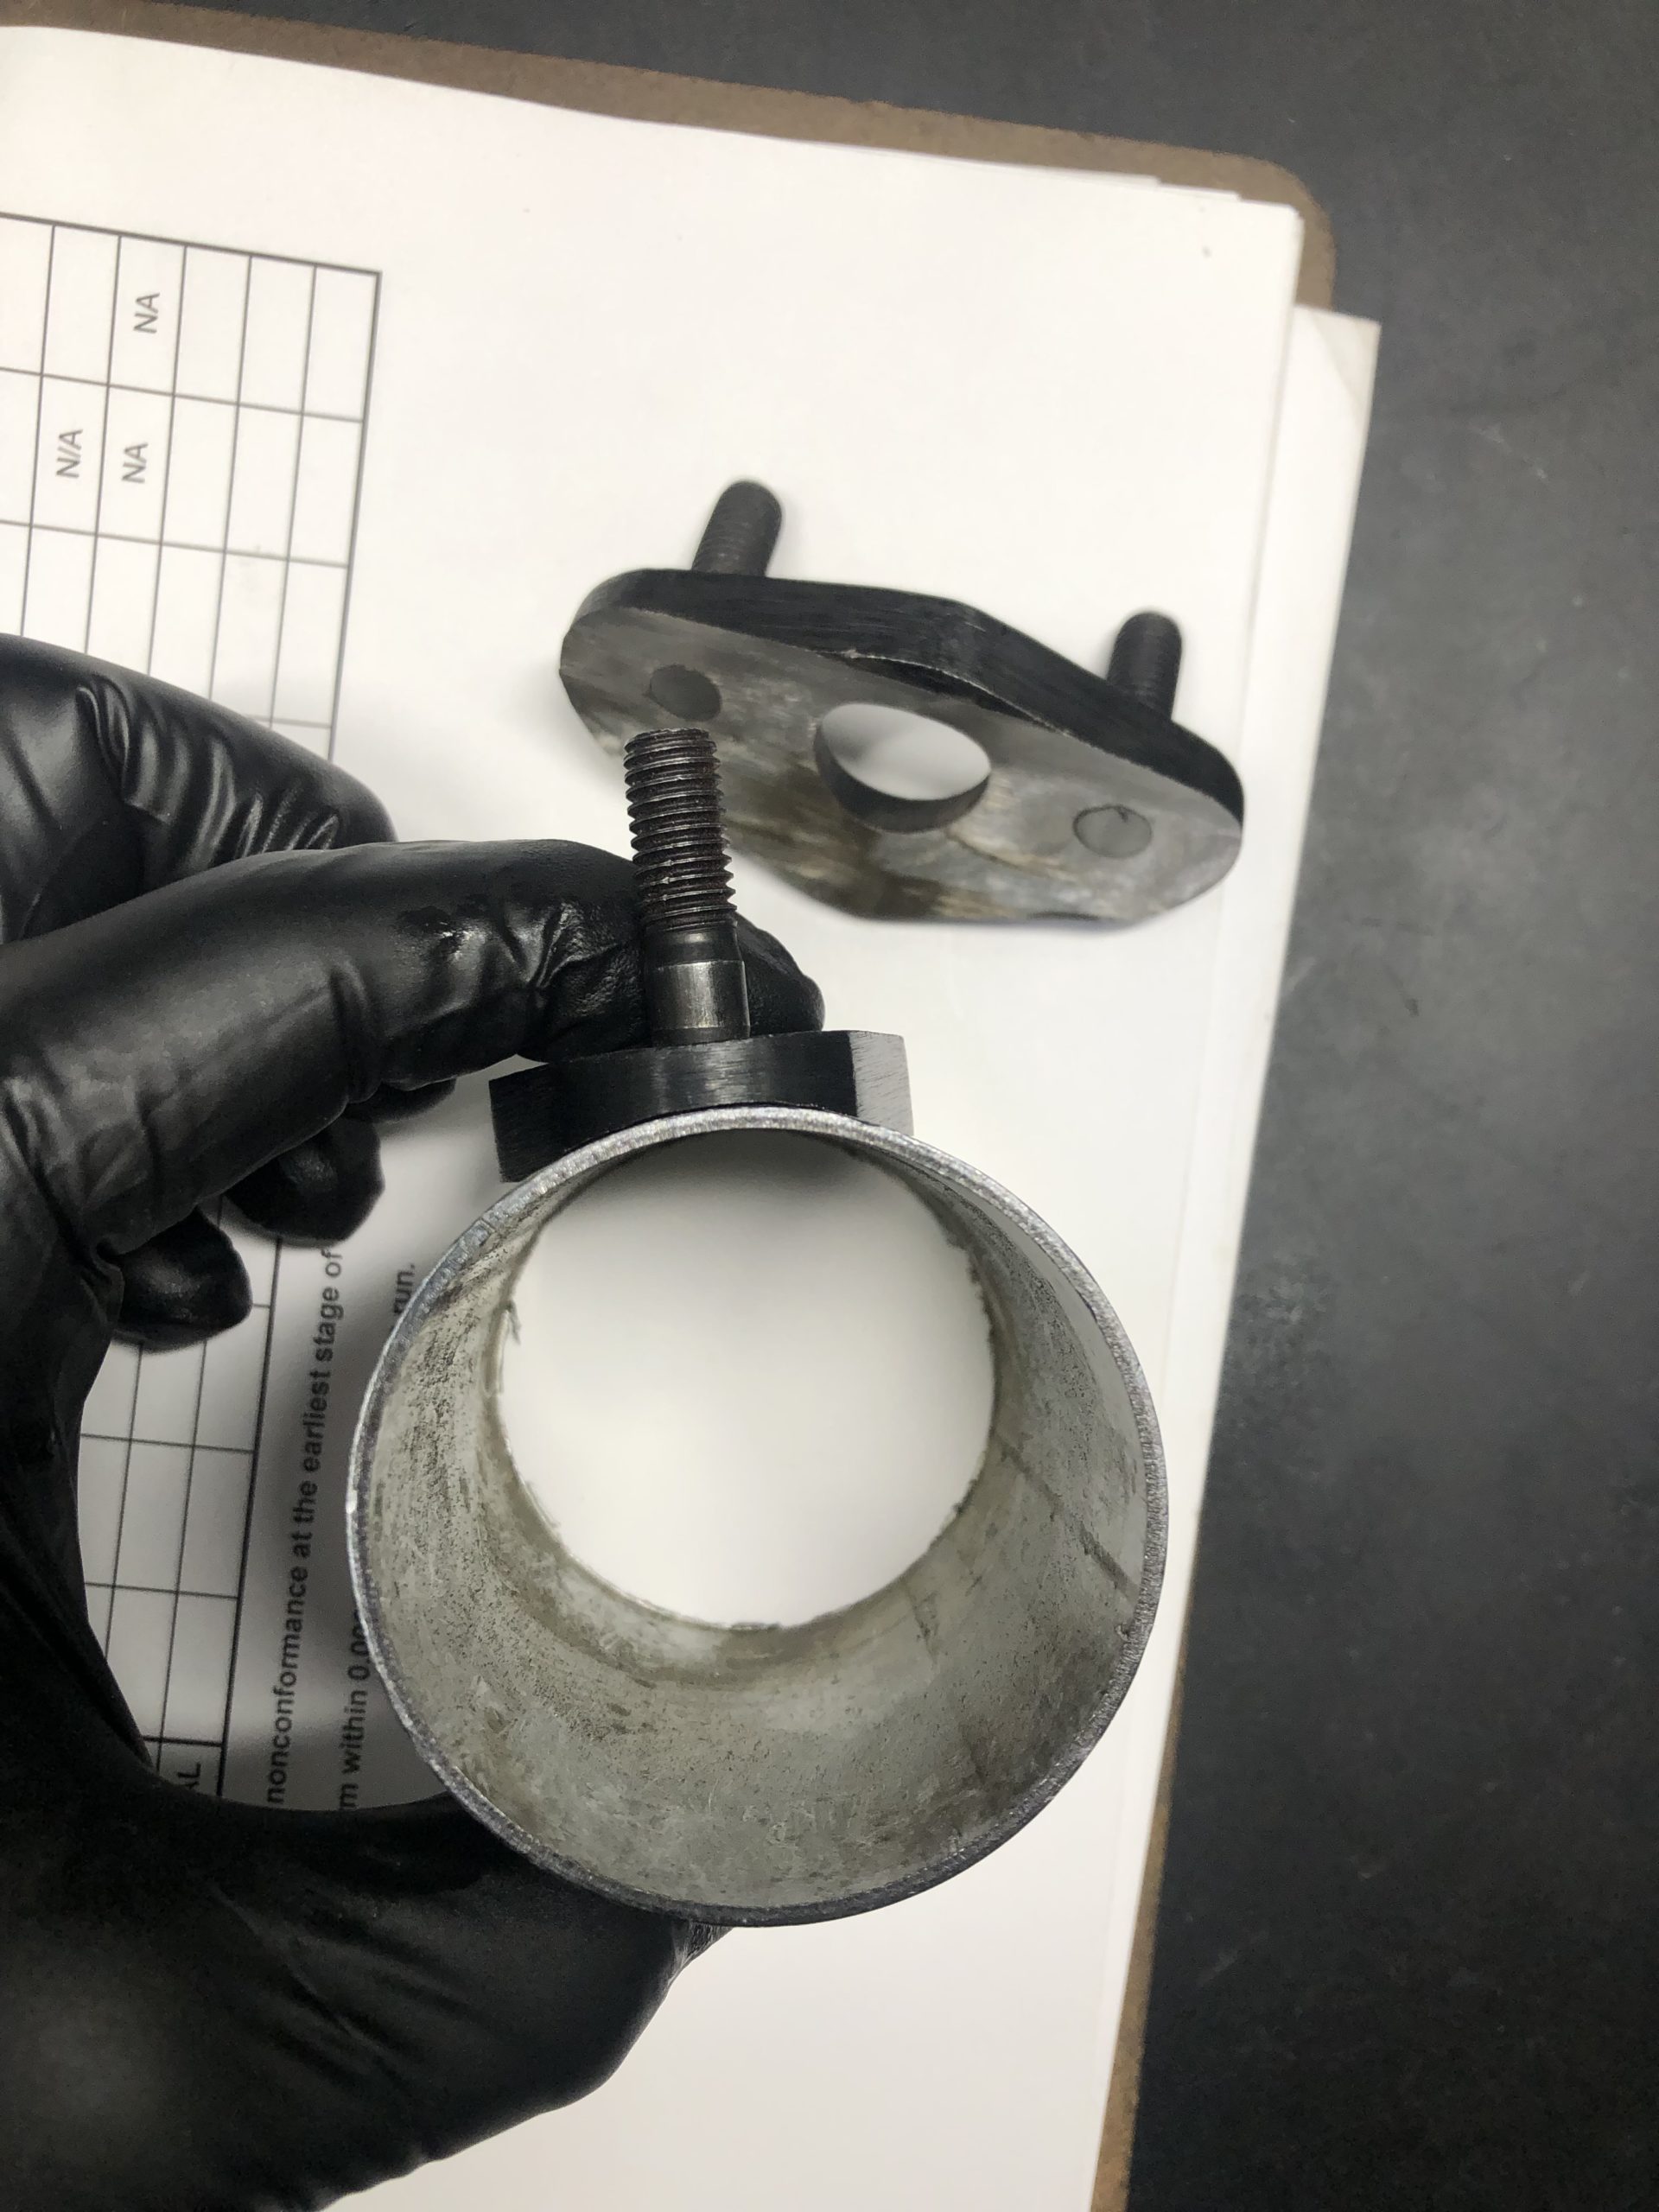
I only need to weld in my O2 flanges after they get contoured a bit. I was planning to do that at work today, but I left after 1 hour to take care of my sick family. I left the task with a buddy, for if he had downtime. Odds are he did. Will find out tomorrow.
I can snake the catalytic pipe into with the O2 sensors in place, means I don’t have to fiddle with nuts, just clips.Attachments:
April 22, 2025 at 5:53 am #212379 Slick_YotaKeymaster
Man, I haven’t been on here in ages! Great progress Tom!
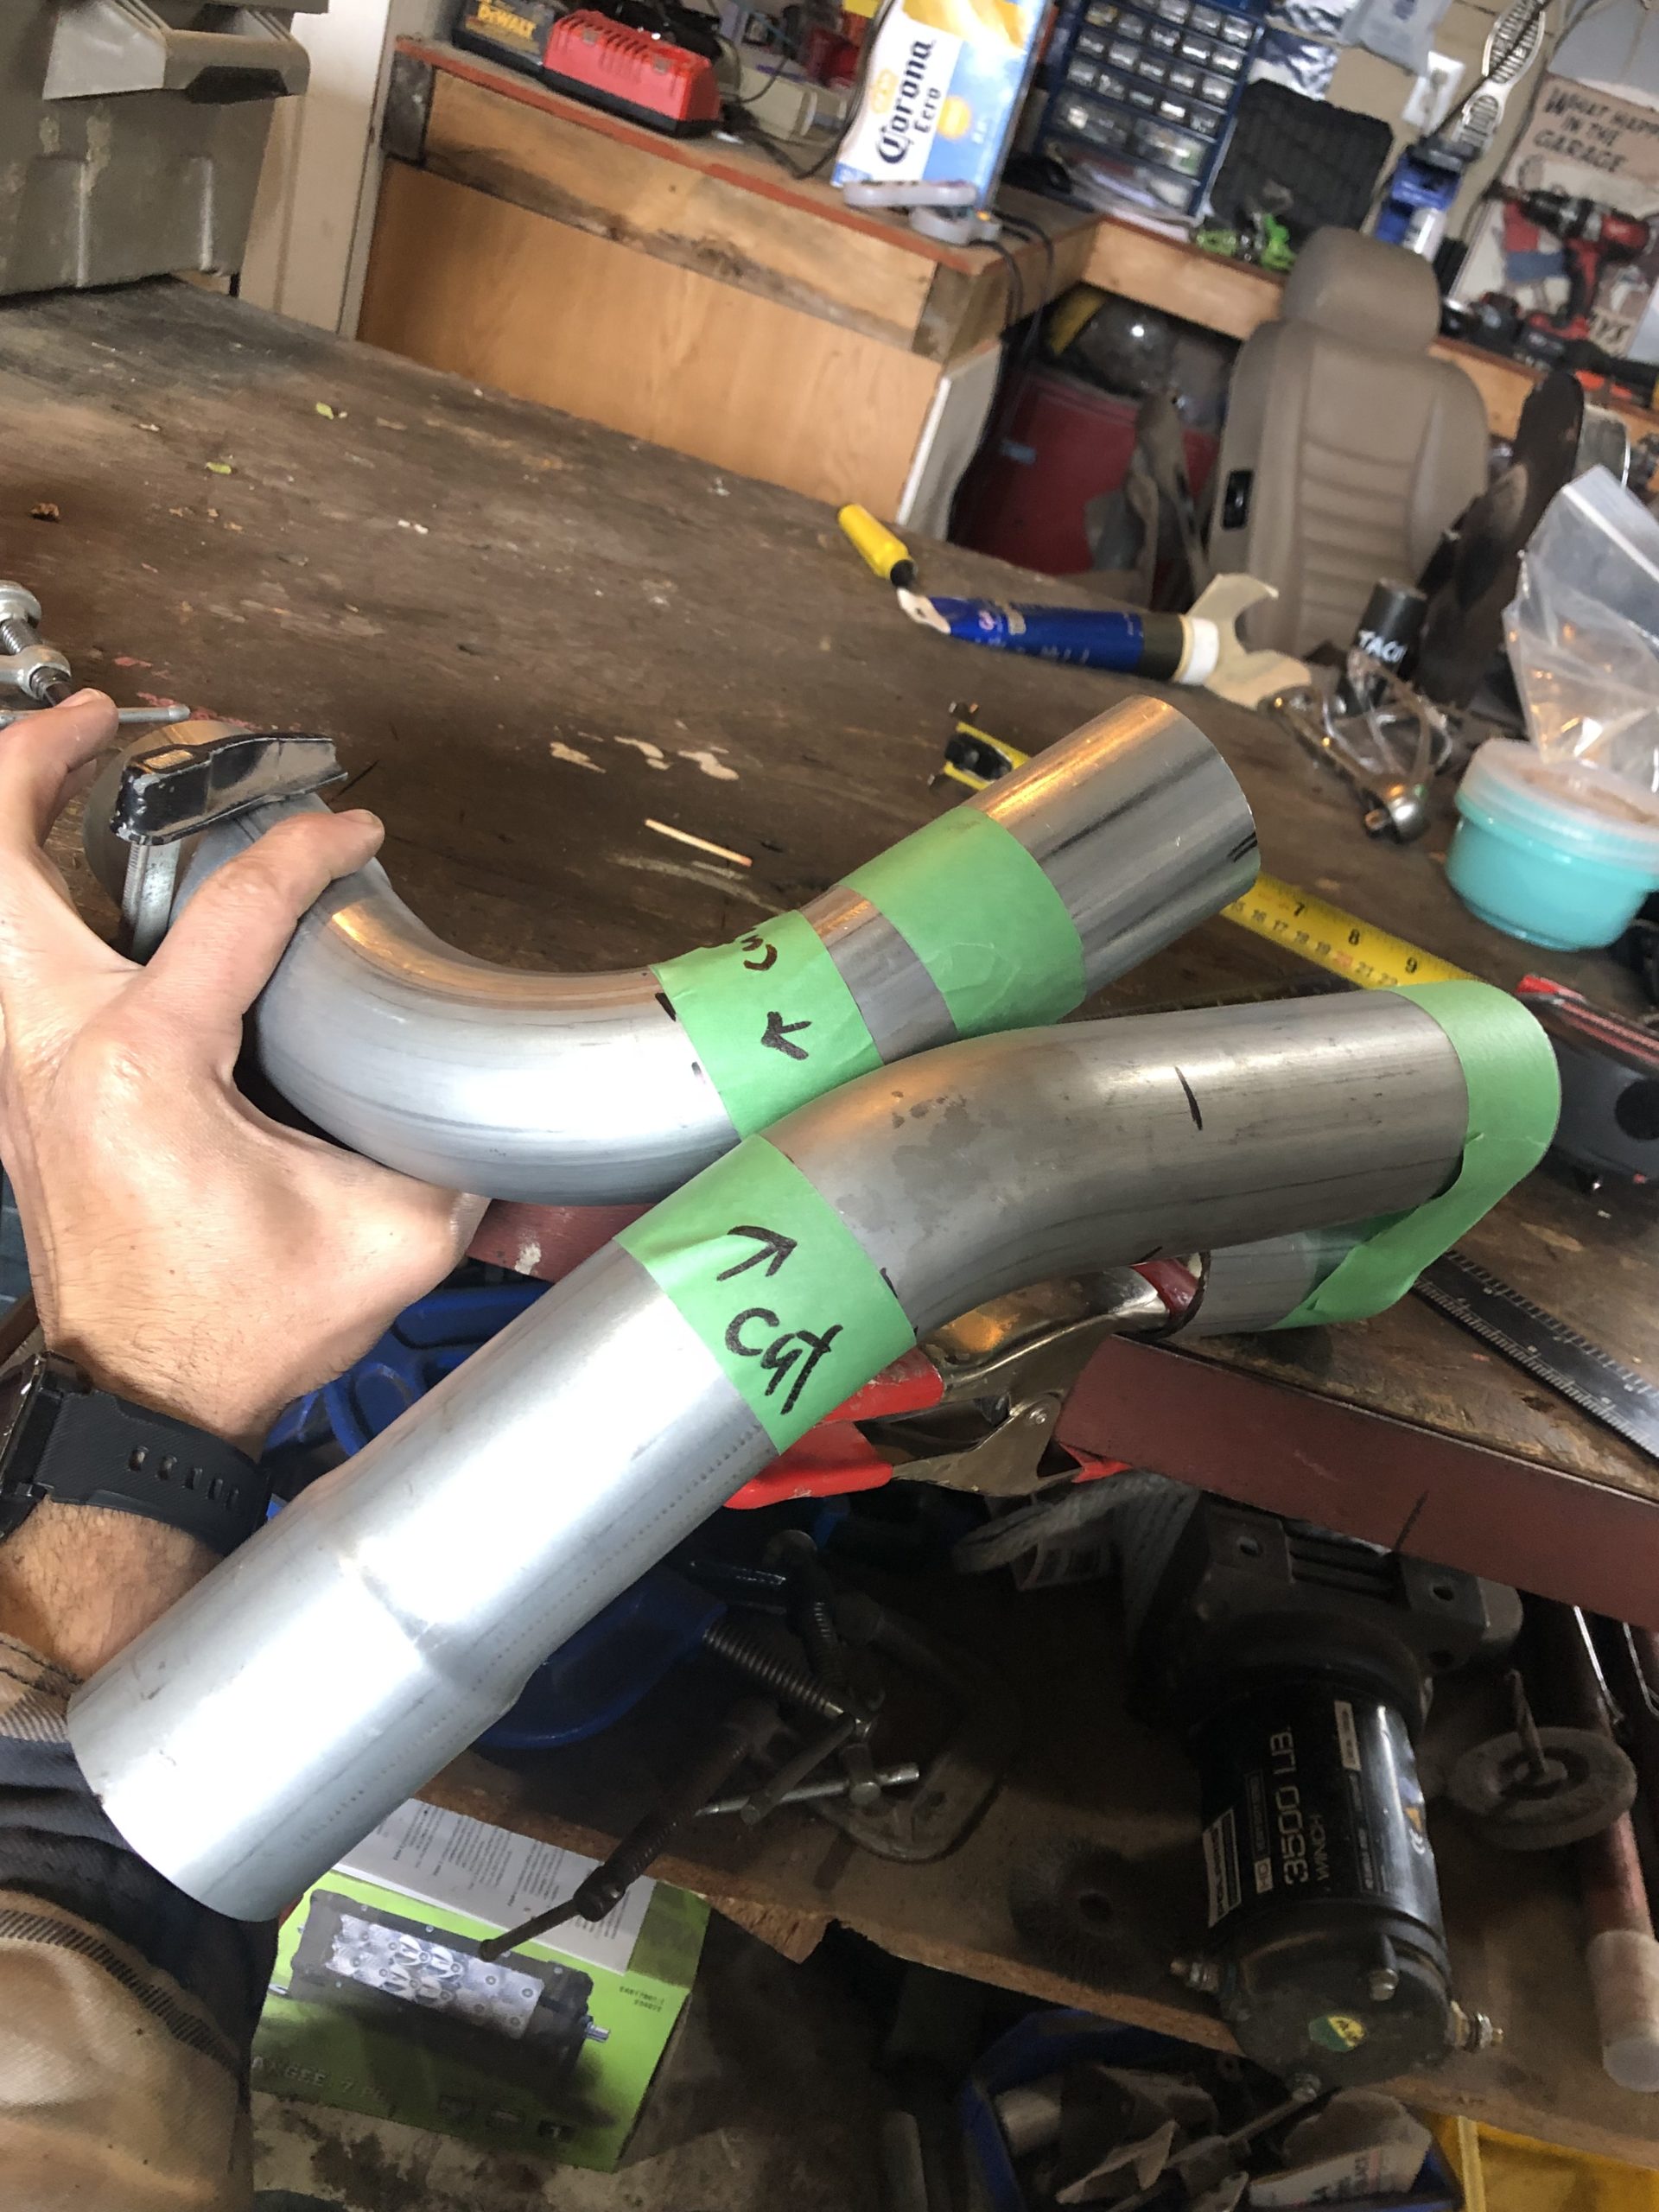
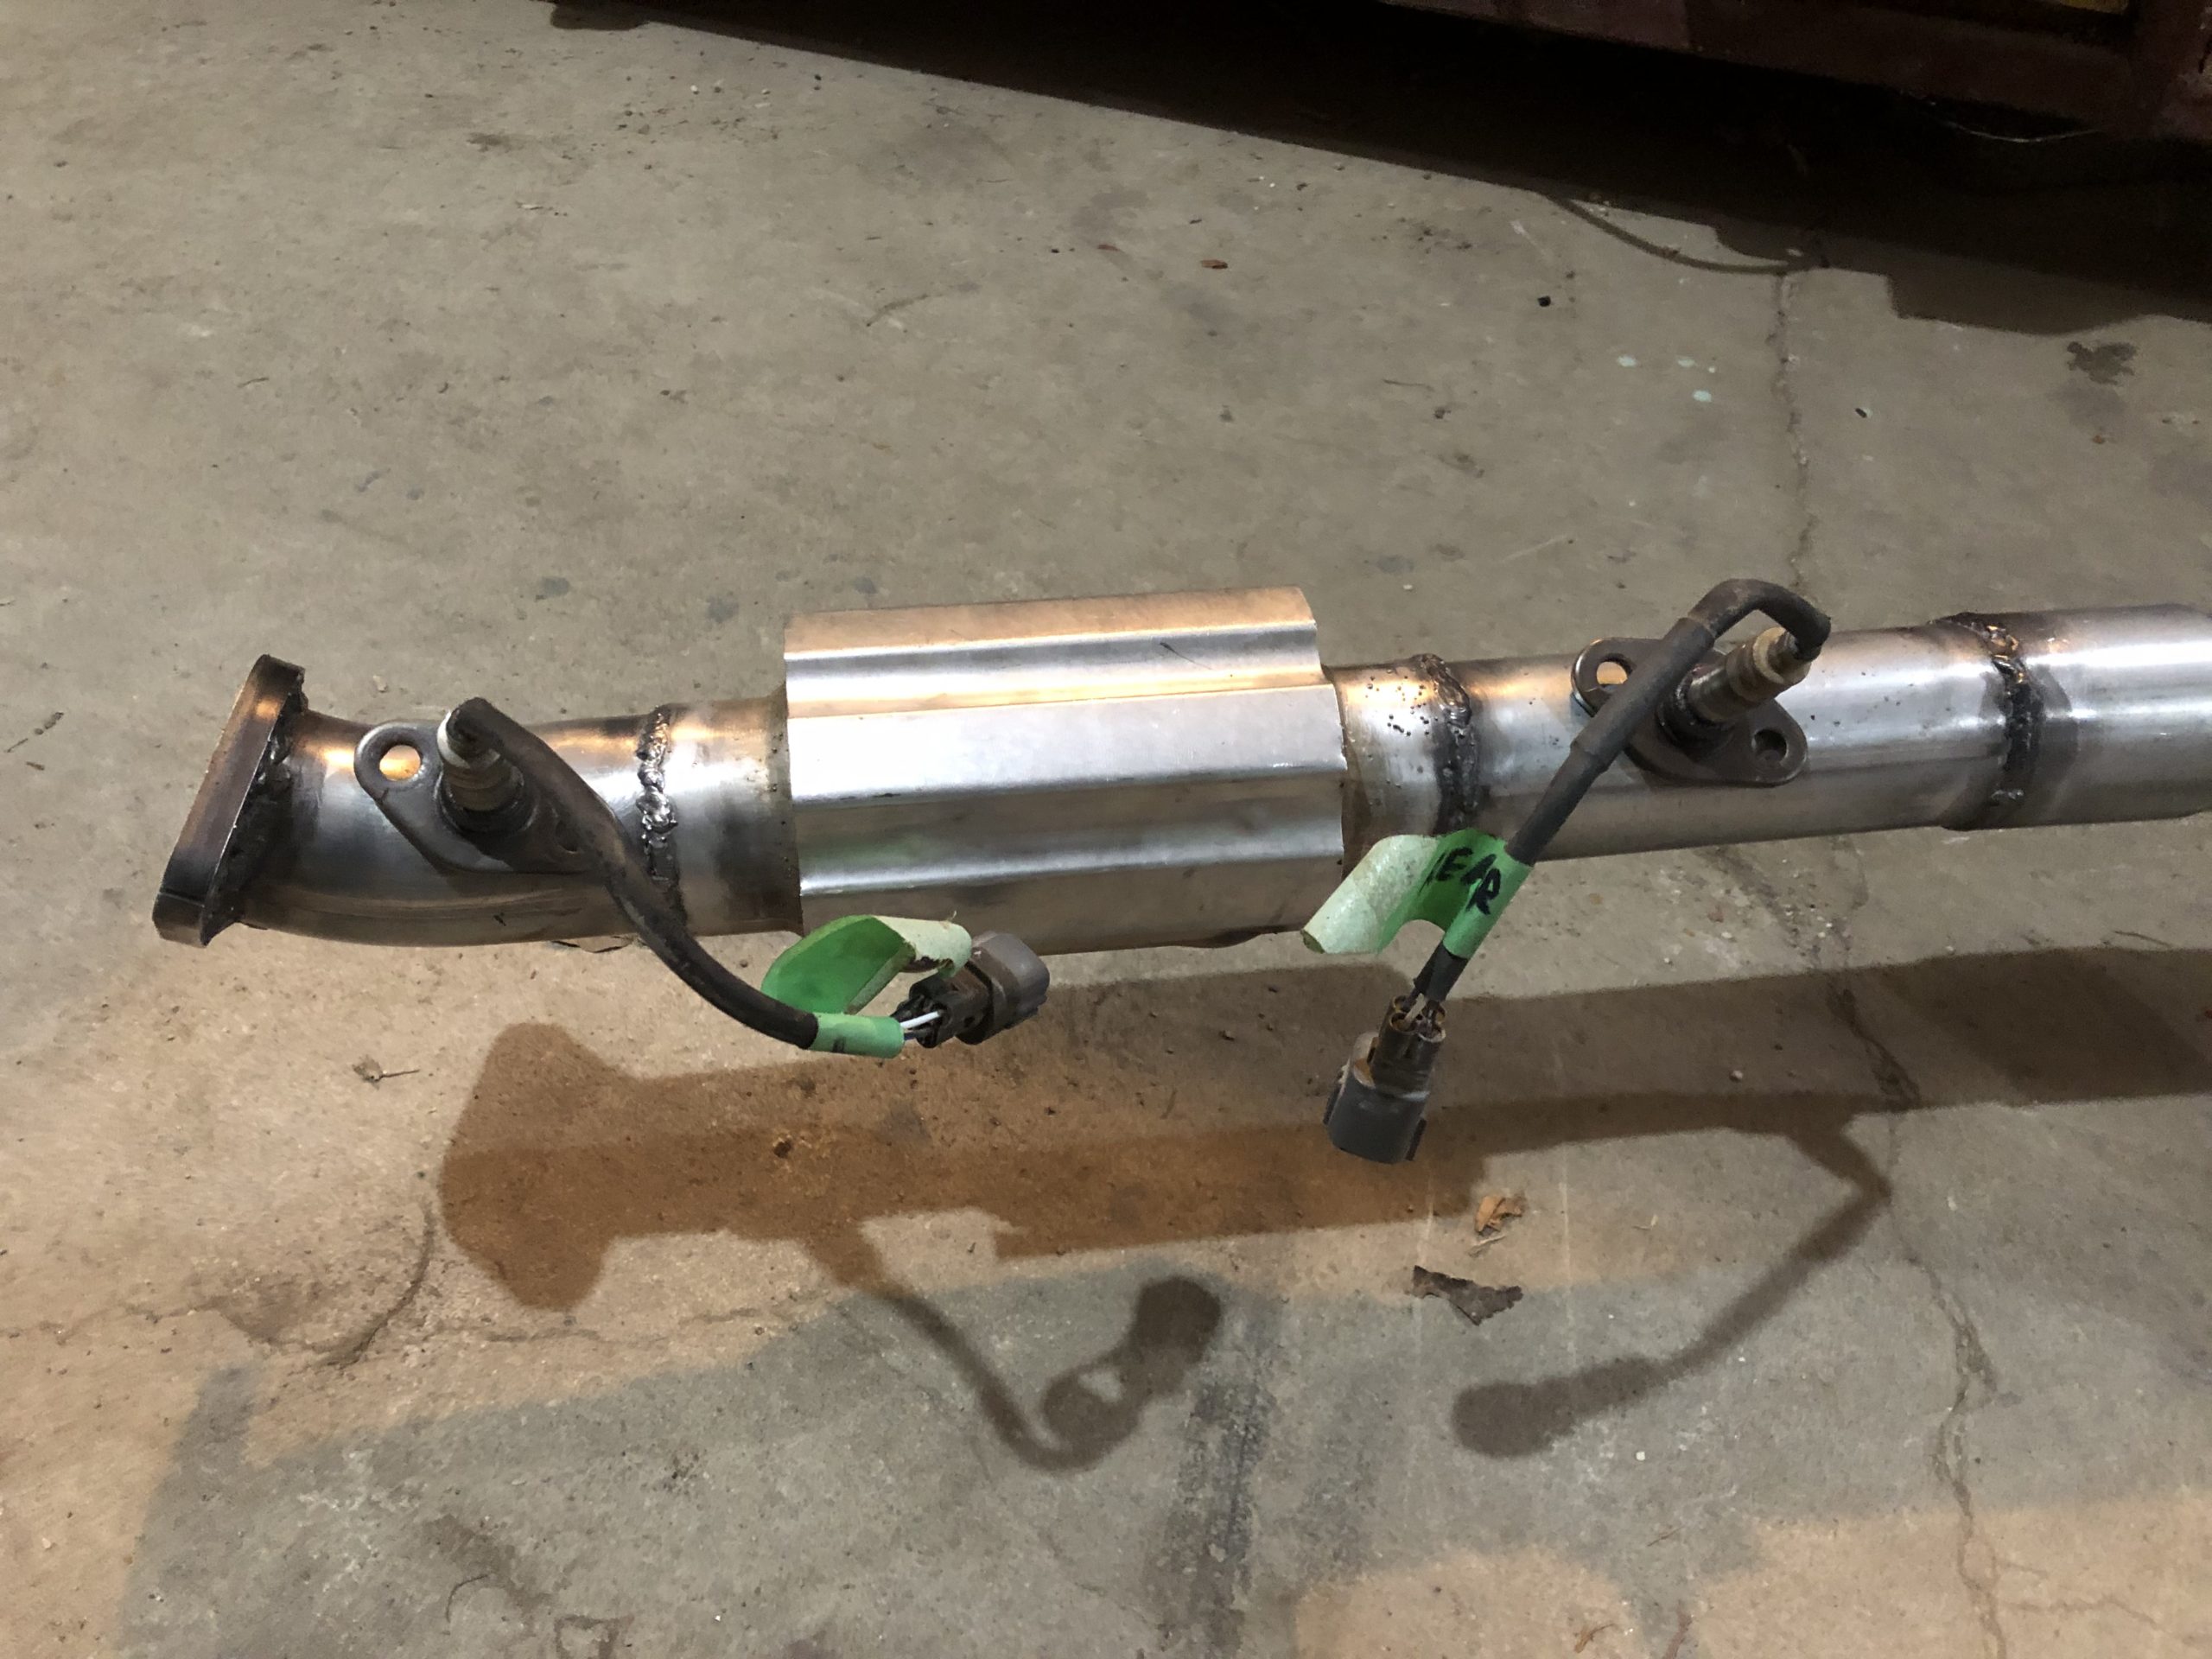
April 22, 2025 at 10:52 am #212380toys-n-yotasKeymasterMy buddy hooked me up with some custom grind parts from his down time at work, many thanks Matt.
Looking forward to welding these in tonight and calling an end to exhaust fabrication. Just arts and crafts will remain
Attachments:
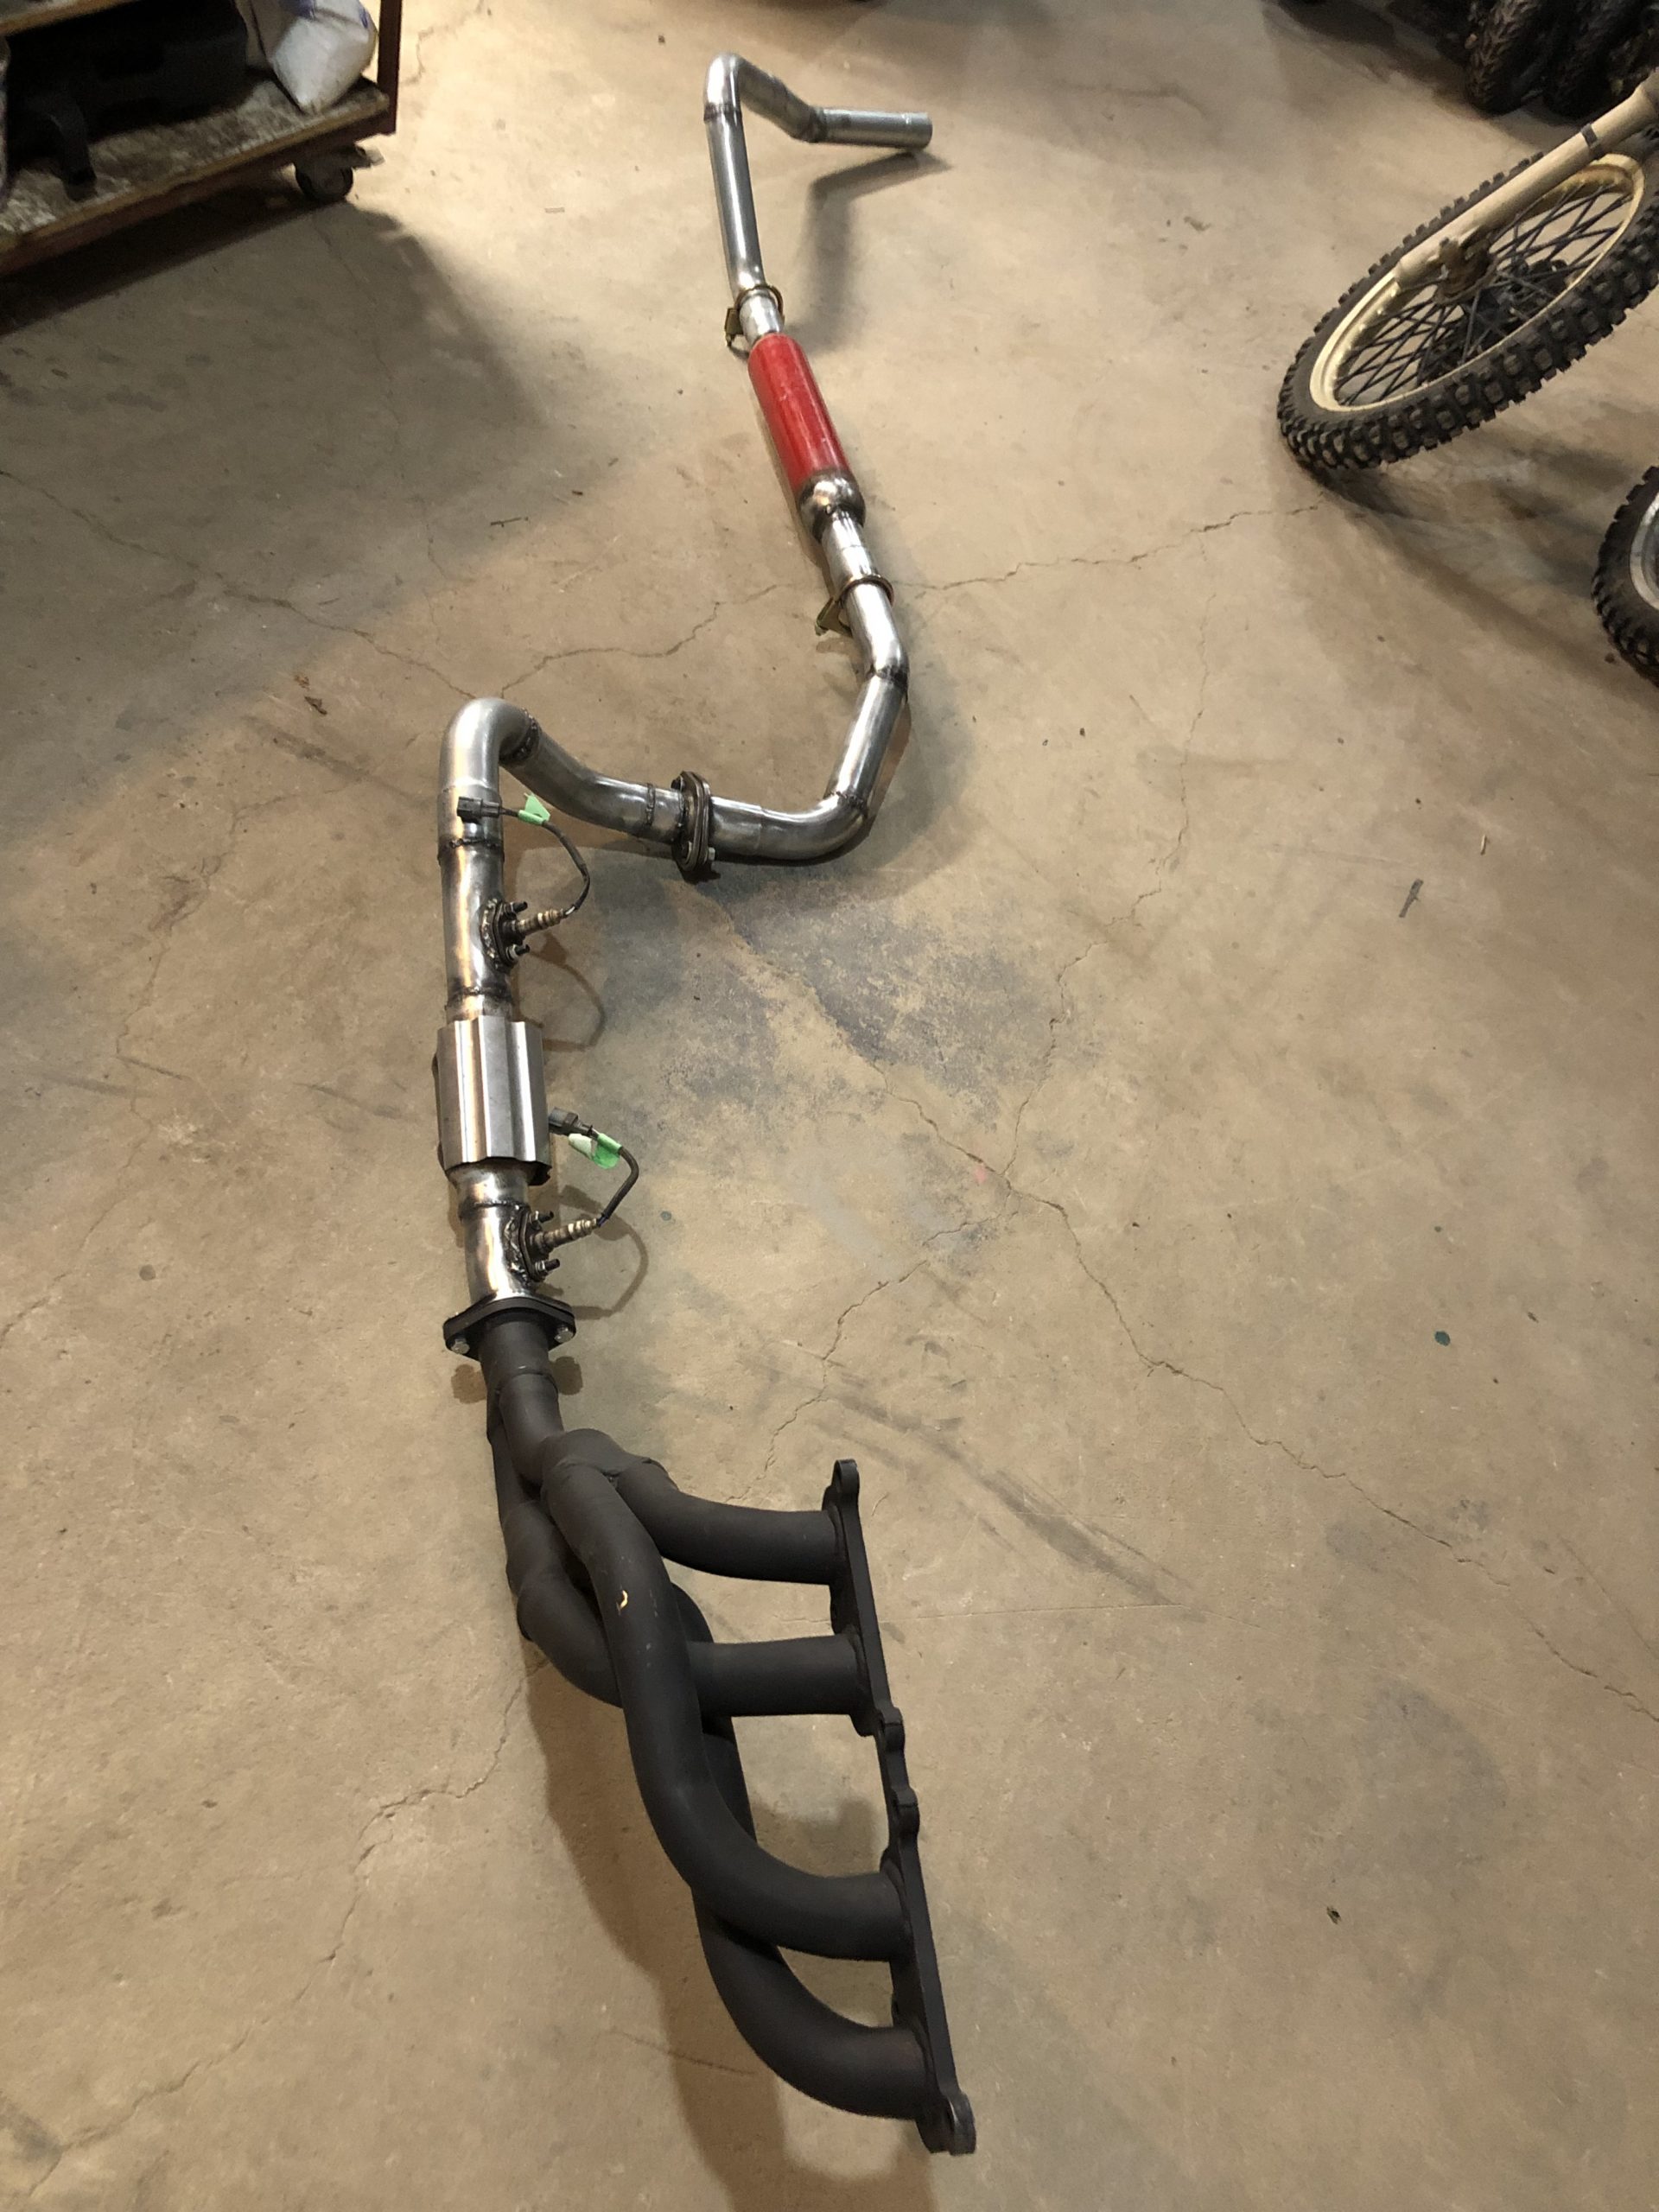
April 23, 2025 at 12:12 am #212382toys-n-yotasKeymasterAll done welding. Until I finalize the tailpipe angle and set that with lightning.
It all came out, got bolted together for a cool picture, then immediately unbolted so it could be painted and look even cooler in the next pictures. But mainly to slow down surface rust. Just high temp bbq paint, very little prep done. Solong red and rust coloured cherry bomb, hello brand new special edition matte black Cherry bomb.
-
This reply was modified 2 months, 1 week ago by toys-n-yotas.
Attachments:
April 30, 2025 at 1:37 am #212386 FJTTSEKeymaster
Great work Tom. She’ll be ‘redee’ for the road in no time!
-
AuthorPosts


- You must be logged in to reply to this topic.