Forum Replies Created
-
AuthorPosts
-
 toys-n-yotasKeymaster
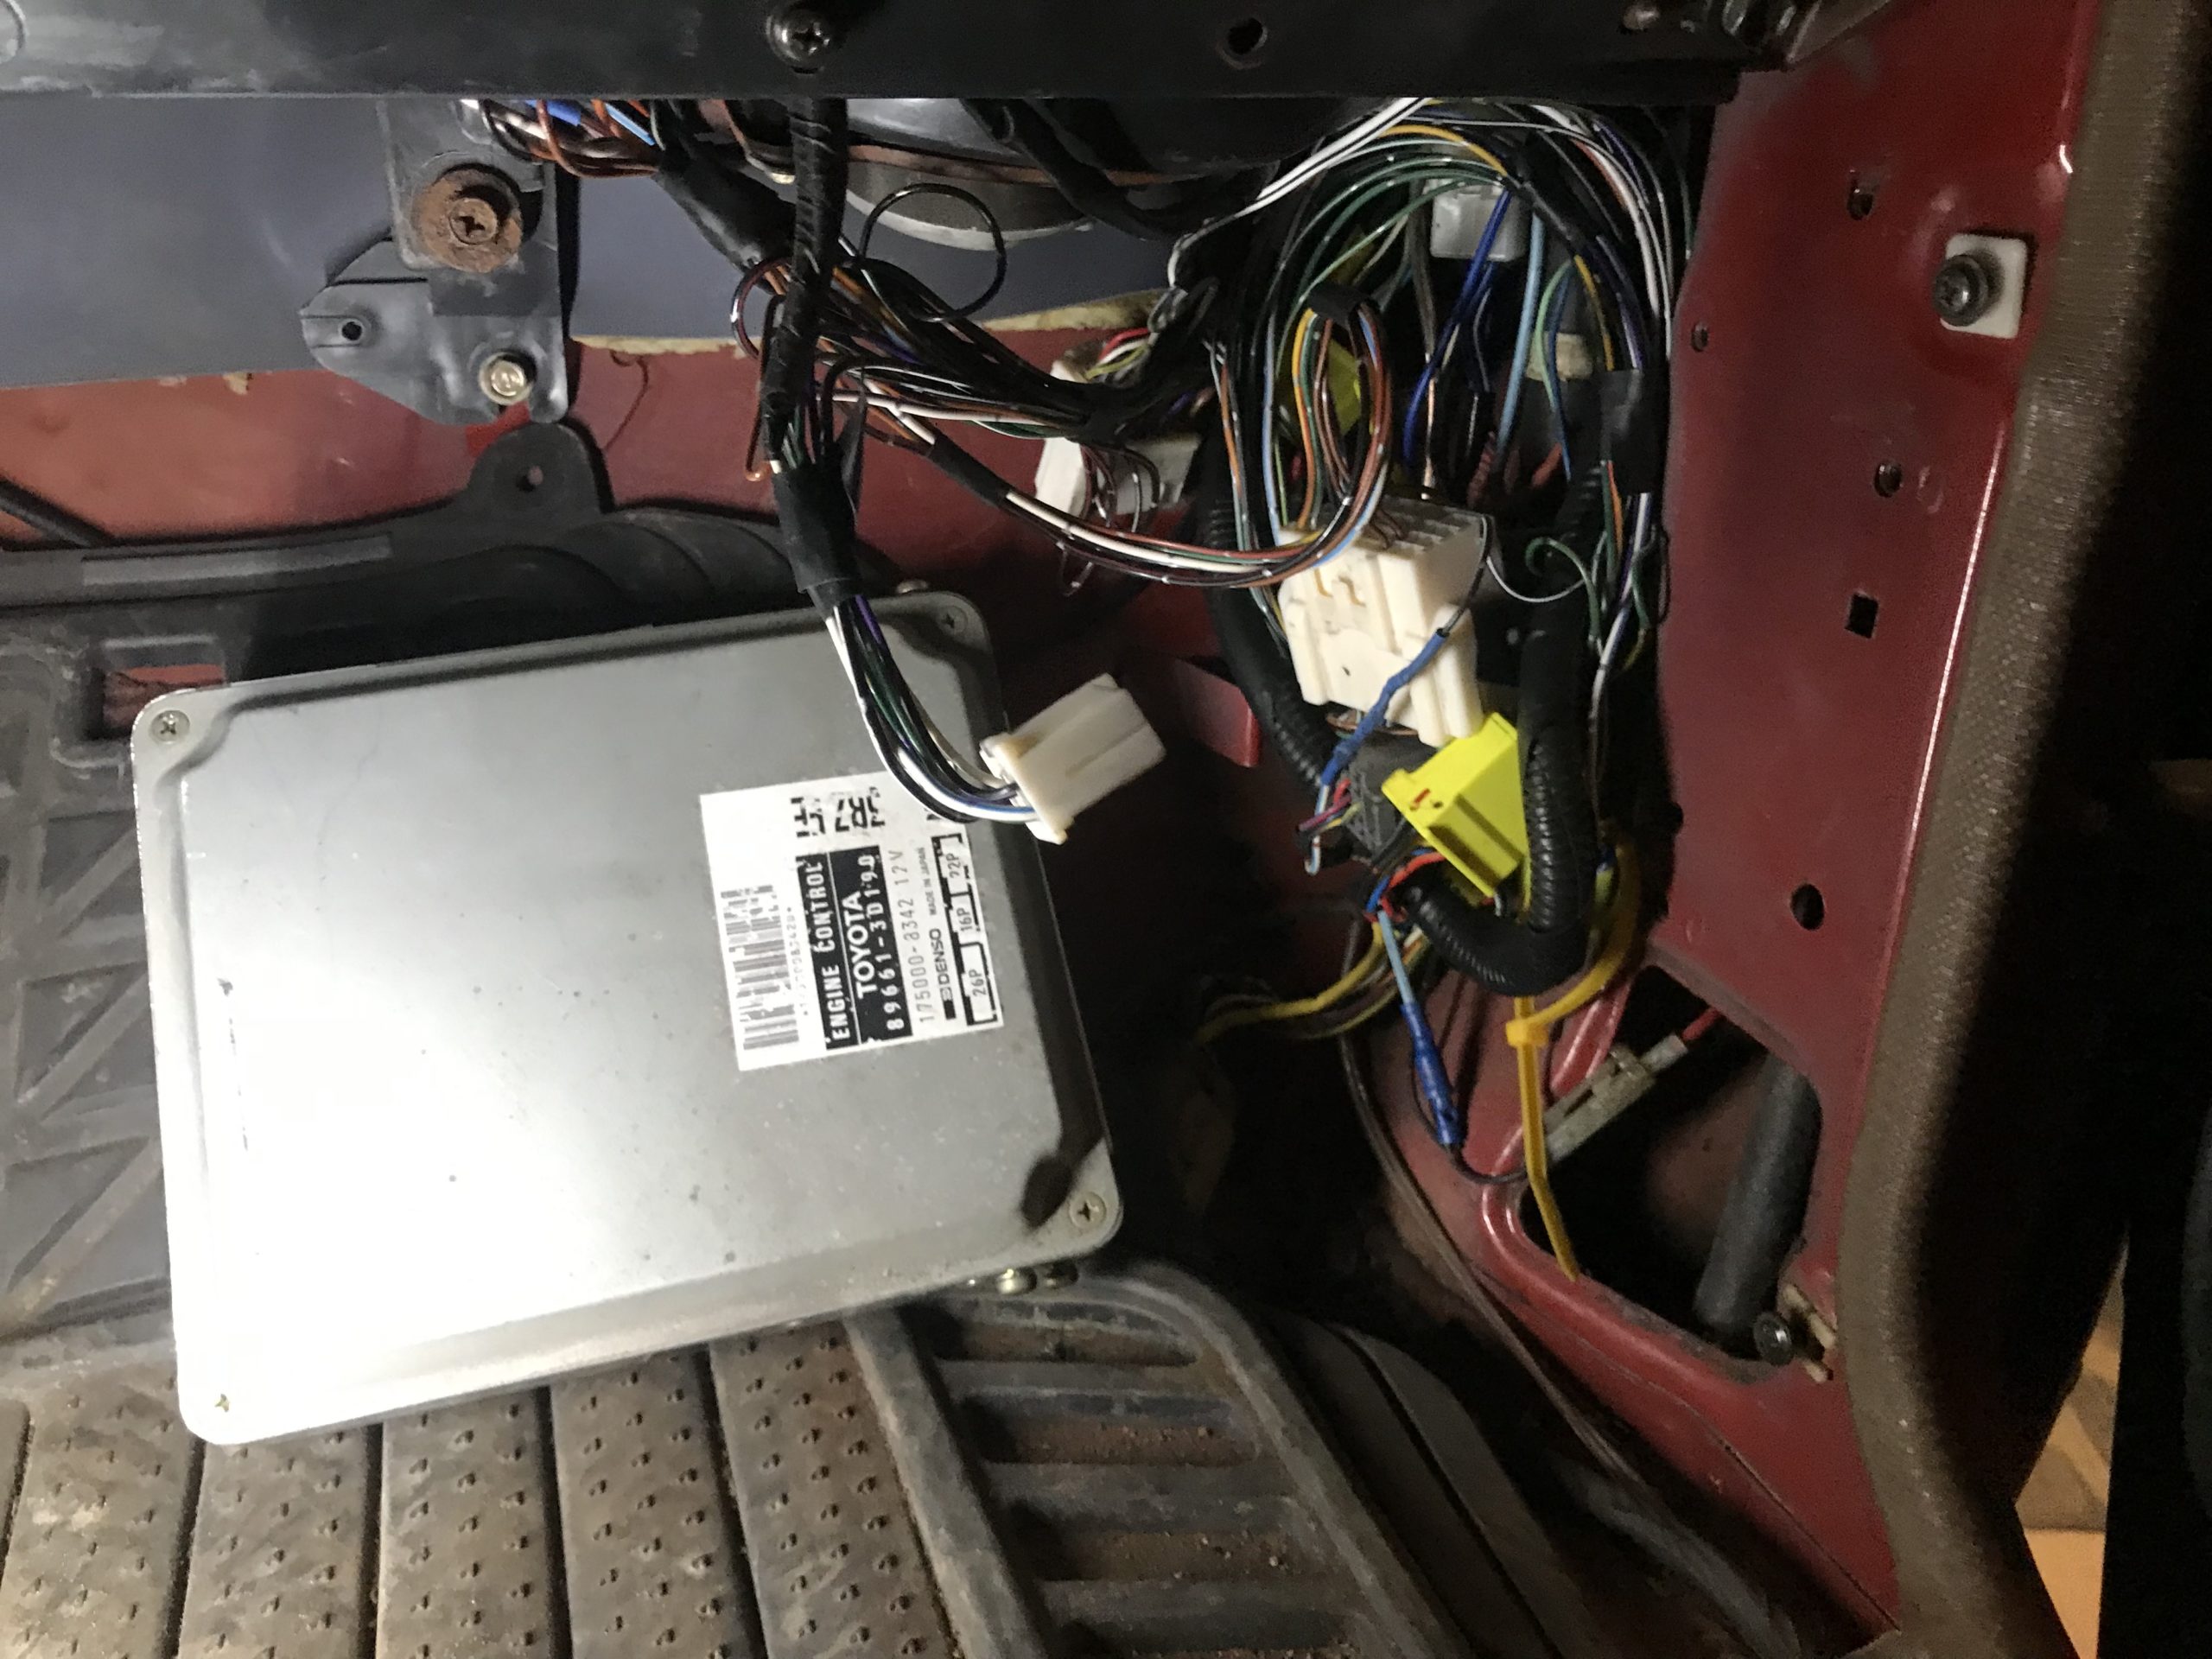
Uggghhhh, this ECU refuses to fit into a spot I deem “preferable”. The ECU has detachable (and modifiable) mounting brackets booked on either side, but there’s not much free space for mounting to Redee. I think I’ll give it one more nights worth of attempt before I break out the industrial strength zipties.
I got distracted (somehow) while routing the O2 harness, and started to investigate where the donor Reverse and 4WD indicator light wires enter the cab, and unfortunately I may have removed those wires already, but I’ll try again to pin out continuity tonight. It’ll save me from running a few wires from the trans/tcase up into the cab myself.
toys-n-yotasKeymasterLast night, I got Redee to crank with fuel pump using the key in the ignition!
I don’t know which of my corrective actions allowed the motor to crank, because during one of my checks I disconnected the starter solenoid wire and forgot to reconnect it for about an hour and 10 small fixes. Anyways once I reconnected the solenoid wire, Redee started cranking on the first twist.I have a couple more wiring tasks ahead of me; mount the ECU, run the O2/reverse/4wd harness over the trans and into place.
My next major task is building an exhaust front to back. And the final task will be swapping the rear third member to the 4.88 lunchbox sitting on the shop floor.
toys-n-yotasKeymasterWell last night I mustered up all my courage, and attached the battery to Redee. Thank God nothing started melting. However that’s the end of the good news.
No crank, and no fuel pump were my condition once i finally twisted the ignition.
No fuel I figured out was because my Circuit opening relay to which I was getting fuel pump power was in a tote rather than under the dash. So I verified it works, installed it, re-wired my 3RZ leads accordingly.
As for no crank, I have more digging to do tonight. Gonnabe Checking voltage at the ECU, perhaps one of my “always hot” or “IGN 2” or “while cranking” wires are incorrect.
toys-n-yotasKeymasterYesterday in The Shop, I bolted in a new-to-me spare tire hoist, so I could finally pull my spare out of the bed. It was pretty tough packing for camping last weekend around the spare. Hoping this hoist lasts longer than the original, it was a real pain in the face cutting the old one out, and hurt the hands getting the new one in. Removing or even just lifting the bed a couple inches would have made a world of difference.
toys-n-yotasKeymasterBusy day in The Shop already today.
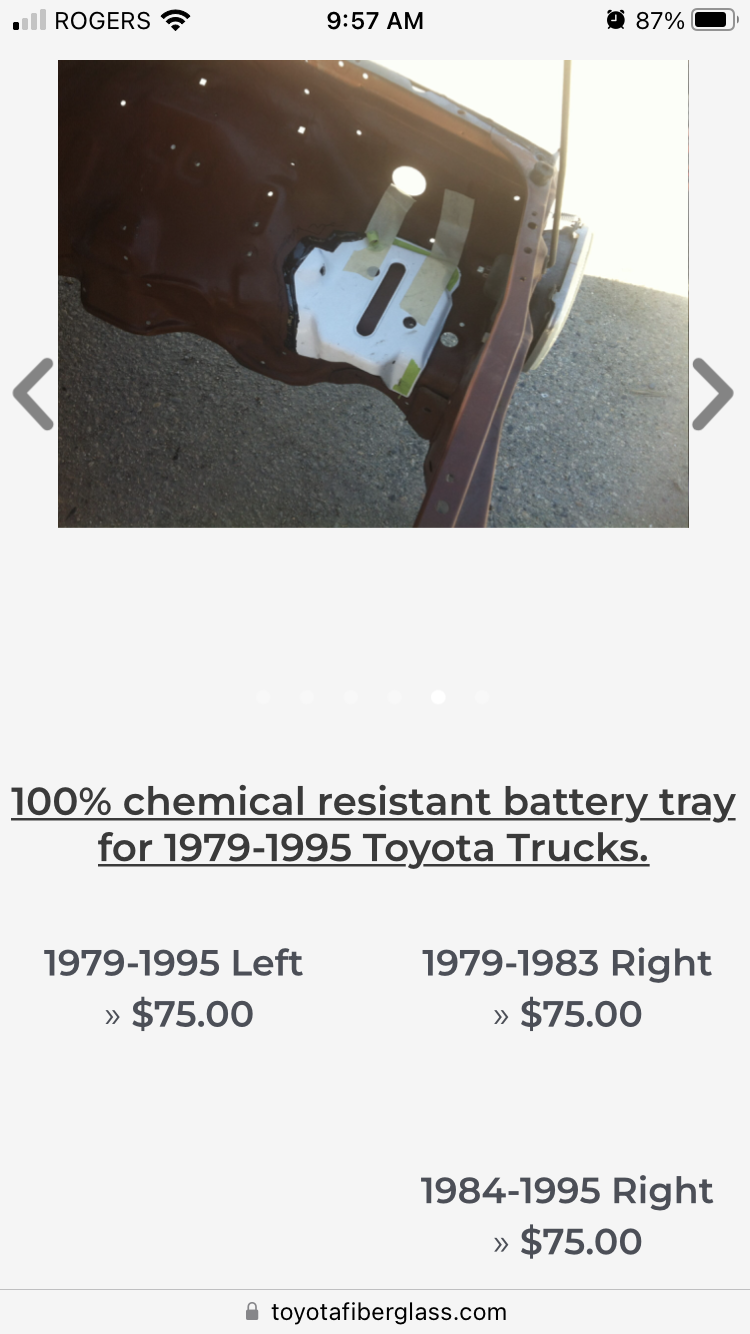
I put two bicycle tire tubes in Matts bike, changed the full set of spark plugs into Sam’s van, did an oil and filter change in my mo-laws suv, and cut the spare tire hoist mechanism out of truckee. I just have to figure out what fasteners are required before I can attempt to bolt in a replacement unit I got offa TacoBro years ago. My hands and arms are sore from all the micro burns cutting the hoist out, may not get anymore work done tonight.toys-n-yotasKeymasterLast week I bought the Fiberglass battery tray off ToyotaFiberglasd, less than $200 to my door after shipping and tax is OK.
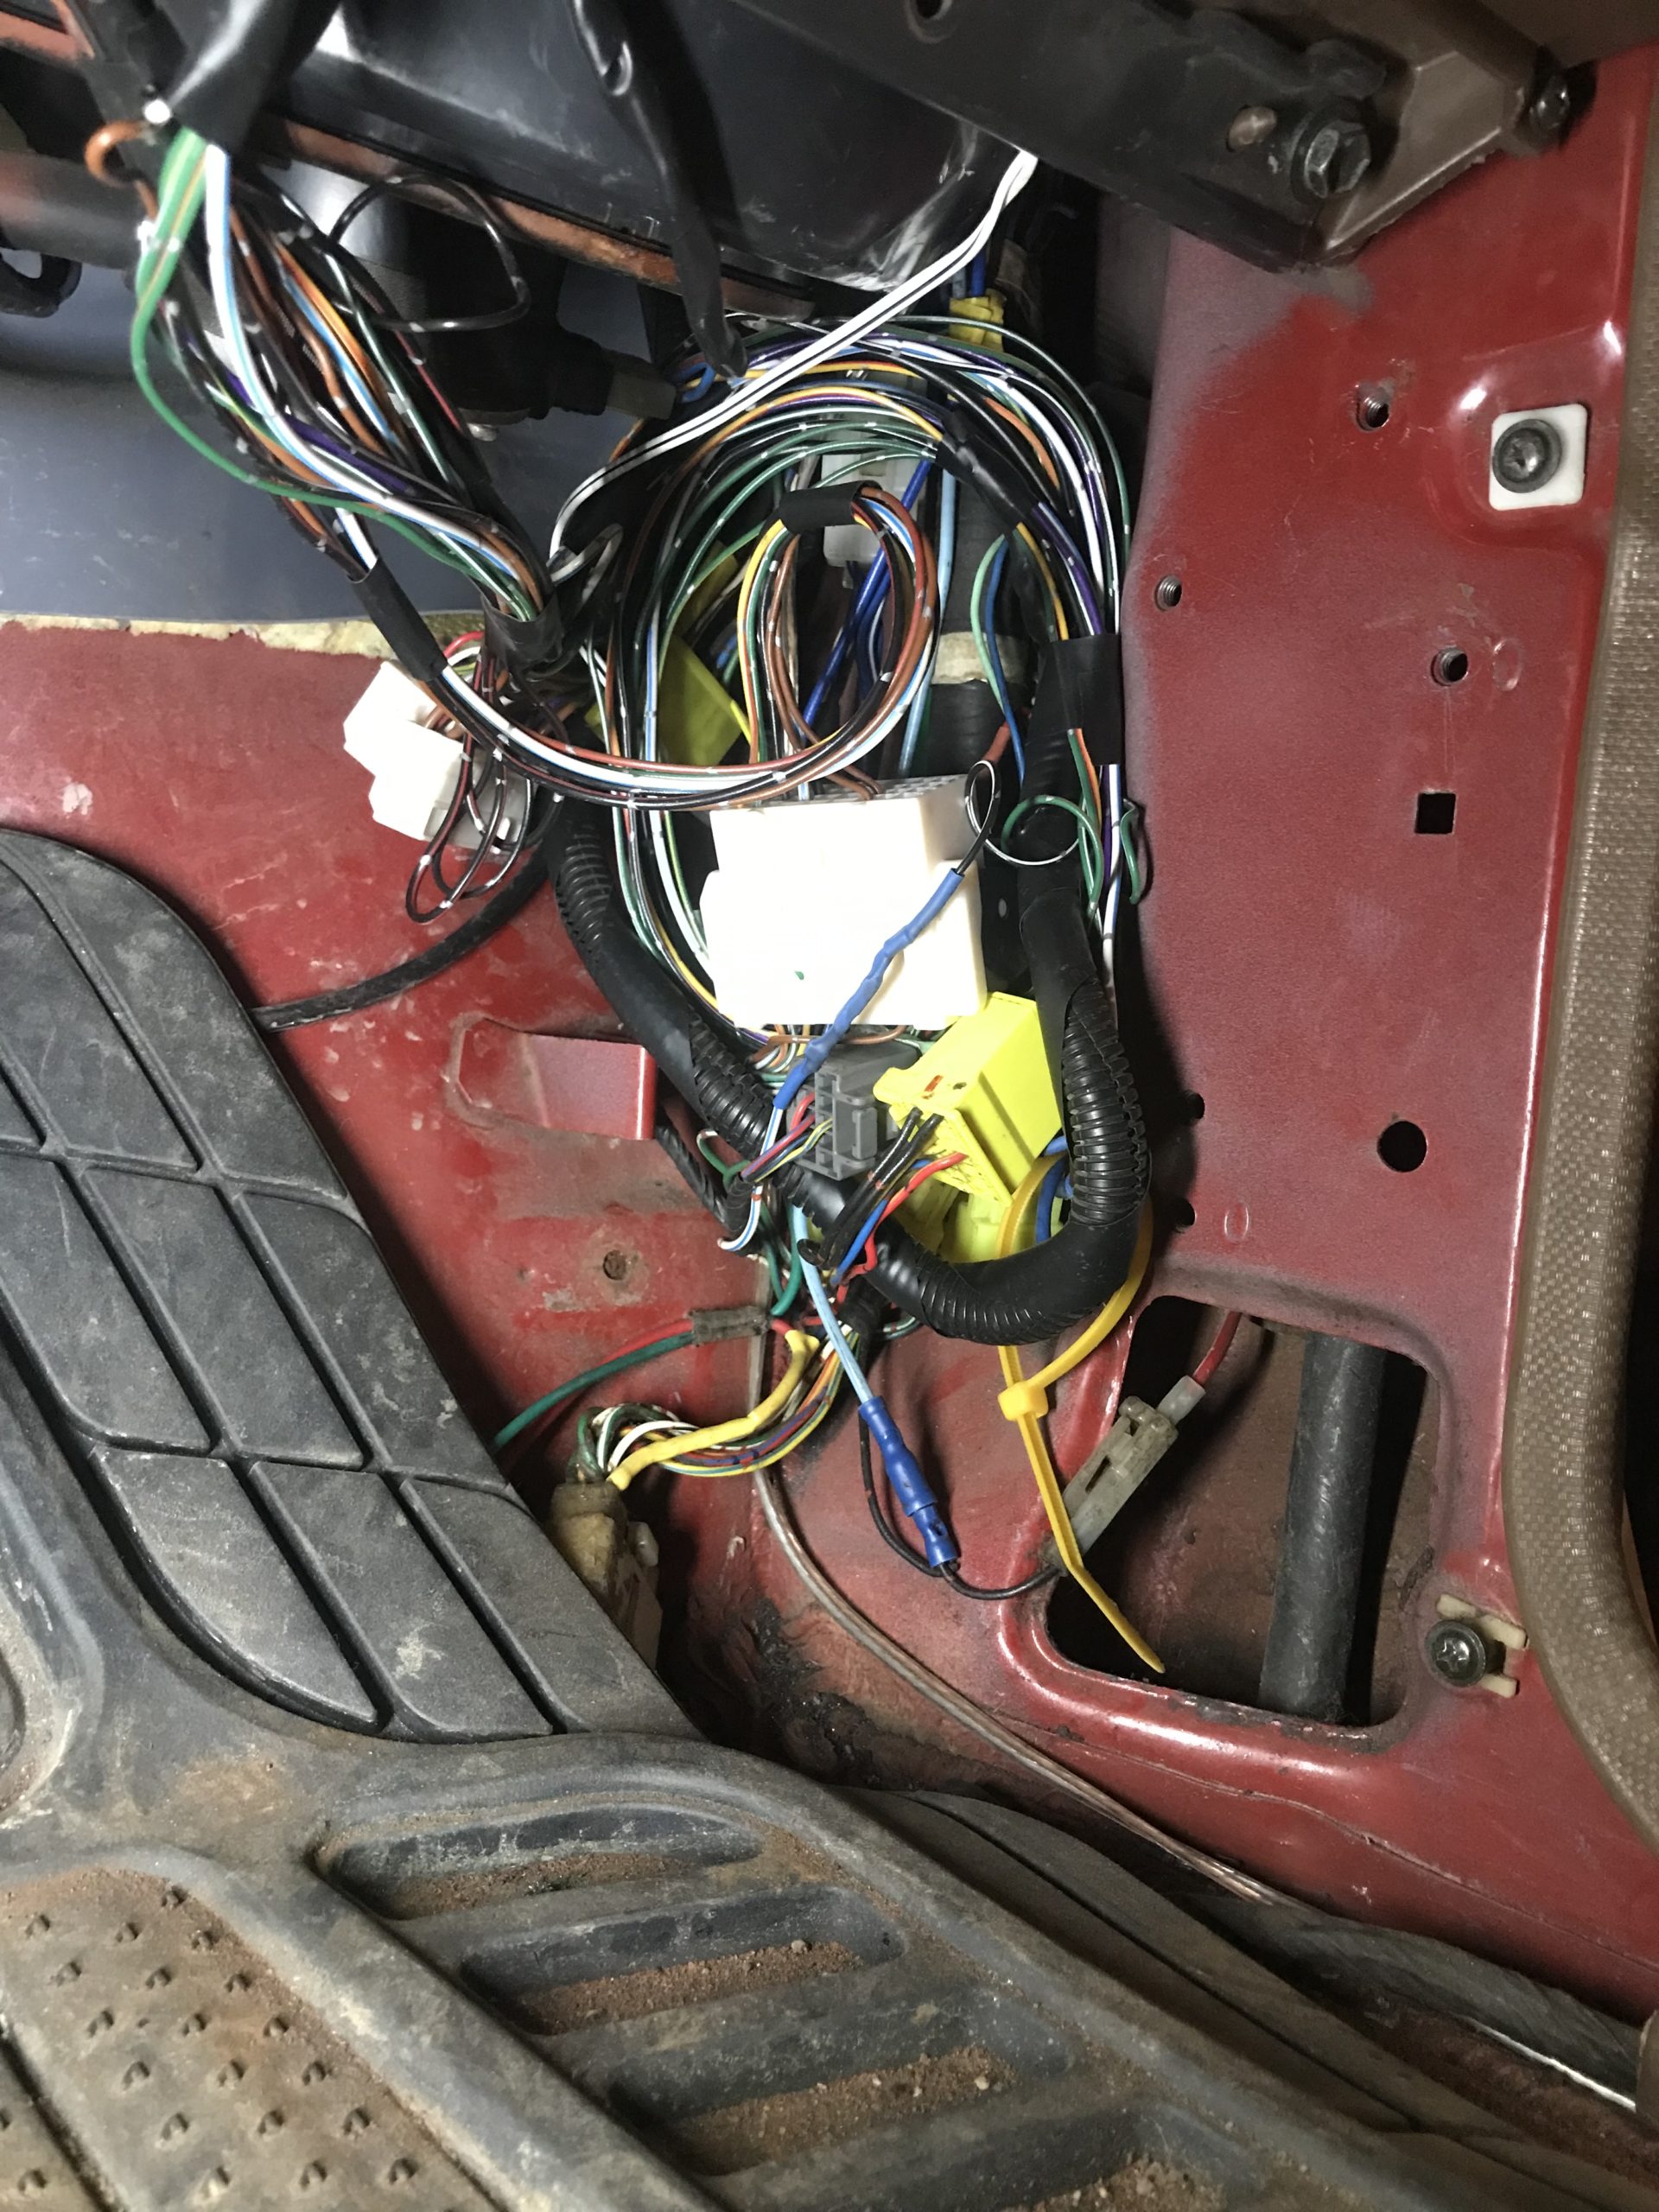
Last night on Redee I think I finished the 3RZ integration wiring. I’m pretty nervous to hook up power to the truck. Gonna do it in stages, and not connect the ECU until I’m assured I didn’t mess up a power or ground somewhere.
I still have to mount the ECU under the dash, kinda limited on location because the leads coming from the engine bay are short. Will fab up a bracket soon enough.
toys-n-yotasKeymasterBeen trying to tidy The Shop for the last couple nights in anticipation of having more work to do on stuff.
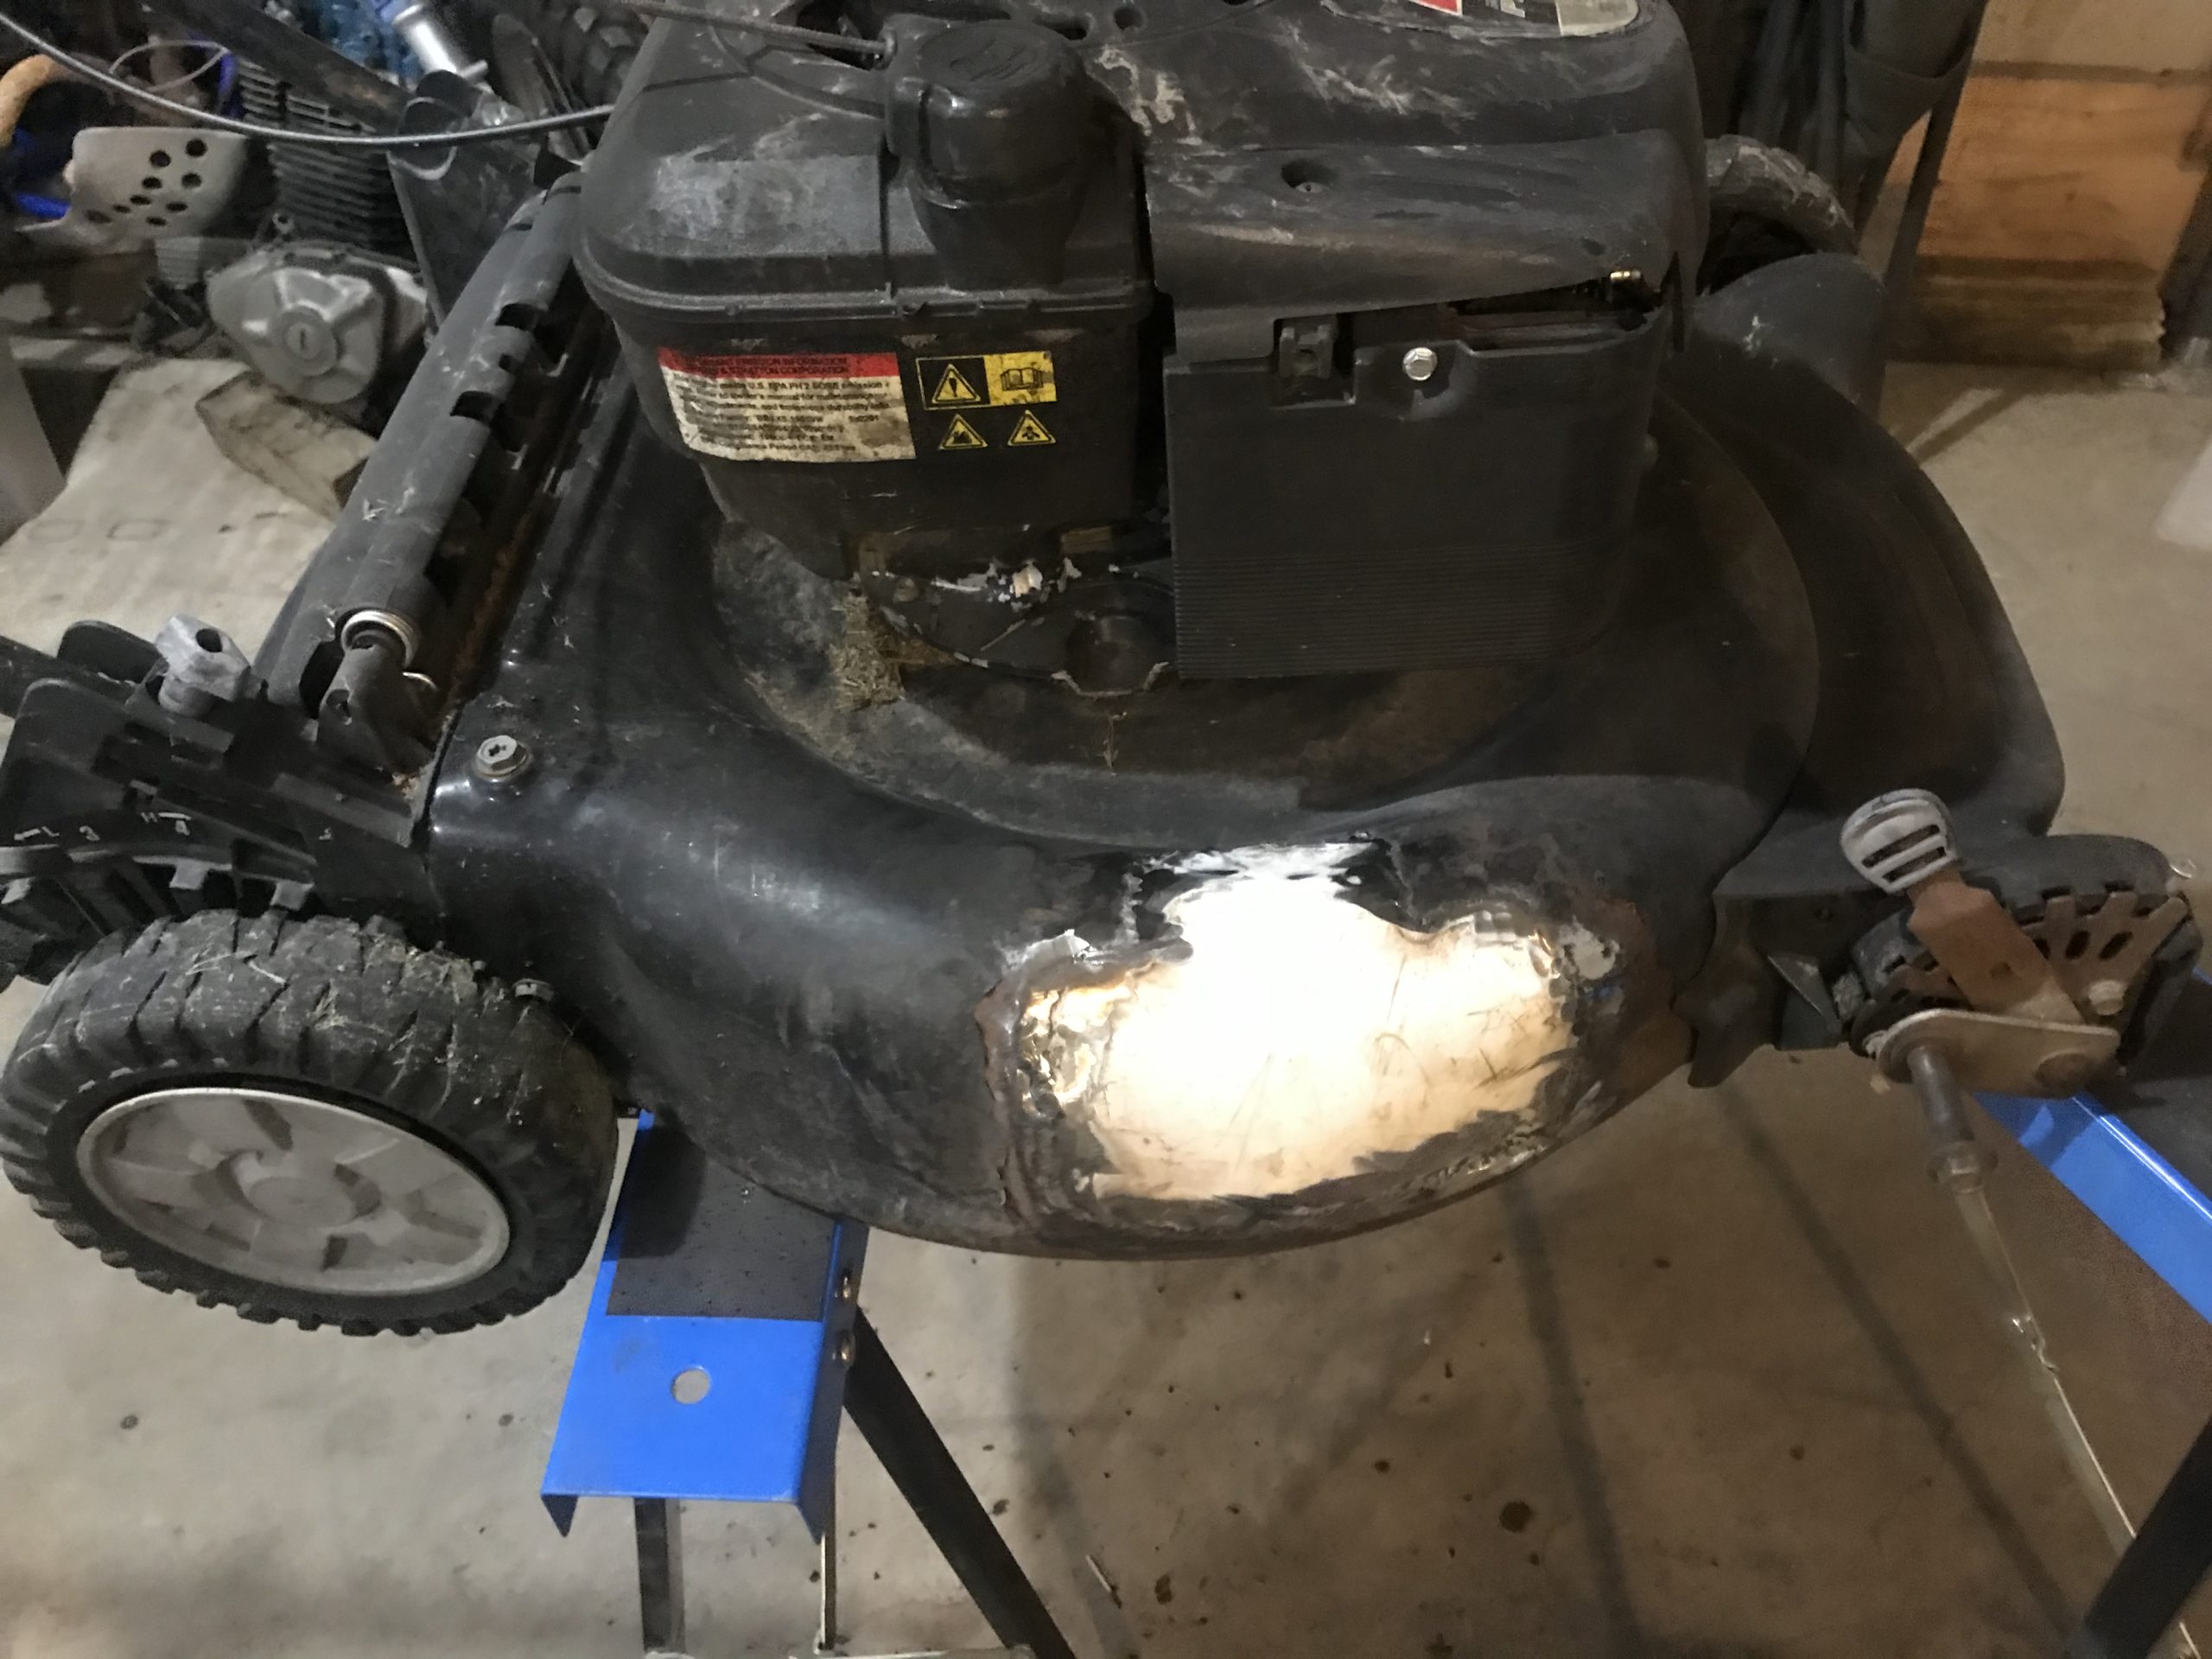
I managed to weld up the side discharge hole on my push mower after the spring loaded flap door Bluetoothed itself. I only ever mulch or bag, so losing the flap door was no big deal.Attachments:
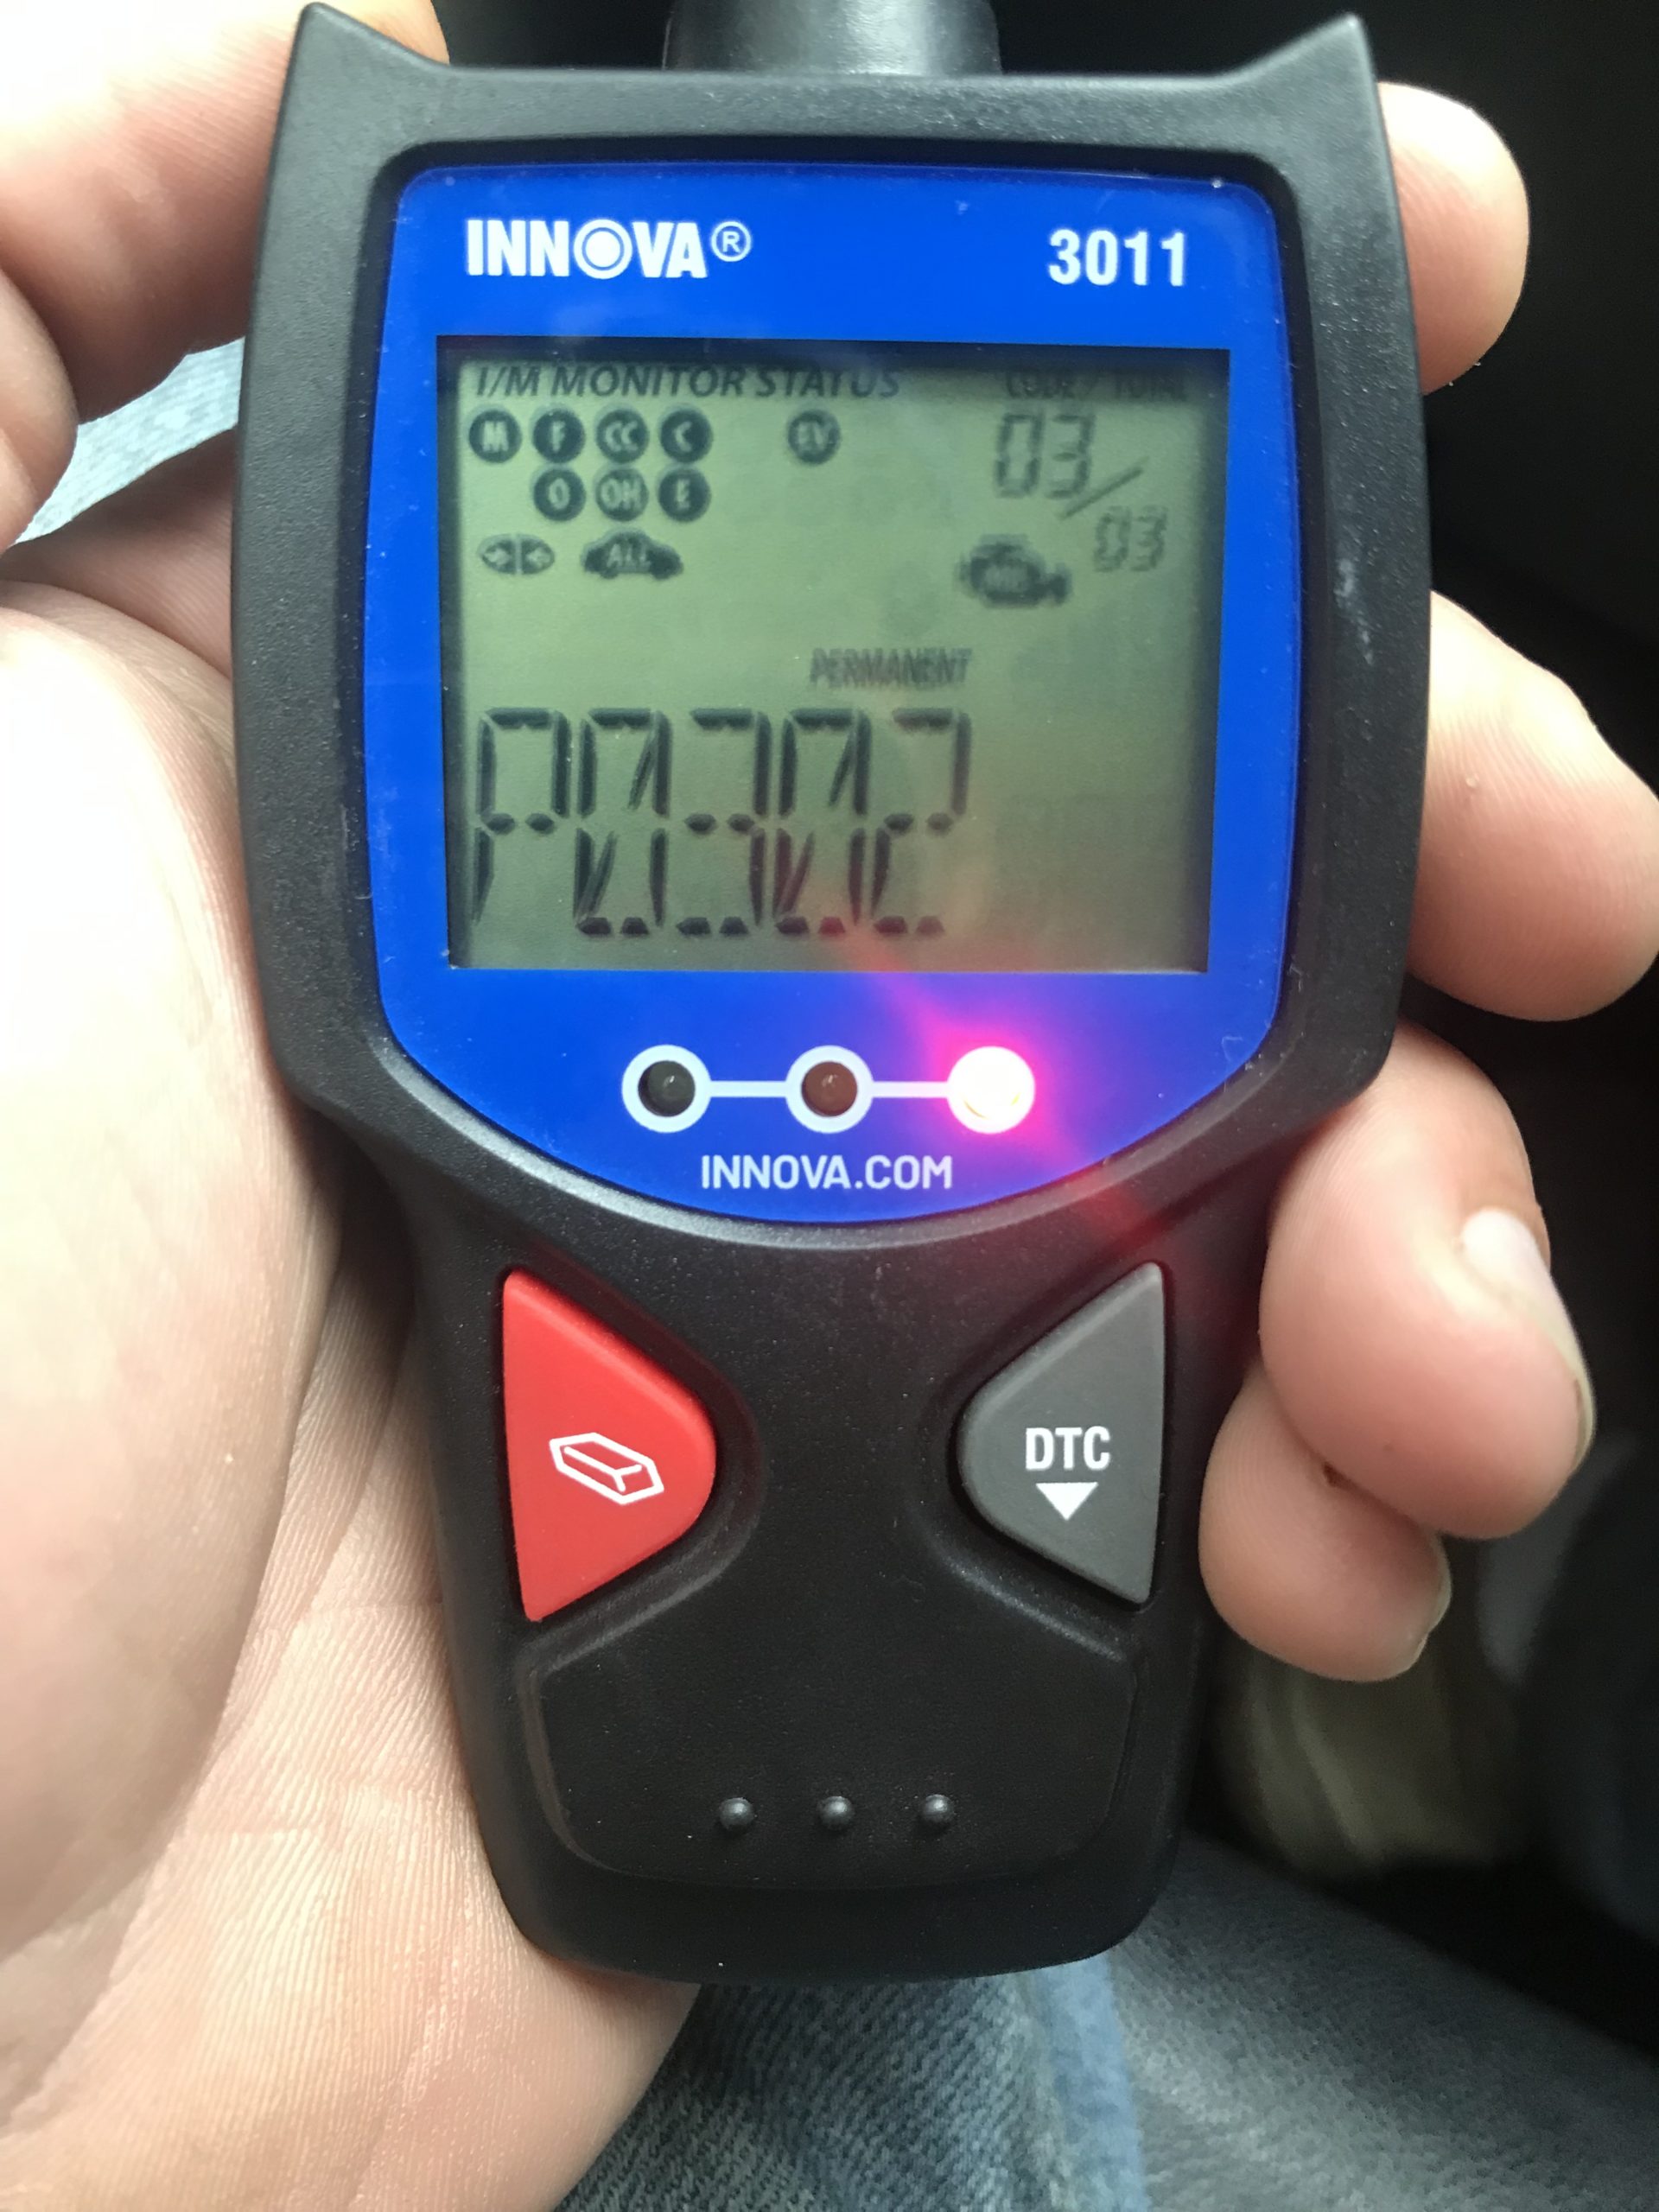
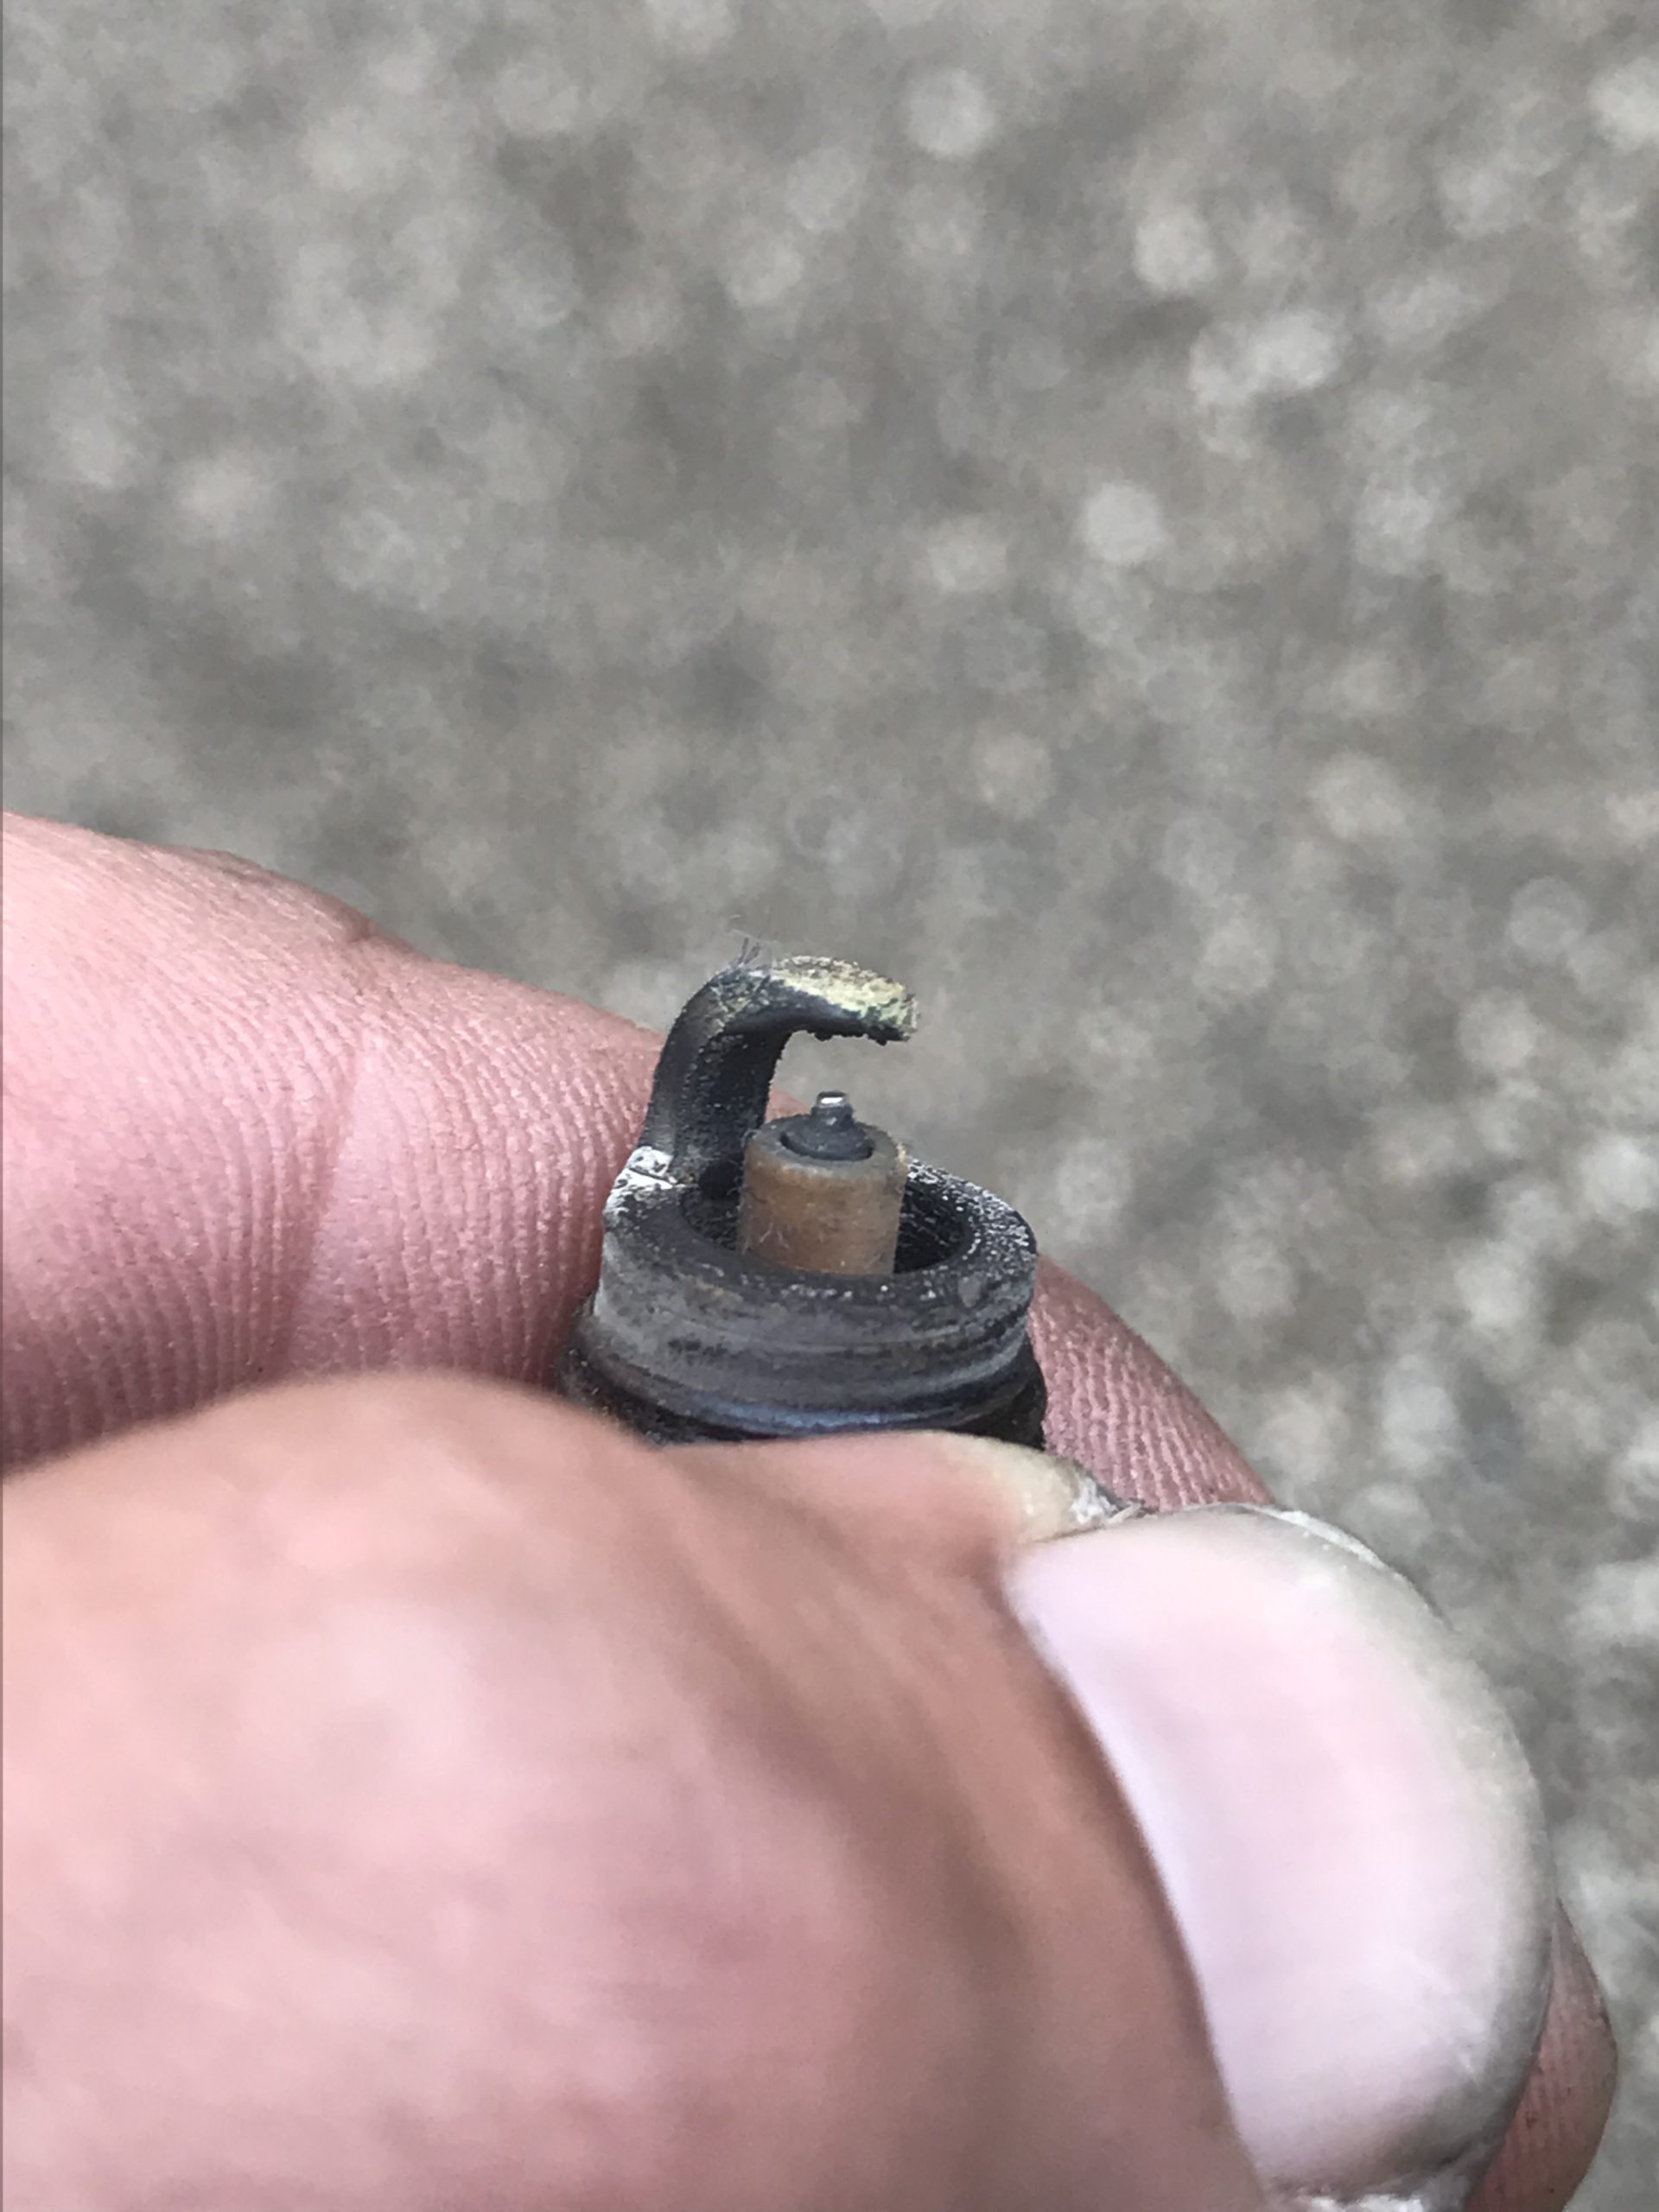
toys-n-yotasKeymasterToday in The Shop, sams Caravan. On her way home from Brampton yesterday, a vicious misfire sprang up. Sam thought a tire was coming off the hub everything shook so badly. I retorqued all the lugs (none were loose), and reset all the tire pressure to comfort her, but the engine light was letting me know this was not a tire issue.
Anyways, borrowed a code reader today (no I’ve never owned one), and cleared two misfire codes. Cylinder 2 is the culprit, so annoyed these gay V6s bury the plugs under the intake manifold. Pulled it apart, only broke one clip, removed plug 2 and it is horribly worn. I’ve ordered a set of 6 off amazon for $35, as opposed to $18 ea at my local store. Wednesday I shall completely re-do this hassle and replace all 6 plugs, as opposed to just this one piece of low hanging fruit.I guess 160,000 kms is plenty on original plugs. Think i change the taco every 60-80 thousand
toys-n-yotasKeymasterSent an inquiry off to Toyota Fiberglass for a LEFT side battery tray. Currently my battery is sitting on nothing, held down by nothing. I was trying to think of something better than 2×6 and ratchet strap for the two “nothings” in question. ~$100 isn’t too shabby for a buy once cry once solution.
Attachments:
toys-n-yotasKeymasterThe voltage regulator arrived yesterday, just in time for dog shit weather, like 12 and raining tomorrow.
toys-n-yotasKeymasterPics all too big, trying again
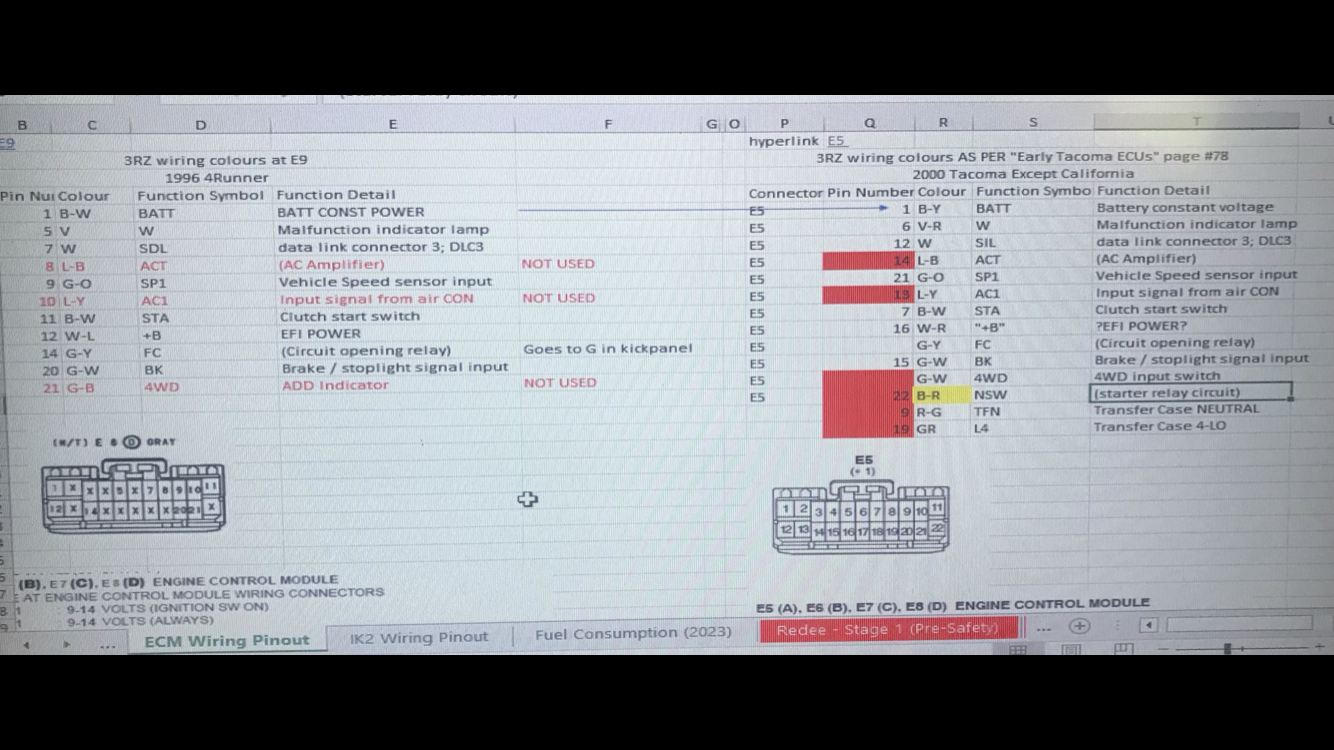
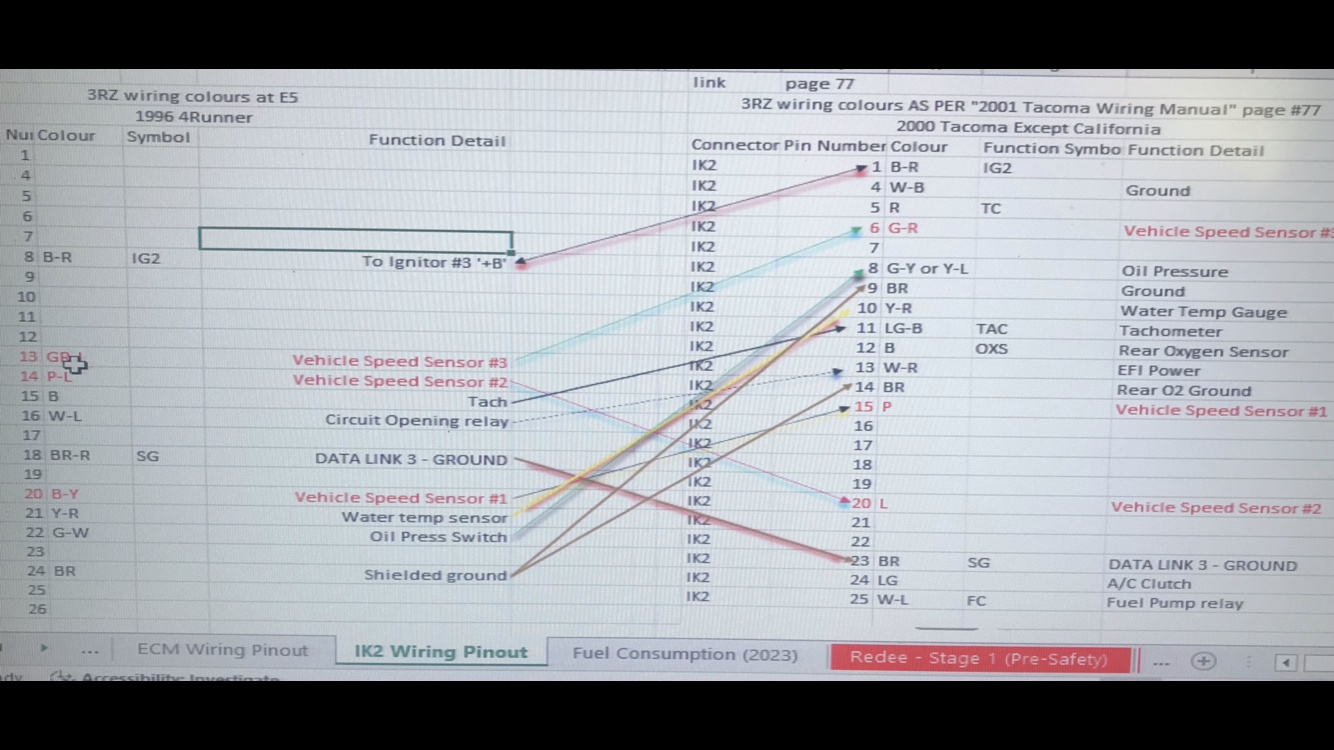
toys-n-yotasKeymasterThe TIS subscription has now birthed actual physical results in my project!
With the really tedious cross referencing over, I confidently made a couple excel charts to compare what my reference doc says VS what i actually have, both pin position and wire colours. Huge pain in the ass, but this .xlsx is worth keeping.
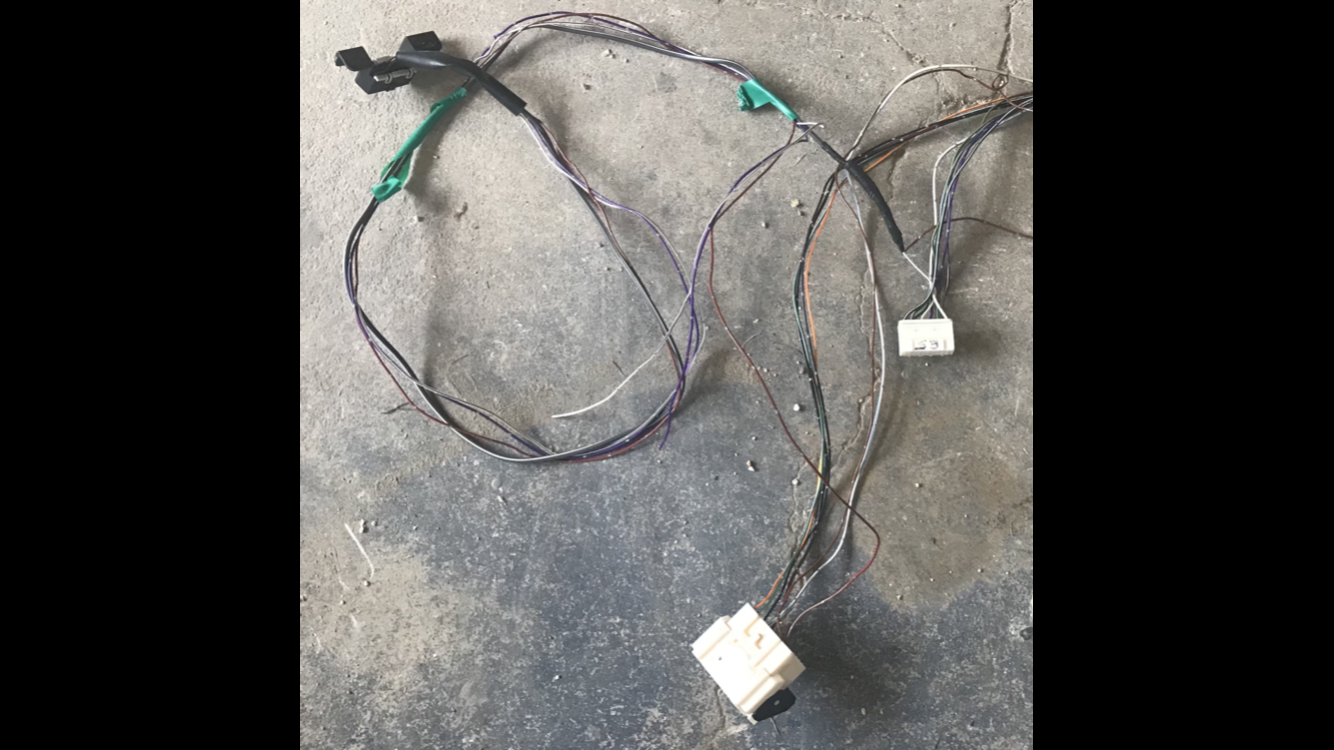
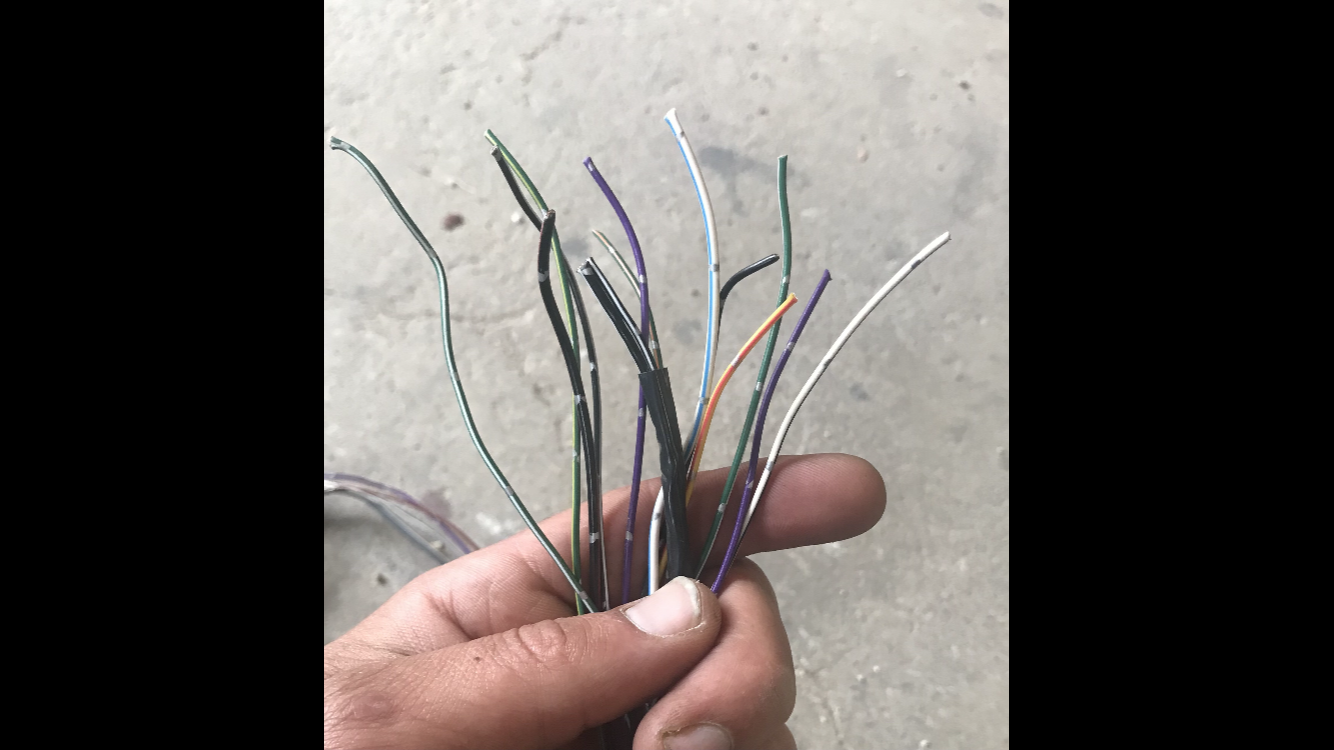
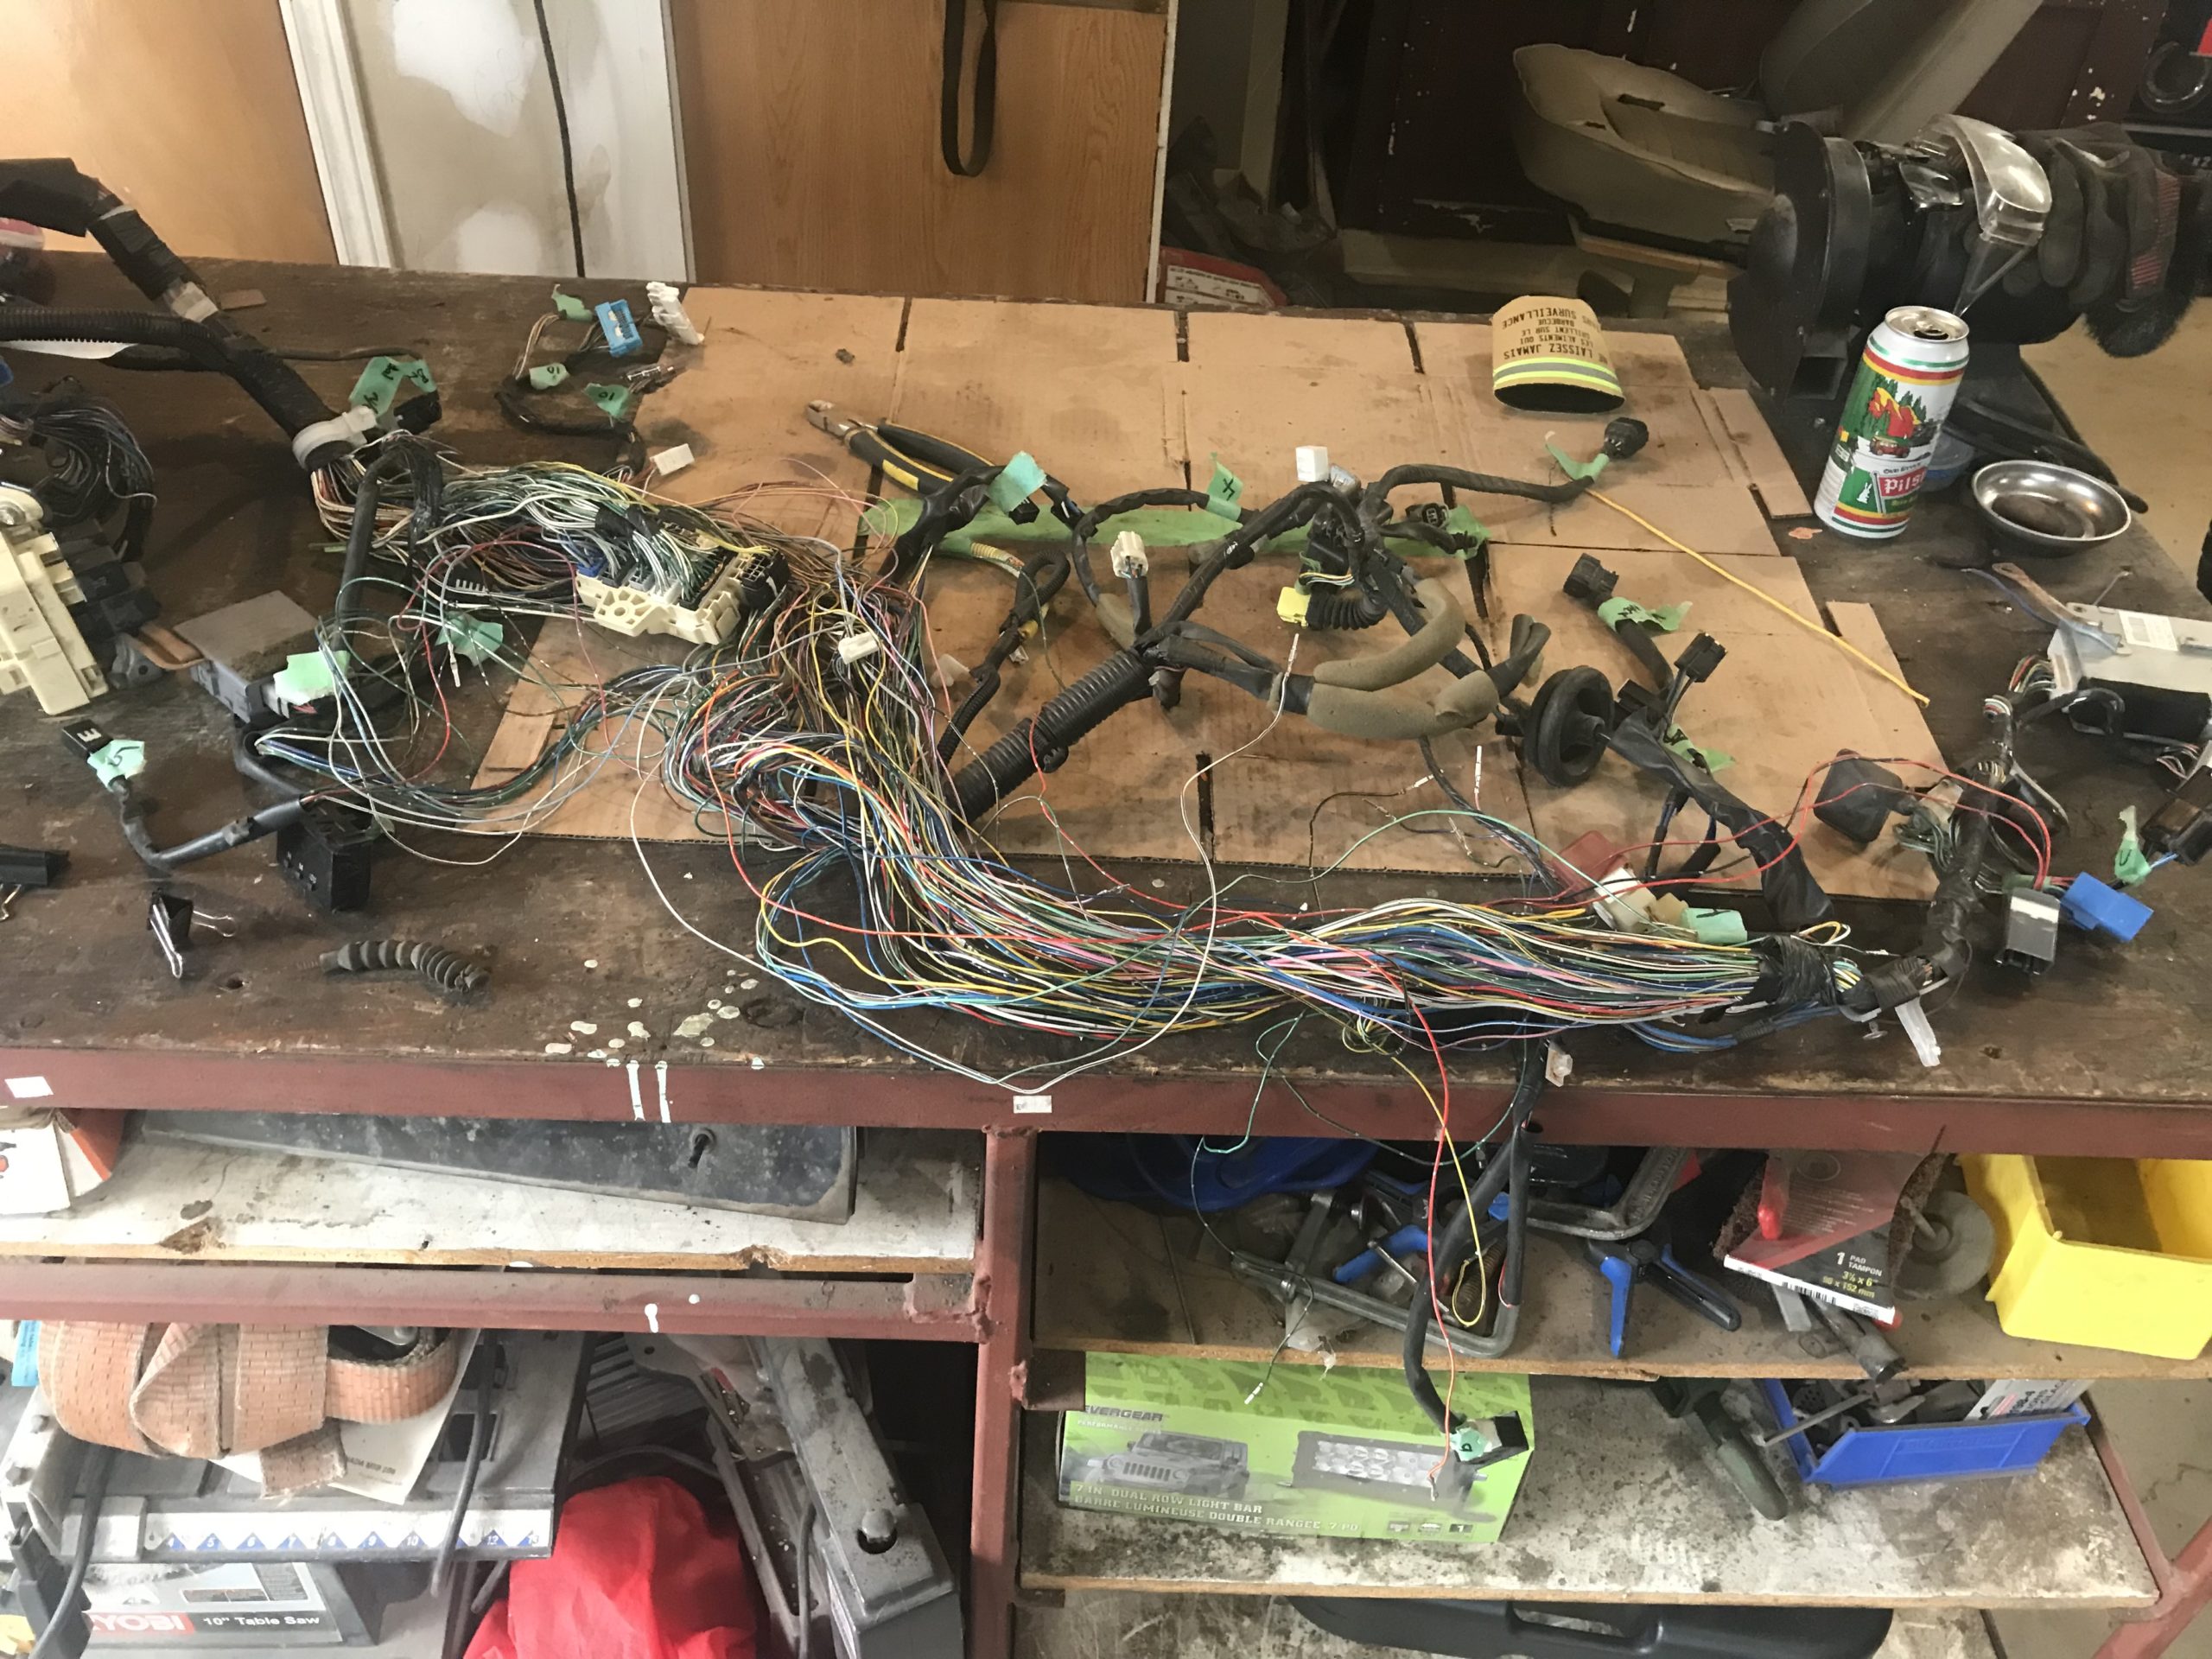
With my E9, II3 and Data Link 3 wires identified, I started actual work to de-pin the useless crap, and cut the connectors out of the interior harness with plenty of OEM wire tails hanging out.
So now I’m left with an interior conversion harness that consists of about 15 wires total, where about an hour ago it was more like 15 – 30 pounds of wires. The portion of the donor harness that remains, unfortunately has no resale value, but Ill try anyways. I’m sure the relay boxes and junction blocks could be of use to somebody eventually.
Hopefully by weekends end, I’ e got the conversion harness wrapped up and starting to go into Redee. That’d be huge.
Attachments:
toys-n-yotasKeymasterThat donor is so much cleaner than my bike top to bottom, may be worthwhile to just toss my motor and carb into that frame.
Last week i got the brakes in natts atv sorted out, fluid flush and bleed.
I got prestons daughters atv sorted out when the AliExpress parts arrived. Fit perfectly, had it all together in 20 mins or so. They went out the next day and sent me a “total success, 1,000 thank yous” text from the trail.
Matt’s scooter is still down waiting on a voltage regulator coming out of the states. Amazing prestons china parts beat matts texas parts by over a week and still counting.
toys-n-yotasKeymasterI ordered the subscription friday evening, it expired last night, downloaded some 1,700 separate documents, most in a Marathon session from 8pm -3am last night. I had false impressions that it was gonna be quick or easy to harvest a whole vehicles worth of documents, but I had my eyes opened quickly.
Anyways, I started with the documents I needed to correct the wiring legend I was referring by getting full wiring diagram of a ‘964Runner and ‘01 Tacoma. From there I captured everything 22RE related, then almost everything for the 2013 Tacoma, then almost everything electrical/wiring for James’ ‘08 FJ.
I have finished cross referencing the two documents for the ECM wiring, and am 2/3 finished the IK2 (my II3) body harness. Some excel charts and screen shots are helping to keep me straight.
toys-n-yotasKeymasterI’ve decided to purchase a 2-day pass to Toyota’s Technical Information System so I can download the year and model specific wiring diagrams. I did my best to correlate between what I have, but 3 wires from the ECM I’ve had to add the qualifier **MAYBE** to the function. I really don’t want to screw up the ECM by putting power to the wrong pin, so $25 US is cheap-ish insurance. I’ll also download ALL the manuals for Tacoma, 4Runner and FJ while I’m in there, get my monies worth.
-
AuthorPosts